This post may contain affiliate links, which means that I may receive a commission if you make a purchase using these links.
Looking to put together your own DIY drip irrigation system for your raised beds or other outdoor home gardens? This complete guide to simple irrigation will help you every step of the way.
Plants need water. Like, a lot of it.
Actually, plants need around a one-inch depth of water per week, which may not sound like a lot.
But, anyone who has tried to hand-water their home garden with a hose can tell you that’s a lot of standing around, wasted time, and wasted water.
If you want to scale up your home garden production, at a certain point you’re going to need to invest in drip irrigation to ensure your plants are getting the water they need.
Plus, you’ll get your time back to actually do the things you love to do in the garden.
(Never mind not have to worry about who is going to water the garden when you leave for vacation!)
If you’re not convinced already, read on for why drip irrigation is the smarter choice (for you and the planet). Plus, get all the details on how to build a DIY drip irrigation system of your own.
This post is all about DIY drip irrigation.
Drip Irrigation is Better for Your Wallet and the Planet
Aside from saving you time and hassle in the garden, drip irrigation can save you money and cut down on water usage.
Think about it–when hand-watering your garden with a hose, you are losing a decent portion of the water to evaporation and misfire. This is especially true for sprinkler systems.
A lot of water lands on the plant leaves, leaving them prone fungal disease.
On the other hand, drip irrigation delivers water right to the soil, where plants can access it at a rate in line with their ability to use it.
For this reason, drip irrigation is credited with up to a 60 percent water savings.
Components of a Drip Irrigation System
Now that we’ve hopefully convinced you on the “why” of drip irrigation, let’s get into the “how.”
In this section, we’ll discuss the components of a DIY drip irrigation system, starting from the source all the way out to the periphery where water reaches its final destination.
Start – Head Assembly
The whole drip irrigation system begins at the hose tap. This is where the water will leave your municipal water system or private well and make its way to your garden.
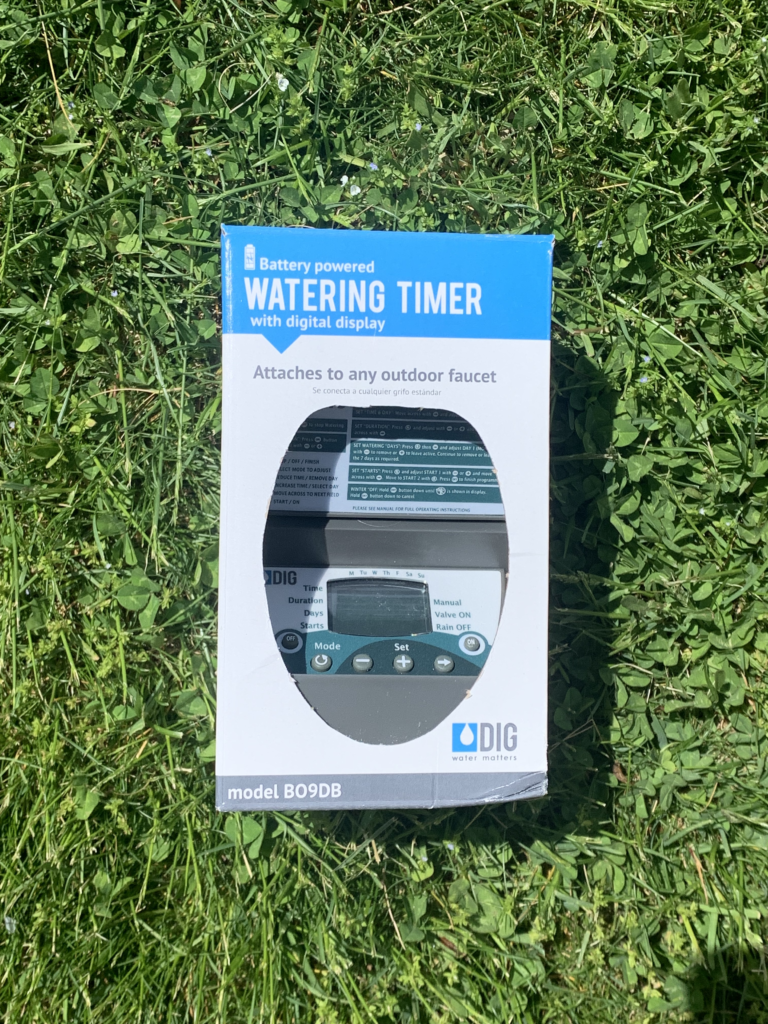
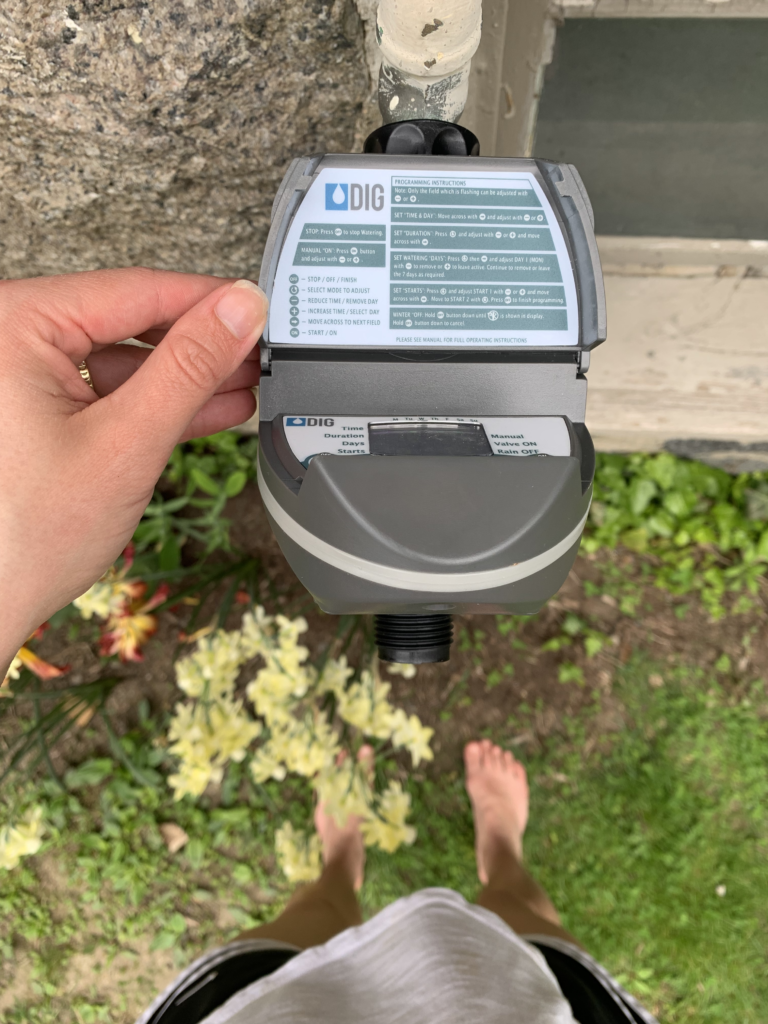
The first attachment to the hose bib at the head of the system is the water timer. This allows you to program the specific frequency and duration of waterings. (More on this later.)
Next, you’ll install the is the check valve, which prevents water from sloshing backward into your water supply in the event of a pressure drop.
From there, you’ll need a water filter that can filter out particles larger than 150-200 microns. This will ensure your drip emitters don’t get clogged.
Finally, we reach the pressure regulator, which should reduce the water pressure coming out of the hose tap to a more manageable five to 20 pounds per square inch (PSI).
Middle – Blank Tubing
One-half inch blank tubing will take your water from the head of the system to your raised beds or in-ground gardens.
You may need various L- or T-connectors to get the tubing around corners.
End – Drip Emitters
Finally, we reach the point where water is emitted from the system. Here, water is slowly dripped from drip emitters.
You have a couple options for drip emitters based on your garden’s needs.
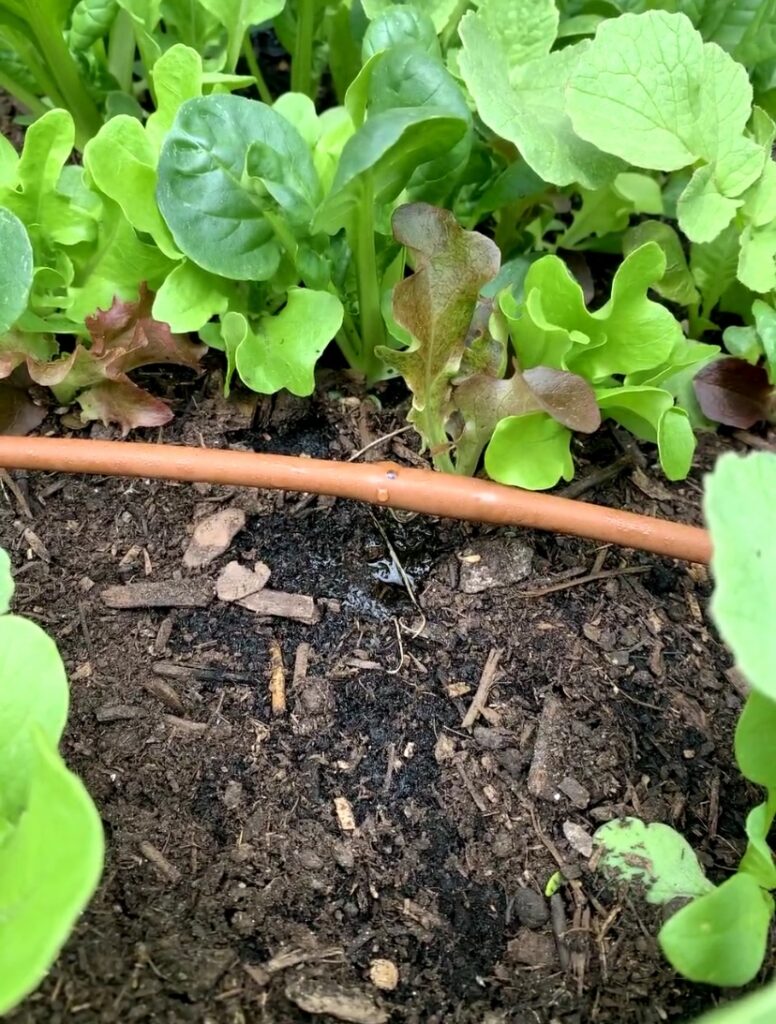
For garden beds and cover large areas of ground, we recommend laying down rows of 1/4″ dripperline.
This thin piping will have a small hole (emitter) every 6″-12″ inches or so (depending on what you buy), from which water will drip out to your plant at varying rates.
Some people will opt for drip tape in lieu of dripperline, which similarly can cover a lot of ground and has evenly spaced emitters. As the name may suggest, drip tape is more of a flat tube that fills with water as the system turns on.
You can also add individual drip emitters for single plants, like shrub or tree, or anything in a pot or grow bag.
Materials – DIY Drip Irrigation
Water timer – Automatically turns water on and off.
Check valve – Keeps water from going backward into water supply.
Double female hose adaptor – Connects two two make garden hose ends together, or in this application, connects your water filter to the check valve.
Spin clean filter (Y type, 150 mesh) – Removes large particles from water so they don’t clog your drip emitters.
Pressure regulator (20 psi) – Reduces the water pressure coming from the hose tap so it doesn’t blow your whole system.
Perma-Loc tubing x female hose thread swivel adapter – Connects your head assembly to 1/2″ blank tubing.
1/2″ Blank tubing – Transports water from the hose tap to your garden.
Preformed wire hold-downs – Keep your blank tubing and dripperline in place.
1/2″ Barbed elbows or L-connectors – Connect two pieces of 1/2″ blank tubing at a right angle.
1/2″ Barbed tees or T-connectors – Connect three pieces of 1/2″ blank tubing to make a T-shape.
1/4″ Hole punch – Puts holes in 1/2″ blank tubing to connect dripperline.
1/4″ Barb connectors – Connect your 1/4″ dripperline to your 1/2″ blank tubing.
1/4″ Dripperline (6″ emitter spacing) – This is where the water drips from. Good for raised beds and other large areas.
1/2″ Compression end cap – Closes open ends of 1/2″ blank tubing.
Goof plugs – Closes ends of 1/4″ dripperline and plugs up mistakes made with the 1/4″ hole punch.
Steps to Build Your DIY Drip Irrigation System
Note: You’ll want to lay down your drip irrigation system before planting.
1. Map out your plans and determine materials you will need.
Grab a notebook and quickly make a sketch of your drip irrigation system, from the hose tap to your gardens. This will help you conceptualize the layout and determine the exact materials you will need.
For example, will you need an L-connector to connect two segments of blank tubing to create a right angle around the edge of your home?
Jot down materials needed as you do this.
2. Determine the length of dripperline and blank tubing you will need.
Measure the distance from the hose tap to the garden. This will determine the length of blank tubing you will need to deliver water to the garden.
Measure the area of each of your gardens. You should have rows of dripperline the length of your garden, spaced no less than 12″ apart.
For example, in my 8×4′ raised beds, I have four rows of 8′ dripperline.
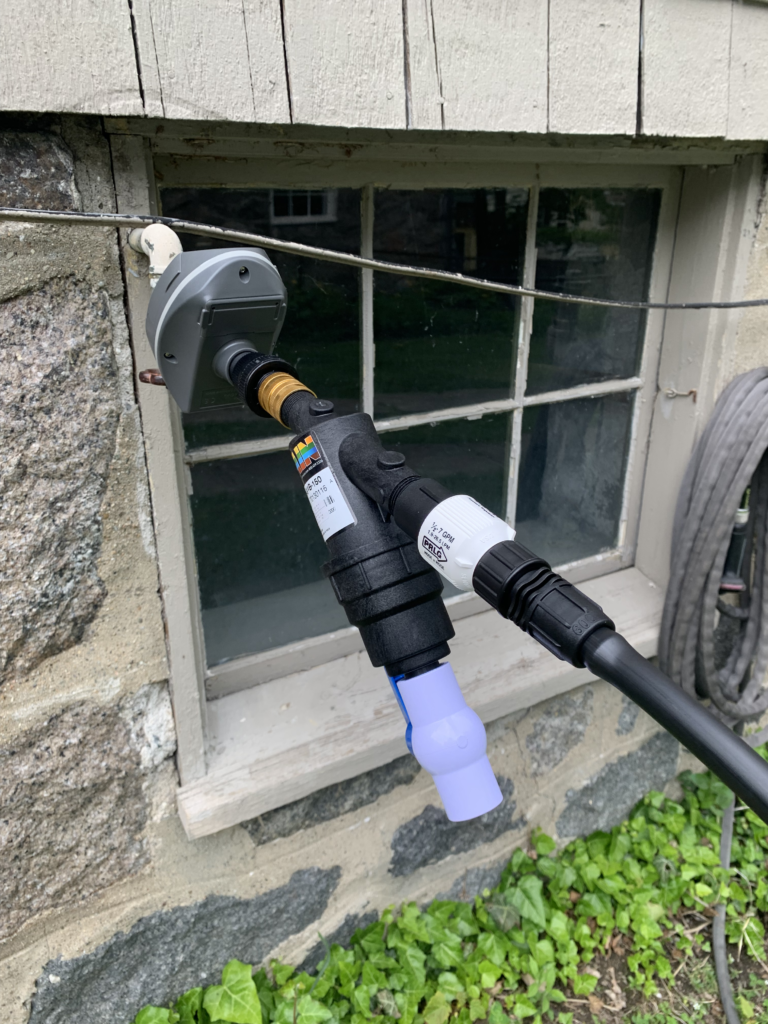
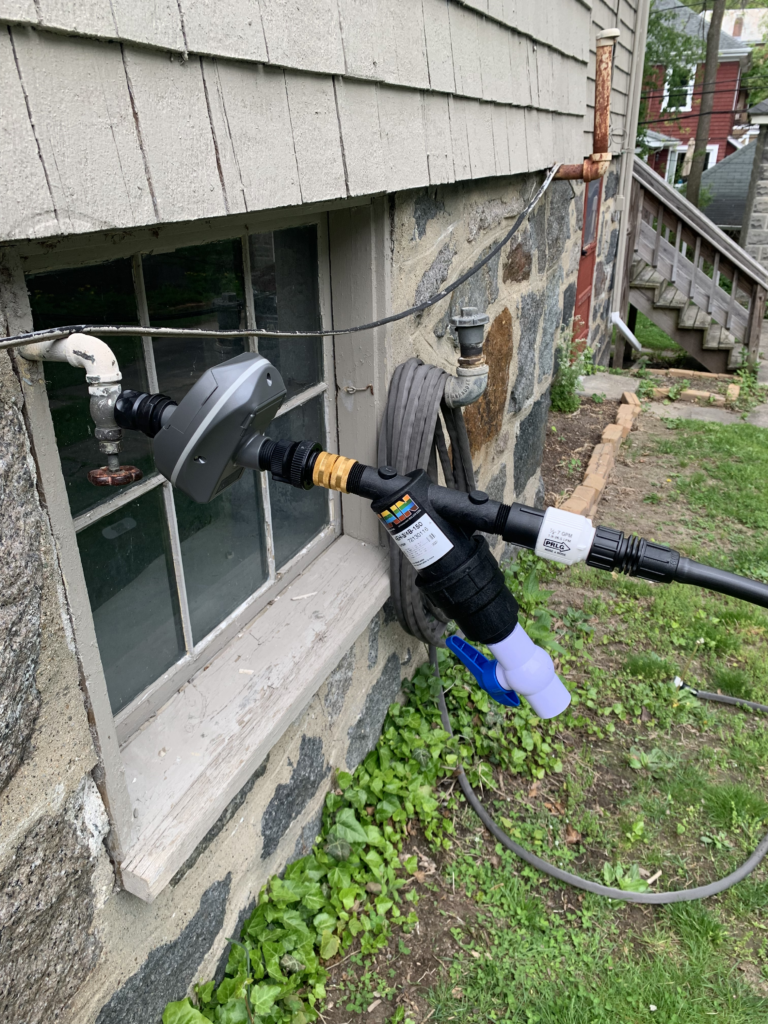
3. Build the head assembly at the hose tap.
The first attachment to the hose tap is the water timer. Screw the water timer directly on to the threads of the hose bib.
The water time valve will have a male end (threads exposed) onto which you can screw the check valve.
Next comes the largest attachment of the whole head assembly–the water filter. Ensure you have the filter right side up, so water is spun appropriately through the fine mesh that filters out larger particles. The filter I use has arrows to indicate the correct orientation.
You will need a female-to-female hose attachment to attach the water filter to the check valve, which both have male ends.
The final gizmo is the pressure regulator. Again, screw this directly onto the previous attachment–the water filter.
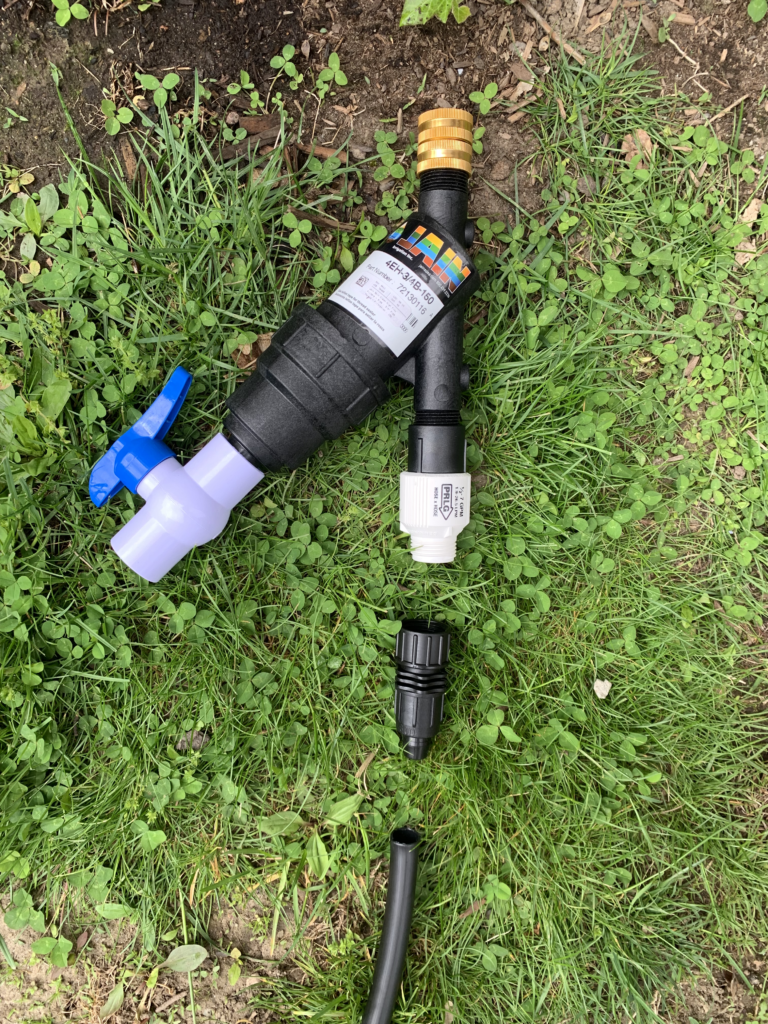
From there, you will need an attachment that connects the male end of the pressure regulator to the 1/2″ blank tubing that will begin the middle part of your system. I used this Perma-Loc Tubing x Female Hose Thread Swivel Adapter.
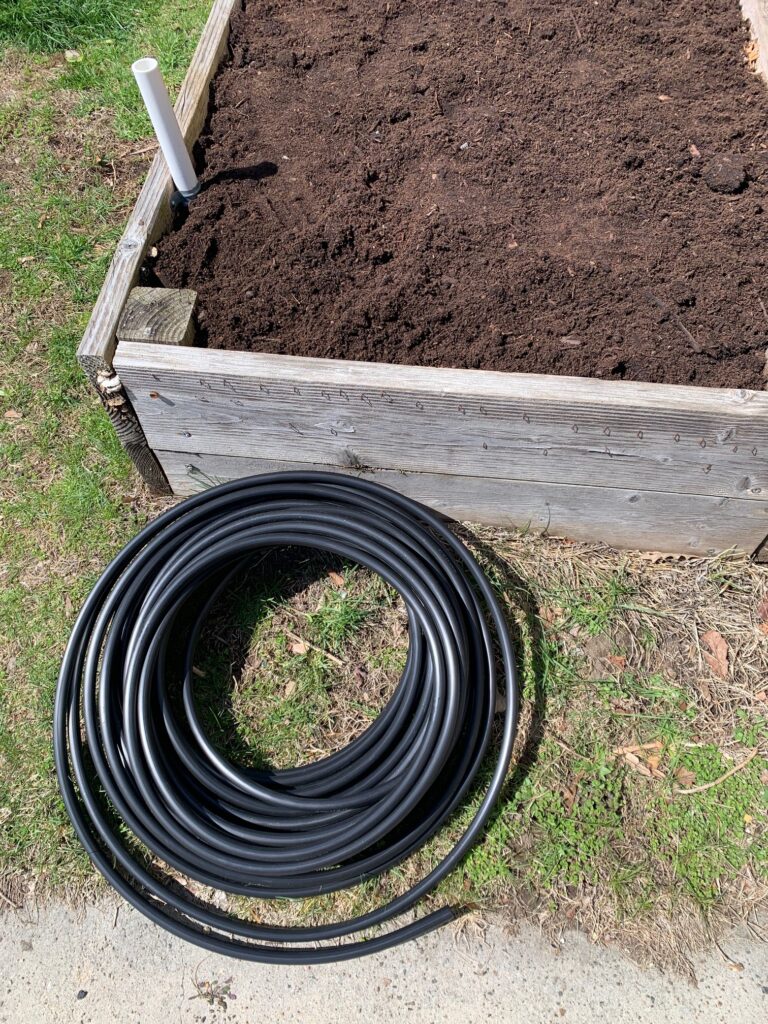
4. Run the blank tubing to the garden(s).
Blank tubing acts as the highway to transport the water from your hose tap to the garden.
Like a highway, there are many, smaller road that branch off from it. This will be your dripperline, drip tape, or individual drip emitters.
But, before we get to the end of the road we have to lay down the highways.
You may have a direct line from the hose tap to your garden(s), in which case, lucky you! You won’t have to do much finagling.
L-connectors
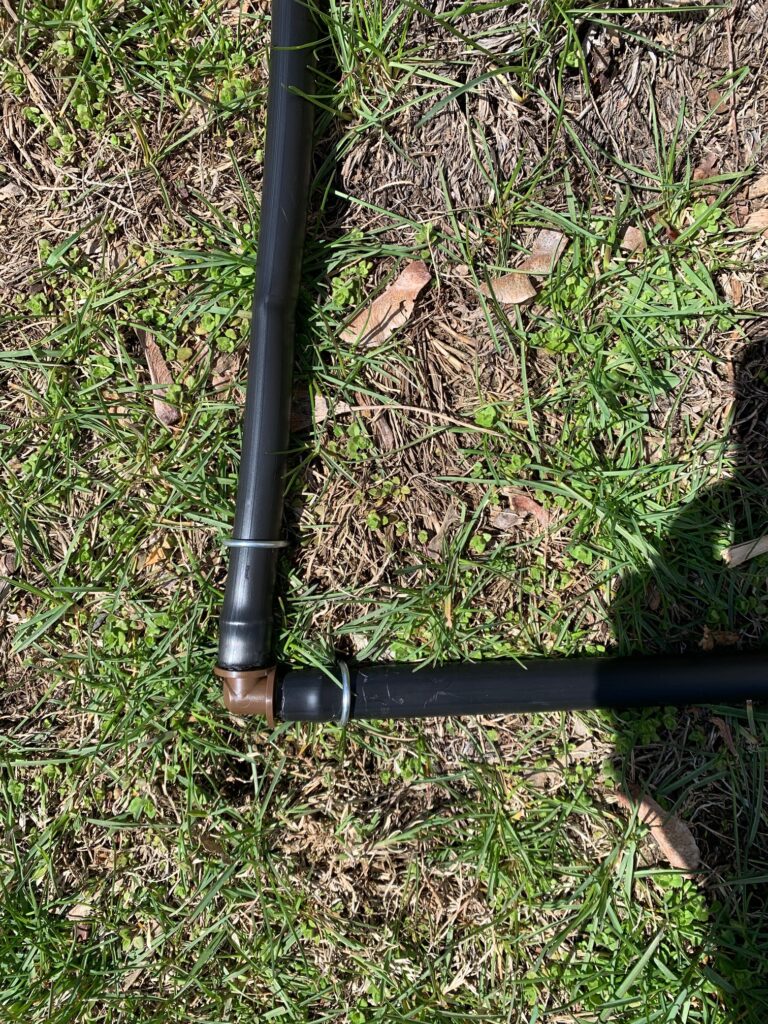
On the other hand, you may have some obstacles in the way between the tap and your garden.
Obstacles and right corners may be neatly avoided by the use of L-connecters, which allow you to connect two separate pieces of tubing to create a 90 degree angle.
I used multiple L-connectors to discreetly run my blank tubing along the edge of my house.
T-connectors
You may also want your system to split off in two different directions. Say if you want to water gardens in both the front and backyard. You can accomplish this with a simple T connect, which connects three lines of tubing in a T-shape.
Preformed wire hold-downs
You may want to stake down your blank tubing to keep it from moving with preformed wire hold-downs. For this, I bought 1/2″ Galvanized Tubing Stakes, but you can get creative.
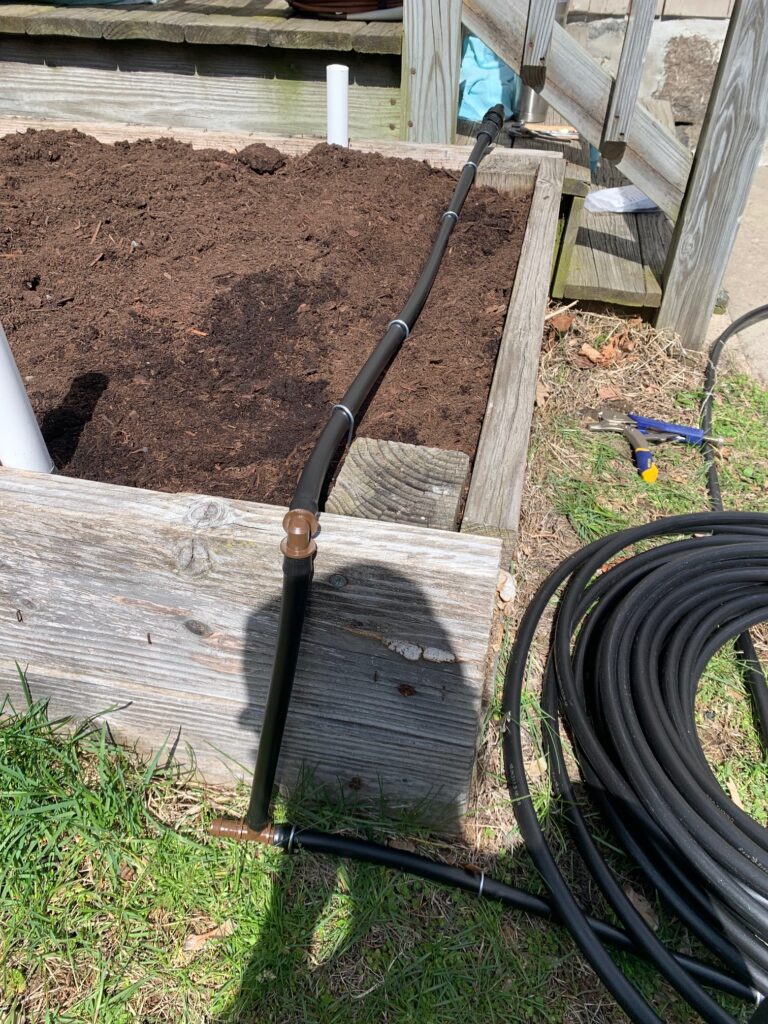
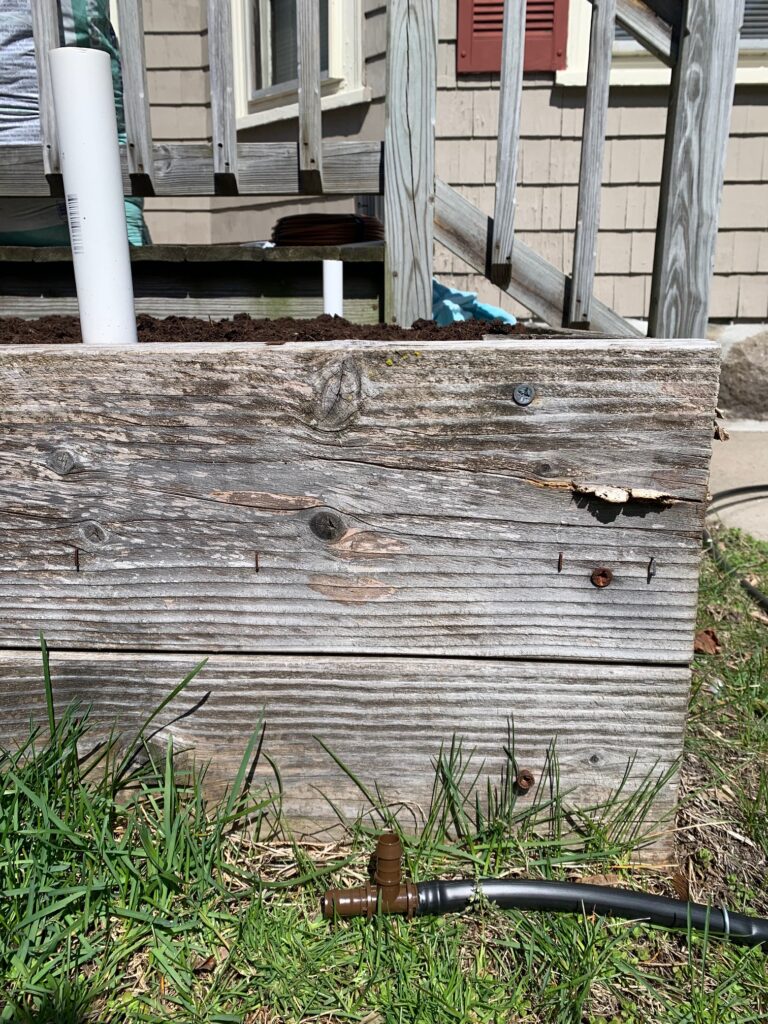
5. Run blank tubing up into raised beds
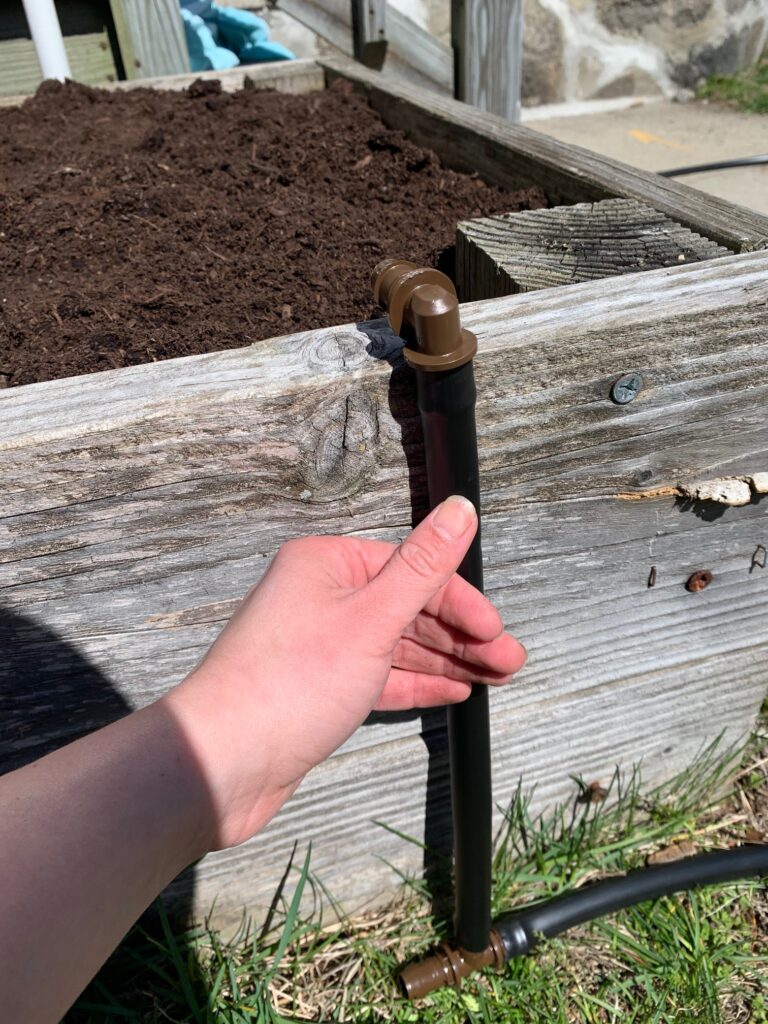
This is an extra step if you are installing drip irrigation in raised beds.
You need to get the blank tubing up and over the edge of your raised beds.
However, you already know how to do this if you got comfortable with L-connectors in the previous step.
Simply place on L-connector at the base of your raised bed. Run a small length of blank tubing (the height of your raised bed) from this connector.
From there, place another L-connector at the lip of your raised bed and run another, final piece of blank tubing across the width of your bed. This will be the piece of blank tubing from which dripperline will run in the next step.
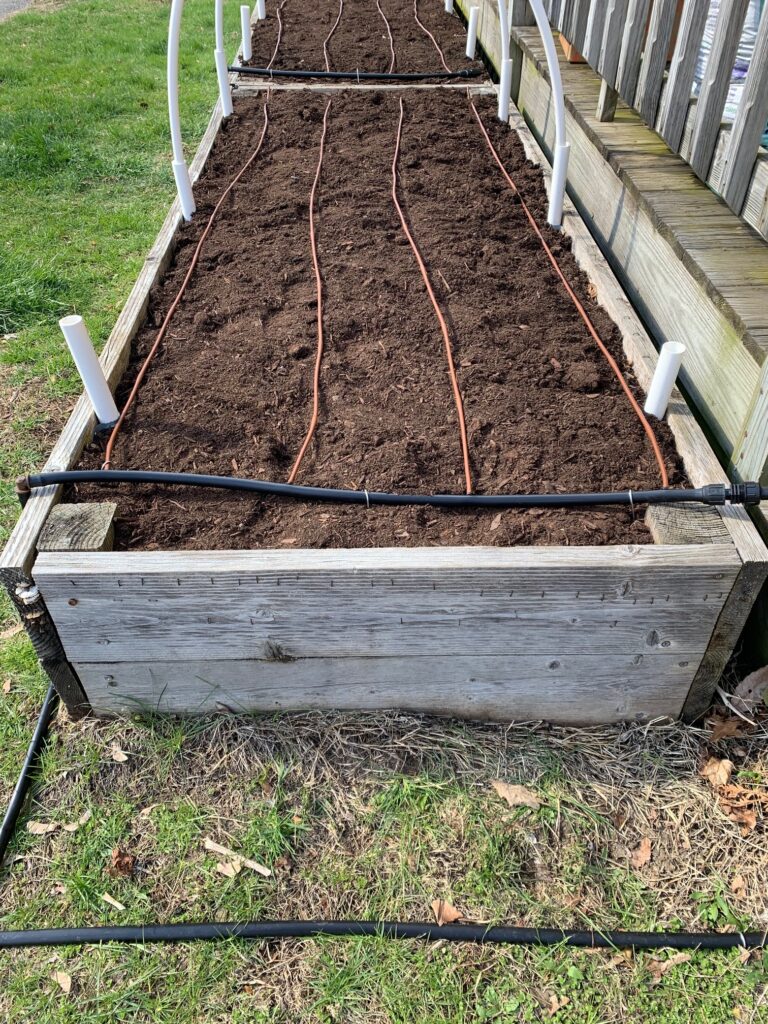
6. Place your dripperline
Again, for raised beds and most home gardens, rows of dripperline that are the length of your garden should be place no greater than 12″ apart.
Dripperline will connect perpendicular to the blank tubing you’ve placed at the head of the bed.
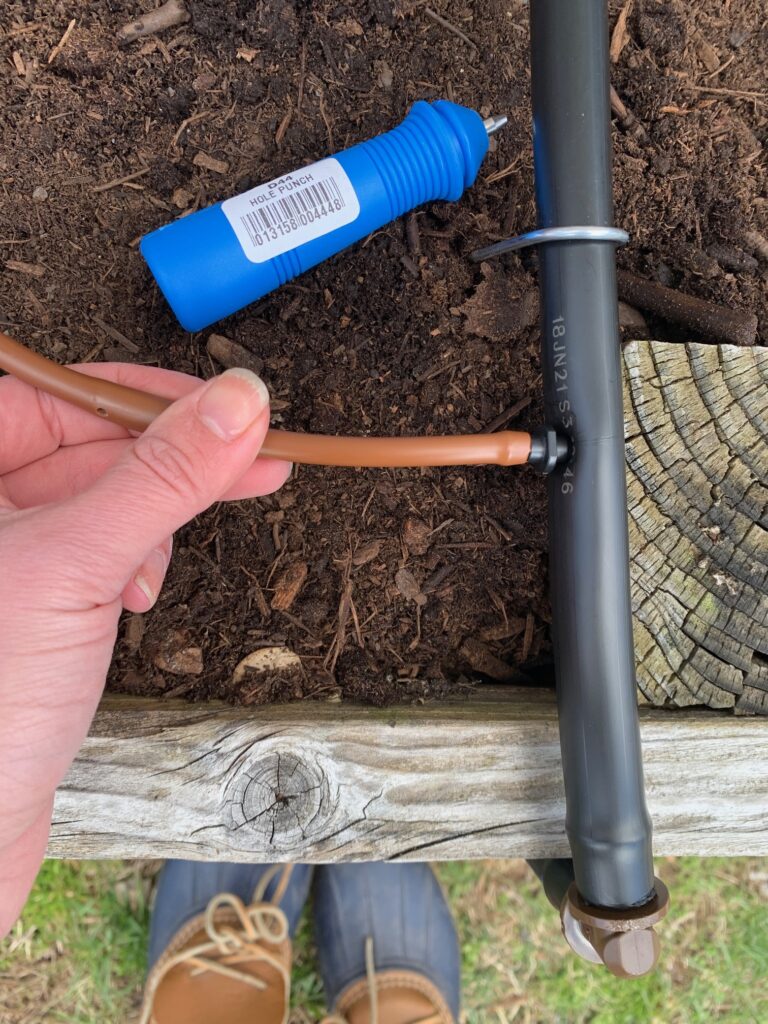
But, how do we connect the 1/4″ dripperline to the 1/2″ tubing?
The answer is with a 1/4″ hole punch and transfer barbs.
The hole punch will create a 1/4″ inch hole in your blank tubing, into which you will insert one end of the transfer barb. Connect your dripperline to the other end of the transfer barb.
Rinse and repeat this process until all your drippperline is laid out.
7. Stake down your dripperline
This step is simple: once your dripperline is in place, simply stake it down with preformed wire hold-downs.
This will keep the dripperline from moving around and damaging surrounding future plants.
8. Plug up the system
The last step is to plug up all the loose ends of the system.
The ends of your 1/2″ blank tubing will be plugged with compression end caps.
The ends of your 1/4″ dripperline will be plugged with goof plugs, which are so named because they can also plug any mistakenly punched 1/4″ holes.
9. Turn it on
Congrats, you’ve built a DIY drip irrigation system from scratch!
Turn on the system and do any troubleshooting that may need to happen.
For example, when I first turned mine on I noticed some leaking at the head assembly, which was fixed with a little thread seal tape.
From here, you will need to determine how to set your water time for your garden’s individual needs.
And, of course, get to planting!
Putting Away Your Drip Irrigation System in the Winter
Everything but the head assembly (read: tubing and dripperline, etc.) can be left out after the first frost. Cold can be damaging to the electronics and delicate parts at the hose tap. After the last frost in the spring, bring out the head assembly parts from storage once again.
How to Set Your Water Timer
Plants need at least one inch, or approximately one half-gallon, of water per square foot of soil.
There are a number of fancy calculations to help you determine how many minutes per day it will take you to reach this number.
However, I’ve found the best way to find the true number is a little bit of tinkering. After all, each garden will have its own unique needs based on the local climate and soil composition.
Start with around one hour of water per week, and adjust to 30 minutes to 2 hours per week based on what you observe in your garden.
Is the soil routinely bone dry for long periods of time? Increase the watering sessions. Do the plants look healthy? You’re probably on the right track.
Spread Out Watering Sessions
You will want to spread out the watering sessions throughout the week as much as possible (as much as your water timer allows!) Shallow watering encourages roots to grow where there is more access to air and microbial activity.
For example, I have my water timer set to two 5-minute water sessions per day, for 70 minutes of watering per week.
This post was all about DIY drip irrigation.