This post may contain affiliate links, which means that I may receive a commission if you make a purchase using these links.
Homemade compost is the some of the most nutritious material you can feed your garden. Learn how to make homemade compost the right way with this complete guide.
Ever since I starting my home gardening journey many years ago, I have known the power of compost to boost plant productivity in the garden.
When I first started, I added a top dressing of store-bought Coast of Maine Compost to my gardens each year. It is a great product that I still recommend to beginner gardeners, and those without the resources to make their own compost.
However, it wasn’t until I started making my own homemade compost (see my exact compost recipe below!) that I began to discover the true power of composting.
Not only did I see my plants thrive more than ever before, but I began to see my home and garden as a more sustainable ecosystem. Food waste produced in my kitchen was now recycled into compost to grow more food.
There is a lot written about the science of making homemade compost, but don’t be intimidated. With a few simple steps, you too can discover the power of home composting!
This post is all about how to make homemade compost.
What is Compost?
Sometimes referred to as “black gold”, compost is essentially just the result of the decomposition of organic (AKA containing carbon) matter. Compost contains essential nutrients that boost plant growth and is a common additive to garden soil.
Finished compost is moist, crumbly and deep brown–almost black. (I’ve heard that the best finished compost will look like crumbled chocolate cake!) However, it may takes months to years to become this finished product.
There are several applications of homemade compost. Compost can be added as a yearly top dressing to established gardens. It should also be added on top of a newly established no till garden. Finally, compost is an essential ingredient in sheet mulch.
Benefits of Homemade Compost
There are many benefits to using homemade compost in the garden.
- Supercharged Soil Power: Compost transforms your garden soil into a nutrient-packed powerhouse, ready to fuel your plants with everything they need to thrive. Homemade compost is like nature’s own multivitamin for soil, packed with essential nutrients like nitrogen, phosphorus, and potassium, all in perfect balance.
- Goodbye Non-Organic Fertilizers!: Toss those synthetic fertilizers aside because homemade compost is all about natural goodness. No more worrying about harmful chemicals seeping into your veggies or wreaking havoc on the environment. With compost, it’s all about organic, eco-friendly goodness straight from your own backyard.
- Weed Wars, Begone!: Ever feel like you’re locked in an endless battle with weeds? Well, say goodbye to those pesky invaders because homemade compost helps suppress weed growth. That rich, fluffy compost layer acts as a natural barrier, smothering weeds and keeping your garden looking pristine. This is especially true if your using compost as a layer in sheet mulch.
- Water Conservation: In today’s world, water conservation is key, and homemade compost is here to help. Thanks to its sponge-like texture, compost helps your soil retain moisture like a pro, meaning you’ll spend less time watering and more time kicking back and enjoying your flourishing garden oasis.
- Goodbye, Garden Pests!: Nobody likes uninvited guests, especially when they’re munching on your prized plants. But fear not, because homemade compost promotes healthy soil teeming with beneficial microorganisms that act as your garden’s own personal security detail, warding off pests and diseases like superheroes of the soil.
- Reduce, Reuse, Recycle: By making homemade compost, you are recycling your kitchen and yard waste into usable energy for your plants. Those kitchen scraps, yard trimmings, and cardboard boxes? They’re all fair game for the compost bin, turning trash into treasure with every flip of the compost pile.
- Cost-Effective Brilliance: Who says going green has to break the bank? With homemade compost, you’re not only saving money on pricey fertilizers and soil conditioners, but you’re also investing in the long-term health and vitality of your garden. Talk about a win-win!
Homemade Compost Recipe

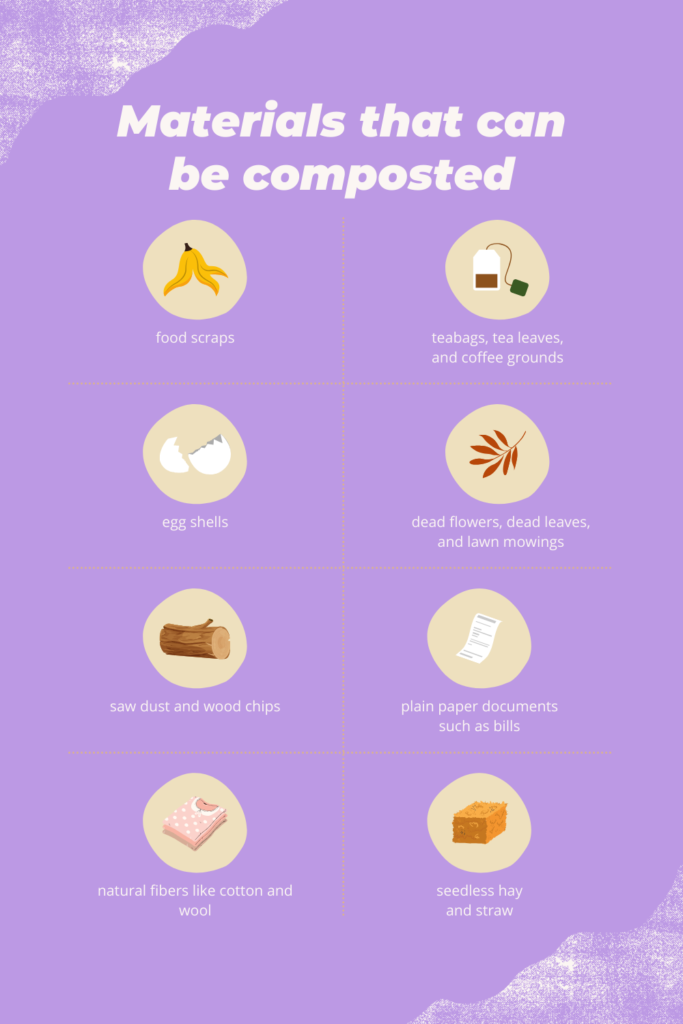
Compost should be fed a good mix of high carbon-containing materials (called “browns” because they are often dry, brown materials) and high nitrogen-containing materials (called “greens” because they are often fresh, tender materials like food scraps and lawn clippings).
The ideal ratio of high-carbon “browns” to high-nitrogen “greens” is 30:1. However, this can be approximated by mixing roughly half-and-half.
My hack for this is to add an equal layer of high-carbon materials on top whenever I add a layer of high-nitrogen materials. I usually keep a pile or leaves or straw bale around for this purpose.
High Carbon “Browns”
Straw
Seedless hay
Paper
Cardboard
Sawdust
Sticks and twigs
Wood chips
Dry leaves
Natural fibers like cotton and wool
High Nitrogen “Greens”
Food scraps
Lawn clippings
Garden weeds
Fresh leaves
Coffee grounds
What Not To Compost
Meat
Fish
Bones
Dairy products
Oils
Dog or cat poop
How to Make Compost Step-By-Step
#1 Choose a Composting Method
There are various composting methods to suit different preferences and available space. Traditional outdoor compost bins, tumblers, and vermicomposting (using worms) are popular options. Select a method that aligns with your lifestyle and available resources.
These instructions will focus on traditional compost bins.
Outdoor Composting
If you have access, it’s best to compost on dirt or lawn. Composting on earth allows for friendly worms to aid the decomposition process and add their beneficial worm castings (AKA worm poop.)
Ideally, an outdoor compost pile should be at least about three feet (3′) high and three feet (3′) wide. A compost pile this size or larger will be able to achieve the internal temperatures required to sterilize weed seeds and kill pests–about 130-150°F.
To achieve this shape, I recommend using a compost bin. These can be makeshift–I have seen very successful outdoor compost bins made of four pallets nailed together. You could also create a circular bin by shaping chicken wire or hardware cloth into a tube and securing with wire.
You can certainly also buy an outdoor compost bin. I like this cedar wood compost bin.
Compost Tumbler/Bin/Container
However, believe it or not, you can compost right on pavement, cement, your back porch–anywhere really–especially if you have chosen a compost tumbler as your composting method.
If you’re worried about pests, or don’t have a patch of land on which to compost, a sealed compost bin may be the best option for you. These containers can be set up anywhere–even on your porch.
#2 Collect Compostable Materials
Understanding what materials can and cannot be composted is essential. Compostable items include kitchen scraps (fruit and vegetable peels, coffee grounds, eggshells), yard waste (leaves, grass clippings), and some paper products (unbleached cardboard, newspaper). I recommend collecting kitchen scraps in a compost caddy that sits on your countertop.
Avoid composting meat, dairy, oily foods, and pet waste, as these can attract pests and slow down the composting process.
#3 Achieving the Right Balance
The ideal ratio of high-carbon to high-nitrogen materials in a compost pile is about 30:1. However, I don’t recommend getting to caught up with maintaining this ideal ratio. Instead, focus on maintaining a good mix by adding alternating layers of “browns” and “greens” to your compost.
A good rule of thumb is to put down a brown layer each time you add a green layer. Too much green material, and you’ll end up with a stinky, mucky mess that is especially inviting for maggots. I usually keep a pile of leaves or straw bale around for this purpose.
#4 Turning and Aerating:
Regularly turning the compost pile ensures proper aeration, helping microbes break down the organic matter efficiently. Use a pitchfork or compost aerator to mix the materials and introduce oxygen into the pile. A well-aerated compost pile accelerates decomposition and reduces the risk of unpleasant odors.
Turn your compost pile any time you notice any unpleasant smells or maggots. Otherwise, you can probably get away with turning your pile at least once a year.
#5 Keep Compost Moist
Compost also needs to be kept moist. The ideal moisture level is that of a damp, wrung-out sponge. During the hot summer months this means you may need to manually water your compost with a hose.
When Is Compost Ready?
Finished compost is moist, crumbly and deep brown. There may be a few twigs and rocks you can sift out, but otherwise there should be no identifiable materials left in your finished compost.
It may take anywhere from a few months to years for your compost to finish. The speed with which compost decomposes depends heavily on temperature. Compost typically finishes faster in warmer climates and in the summer months.
How to Use Compost
I recommend dressing your gardens with at least a couple of inches of compost every year at the start of the spring before you plant.
You can also use your homemade compost as an ingredient in your sheet mulch.
This post was all about homemade compost.
Hi, I’m Leslie, the founder of PunkMed

Hey friend! I’m so glad that you stopped by the blog today. I had a blast sharing my complete guide to making homemade compost.
If you’re into composting, gardening, urban homesteading, or living a more sustainable life–stick around! There are a good number of resources on my blog, and I always love to hear from my readers (that’s you!) Feel free to send me a DM on Instagram!
Other posts you may like:
I so enjoyed sharing my complete guide to homemade compost. Below, I’ve shared a few other of my composting resources and guides that share my experience on other important gardening topics!


