This post may contain affiliate links, which means that I may receive a commission if you make a purchase using these links.
Starting tomato seeds indoors doesn’t have to be daunting. This complete guide to growing juicy tomatoes from seed will build your confidence and skill as a home gardener in growing one of the most delicious veggies.
I’m a big proponent of the fact there are just certain vegetables that need to grown at home to experience their full deliciousness.
Tomatoes are one of those veggies! There’s nothing better that a sun-warmed tomato straight from the garden on a summer day.
But, because of their warm-weather loving nature (tomatoes are native to Mexico, South America, and Central America) and their relatively long grow time, tomatoes are best started indoors under grow lights in temperate climates.
This gives you a head start, and full control over the temperature, etc., so you don’t expose those baby seedlings to harsh conditions before they’re ready.
Ready?! Let’s grow!
This post all about starting tomato seeds indoors.
Why start tomato seeds indoors?
As discussed above, starting tomato seeds indoors (vs. direct sowing) is pretty much the way to go if you live in a temperate climate.
More generally, seed starting is a beautiful practice that, in my experience, is completely worth it.
Of course, you can always buy seedlings at the nursery. I’m not knocking that–it’s important to support our local small businesses, and I definitely still buy seedlings for certain plants! But, there’s something so special about getting to know a plant from seed to harvest.
Plus, you’ll be able to save money–seeds are cheaper than seedlings and you can save your own seeds for next season, which is literally FREE!
Who should start tomatoes indoors?
Starting seeds will save you money in the long run, but it does take a little investment in the proper equipment up front. Before you start tomatoes indoors, make sure you:
- Are at least serious enough about gardening that you don’t mind spending money on equipment that will last you many seasons
- Have enough room in your home/apartment to start seeds (at least enough space for a 2’x1′ storage shelf)
- Have a space to keep your seedlings away from curious pets
With that in mind, let’s look at the equipment you need to get started growing tomatoes seeds indoors!
When to Start Tomato Seeds
Start tomato seeds indoors four-six weeks before last frost in your area. Look up the date of last frost by your zip code here.
Tomato Seed Starting Equipment
Tomato Seeds
Obviously, the most important ingredient to tomato seed starting is the tomato seeds! If you happen to be reading this at the end of harvest season, read more about how to save tomato seeds for next season. (Hint: they require an extra fermentation step in order to germinate next year!)
Otherwise, if you are buying seeds, there are a few things to consider:
- DETERMINATE VS. INDETERMINATE All tomatoes fall into one of these categories. Determinate tomatoes grow to a fixed size and have a relatively short fruiting period (i.e. fruit will only be available to harvest for a certain period of time.) Indeterminate tomatoes have no fixed size and will continue to produce fruit for a long period of time.
- VARIETY OF TOMATO Tomatoes come in all shapes and sizes: cherry, grape, beefsteak, etc. Base your choice of tomato seeds on what you like to eat and how you plan to use the tomato. If you’re more of a snacker, I would choose a smaller variety like a cherry or grape. Other tomatoes are best for slicing on sandwiches. Still others are best for cooking and canning (one of my favorite varieties in this category is the Amish Paste tomato.)
- BUY LOCAL AND ORGANIC I always recommend buying seeds from local growers vs. big seed companies. That way, you can be assured the specific variety is well-acclimated to your particular climate.
Seed Starting Medium

DO NOT start seeds in your regular soil! There could potentially be pests and pathogens lurking in untreated soil that could easily harm your baby tomatoes.
Give your seeds the best chance at growing healthy and strong by using special seed starting medium. Seed starting medium is specially formulated to germinate and grow seeds.
Seed Tray with Humidity Dome and Flood Tray

Listen, I’m all for avoiding plastic where possible, but believe me I have tried every compostable seed pot and they just DO NOT get the job done!
Instead, I recommend a standard, plastic seed tray with a humidity dome and flood tray without holes.
- HUMIDITY DOME – helps protect the seeds and helps move along the germination process. Cover the seed tray with the humidity dome until the seeds have germinated and then remove.
- FLOOD TRAY – holds the seed starting cells. A flood tray is essential for a practice I recommend called ‘bottom watering.’ Bottom watering basically means instead of watering your seedlings directly, you’ll fill the flood tray with about a 1/4 inch of water, and that water will be wicked up into the soil. This practice encourages root development.
Be gentle with your plastic seed trays and they will last you a few seasons!
Heat Mat

Most seeds like it warm in order to germinate! The optimal germination temperature for tomatoes is 65° to 85°F. I don’t know about you, but that is just a little bit warmer than my apartment in the early spring! (Hi, I’m in Boston!)
This heat mat warms the rooting area 10-20°F above ambient temperature.
Grow Lights
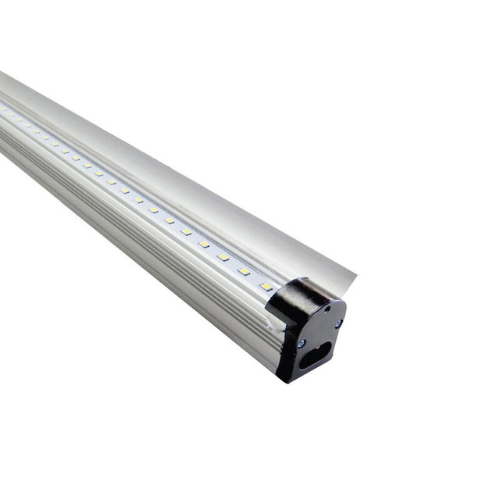
Okay, I hate to be the one to break it to you BUT, unfortunately putting your seedlings by a window is just not going to cut it. They’re not going to get enough light to grow. Believe me, I’ve tried, and they end up being leggy little babies, straining for the sun, and just DO NOT thrive!
You’re going to have to invest in grow lights.
You’ll need a 2 ft light for every tray of seeds.
Best Type of Grow Lights for Seed Starting
I recommend T5 fluorescent or full-spectrum LED 6500K lights. The K stands for Kelvin, which is a measure of the ‘color temperature’ of the light. Generally, lights higher on the Kelvin scale (i.e. white-blue) emulate daylight and are best for vegetative growth. Ignore those pink lights–they’re pretty but NOT the best for seed starting!
The grow lights should ideally come with hooks to hang from above, as well as a pulley system to move the lights up and down.
You’ll want to move the lights up as the tomato plants grow!
I like the SunBlaster LED Strip Light Kit – 36″.
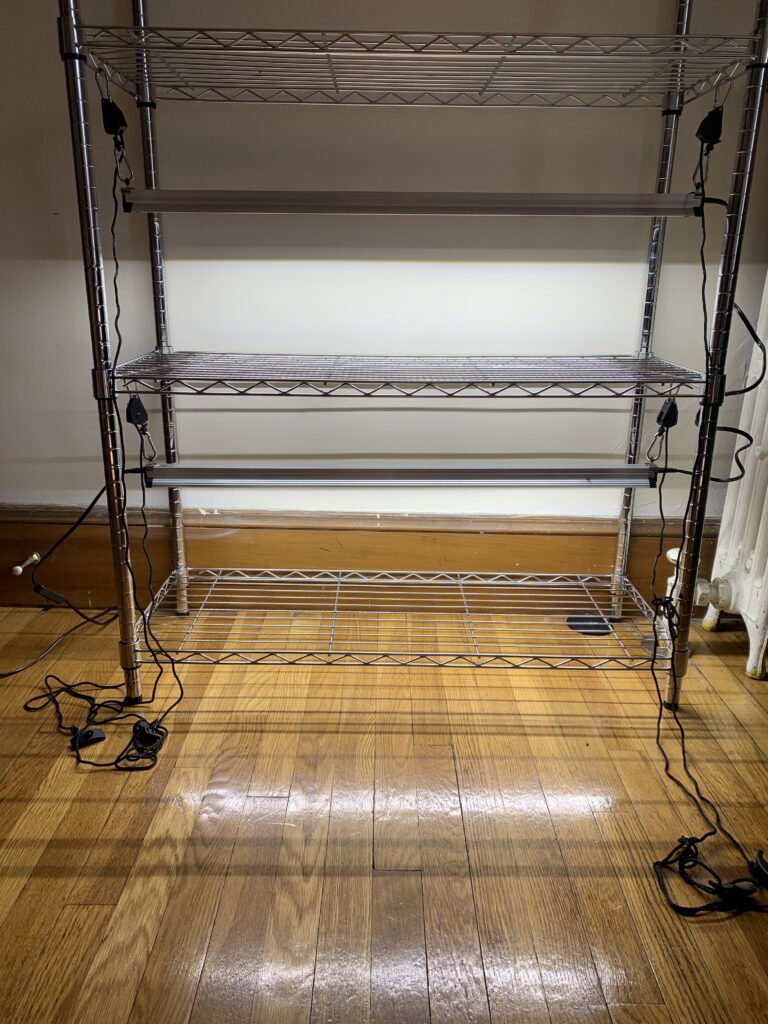
Shelving

Now you are going to need some safe and sturdy shelving to hold your seed starts. I like the basic, heavy-duty storage shelving for seed starting purposes.
The steel wire material will allow you to hang your grow lights safely from the shelf above your seed trays. (Again, ideally your grow lights came with hooks for this purpose.)
The exact sizing will depend on the amount of trays you plant on growing.
Please be safe when using electricity and water in the same area!
How to Start Tomato Seeds Indoors
Okay, now that you’ve got your equipment and you’re ready to grow, here’s how to actually start tomato seeds indoors!
#1 Set Up Shelving Unit/Seed Starting Station
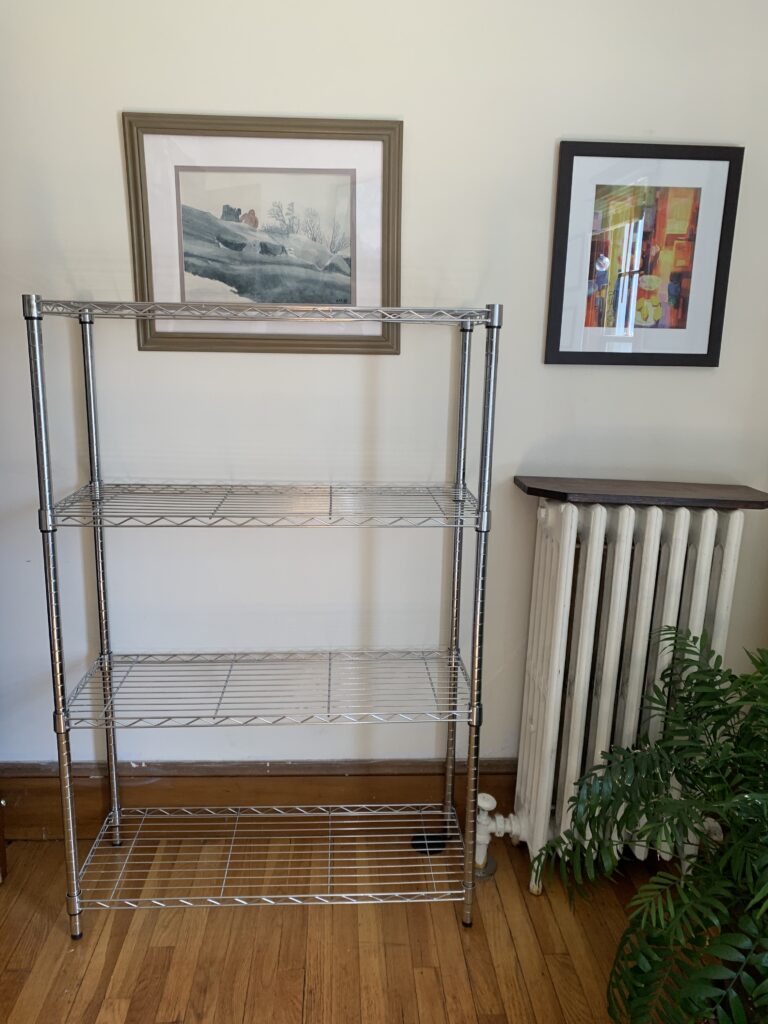
Setting up your seed starting station is going to look different based on your space and the number of trays you’ll be planting. Make sure your space is near an outlet, as you will need to plug in the electronics.
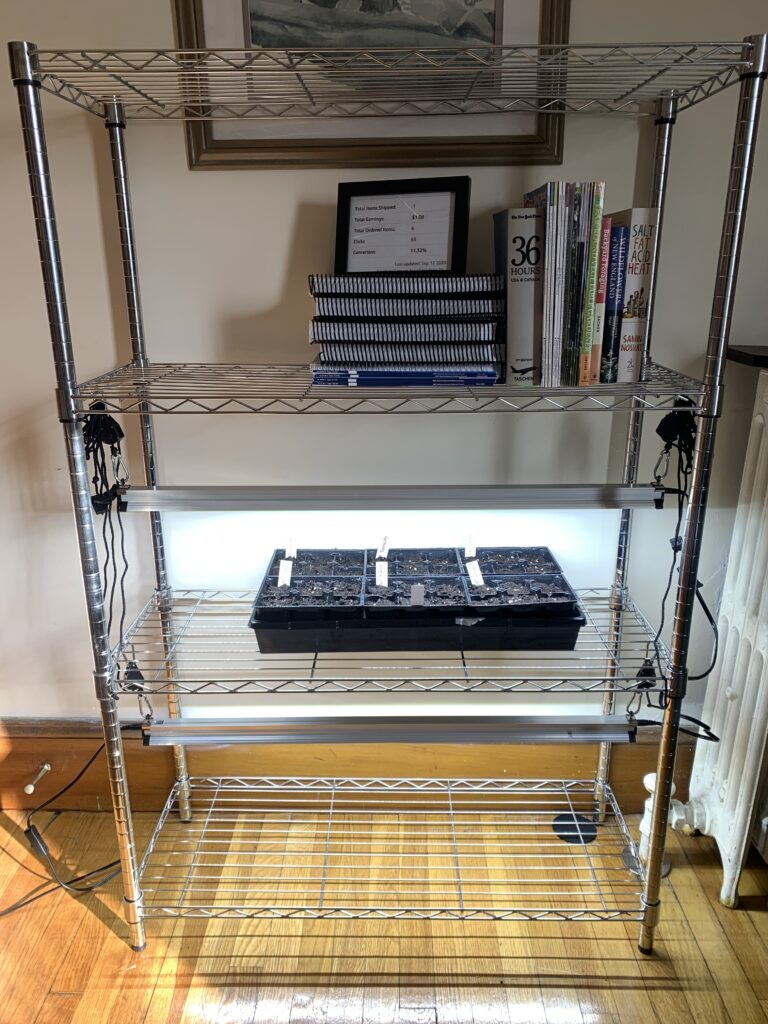
I recommend using heavy-duty steel shelving units in whatever size works best for you. I use the Amazon Basics 4-Shelf Adjustable, Heavy Duty Storage Shelving Unit (36L x 14W x 54H). This allows me to grow on three of the shelves, with grow lights hanging from the shelf above.
Pro tip: set up your seed starting station away from curious pets and small children! You don’t want anyone knocking over trays full of water onto electronics.
#2 Hang Grow Lights
After you’ve got your shelving set up, you’ll want to hang your grow lights.
Ideally you’ve purchased grow lights that come with hanging hooks and clips. I like the SunBlaster LED Strip Light Kit – 36″ for this reason, and because they are the same length as my shelving unit! This model comes with hanging clips, but you’ll need to buy the adjustable hanger separately. (This allows you to adjust how the the lights hang over the plants as they grow.)
You will need at least one two feet light for each standard 10″x20″ tray of seedlings you want to start. I like to double up with two LED lights over each seed tray.
Using the hanging clips and hooks, hang the light strips from the steel wire of the shelf above where you will keep your seed tray(s).
You won’t need to turn the lights on until the seeds have germinated, but it’s good to have your space set up in advance.
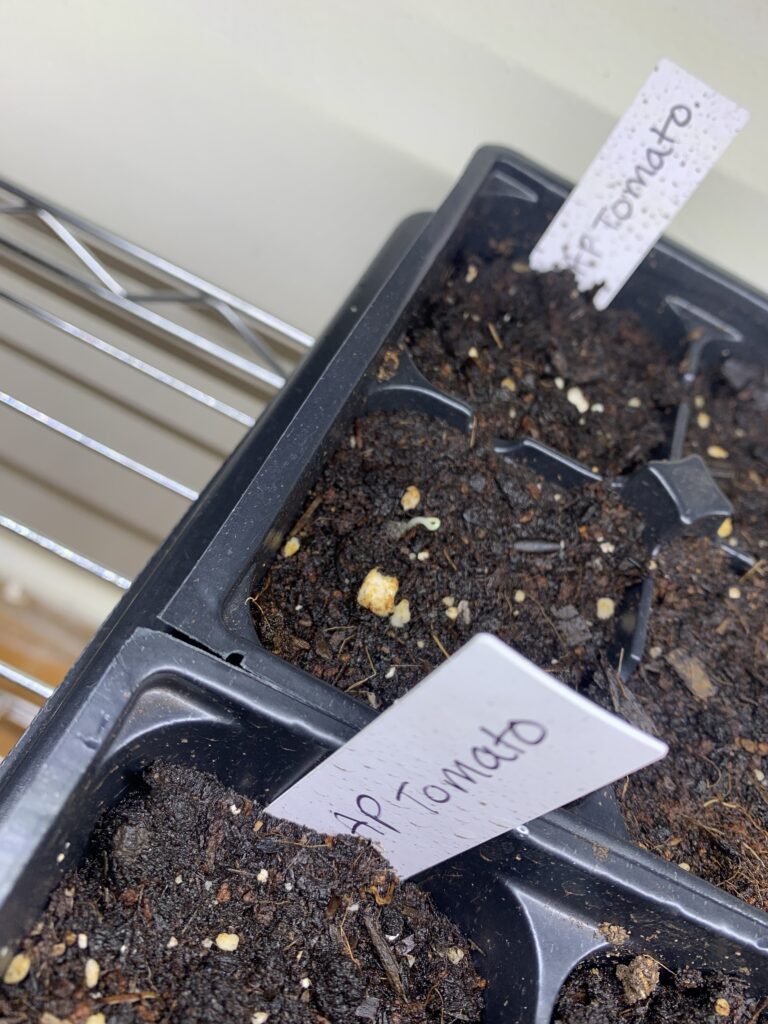
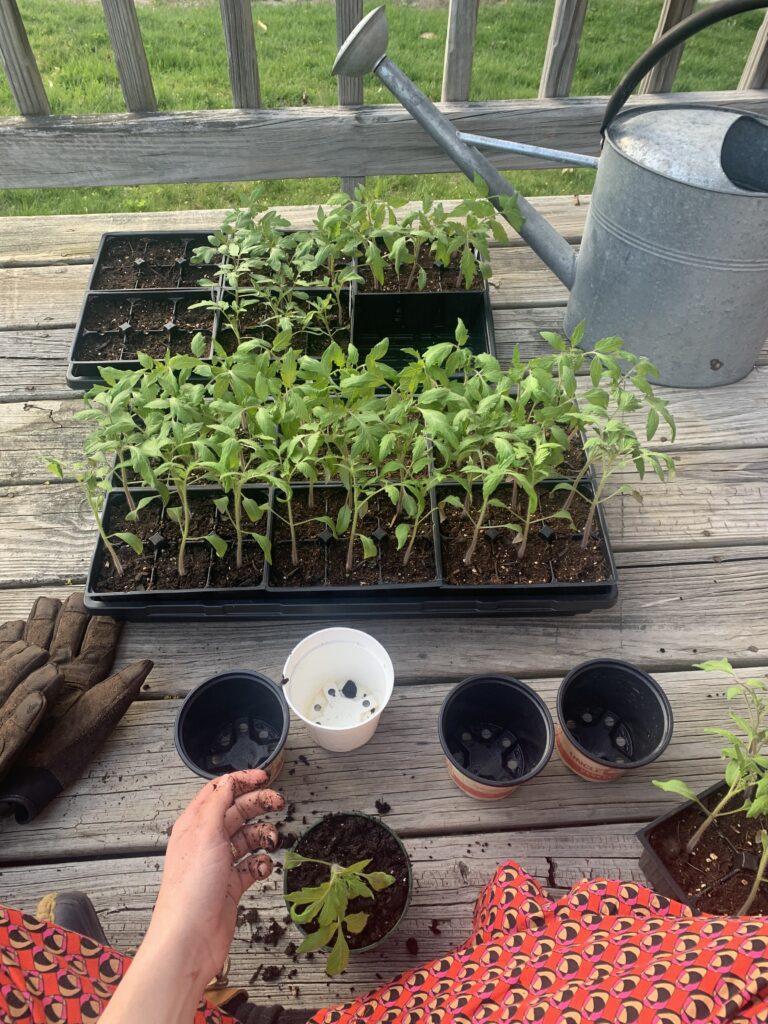
#3 Plant Seeds
Okay, now for the fun part–time to actually plant the tomato seeds! I like to do this outside on my front porch so as to not make a huge mess indoors.
Make sure your seed tray and supplies are sanitized if reusing them from last growing season.
Fill each cell with seed starting medium, leaving about a 1/4″ inch at the top.
Poke a 1/4″ hole in the top of the soil with a pen tip or finger, drop your tomato seed in, and sprinkle with grow medium to cover.
Spray gently with water.
#4 Add Heat Mat and Humidity Dome
Alright, now time to set up the optimal conditions for your seed to germinate.
Plug in the humidity mat and set it to the optimal germination temperature for tomato seeds, 65° to 85°F. Keep an eye on the ambient temperature in your house–the heat mat may not need to be on 24/7.
Make sure each of your seeds has been sprayed with water. You’ll want to keep them hydrated throughout the germination process, so keep spraying them with water when the growing medium starts looking a little dry. (We won’t be bottom water with the flood tray quite yet.)
Cover the seed tray with the humidity dome. If it ever looks like it’s getting a little TOO wet in there (and maybe getting moldy) offset the dome a bit to let in some air.
#5 Wait for Germination!
Now we wait! Keep the seed starting medium moist by spraying gently with water whenever you notice it getting a little dry.
Remember: you don’t turn the grow lights on during the germination phase! Those seeds are underground anyways! They just need moisture and warmth!
Tomato seeds should germinate in about 5-6 days if you can keep the soil temperature around 80°F.
#6 Turn on Grow Lights
Once your tomato seed has germinated, it’s time to turn on the grow lights!
In general, seedlings should get 14-16 hours of light a day under LED grow light, and 16-18 hours of light a day under fluorescent lights.
Keep your seedlings 2-4″ away from the grow lights, using the adjustable hooks to raise the lights as the seedlings grow.
#7 Maintenance
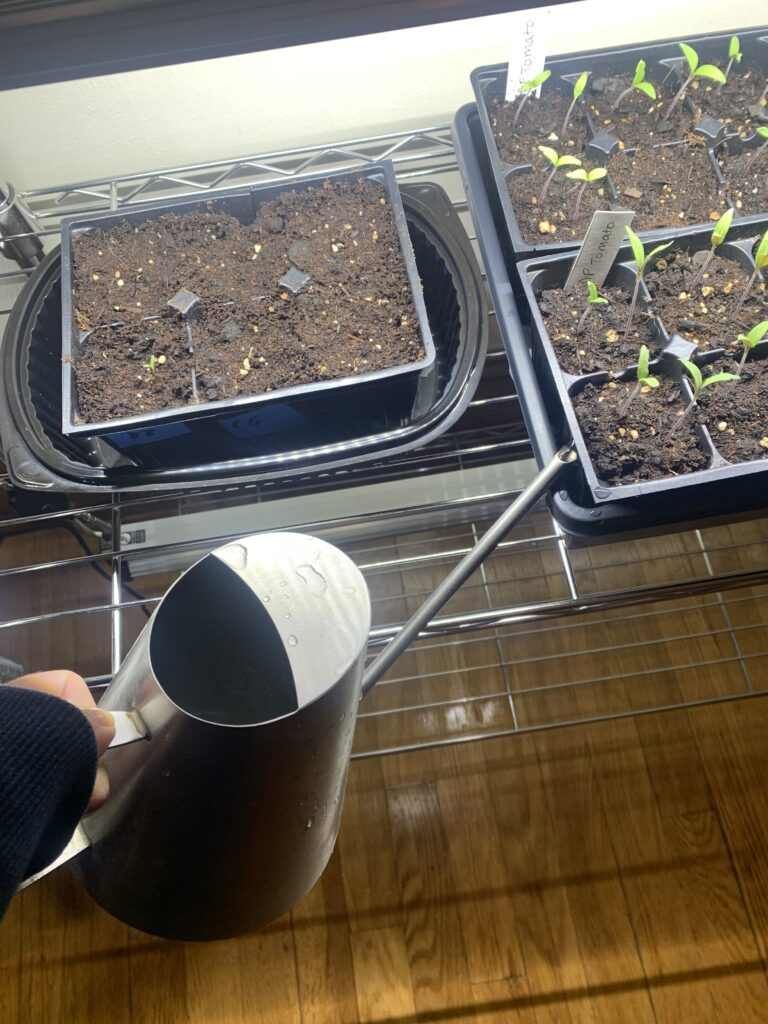
Now that your seeds have sprouted, it is time to being bottom watering.
Water your tomato seedlings by keeping the flood tray filled with about 1/4″ of water. The water will be “wicked up” by the growing medium, and encourage your seedlings to grow deeper roots.
You can turn the heat mat off at this point.
#8 Feeding
Tomatoes are heavy feeders and can benefit from a little fertilizers during the seedling stage.
This is optional, but your tomato seedings may benefit from a 50% diluted liquid fertilizer about a week or so before hardening off. Simply add the diluted fertilizer to the flood tray as you would during a watering.
#9 Hardening Off
Hardening off is the process of transitioning your seedlings to the outside world before they are transplanted. You can begin the hardening off process when the tomato seedling have put out 3-5 sets of true leaves (i.e. the leaves that look like tomato leaves, not the first set of baby cotyledon leaves.)
Start the hardening off process on a warm, clear day when the temperatures are above 45°F. Place your seedlings outside in a place where they are protected from wind and direct sunlight. Leave them out for an hour.
Increase time outside by an hour over the course of the next week or so, never leaving your seedlings outside in the harsh wind or rain!
After max two weeks, your seedlings are ready to be transplanted! Great job!
This post was all about starting tomato seeds indoors.
Hi, I’m Leslie, the founder of PunkMed
Hey friend! I’m so glad that you stopped by today. I had a great time sharing my tomato seed starting tips and tricks! If you’re into vegetable gardening, urban homesteading, or living a more sustainable life, stick around! There are a good number of resources on my blog, and I always love to hear from my readers (that’s you!) Feel free to send me a DM on Instagram or chat with me on TikTok!