This post may contain affiliate links, which means that I may receive a commission if you make a purchase using these links.
Are you looking for tips on how to start a container garden? Then this post is for you!
Maybe you’re sick of throwing away plastic bags of wilted spinach that you abandoned in the vegetable crisper. (Food waste and plastic headed to a landfill—not cute!)
Maybe the scarcity of fresh vegetables on the shelves of grocery stores during the peak of the pandemic has you thinking about ways you can become more self-sufficient. The boom in the home gardening industry since then suggests that a lot of people have a new sense of distrust in our supply systems.
If you’re one of them, or just interested in gardening at all, a great place to start is with a container garden or two!
Why Start a Container Garden?
Regardless of what brought you to home gardening, you will soon learn the deeply satisfying work of having your hands in the soil, growing something from seed, and being able to feed yourself and your family—whether the final product is just a sprig of mint in your julep or a full-fledged tomato canning operation that will prolong your harvest into the winter.

Home and community gardening can provide a variety of health benefits, including increasing fruit and vegetable intake, physical activity and boosting mental health.
Container gardening, in particular, is fantastic because it can bring nutritious produce to homes without green space or workable soil. It may be a good idea to grow in containers if you live in an urban area, particularly near a road, industrial site or older house known to have a history of lead paint and fixtures.
Plus, one of my top tips for new gardeners is to start small. It’s easy to get overwhelmed with Instagram gardening goals and ambitious gardening projects when you’re first starting out. Starting a container garden is a great first gardening project for beginners!
Okay, that’s enough! You came here for a how-to guide! To get started, you’ll need to determine how much space and time you have to dedicate to a home gardening project. We’ll start with the smallest, easiest projects and progress to the more time-intensive.
This blog post is all about how to start a container garden.
How to Start a Container Garden
The great thing about container gardening is almost any vessel will work once you discover the general principles. In fact, I encourage resourcefulness where possible. Please find ways to reuse containers you have lying around the house! I incorporate all of the containers below in my urban garden.
List of Needed Items – How to Start a Container Garden
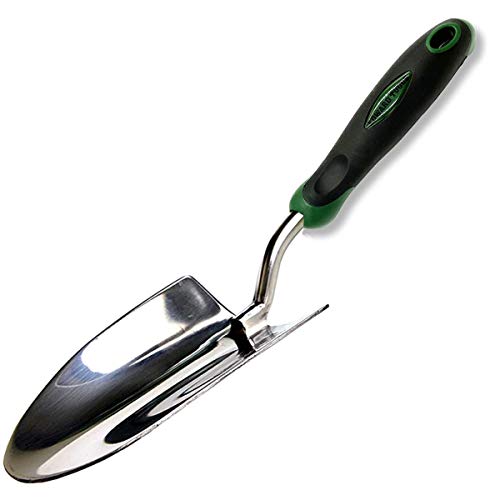
Before you get started and pick out a project, you need a few essentials. Garden gloves and a good spade are important tools to have around.

Best Soil for a Container Garden
You’ll also want the best, organic soil you can find. We like Coast of Maine products for container gardening and larger raised beds (affiliate link). Shop for your essentials and tackle one of the container gardening projects below this weekend!

The Cocktail Garden – Container Garden Idea
You know the pure panic of making the long trip to the grocery store only to find they don’t have any mint, and you had your heart set on a mojito? The idea behind the cocktail garden is to make sure that never happens to you again. With a cocktail garden, you will always have a set of herbs within your reach, should ever the mood strike you for a tipple.
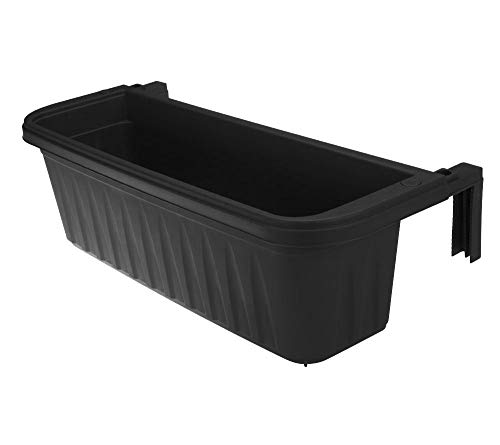
In general, these come in the form of a window box or hanging basket, and look great on a windowsill or porch ledge. Shop some of my picks below.
Adjustable Railing Planter
SOME PLANTS THAT WORK GREAT IN A COCKTAIL GARDEN:
ROSEMARY
SAGE
LEMON VERBENA
LEMON BALM
BASIL
MINT
TULSI OR HOLY BASIL
My tip: You could buy these plants as younger seedlings and transplant them into your garden or start them from seed in the spring. See your seed packet for instruction on how to start individual plants.

Idea for Container Garden – Five Gallon Bucket
A surprising number of plants will thrive in the type of five-gallon bucket you can get at your local hardware store. Ideally, use food-grade plastic or other materials considered safe for growing food. A general rule of thumb for plastics is that typically any of those with the ‘recycle’ symbol are consider safe for food.
Recyclable 5-Gallon Plastic Bucket

If you want to go above and beyond, try sourcing your buckets from out behind a local restaurant or coffee shop—you know the containers will be food-safe. Reduce, reuse, recycle!
5 Gallon Bucket Planter How-To
- Allow for drainage by drilling a number of holes into the bottom of your bucket.
- To keep soil from clogging up the holes, put down a layer of chunkier solids like rocks or gravel. I’ve even used shards from broken pots for this application (be careful!)
- Fill the container with potting soil, allowing enough space for the root ball for the plant you are transplanting. You want the root ball to be an inch or so below the lip of the bucket, otherwise watering can be difficult and you may expose the roots.
- Pop the plant in and watch it grow!
PLANTS THAT DO WELL IN A FIVE-GALLON BUCKET:
BASIL
ITALIAN PARSLEY
TOMATOES
EGGPLANT
CUCUMBER
MELON
STRAWBERRIES
BLUEBERRIES (REQUIRE SPECIAL SOIL)
Storage Tub – How to Start a Container Garden
I don’t know how to describe these storage tubs other than to say they seem to be universally used in attics to store holiday decorations. I have some laying around that were gifted to us to use as we were moving. Maybe you have some lying around the house. In that case, these eight to 14-gallon sized storage tubs make the perfect vessel to start a beginner’s salad garden.
14-Gallon Storage Tub

Lettuce is perfectly suited to growing in these tubs and will provide you with fresh greens throughout the spring.
Lettuce does not love the hot sun of summer, so it is generally best to plant in the early spring in areas with freezing winters. In warmer climates, you can start lettuce in the fall, or even over the winter.
The process for preparing the storage tub for soil is very similar to what we did with the five-gallon bucket. However, the bin will give you more area for growing plants that can be placed closer together, like lettuce and other salad greens.
Storage Tub Planter DIY
- Drill holes in the bottom of the storage tub to allow for drainage.
- Spread a layer of rocks, gravel, or other chunkier material at the bottom of the tub, so that the soil will not clog the holes.
- Fill the bin with potting soil up to an inch shy of the lip of the container.
- Add a handful or so of dry organic fertilizer.
- Water the soil you’ve added so far. It may settle—add more soil if needed.
- Sprinkle a layer of salad green seeds evenly over the top of the soil. The seeds should have about a centimeter space between them, but this does not need to be perfect. The beauty of salad greens is they are tastier when eaten young, so you will be doing some natural clearing out throughout the growing season by plucking whole baby plant greens and eating! This makes room for the remaining plants to grow.
- Lightly sprinkle some more potting soil over the seeds just to cover—about ¼ of an inch or less.
- Gently water your seeds. You may want to use a spray bottle for this to ensure you don’t disrupt their placement. You don’t want your seeds to go swimming.
- Keep your lettuce seeds moist with the spray bottle until they sprout. Check your seed package for time until germination.
- As the plants mature, thin them out by plucking baby lettuce heads out whole. Make a big salad for lunch!
Eventually, it will get too hot and the remaining lettuce will start to send up flowers. This is called “bolting.” The greens tend to taste bitter at this point. Time to plant something new or wait until next season!
Raised Bed Vegetable Garden (8×4) – Container Container Garden Instructions

The raised bed garden is less of a container garden and more of a real garden that can supply you with a variety of fresh vegetables throughout the growing season. For that reason, this project is for the advanced urban gardener with some time and space on their hands. Still, the raised bed garden is no more than a weekend project once you have all your materials.
The general idea as outlined below can be adapted to the specific space you have allotted for a raised bed garden. However, if you want to keep it super simple, I recommend the 8×4’ garden because it requires barely any math and handiness.
Wood at the hardware store comes in 8-foot planks, so you’ll be using the entire plank for the long side of the garden, and just cutting in half for the short side. If you don’t have a saw, have the pieces cut for you at the store or lumber yard.
If you don’t want to DIY your raised bed garden, there are plenty of ready-made raised bed on the market that require limited assembly. Shop a few of my picks below.
Cedar Raised Bed Garden Kit 3’x6’x11″
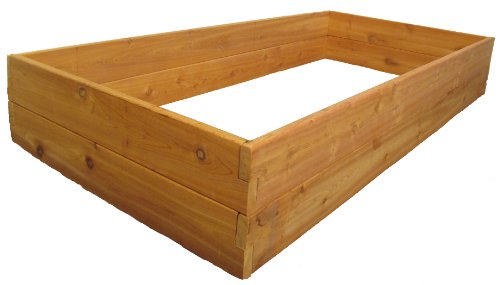
Square Cedar Raised Garden Bed Kit 48″x48″x12″

DIY Raised Bed Garden Materials
- A PATCH OF LAWN OR DIRT IN YOUR YARD THAT GETS A MINIMUM OF 6 HOURS OF SUNLIGHT PER DAY
- DRILL
- DRILL BIT FOR #14 SCREWS
- SHOVEL
- (6) 2” X 8” BOARDS, EIGHT FEET LONG. CUT TWO OF THESE BOARDS IN HALF FOR THE SHORT SIDE OF THE GARDEN.
- (1) 4”X 4”, SIX FEET LONG. CUT INTO FOUR EQUAL PARTS, 18” EACH. THESE ARE THE CORNER POSTS OF YOUR GARDEN. THE 2” X 8” BOARDS WILL BE SCREWED TO THE POSTS FOR EASY ASSEMBLY.
- 3½“ #14 WOOD SCREWS
DIY Raised Bed Garden
- Start with two of the 2” x 8” boards that were cut in half (these should be 4’ long) for the short side of the garden. Drill two guide holes on each end of each board where they will be screwed to the corner post.
- Line the boards up so they are flush with the top and side of a corner post.
- Screw the boards to the corner post. The corner posts should be a couple inches longer than the two plank boards on one end. This is good. Those corner posts will be going into the ground to keep your garden in place.
- Drill the other side of the planks to another corner post.
- Repeat the process with the other two side planks and corner posts. You should have the two short ends of the garden now with the four corner posts attached.
- Drill two guide holes on either end of the 8-foot long planks.
- Line two of the 8-foot long boards so they are flush to the corner post of one of the sides. It is easiest to do this with the legs of the corner posts sticking up in the air.
- Screw the long boards to the corner posts.
- Repeat the process with the other two long boards. Now you should have an upside-down garden box!
- Right the garden box and use the legs of the corner posts to mark where they will go in the ground. Note here that it is find to place your garden over pre-existing lawn. No need to dig up the grass or turnover the dirt. This will all be killed by the weight of the soil you’re about the throw on it. Plus, all the decaying organic matter will act as compost to your plants growing above.
- Dig a few inches into the soil to make room for the four legs of your garden box. You may need to loosen up the dirt beforehand.
- Place your garden box into the holes, making sure your planks are reasonably flush to the ground. You can use a level here. It may take a few attempts and re-digging to get this right. It doesn’t have to be perfect; it just needs to hold soil!
- Fill your garden box with the highest quality, organic soil you can find. I like Coast of Maine Organic Raised Bed Mix for this purpose. Fair warning, this will be expensive, but in subsequent growing seasons you should be able to simply supplement your existing soil with some compost and replant. In other words, your initial investment will pay off for years. Fill the box to the top, as it will settle after watering. Reserve some soil to cover your seeds.
- I do not subscribe to the notion of neat, little garden rows organized by species. Instead, we encourage survival of the fittest and throw a mix of seeds all over the garden. The result is a beautiful, tangled burst of green that you thin out by eating over the course of the season. See below for the exact seeds I use in my raised bed gardens. The plants in this mix will reach maturity at different times so you will have a harvest throughout the spring, and potentially even into the winter. Grab your seed packets and spread evenly over the soil. Do not premix the seeds—spread them out one by one!
- Cover your seeds with ¼” or less of reserved soil.
- Water gently, with your hose on the lowest sprinkle setting.
- Keep your seeds moist until the seeds germinate, then begin daily, deep watering.
- Enjoy the fruits of your labor!
THE SEED MIX IN MY RAISED BED GARDENS:
SPRING MATURITY:
LETTUCE
BOK CHOY
RADISH
SPINACH
SUMMER/FALL MATURITY:
SWISS CHARD
CARROT
PARSNIP
BEET
CABBAGE
FALL/WINTER MATURITY:
KALE
Many of the ideas in this post were adapted from The Urban Homestead by Kelly Coyne and Erik Knutzen. If you want to learn more about urban gardening, please check out this book.
The Urban Homestead

This blog post was all about how to start a container garden.
What to Read Next
I so enjoyed sharing my guide on how to start a container garden. Below, I’ve shared a few other gardening guides that share my experience on other important gardening topics!