Home Blog Page 13

5 Beverages I Drink Every Day for Beauty and Overall Health That Are Actually Good

close-up-of-hands-holding-olipop-beverage

Not to brag, but my beverage game is strong. 

Just ask my partner–at any one time there are probably two to four drinks on my desk while I’m working.

I like having options, but beyond that, I like to view beverages as little nutritional boosts throughout the day. 

How can I maximize the nutritional value of what I’m consuming? For example, we love water (absolutely be drinking half your bodyweight in ounces of water every dang day!), but what about incorporating herbal teas as well? Welcome to the hydration party, vitamins and minerals!

I also like to use beverages as fuel to get me to my next meal when I’m not exactly hungry. (Always listen to your body’s hunger cues). For example, I love coffee, but it often leaves me feeling jittery and ravenous. How about adding protein and fat to make it more nourishing?

Here are five of my favorite daily beverages that support beauty from the inside out with their nutritive properties. And these are not just beauty beverages: because no one part of the body is separate from the other, whatever is good for your hair, skin and nails is good for your overall health.

Cheers to good health!

Please note I am not a doctor or nutritionist, and these recommendations are not meant to be medical advice. Please talk to your doctor especially before incorporating herbs into your diet.

1) Collagen Coffee

Coffee is a non-negotiable for me. However, for some people a cup of joe is a far cry from a beauty food. Instead, it causes jitteriness, anxiety and adrenal crash and burn. If coffee is not your thing, I respect your choice.

However, if you love coffee but not the side effects, there is a way to sneak in extra benefits without the crash. Specifically, I like to add collagen powder and fat to add a little extra nutritive oomph and calories. This keeps me full and seems to ward off the jitteriness that’s often associated with caffeine.

Collagen is a protein found almost everywhere in your body, but is perhaps most known for its role in maintaining skin structure. Collagen is particularly abundant in the skin and connective tissue of animal foods, but luckily for us we can add the flavorless powder version to a variety of beverages, including coffee.

How to Make Collagen Coffee

Start with a high quality coffee like Bulletproof brand coffee and brew as you normally would. (I like drip coffee made with a Chemex like a true hipster).

From there, pour your coffee into a blender with collagen powder and a fat of your choice. For the fat you can add butter, coconut butter or oil, cacao butter, full fat dairy creamer–get creative! Lately I’ve been loving powdered coconut creamer like this one from Laird.

2) Nettle Tea

Stinging nettle (Urtica dioica) is actually considered a common weed in many parts of the world. However, as you’ll learn if you stick around on this blog, one man’s weed is another man’s treasure.

Like the name suggests, stinging nettle will actually cause mild inflammation if touched bare handed due to the tiny stinging hairs on its stalks and leaves.

When cooked or dried as served as a tea, however, nettle leaves have the opposite effect on our bodies and may actually reduce inflammation.

Nettle is also a nutritional powerhouse and contains a wide range of health-supporting vitamins (vitamins A, C, K and some B vitamins) and minerals (calcium, iron, magnesium, among others).

How to Make Nettle Tea

To enjoy the many benefits of nettle, steep nettle leaves in hot water as you would make any tea. My personal favorite way to make nettle tea is to fill a French press about a fifth of the way up with nettle leaves and top off with hot water and let it infuse overnight. I then enjoy a couple cups of tea throughout the next day.

I have read that using scalding hot water can damage some of the vitamins present in nettle leaves. I like to use previously boiled water that has cooled down a bit.

Stinging nettle can be found worldwide. You can either forage your own and prepare for tea or buy from Mountain Rose Herbs.

3) Olipop

The health of your gut can have a profound effect on the health of your skin. The relationship between the gut and the skin is an area of ongoing scientific research, but it is thought to be mediated via the gut microbiome.

There is a delicate balance of bacteria living in your gut. When things are in balance, the friendly bacteria produce compounds that are known to reduce inflammation. When things get out of whack, a proliferation of other kinds of bacteria may lead to inflammation (think acne) and even autoimmune disorders (for example, psoriasis).

How Prebiotics Protect the Skin

We need to feed our beneficial bacteria to get the nutrients that protect our skin.

How do we feed the good guys? Short answer: prebiotics.

You may have heard of probiotics, which are typically live bacterial cultures taken in supplement form. Probiotics are also great.

Prebiotics are dietary fibers that feed the beneficial bacteria that are already in your gut. These bacteria ferment the undigested fibers into short chain fatty acids which reduce inflammation.

Olipop Makes Incorporating Prebiotics Easy

Many foods contain prebiotics, but the easiest way I have found to regularly incorporate gut health into my routine is by drinking Olipop.

Olipop is a carbonated beverage that mimics the flavors of your favorite sodas but also contains nine grams of prebiotic fiber in the form of chicory root inulin and jerusalem artichoke inulin. 

Chicory root and jerusalem artichoke have some of the highest concentrations of prebiotic fiber, but when was the last time you had them at your dinner table? Olipop makes it easy to incorporate prebiotics in your diet.

My favorite flavors are vintage cola and orange squeeze.


4) Bone Broth 

Since the rise in popularity of bone broth among the wellness crowd, chefs have rolled their eyes at the trendy rebrand of what has been known in the culinary world for centuries as simply stock.

Whatever you call it, simmering animal bones, veggies, herbs and spices in water for an extended period of time is a time-honored tradition that has nourished generations.

Bone broth has numerous nutritious benefits, many of which are specifically beneficial to the hair, skin and nails. 

First, broth contains collagen and gelatin, which are proteins extracted from the bones and ligaments as they cook. These proteins provide structure to your skin, improving its appearance. They are also nourishing for the joints, repair digestive tissues and mucosa, and help with the absorption of nutrients.

Second, bone broth is extremely high in vitamins and minerals, especially calcium. (We all know how calcium is important for bone health!)

Where to Source Bones

Start by saving the carcass after you’ve roasted a chicken (or even purchased a rotisserie chicken from the store!) Keep the bones in the freezer until you’re ready to make your bone broth.

Another option is to source bones from your local butcher (beef, chicken, lamb, etc.) Bones are often very cheap, as they would normally go to waste! 

As an added sustainability bonus, I find there is a certain satisfaction that comes from using the entire animal when feeding yourself.

Bone Broth Add-Ins

All you really need are bones, water, an acid (like vinegar, wine, or lemon juice), and herbs, spices and veggies of your choice. 

A basic stock recipe will include what the French call mirepoix–carrots, celery and onion. I also like to throw in a few sprigs of herbs like parsley or rosemary. For a little heat, I usually add garlic, ginger and whole peppercorn.

Feel free to add whatever herbs, spices and veggies call to you. You can even collect kitchen scraps in the freezer to use whenever you make a stock (think onion skins, parsley stems, herbs that are about to go bad!)

Another key ingredient to a bone broth is the acid. This can be lemon juice, lime juice, wine or vinegar. I like to use raw, unfiltered apple cider vinegar. The acid breaks down the bones as they cook, making the minerals within more bioavailable. 

How to Make Bone Broth

Making bone broth at home is cheap and easy once you make it part of your routine. 

Add your bones to a large stock pot or crock pot. 

No need to brown your bones beforehand. You can if you want, but for me it doesn’t make too much of a difference. I usually throw them in straight from the freezer. 

Cover completely with 4-5 inches of water.

Throw in your herbs, spices, and veggies. I usually keep these loose ingredients in a mesh bag or “soup sock” to make straining and clean-up easier.

Add ¼ cup of your choice of acid for every 1.5 lbs of bones.

If cooking on a stovetop, cover and bring to a boil on high heat. After the stock has reached a boil, bring to a simmer. Let cook for as long as possible for maximum benefits–up to 48 hours.

If cooking in a crockpot, follow pretty much the same steps as above. Cover bones with a few inches of water. Slow cook for up to 72 hours. 

The crockpot is my favorite way to make bone broth because you can safely leave it simmering for long periods. The more time the bones have to simmer, the more minerals are extracted into the broth!

5)
Natural Vitality Calm Magnesium Supplement Drink

Magnesium is a mineral that plays an important role in the human body, including many processes that affect the hair, skin and nails.

First, magnesium is vital to the immune system and can be protective against inflammation. Magnesium deficiency has been linked to inflammation, which can directly or indirectly cause hair loss.

Magnesium is also essential in the division and growth of cells. Cell turnover is responsible for that youthful glow!

Finally, magnesium plays an important role in the nervous system and has been shown to be a muscle relaxant and potentially be protective against anxiety.

My favorite way to take magnesium is to wind down with a hot cup of Natural Vitality’s Calm magnesium supplement drink.

Natural Vitality has several flavors, but my favorite is the raspberry lemon. They even have a flavorless version.

Simply add a teaspoon to hot water every night before bed and enjoy your beauty sleep.

The Easy Guide to Starting a Garden Anywhere Without Breaking Your Back

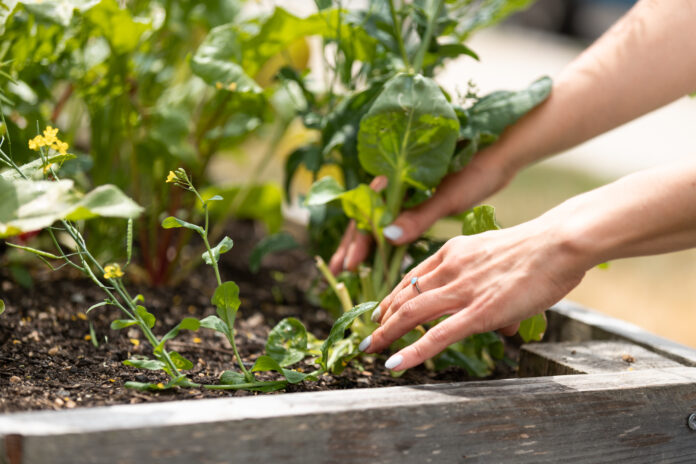
close-up-of-hands-pulling-plant-from-garden

The thought of starting a new garden from scratch may sound daunting. 

It conjures the humble farmer working the land dusk to dawn. Surely you need a limber back, superhuman strength, or a work horse to help do the tilling?

But what if I told you the healthiest gardens don’t require any back-breaking digging and starting a garden is a project that can be completed in a single morning or afternoon?

That’s right–with a few materials on hand you can pick a plot in the morning and have seeds in the ground by lunchtime.

Replace your lawn or a sorry patch of weeds with a brilliant garden of vegetables, flowers, shrubs, etc. in very little time with the no-dig gardening method. 

Not only is no-dig gardening easier on you, it is the best option for healthy soil and plants.

Why No-Dig Gardening is the Healthiest Option for Your Plants and the Planet

Tilling or “turning over” the soil was long thought to be the necessary first step in starting a garden or preparing a piece of land for farming.

The theory behind tilling is that it aerates the soil and brings a burst of microbial activity that is beneficial to plant growth. While this is true, the benefits are usually short-lived as the microbes in the soil burn up organic matter at an unsustainable rate with the artificial introduction of excess oxygen. 

Plants may appear healthy for a time, but soils will be depleted after even a few years of this practice (such is the case in so much of America’s farmland.) 

Tilling also destroys the tiny, intricate capillaries in the soil (either there naturally or created by earthworms) that allow for the steady absorption of water. Without this delicate structure, erosion and runoff may occur.

Leaving the soil undisturbed also protects the natural layer of organic matter on top of the soil to protect your plants’ roots from the elements–whether that be the harsh summer sun or a cold, heavy rain.

By practicing no-dig gardening, you are protecting your layer of topsoil, or the top five to 10 inches of soil in your yard. Topsoil is one of Earth’s most precious resources as it can take more than 100 years to properly build even 5 mm of healthy soil.

Building the Soil From the Top-Down

In lieu of tilling, we are going to be feeding and building your soil from the top-down.

To accomplish this you will need to kill off anything that is growing in your chosen garden site (i.g. grass if you’re starting your garden in a piece of your lawn) and allow that organic matter to feed your future plants.

This somewhat gruesome-sounding process allows you to maintain the integrity of your top soil while assuring your plants’ health for years to come. (Don’t worry, we won’t be using any weed killers or other nasties.)

From there, you will layer on fertilizer, compost, and mulch to feed your soil and your plants.

The no-dig method doesn’t just save you work up front, it also ensures less work overall. By choosing this method, you will be able to skip the annual slog of turning over your garden and constant weeding.

Read on for the exact steps to grow your healthiest garden ever with the least amount of effort.

Materials to Start Your No-Dig Garden

To start your garden you’ll need:

  • Plot of land (any size–can be lawn, dirt, weeds, former overgrown garden, etc.)
  • Fertilizer with around 5% nitrogen (affiliate)
  • Newspaper (black & white–try to avoid color ink)
  • Compost (especially if starting seeds)
  • Mulch (straw, bark chips, wood chips, grass clippings, compost, seaweed, etc.)

Steps to Start Your No-Dig Garden

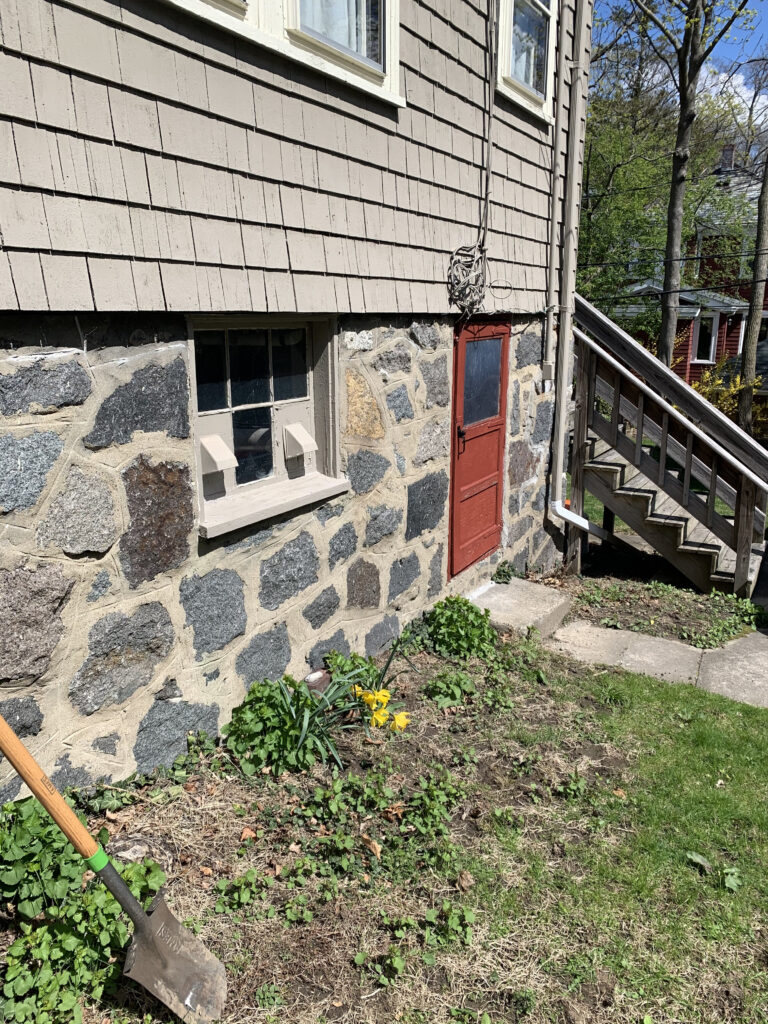
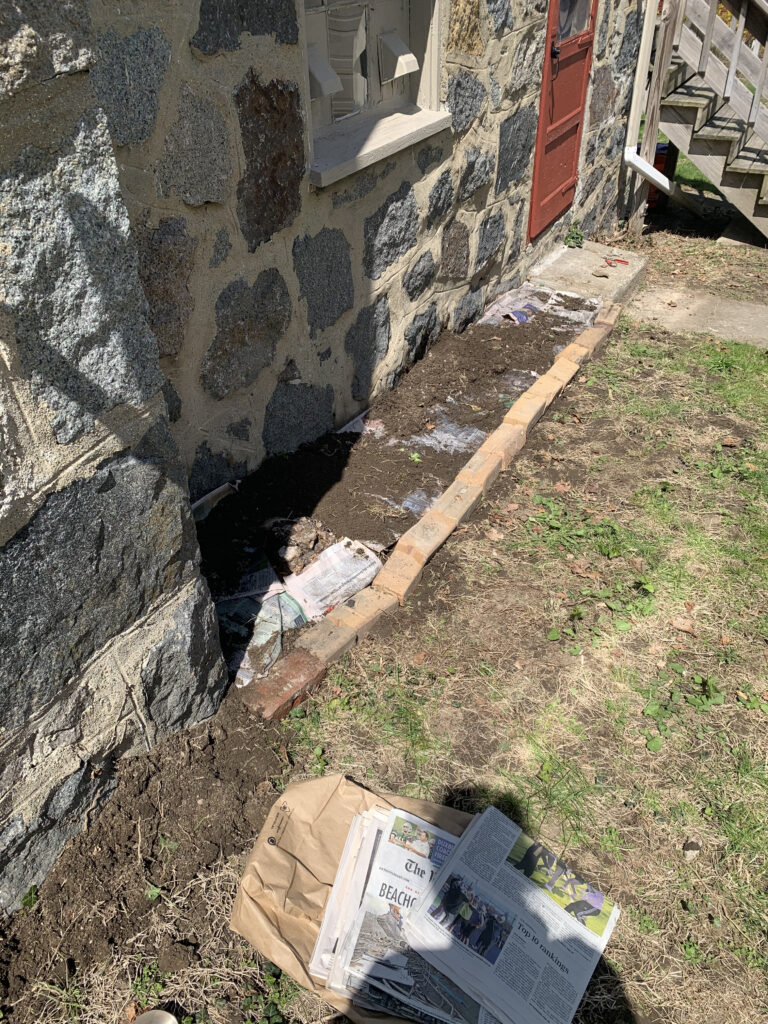
This unsightly patch of weeds is about to become a no-dig vegetable garden in one afternoon.
  • Plan a spot for your new garden. The right location will depend on what you are planting. A vegetable garden will need six to eight hours of sunlight a day, for example.

  • Stomp or cut down any existing vegetation. Whatever is growing in your garden plot needs to die so it can feed your future plants (RIP, we thank them for their service).

    If you’re starting a garden on top of your existing lawn, just mow the lawn. Weeds or other stragglers can be stomped down or otherwise cut with gardening shears or a weedwhacker. Your goal is to cut the vegetation down so it’s close to the ground as possible and even enough to layer on top.
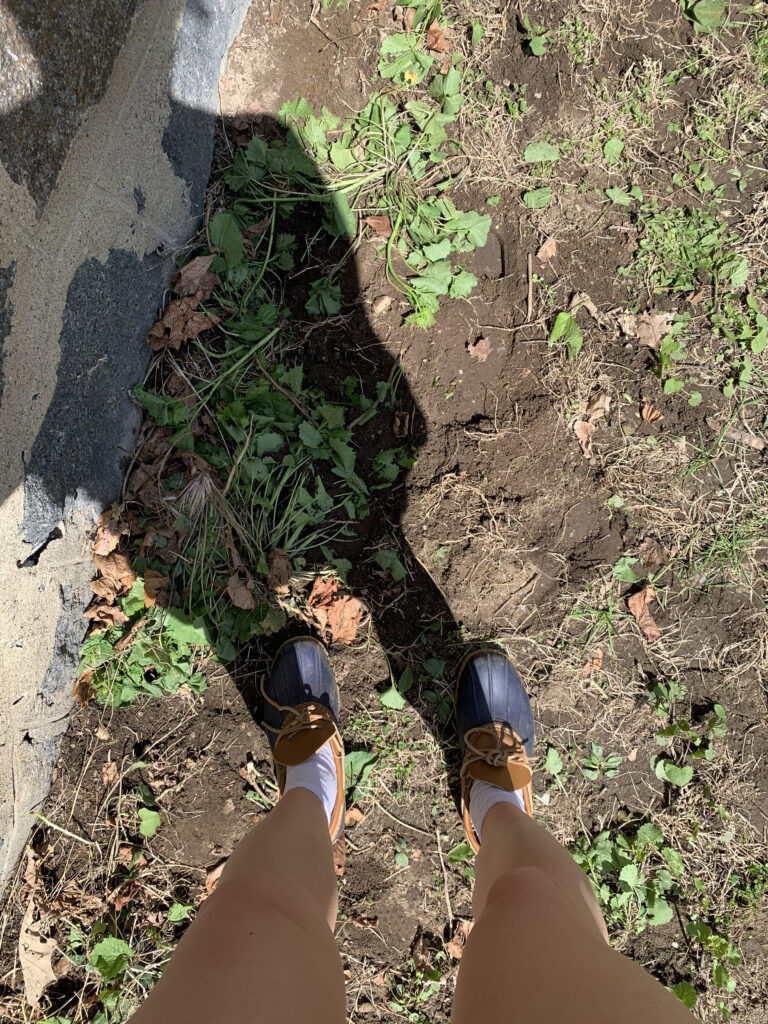
Stomped down the weeds.
  • Spread about six cups of fertilizer for every 100 square feet of garden. The fertilizer should contain around 5% percent nitrogen, but you can adjust your amounts based on this percentage. For instance, this bat guano fertilizer (affiliate) contains 10% nitrogen, so you would use about three cups per 100 square feet of planted area. In addition to nitrogen, choose a “complete” fertilizer that also has a good blend of potassium and phosphate.
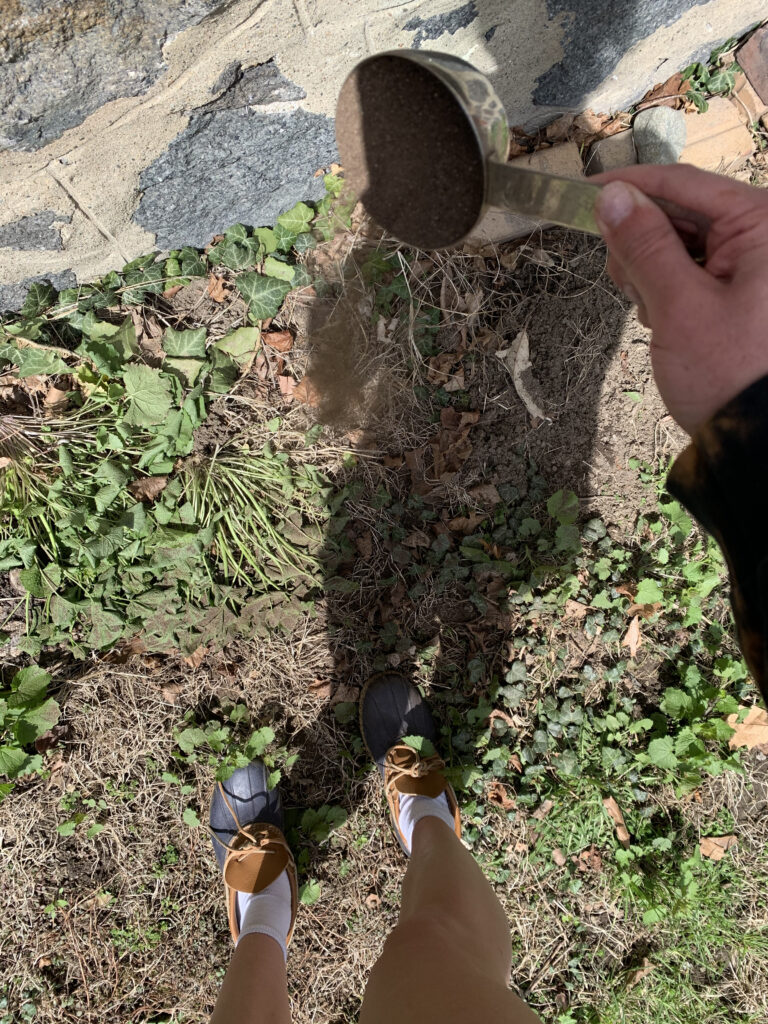
Spreading fertilizer.
  • Cover the surface area of your garden with at least four layers of newspaper. The idea is to suffocate the existing vegetation. Without access to sunlight, the plants underneath will die.

    Grass will easily die underneath four layers of newspaper. You may need to add a thicker layer on top of hardier weeds.
Covering the surface of the planted area with at least four layers of newspaper.
  • Wet the layer of newspaper. This softens the paper and begins the decomposition process. Eventually your plants will put down roots through the newspaper layer.
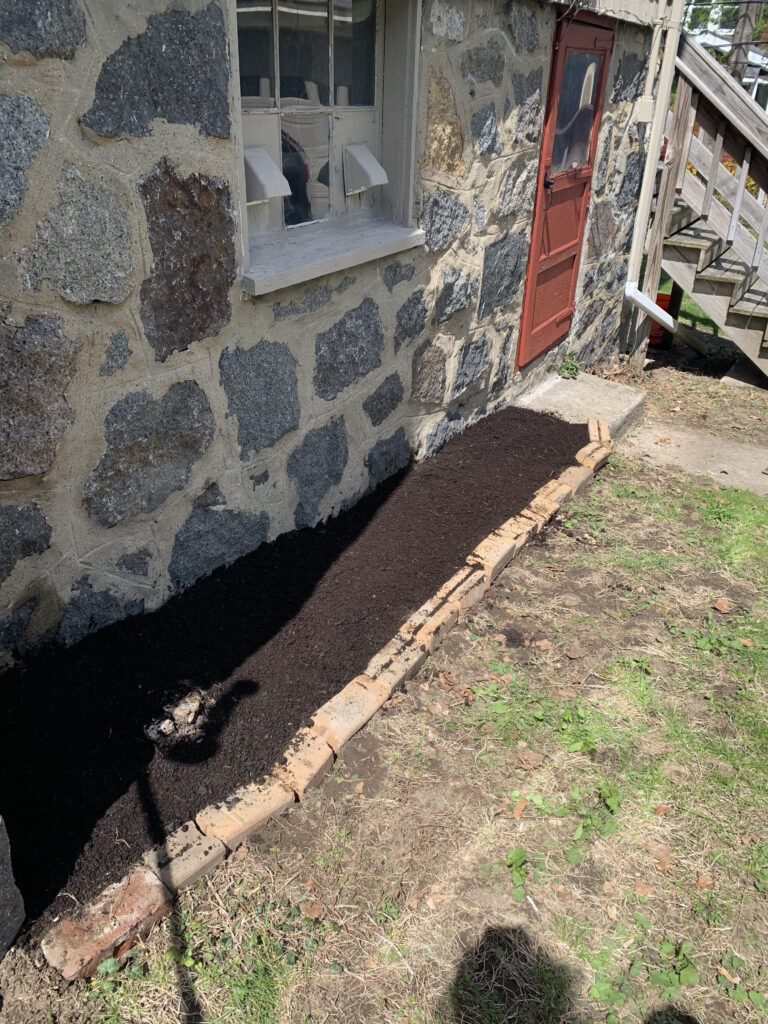
  • Cover the newspaper with one to three inches of compost.

    If you are starting seeds, you can sow directly into the layer. As your sprouts grow, the roots will be able to penetrate the newspaper and grow into the soil below. Keep moist until plants germinate. See seed packets for specific instructions.

    If you have plants ready to go in the ground, cut an X into the newspaper and tuck your plant in. Add your chosen mulch around the plants.
  • Edge your garden. This is an optional step, but edging your garden with a barrier will help keep weeds and other interlopers out. A physical barrier like brick, cinder blocks, wood, or plastic edging can be an attractive option. Alternatively, you can simply use a half moon edging tool (affiliate) to create a chasm between your garden and the rest of your space.
Brick will act as a barrier to keep weeds out.

Starting a new garden from scratch doesn’t have to be back-breaking work. In fact, I hope this guide has demonstrated how no-dig gardening is not only the easiest option for you, but the healthiest option for your soil and plants.

To learn more about the no-dig gardening method, check out the book Weedless Gardening by Lee Reich (affiliate).

How to Plan Your First Vegetable Garden

woman-writing-in-notebook

With spring finally here, now is the time to start planning and designing your vegetable garden for the season. 

Unfortunately, starting a vegetable garden isn’t as easy as putting some plants in the ground wherever is convenient and calling it a day. It takes careful planning and consideration of some key factors to ensure a bountiful harvest later in the growing season.

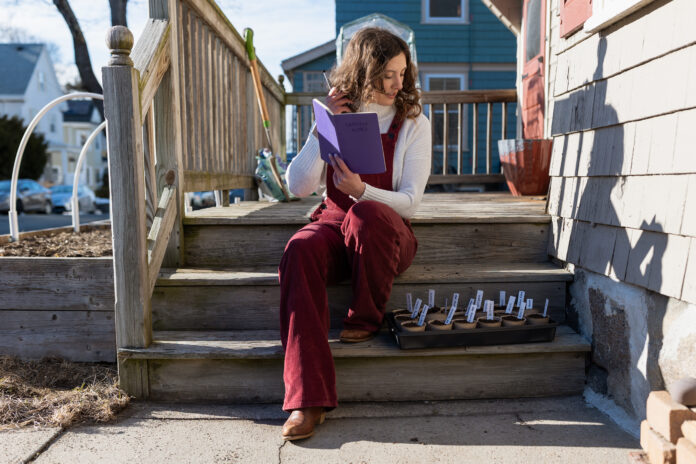
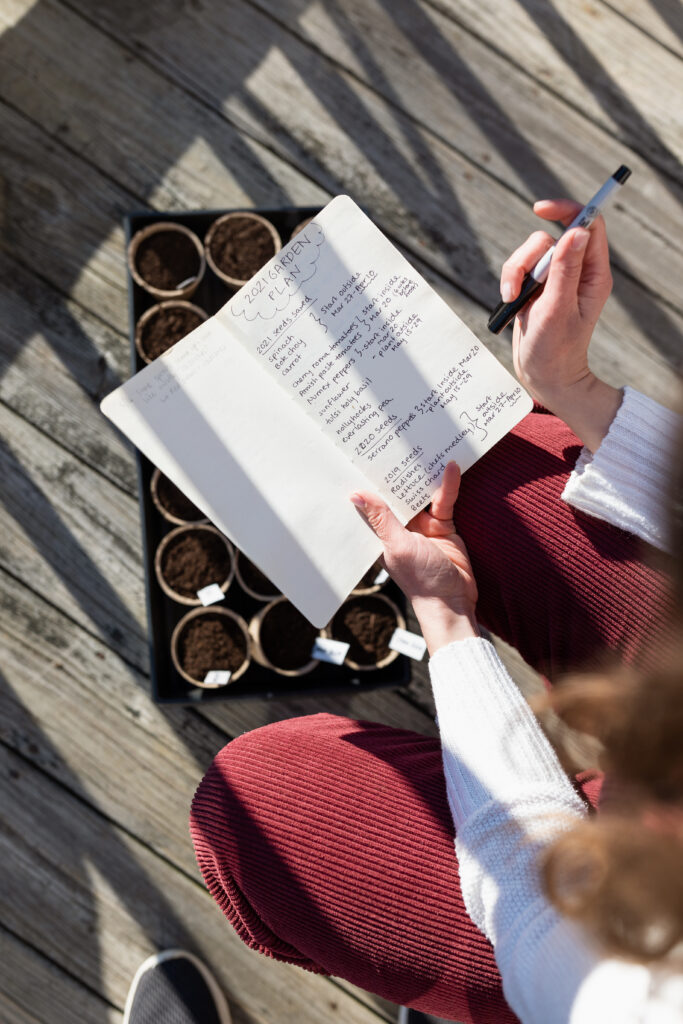
My 2021 garden plan. Photo by Caroline the Photographer.

This article will highlight some of those important considerations to make when planning for your first vegetable garden. The most important considerations to think about when planning a vegetable garden are:

  1. Space
  2. Sunlight
  3. Temperature
  4. Water
  5. Soil health
  6. Crop selection

This article touches on each of these considerations to help you design an abundant vegetable garden in no time.

Who Should Use This Guide?

This guide will be especially helpful for beginner gardeners planning a vegetable garden for the first time and will answer some of the first questions that come up in planning a vegetable garden like,  “Where should I put my vegetable garden?” or “What plants should I grow?”

However, there is always more to learn when it comes to gardening. I share my favorite gardening resources at the end of this blog post if you are looking to learn more about home gardening.

Space

The first step in designing a productive vegetable garden is considering your space. One of the common misconceptions about home gardening is that you need acres of land to produce a meaningful amount of food.

This is not true. You can feed your family with pounds of vegetables weekly with even a humble porch garden.

However, taking into account your space will help determine garden type, gardening method, and what vegetables to grow.

For instance, if you don’t have any workable soil on your property (or your landlord doesn’t want you digging) then you’re going to have to plan for container gardening in pots, bins, self watering containers, or raised beds. 

You can get really creative with container gardening! Picking a container gardening project will (again) depend on your space and time. Read more on how to start a container garden here.

If you don’t have a ton of space, you’re also probably not going to opt for vegetables like corn that prefer wide open spaces and have low yield per plant.

My raised bed gardens. Photo by Caroline the Photographer.

Start Small

One of my favorite gardening methods called Square Foot Gardening, which allows gardners to maximize their harvest per square foot with limited space. This method is great for beginner gardeners looking for a small but productive option for their raised bed gardening.

Starting with a small garden can actually be a smart move for beginner gardeners. When you’re just starting out, it is easy to get overly ambitious and try too many things out at once. Start small and take what works into the next growing season.

Hours of Sunlight

Remember learning about photosynthesis in second grade science class? Plants need sunlight to grow and produce the tasty carbohydrates that we like to eat.

A vegetable garden should ideally get full sun, or at least around 6-8 hours a day.

Finding an area with full sun exposure can be tricky. For urban and suburban areas, make sure you consider shadows cast throughout the day by buildings and other structures. Even rural areas may need to consider the leaf cover from trees nearby.

You may still be able to grow in lower light situations (around 4- 6 hours). It might take more careful selection of plants for these areas.

Consider how much light it might take to grow the vegetable you want to place in a lower light area. For example, cherry tomatoes do better in lower light than beefsteak tomatoes because they require less light to ripen the smaller fruit.

Tailor your garden and plan your plant choice based on light.

Need help determining which areas of your yard might be best for a garden based on sun exposure? Try the SunSeeker app. The SunSeeker app tracks the sun as it moves through the sky to help gardeners find optimal planting locations.

Temperature

As you gain more gardening experience, you will quickly learn that some plants like it cool, while others like it hot. 

For many years, I would wonder why my beautiful lettuce gave me such a short season, often bolting by early summer. (Bolting is the process of sending up flowers, making the leaves bitter and not very tasty.) 

Basically, it was getting too hot for the sensitive lettuce in my garden that gets nearly 10 hours of sun in the summer. I now know to plant my lettuce in cooler areas or pull up the plants whole earlier in the season, while they are young and tender.

How is considering temperature preferences different than considering the hours of sunlight your garden will receive? 

Of course, in many ways, sun exposure and temperature are directly related. However, it’s important to consider that plants do their growing at night. For this reason, it is important to consider optimal nighttime temperatures.

The seed packet will often tell you the minimum nighttime temperature required to sow your seed or transplant your plant into the ground.

Generally speaking, plants that prefer cooler temperatures can be planted earlier and tolerate lower light. Plants that prefer warmer temperatures should be planted later (usually when the nighttime temperatures reach a certain point) and like full sun.

Tomatoes like it hot. Photo by Caroline the Photographer.

Here are the general temperature preferences of some common garden vegetables. 

Cooler Temperature-Loving Vegetables:

  • Radishes
  • Kale
  • Peas
  • Lettuce
  • Broccoli 
  • Cauliflower

Warmer Temperature-Loving Vegetables:

  • Tomatoes
  • Peppers
  • Squash
  • Eggplant
  • Melons
  • Cucumbers
  • Beans

Water

Most beginner gardeners underestimate just how much water plants need. 

Plants need deep waterings of an hour or more for good root development. If water does not penetrate deeply into the soil, your plants will have shallow roots making them vulnerable to disease and pests.

I happen to like getting out in my garden in the summer mornings and giving my plants a good soak by hand.

However, for most people who are strapped for time, the best option is going to be to invest in a soaker hose or drip emitter system. These systems allow you to turn on the hose and walk away. 

Some models even offer a set-it-and-forget-it watering timer option. These come in handy for vacations when you’ll be away from your garden for extended periods of time.

Definitely not how you should water your plants. Photo by Caroline the Photographer.

Soil Health

Soil health is a topic that can get real complicated, real fast. 

A good indicator of your soil health is whether anything is growing in it now. Can only the hardiest weeds survive (or nothing at all)? Does it look too sandy or gravelly? Is it hard-packed and dry?

If so, soil remediation may be in order. The simplest way to remediate soil issues without getting too science-y is through intensive mulching.

Mulching

Maybe you are familiar with mulch as the wood chips your family would put around the decorative shrubs in front of your house growing up, but mulch can be much more. Mulch can be basically any organic matter that breaks down over time and improves your soil, including leaves, straw, wood shavings, pine needs, corn husks, etc.

Soil Remediation

Mulching is a great gardening habit regardless of soil quality. However, it comes in handy especially when dealing with poor soil.

To remediate poor soil, consider making a “mulch lasagna” by layering manure, newspaper, three inches of compost, topped by at least three inches of your mulching material. Return to this area after a year to see if growing conditions have improved. In the meantime, you can place a raised bed on top.

More science-minded soil nerds might be interested in sending their soil for a soil test at a lab. Many state university agricultural programs offer soil tests for around $20.

A Note on Lead

A soil test might be worth pursuing if you plan on growing in an area with a history of lead contamination. 

Lead used to be found in gasoline, plumbing fixtures and paint. Levels in soil tend to be higher near roadways and homes with a history of lead paint. Lead contamination in soil is common in New England where I live with our older housing stock.

Ensuring a good nutrient base in soil limits lead uptake in your vegetables. Plants actually don’t want to take on lead, but they will in poor soils. Make sure you have good organic matter and consider mulch on the surface.

Selecting Crops

Choosing what vegetables to grow in your garden can be the most exciting part of planning. With so many options available at your local gardening center, how do you choose?

The easiest answer is grow what you like to eat. However, don’t be afraid to experiment within that range. For example, if you like lettuce or kale try experimenting with Asian greens like bok choy or rainbow tatsoi. 

Consider prioritizing vegetables that taste best fresh from the garden. The tomato is the classic example of a vegetable whose full sun-ripened flavor simply cannot be store-bought. I would argue that green beans and tender greens also fall into this category.

Vegetables that offer a good return on investment for time and space also make for good choices. These include the ‘cut and come again crops’ like lettuce, spinach, swiss chard, kale, that will produce more leaves as you snip them off. Plants like tomatoes, bush beans, squash and peas will continue to produce as long as you keep harvesting.

Growing bush beans this year. Photo by Caroline the Photographer.

When to Plant

After you have selected the vegetables you would like to grow, take note of their growing season.

Can your seeds be sown directly into the ground in the early spring like peas? Or would your plant prefer to be started indoors and transplanted outside when the temperature warms, like tomatoes?

This information can be found on the seed packet or in seed catalogs.

Most planting times are given in their relation to the average last frost in the spring and the average first frost in the fall. Look up these dates for your area to get a better idea of the exact dates you should begin planting your seeds.

More Gardening Resources

Want to learn more about home vegetable gardening? Here are a few of my favorite books that began my gardening journey.

Weedless Gardening by Lee Reich

The Urban Homestead by Kelly Coyne and Erik Knutzen

Square Foot Gardening by Mel Bartholomew

Early Spring Foraging Guide for the Northeast

woman-collecting-pine-needles-in-woods

The ground is slowly thawing here in the Northeastern part of the United States, and hobbyist food foragers are eager for the bounty that warmer days provide. 

The month of March, straddling winter and spring, can be particularly frustrating; teasing us with a few warm days followed by a bitter frost. 

The ground can seem barren despite the more temperate breeze. The lush greenery we associate with the height of spring has certainly not yet arrived.

To the naked eye, it doesn’t look like there is much food to potentially collect. Yet, if we look closer there are actually a number of beautiful, forageable plants to find in New England in the early spring.

Here are a few of my favorite forageables to eat, cook and otherwise work with during this time of transition into spring.

Note: Please use caution when foraging plants for consumption. Do not eat foods you are not comfortable with identifying.

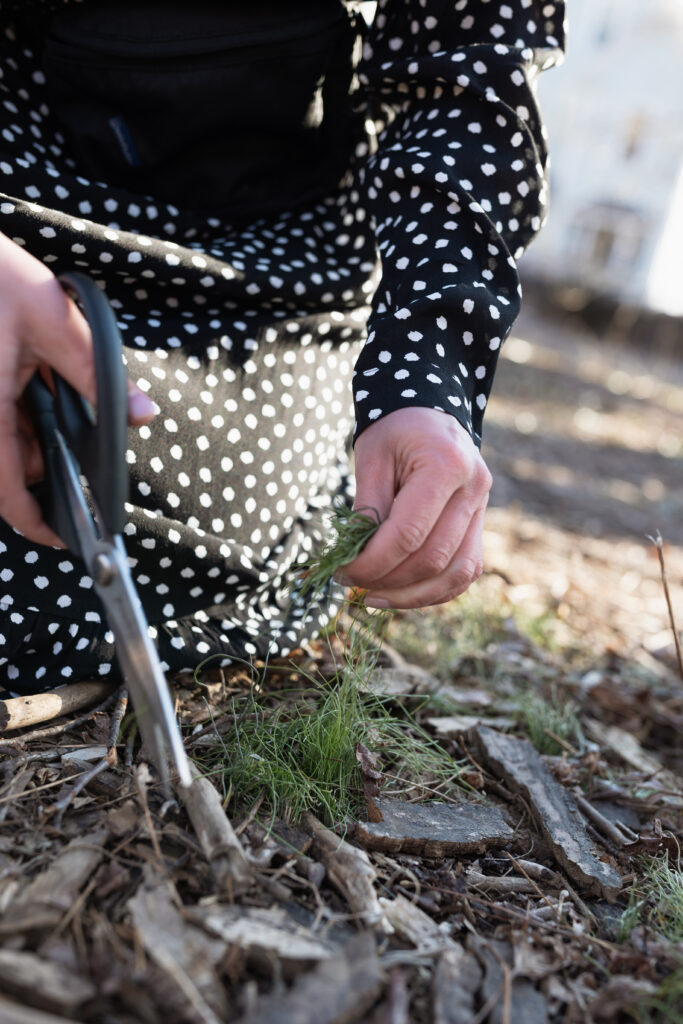
Collecting wild chives. Photo by Caroline the Photographer.

Chives (Allium schoeneprasum)

You are likely familiar with chives as the common culinary herb. But did you know the wild chive grows abundantly in temperate regions around the globe? Lucky for us, wild chives are one of the first edible plants to appear every spring.

If you don’t know what you’re looking for, chives can look a lot like grass–especially in the early spring. Unlike grass, chives will have hollow, tubular leaves. If you’re unsure, break off a little piece of the leaf and give it a whiff. Chives will have the unmistakable oniony scent of the Allium family. 

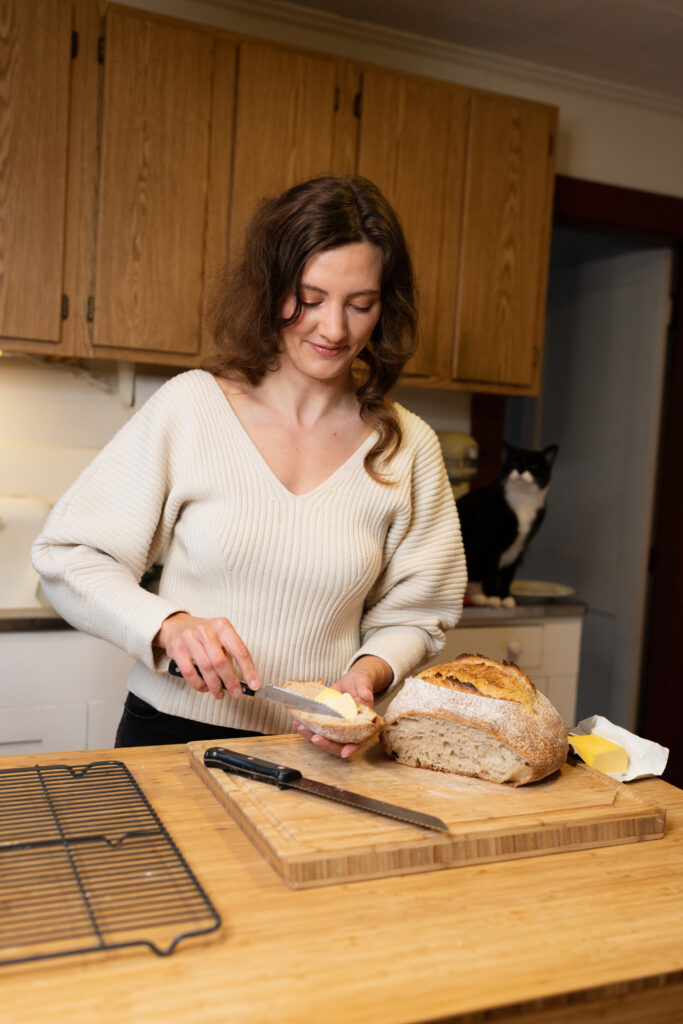
One of my favorite simple things to make with wild chives is chive butter. To make chive butter, finely chop a few chives and mix with room temperature butter. Spread your chive butter on a fresh piece of sourdough bread. Heaven.

Birch sap

Why let maple syrup get all the fame? Just like maple syrup is the boiled down product, so too can you reduce birch sap into a sweet syrup.

Birch sap also tastes delicious straight from the tree, and has been used traditionally as a medicinal beverage for strength after a long winter.

Birch sap runs a little later than maple sap, making this the perfect early spring foraging project.

Find a healthy tree that is at least 8 inches in diameter around the base. Check to make sure the sap is flowing by inserting a sharp knife upwards a few centimeters into the tree. When you remove the knife, the tree should ‘bleed’ a little sap.

To collect a small amount of sap, you can cut off a branch and secure a bottle to the end. Leave the bottle for a few hours. You should have enough to sip when you return.

If you intend to make syrup, you will need a much greater volume of sap. This will require tapping the tree.

To tap a birch tree, drill a small hole slightly upwards a few centimeters into the tree. Insert a pipe or straw that fits the hole you created. The pipe should direct sap into a collection vessel secured below.

Birch sap season lasts until green leaves appear on the trees, usually sometime in April.

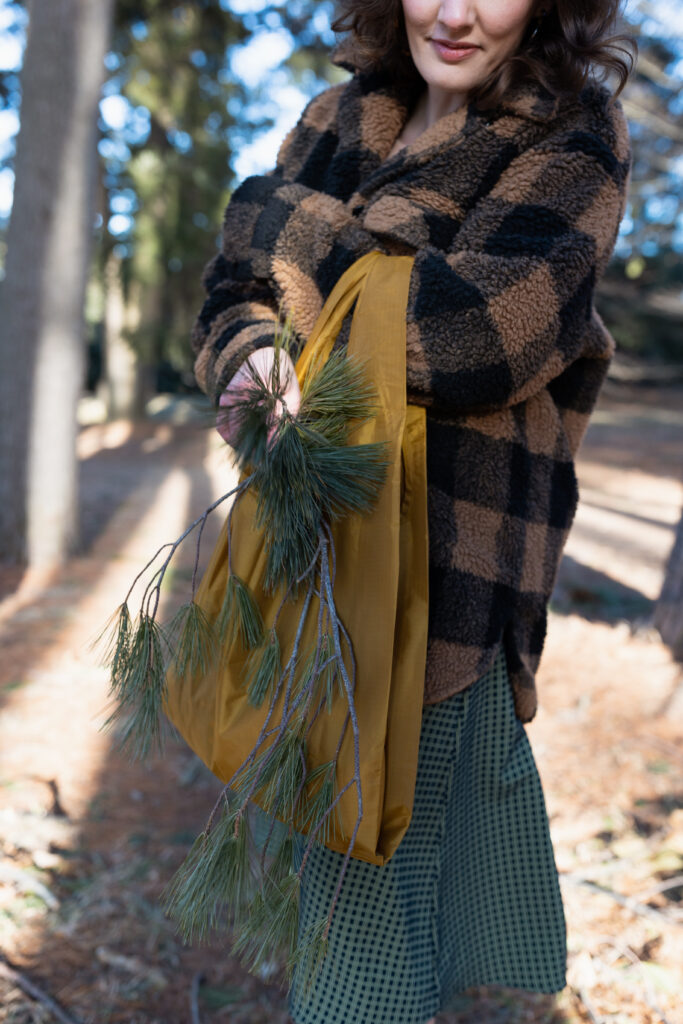
Collecting pine needles. Photo by Caroline the Photographer.

Pine Needles (Pinus strobus)

Pine is the quintessential evergreen of the Northeast. But, did you know, pine needles are actually a very useful plant in the home and the kitchen?

Pine needles are purported for their high levels of vitamin C–up to three times the amount found in oranges. 

Pine needle tea is a traditional preparation to extract pine’s healthy goodness. Just collect, chop and steep a couple of tablespoons of pine needles in water for at least 5 minutes, like you would tea.

Another fun culinary use is to make pine sugar. Blend up equal parts pine needles and sugar until the needles are incorporated and the mixture is uniformly green. This is excellent in holiday cookies or as the sugar rim for festive cocktails.

Be careful identifying this one. Some conifers are known to be toxic. There are some concerns around certain varieties of pine (Ponderosa pine, for example). There is also a recommendation to avoid pine if you are pregnant. Stick with Eastern White Pine (Pinus strobus) if you have concerns. 

Nettle (Urtica dioica)

Stinging nettle gets its name from the painful irritation it causes when touched. Tiny hairs on the stem and underside of the leaves act as little needles that penetrate the skin and inject chemicals that cause a stinging sensation. Not fun.

So why in the world am I encouraging foraging (nevermind eating) nettles?

Because with great pain, comes great reward. (JK, just wear protection!) Nettles are extremely high in vitamins and minerals. I try to drink nettle tea daily for skin and hair health.

Nettles can be harvested in the early spring with thick gardening gloves. Leaves must be cooked or dried to deactivate the stinging.

Try using nettle leaves in a daily nutritritive tea. You can also get creative in the kitchen and use nettle in soups, frittatas or in any recipe as a replacement for spinach.

Collecting garlic mustard. Photo by Caroline the Photographer.

Garlic Mustard (Alliaria petiolata)

Garlic mustard is one of the earliest greens to show in New England. They may still be quite young around mid-March, but I don’t feel bad plucking with abandon because garlic mustard is actually an invasive species.

Once you get proficient at identifying garlic mustard’s kidney-shaped leaves, you’ll realize it’s quite ubiquitous.

Perhaps the best way to identify garlic mustard is by its smell. A crushed leaf between your fingers will indeed smell like garlic.

True to its scent, garlic mustard does well in culinary uses where you want to impart a gentle garlicky flavor. (It’s not as pungent as real garlic). My favorite application is making garlic mustard pesto. Just replace basil with garlic mustard in your favorite pesto recipe.

Follow me on Instagram for more of my foraging adventures this spring.

I want to hear from you! What are your favorite plants to forage in the early spring?

Everything You Need to Start Making Sourdough Bread: A Beginner’s Guide

Loaf-of-bread-on-table

What is Sourdough Bread?

Sourdough bread is bread leavened from a wild culture of bacteria and yeast called a ‘starter,’ as opposed to bread leavened with store-bought dry active yeast. 

Leavening is the process that makes bread dough rise.

This leavening action comes from the process of fermentation. Yeast and a type of bacteria called lactobacilli ‘digest’ the sugars in the wheat flour and produce gas and lactic acid, the compound that lends the bread its signature sour taste.

Sourdough bread making is actually an ancient process, used before humans could shop for dried yeasts at the grocery store.

Today, sourdough bread making is becoming popular as more home bakers turn to traditional baking methods to feed their families. 

Why Make Sourdough Bread?

Photo by Caroline the Photographer.

Making sourdough bread is fun, rewarding, and the finished product is tastier than any loaf of bread you can buy at the store. 

A well-cared-for sourdough starter is a self-replenishing resource that offers you the opportunity to have fresh bread on the table whenever you want. Homesteaders and folks interested in decreasing their reliance on conventional food systems might be interested in sourdough bread making.

Once you have your starter, you’re not limited to making bread. Try experimenting with sourdough pizza, crackers, and desserts.

There is even some evidence that sourdough bread may be more easily digested (especially for the gluten-sensitive folks!) The theory is that the yeast and bacteria that are feeding on the wheat flours are also doing some of the digesting for you, breaking down proteins into more digestible forms.

What is Sourdough Starter?

To make a starter back in the day, you would leave out a mixture of flour and water and let the naturally-occurring yeasts in the air to begin the fermentation process.

You can still take that approach today, but a more reliable option is to buy a starter kit or to source starter from a friend or local bakery. Asking someone for starter shouldn’t be a big ask; once you have your own you’ll see how quickly you’ll have more than you can handle!

My favorite starter kit is Culture for Health’s San Francisco Sourdough Style Starter Culture. It contains freeze dried starter culture that you reactivate by feeding increasing amounts of flour and water over the course of a few days. Follow the instructions on the package.

Feeding Your Starter

Think of your starter like a child or pet–it needs to be fed every day. Remember, the yeast and bacteria that make your bread rise are living things and they need to be kept happy!

Feed your starter once in the morning and once in the evening. Feeding your starter just means adding equal parts flour and water.

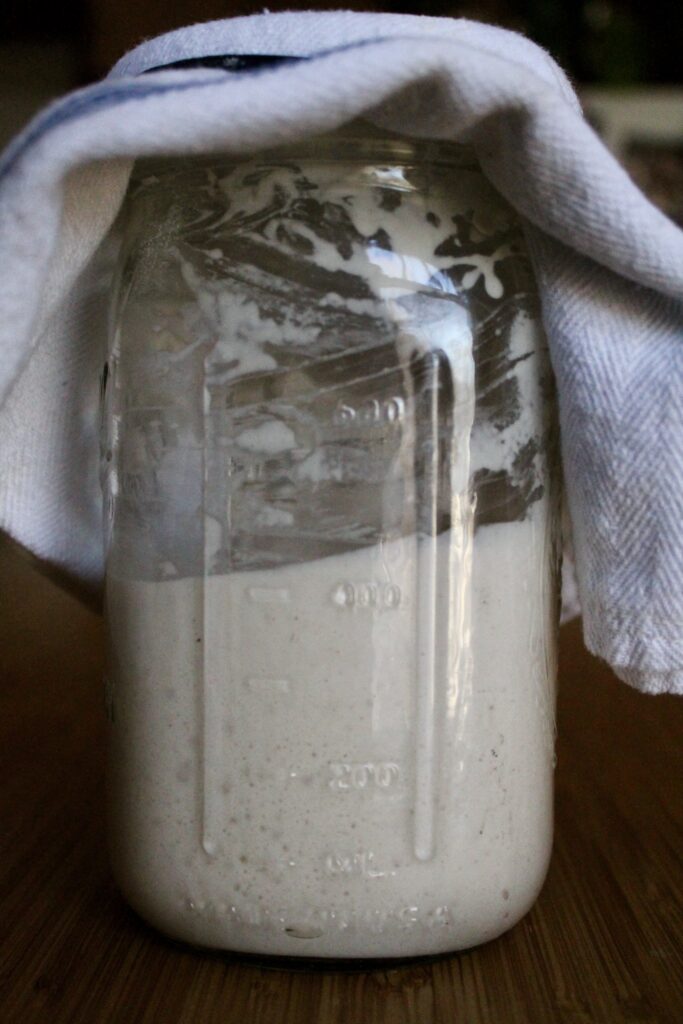
To feed, add ½ cup flour and ½ cup water to ½ cup of starter. Mix together with a spatula. The consistency should be like thick pancake batter. 

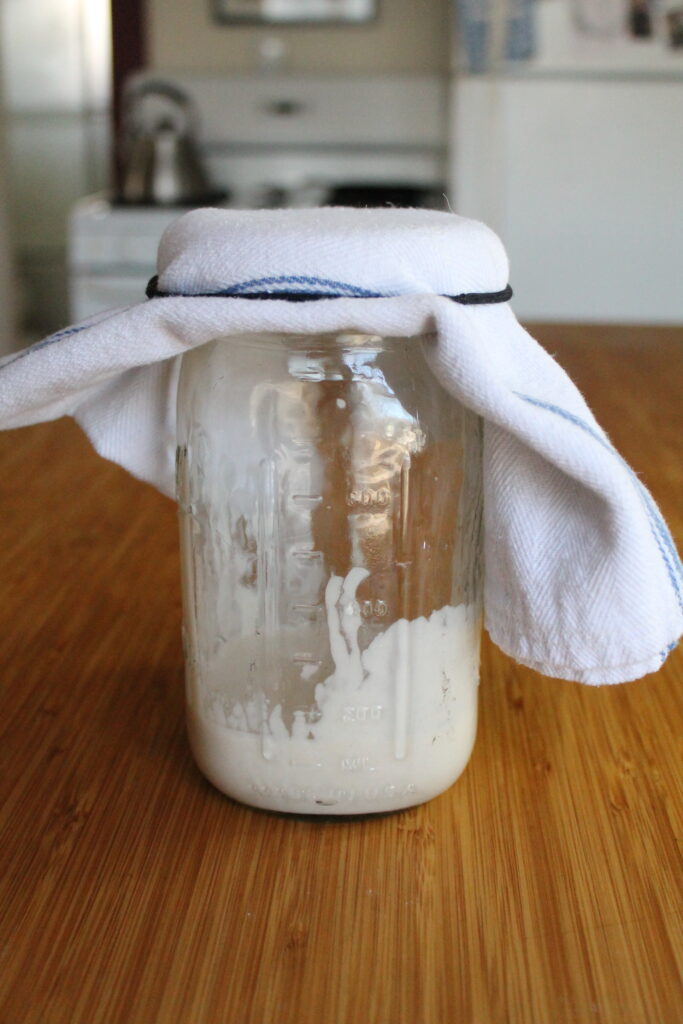
Sourdough starter after feeding, to give you an idea of the thickness.

It’s important to buy unbleached flour for feeding your sourdough starter. Using unbleached flour ensures your yeast and bacteria culture will thrive. I like King Arthur’s Unbleached All Purpose Flour for starter feeding and King Arthur’s Unbleached Organic Bread Flour for actually baking the bread. 

It doesn’t matter too much the brand of flour or whether it’s specified as bread flour, so long as it is unbleached. Bread flour just contains more protein, which can help with gluten development and rise.

Store in a safe place at room temperature. Make sure the starter is well covered, but can breathe. I keep my starter in a 32 ounce mason jar on top of my refrigerator, and cover with a tea towel secured by an elastic band.

You’ll notice that after each feed, bubbles appear and your starter will grow (and often double in size!) This is a sign your yeast and bacteria are happy. You typically want to use your starter when it is in this stage, often referred to as ‘on the rise.’

As your starter grows, you’ll quickly have more starter than you’ll ever need. Before each feed, reduce your starter down to about ½ cup. The remainder is called ‘discard.’ You can either chuck your discard, or use it in other recipes like crackers, pancakes and crepes.

Equipment for Making Sourdough Bread

When it comes to making sourdough bread, there are some must-have tools and some nice-to-have tools. If you plan on making sourdough part of your lifestyle, I recommend investing in your kitchen equipment. These are the tools I wish I had on hand when I started, listed in order of importance.

Dutch oven – If you don’t already have a dutch oven, now is the time to invest. The dutch oven’s use goes well beyond sourdough bread making, but since that is what we’re talking about: the dutch oven gets really hot, which is key in getting that perfect crust.

Kitchen scale – Sourdough bread making can be an exact science. Weight is the most exact way to measure your ingredients. Most bread recipes are listed in grams. A kitchen scale is key if you want to play around with recipes and measure hydration percentages.

Bench scrapers – You’re going to be handling a lot of sticky bread dough. Bench scrapers make kneading (and cleanup) easier.

Parchment paper – You’ll need to line the bottom of your dutch oven with parchment paper so the dough doesn’t stick.

Banneton proofing basket – You can get by the secondary ferment stage by placing your dough boules in colanders as opposed to the traditional banneton basket. But, you risk more mess. Plus, with the banneton, you get to sound fancy and French.

Gigantic 20 quart bowl – All my initial flour mixing goes on in this gigantic 20 quart bowl. You will laugh at the size of this thing, but quickly realize its utility. When you’re mixing flours, you want a lot of room to work. This eliminates the problem of flour spilling out of tiny bowls and getting thrown around your kitchen.

Proofing plastic container – You’ll want just a plastic bin (something you’d get at the Container Store) for the bulk fermentation phase. This allows you the room to stretch out the dough and get good gluten development. Make sure to drizzle a little olive oil in there so the dough doesn’t stick.

Bread lame – The bread lame (pronounced “LAHM”) is a nice-to-have tool. It’s basically an extra-sharp razor that allows you to make exact scores on your bread. Some people use the lame to make really beautiful bread art.

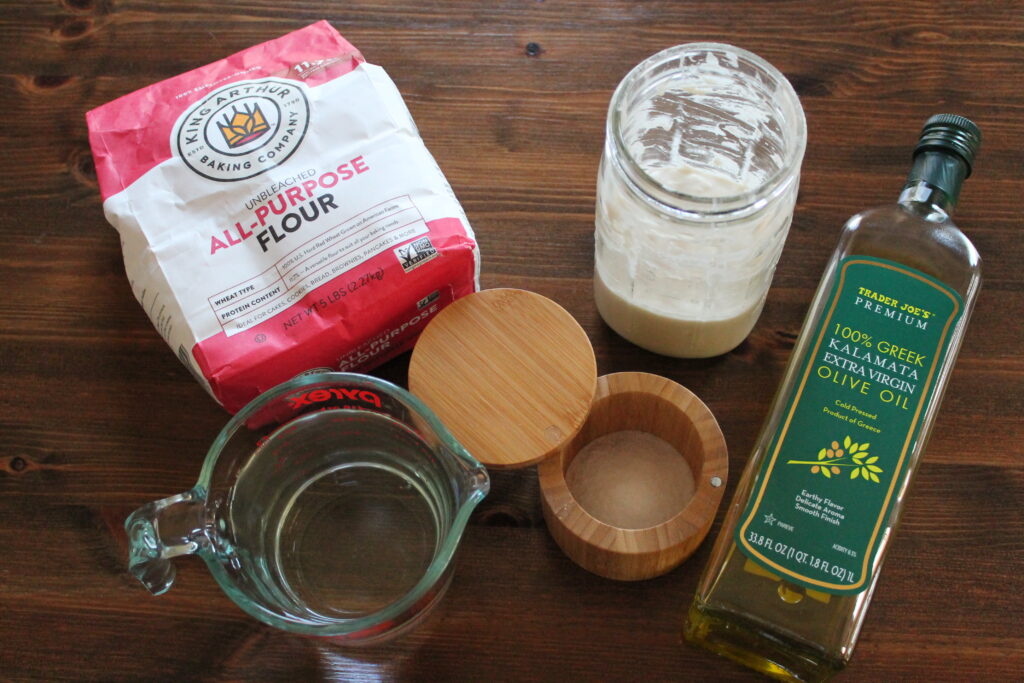
All the ingredients you need to make sourdough bread.

How to Make Sourdough Bread

This recipe makes two sourdough boules. See previous section for recommended equipment.

Ingredients

1000 grams all-purpose or bread flour (I like King Arthur’s Unbleached Organic Bread Flour)

750 grams water (plus a splash for dissolving salt step)

200 grams sourdough starter (“on the rise,” i.e. a few hours after a feeding)

20 grams sea salt

Olive oil for proofing container

Note: Have all your ingredients ready to go, mise en place style. Your hands are going to be sticky and you don’t want to be rummaging around in kitchen drawers with sourdough starter on your hands (that stuff sticks like glue!) I would also recommend having bench scrapers at the ready, and a decent amount of clean counter space to knead the dough.

  1. In a large bowl, mix together 750 grams of the flour and 750 grams of water until fully combined and the flour has absorbed all the water (there should be no dry flour.)
  1. Let the flour and water mixture sit for at least 30 minutes, or up one hour. This process is called autolyse, which is just a fancy word for allowing the flour to fully hydrate. It may seem like nothing is happening, but this step is important! Autolyse allows for gluten development and improved flavor. 
  1. Add the remaining 250 grams of flour to your dough. Mix until fully combined.
  1. Add the 200 grams of sourdough starter. I recommend mixing the starter in with your hands using the pinching method. Basically, use your hands like pinchers (like a crab) and pinch the starter into the dough. This allows the starter to fully incorporate.
Pinching the sourdough starter in like a crab.
  1. Once the starter is fully combined into the dough, add in the 20 grams of salt with a splash of water to dissolve. Knead in with your hands. At this point, you should feel a distinct change in texture in the dough. It should feel like the dough is holding its shape better.
The dough should be holding together nicely now.
  1. Plop the dough out on your clean counter space. Now is the fun part. You’re basically going to do bread kneading on steroids. This process is called the ‘slap-and-fold’ and it’s basically what it sounds like. Pick your dough up and slap the end farthest  away from you onto the counter, and fold it over itself. Repeat. It helps to use a bench scraper here to pick up the dough cleanly off the counter. Continue slapping and folding for 5 minutes.
The slap and fold method.
  1. Place the dough in a well-oiled (I use about two tablespoons of olive oil) plastic proofing container for the initial fermentation, also known as ‘bulk fermentation’.’ 
  1. Let rest in a warm place for 30 minutes. Make sure the container is covered at least loosely so no nasties can get in.
  1. Oil your hands with olive oil before touching the dough. Pick up the dough from its middle, lifting it high so the two ends stretch and sag below your hand. Fold the dough on top of itself back inside the proofing container. Rotate dough 180 degrees and repeat this stretch and fold on the other side of the dough. This stretching and folding is basically more kneading, but in slow motion, to allow for fermentation and flavor development.
The stretch and fold process. Repeat every 30 minutes for at least 4 hours.
  1. Let rest in a warm place for another 30 minutes. Repeat this stretch and fold every 30 minutes for at least four hours (a total of eight rounds.) You’ll know you are done when the dough has risen considerably and is very bubbly and fluffy.

    Note: The time it takes for your dough to rise is temperature dependent. In colder climates (like in New England where I live) bulk fermentation can take 8-10 hours on a chilly day. Ideally your dough is proofing in a warm place around 75-80 degrees Fahrenheit.
  2. Plop the fully proofed dough out on your clean counter space. Using your bench scraper, cut the dough in half (this can be eyeballed, unless you want perfectly matching loaves.)
  1. Using your bench scraper, shape the dough into two boules. The technique is to tuck your bench scraper underneath the dough and rotate it around in a circle, using the surface tension to create a ball shape. Do not use your hands; this dough is very sticky.
  1. Once you have two boules, sprinkle lightly with flour and cover with a tea towel. Let rest for 10 minutes.
  1. Sprinkle flour on the counter in front of your two boules. Using your bench scraper, flip the dough over onto the floured space so the sticky side of the dough is facing up (this is important so the dough will stick to itself in the next step.)
  1. Tug around the dough to stretch it out slightly into a wider circle. Fold the dough onto itself like an envelope. Take the bottom edge and fold up into the middle. Then fold in the right and left sides. Finally, tug the top a little more, and fold up and over into the middle, covering your other folds. Pinch all your ends together to create a seam.
  1. Lightly flour two banneton proofing baskets. Place your boules seam side up in the basket, lightly dust with flour, cover with a tea towel and place in the fridge overnight.
  1. The next morning, preheat your oven to 425 degrees Fahrenheit.
  1. Cut a circle of parchment paper the size of the bottom of a dutch oven (or other vessel). Place the parchment paper circle on a plate and lightly dust with flour.
  1. Place your dutch oven in the oven while it preheats. You’ll want your dutch oven nice and hot so the bread forms a nice crust.
  1. When the oven has preheated, take out the dutch oven. Take one of the boules from the fridge and overturn dough seam side down onto the plate with the floured parchment paper.
Plop the bread onto your floured parchment paper.
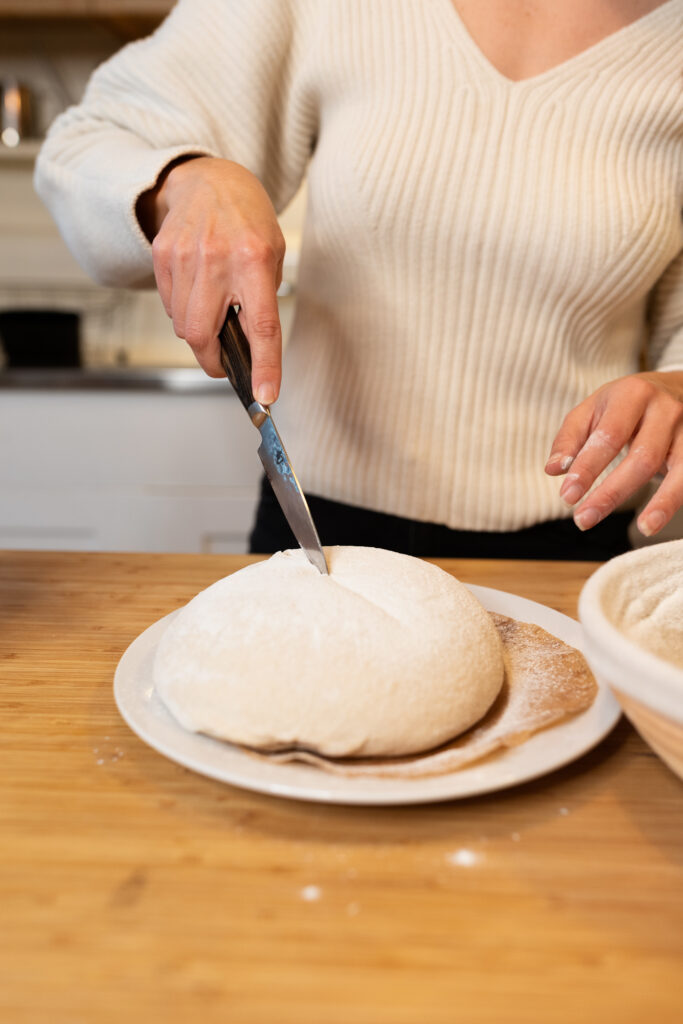
  1. With a sharp knife or bread lame, make at least one cut on the surface of the dough. You can get really creative here, and come up with your signature mark.
Photo by Caroline the Photographer.
  1. Slide the parchment paper with the dough into the dutch oven. (Be careful, remember the dutch oven is hot!) 
Slide dough into the hot dutch oven using the parchment paper. Careful!
  1. Put the lid on the dutch oven and bake for 20 minutes with the lid on. This phase allows for the steam created under the lid to make your dough rise even higher.
  1. Take the lid off and cook for another 15-20 minutes. We’re looking for a golden brown crust. Some bakers give the bottom of the bread a little knock. Fully cooked bread will sound a little hollow.
  1. Place bread on a steel cooling rack and let cool for at least an hour before cutting into it. (I know, waiting is the hardest part!)
Photo by Caroline the Photographer.

6 Common Mistakes to Avoid When Starting Your Own Seeds

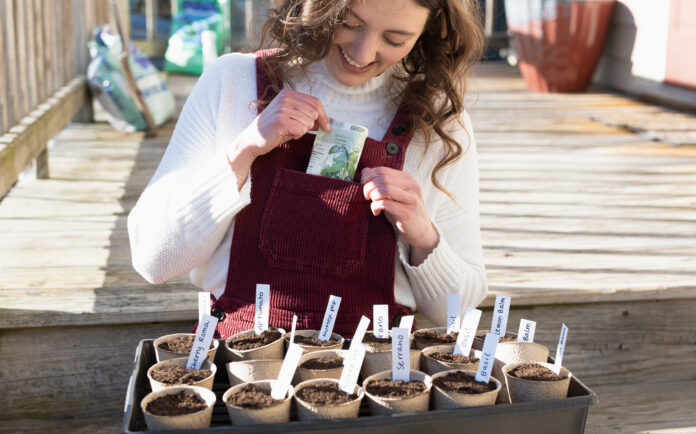
woman-holding-tray-of-seedlings

Growing your plants from seed is a gratifying process. Like any journey worth taking, it can also be challenging.

There will always be bumps along the road, but each challenge is a learning opportunity you can take with you to the next growing season. Nothing teaches you more about the lifecycle of the garden and the personality of each plant like starting seeds yourself.

I hope these tips help you avoid some lessons I had to learn the hard way. That being said, gardening is meant to be fun, so don’t be afraid to experiment and try something new.

First let’s talk about why I recommend starting your own seeds in lieu of buying seedlings in most cases. Then we’ll get into some common mistakes to avoid when starting your own seeds indoors.

Why Start Your Own Seeds

First, let’s talk about the money you can save by starting your own seeds. Let’s say you buy a pack of 25 organic, heirloom tomato seeds for $4.00. This is $0.16 a tomato plant. A single tomato seedling alone might cost you around $4.00.

The cost savings don’t have to stop there. Hopefully, the process of starting your own seeds might inspire you to save seeds from your plants for the next season. Thus, your garden becomes a self-sustaining resource. You may never have to buy seeds again!

Finally, as I alluded to earlier, starting your own seeds is a crash course for beginner gardeners in the life cycle of a plant. If you can raise a plant from a tender green to a powerhouse producer, you’ll be a more confident gardener.

I know you can do it. Just make sure to avoid the following beginner mistakes when starting your own seeds.

Mistakes to Avoid When Starting Seeds Indoors

Here are some of the tips I wish I had when I first began starting my own seeds indoors. 

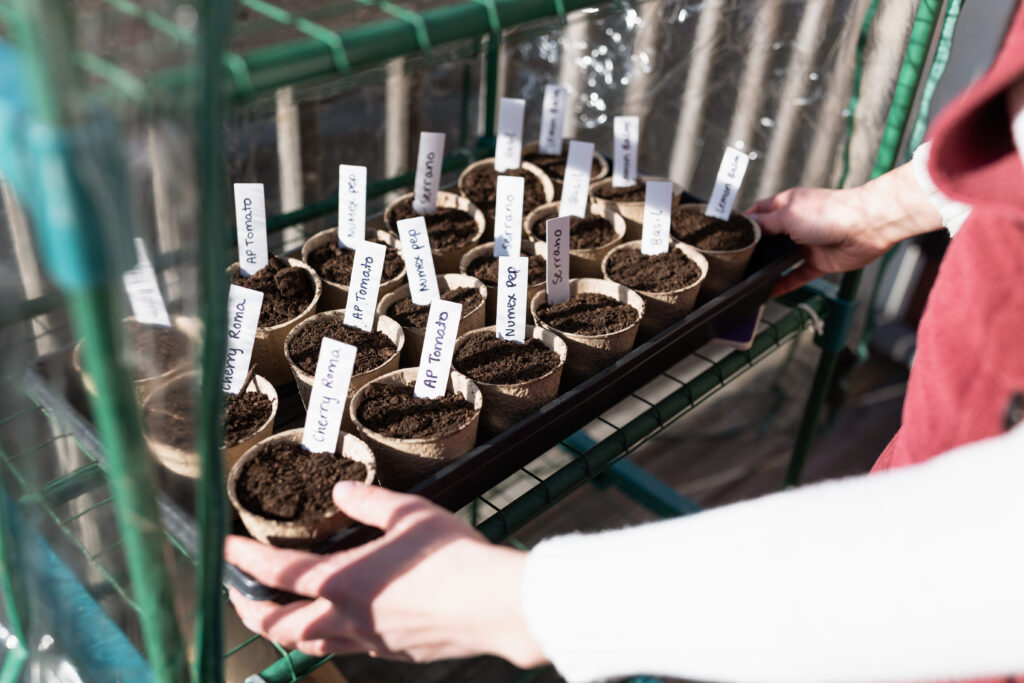
Tray of seedlings going into a plastic greenhouse. Photo by Caroline the Photographer.
  1. Too little light

    The most important resource plants need to grow in the earlier stages of life is light. If you are planning on starting seeds indoors, you will need to be brutally honest with yourself about whether there is enough natural light in your home to grow a plant.

    At the very least, place your seedlings by a window where they will receive at least 12 hours of sunlight a day. A south-facing window is best for this. I have had luck placing my seedlings in a plastic-protected greenhouse by a south-facing window in my apartment. This protects the plants from harsh temperature fluctuations being near a drafty window.

    Growing your plants under fluorescent lights ensures they get enough light, but involves a little more setup. You can buy “grow lights” that are marketed specifically for this purpose. Hang them as close as two inches from your plants.

    A seedling with an unusually long stem is a surefire sign your plant is not getting enough light. We refer to these as ‘leggy’ seedlings. They are long because they are reaching for the light! Place your plants under grow lights if your natural light isn’t cutting it.
  2. Overwatering

    The possibility of overwatering can seem counterintuitive to a beginner gardener. Don’t plants need water to grow? This is true, but there are risks of too much water–especially at the delicate germination and seedling stages.

    Watering with too blunt of an instrument like a watering can at the outset can disturb the seed before it has even germinated. I have flooded my peat pots with water, spilling the seeds out over the sides. You can’t grow a seed that isn’t planted!

    It’s important to instead gently spray your germinating seeds and small seedlings with a spray bottle. This is my favorite spray bottle for plants because of its delicate, fine mist. It’s seriously almost aerosolized, I swear.

    Keep soil moist during the germination phase. Clear out any excess water from the trays below the pots to avoid mold.
  3. Starting in egg cartons

    Reduce, reuse, recycle any chance you get. However, recycled egg cartons may not be the best vessels for starting seeds.

    Seedlings actually need a decent amount of space for their roots to grow. Healthy roots mean a healthy plant that is able to support a big first set of leaves and able to survive the transition to the outside world.

    An egg carton just doesn’t have enough space and depth for most plants to grow up healthy and strong.

    There are several container options to choose from when sowing your seeds. Most plants should be planted one seed to a container. Make sure there is a hole at the bottom for drainage. My favorite seed starting containers are organic and biodegradable peat pots.
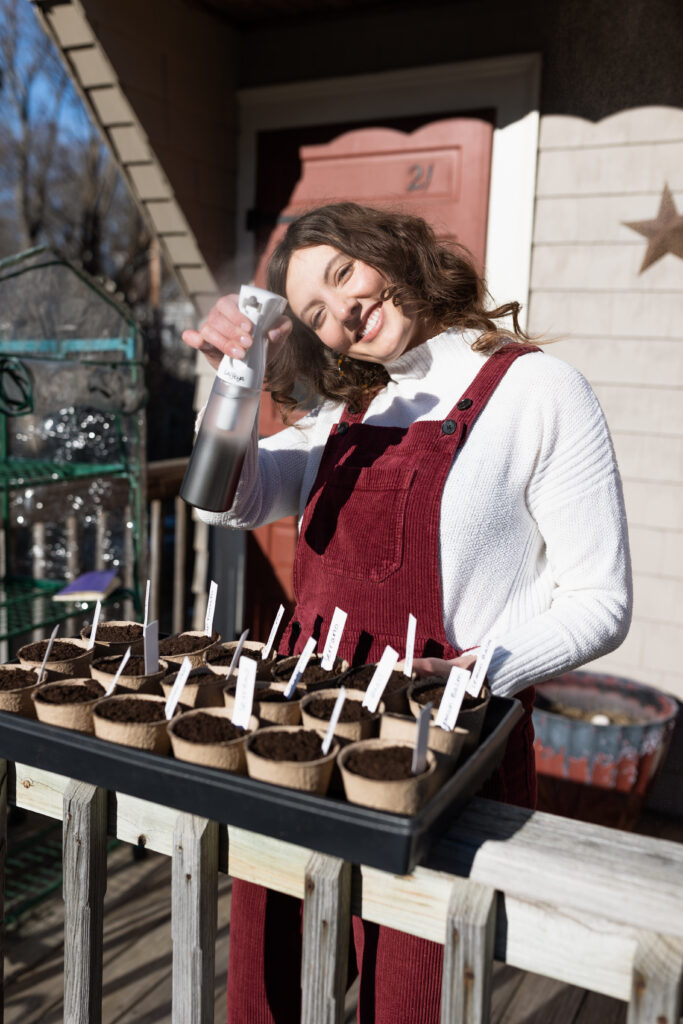
My favorite spray bottle for watering seedlings. Photo by Caroline the Photographer.
  1. Ignoring instructions on seed packet

    All garden plants (vegetables, fruits, flowers, etc.) have specific needs relative to germination, planting, soil temperatures, etc. Even different varietals of a certain type of plant may have different specifications  (cherry tomato vs. beefsteak tomato).

    All of this information can be found on the seed packet.

    Do your seeds even want to be started inside? Many vegetables (particularly root vegetables like radishes, beets, carrots) are so hardy it’s basically pointless to start them inside. You can just throw these seeds in the ground at the appropriate time. What is the appropriate time? You can find that on the seed packet.
  2. Not researching best times for planting in your area

    Growing seasons are generally determined by the average date of last frost in the spring and the average date of last frost in the fall (although there are some strategies to extend your growing season–that is another blog post).

    The information on the seed packet will generally tell you when to sow your seeds indoors or outdoors relative to the date of last frost if planting in the spring or fate of the first frost if planting for the fall.

    Use the Farmer’s Almanac website to determine these dates for your area.
  3. Transplanting seedlings too early

    Generally, a good rule of thumb to use is a plant is about ready to transplant after it has grown its second set of leaves.

    The first set of leaves, called cotyledons, are basically just big solar panels designed to absorb as much light as possible in the first stages of growth. These leaves look wide and generic.

    With the second set of leaves, the plant is coming into its own. These leaves are more identifiable and unique to the plant.

    Before transplanting outside, you’ll need to ‘harden off’ your seedlings. The hardening off process exposes your plants gradually to the outdoors so they do not experience shock when placed in the ground.

    About two weeks before planting outdoors, start bringing your plants outdoors for a few hours during the day. Extend the time outdoors gradually. Bring them indoors at night as it cools. Make sure they are protected from the elements like wind and harsh rain.

    At the end of two weeks, ensure the soil temperatures are suitable for planting (i.e. there hasn’t been an unexpected frost) and transplant away!
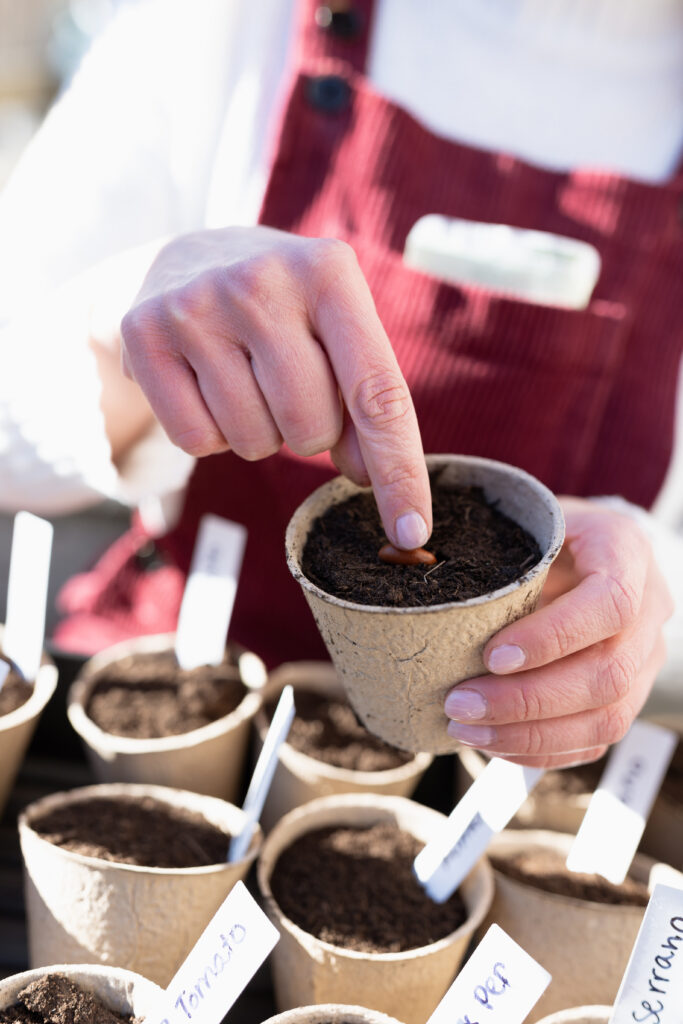
Planting a green bean. Photo by Caroline the Photographer.

Have you ever started your own seeds? What did you learn from the process?
Want more gardening tips? Follow me on Instagram to follow along my gardening journey this spring. Feel free to ask me any gardening questions! I love to chat plants.

14 Women-Owned Sustainable and Small Biz Fashion Brands to Support

woman-wearing-pink-bow-face-mask-and-pink-top

Celebrate International Women’s Day by supporting women-owned fashion brands, particularly those small businesses with an eye toward sustainability. 

Why feel good about supporting women-owned small businesses?

For starters, of course we want to see women entrepreneurs succeed in the business world where they are often underrepresented and underpaid (race also factors in here). Even women entrepreneurs make less than their male counterparts.

Secondly, it is important to support women in fashion because of the exploitation that is so rampant in the industry, particularly in fast fashion. In fact, 85% of garment workers are young women ages 18-24. These women are paid an average of $3 per day.

By supporting small, sustainable women-owned businesses you are voting with your dollars against the mass consumerism, environmental harm and women’s rights violations of fast fashion.

Here are some of my favorite small women-owned brands with commitments to sustainability, but I encourage you to do some research and support your local businesses as well!

Bow mask by Erin Robertson.

Erin Robertson

Erin Robertson is the season 15 winner of Project Runway and local to me here in Boston. Erin has been creating some of the coolest face masks of the pandemic, and I hear she is working on a new collection.

Brother Vellies

Brother Vellies is a luxury shoes and accessories brand with a deep respect for traditional design methods and the artisans that keep them.

Fly by Night NYC

Fly By Night pieces are handmade in NYC by Laura Harrington, who uses deadstock fabrics (including textiles from old movie sets!)

Paloma Wool

This funky Barcelona-based brand champions local production, minimal waste procedures and the use of sustainable fibers and environmentally-friendly dyes.

Earrings by Fat Pom Poms.

Fat Poms Poms

Jess Gladwish of colorful accessories brand Fat Pom Poms is committed to sustainability in her production, emphasizing reuse and recycling of scrap yarn and other materials.

MLE

MLE (named after founder Emily Antonian Li Mandri) offers bespoke clothing and accessories at a relatively affordable price point (they even have cute stuff for your dog!)

Zanni

Zanni makes elevated basics using sustainable fabrics from OEKO-TEX ® certified mills.

ODIE NOLA

Chloe Dewberry of ODIE NOLA embroiders powerful messages onto recycled pieces found around New Orleans. A percentage of each purchase goes toward local advocacy organizations focused on racial justice, mutual aid, or criminal justice reform.

MACHETE

MACHETE’s jewelry and accessories are made with natural and renewable materials.

Face mask by Nathalia JMag.

Nathalia JMag  

Nathalia JMag is another Boston local and Project Runway alumni. Her designs feature upcycled materials and natural dyes.

Baggu

Founded under the mission to replace the single-use plastic grocery bag, Baggu has expanded to create all types of colorful and functional handbags.

Yam

Handmade in NYC, Yam jewelry features upcycled and deadstock materials.

Rudy Jude

Rudy Jude makes adult and children’s clothing made with organic fabrics and natural dyes.

Nat + Noor

These hair accessories are made with recycled materials and cellulose acetate, a natural and renewable resource.

Follow me on Instagram, where I regularly feature and style women-owned fashion.

Let me know your favorite women-owned sustainable fashion brands.

Review of the Rent the Runway Membership

woman-posing-in-colorful-red-and-blue-coat

Versace. Maison Margiela. Diane Von Furstenberg. These are the big names in fashion that I drool over but thought I would never wear. Luxury brands are often inaccessible to the average person on a budget like myself. 

That is, until I discovered the Rent the Runway membership.

Rent the Runway offers a clothing subscription that allows you to rent clothing items (including jewelry and handbags) at a fixed monthly cost much less than any one single piece. If you fall in love with a garment, you can buy it at a reduced price only available to members.

I love clothing subscription programs in general because they allow you to experiment with your style without commitment. Renting clothing is the sustainable alternative to allowing statement pieces to sit neglected in your closet, or worse, end up in a landfill.

How it Works

Rent the Runway offers three tiers of memberships. The first tier is the cheapest, and allows you to rent four items per month. You get access to Rent the Runway’s ‘Basic Closet,’ which is more limited and includes more casual and workwear styles with a retail value up to $350.

The higher price membership tiers allow you to rent from Rent the Runway’s ‘Full Closet,’ which includes eventwear and premium styles with retail value up to $3500. 

The second tier allows you to rent up to eight items monthly. You can only rent four items at a time, so that means your monthly rentals will be across two shipments.

The third, most expensive tier allows you to rent up to 16 items monthly. Still, you can only rent four items at a time so you need to return and order another shipment four times to add up to 16 items total.

How Much it Costs

Rent the Runway’s cheapest plan at four items per month costs $89 per month, with a $69 first month trial.

The second tier membership plan at eight items per month costs $135 per month, with a $99 two month trial.

The most expensive 16 item plan costs $199 per month, with a $149 two month trial.

My First Rent the Runway Order

To get the most a bang for my buck with clothing rental subscriptions, I always try to go for the boldest, most expensive pieces that would maybe not get much use in my day-to-day.

It is cold here in New England, so I thought it would be a good time to try some statement outerwear. I grabbed a few colorful coats and a tan faux shearling jacket that is outside my personal style.

I also jumped at the chance to rent some Maison Margiela wide-leg trousers because why not?

See how I styled my first Rent the Runway order below.

ESSENTIEL ANTWERP – WICE CHECK COAT

Photo by Caroline the Photographer.

JOIE – HALONA COAT

Photo by Caroline the Photographer.

JONATHAN SIMKHAI – ADELYNN FAUX SHERPA JACKET

Photo by Caroline the Photographer.

MM6 MAISON MARGIELA – TAN WIDE LEG TROUSERS

Photo by Caroline the Photographer.

TANYA TAYLOR – VIKKI FAUX FUR COLLAR COAT

Photo by Caroline the Photographer.

Is Rent the Runway Worth the Money?

If you want to experiment with your style or try designer clothes at a lower price point without commitment then Rent the Runway’s  membership is absolutely worth the money.

Still, Rent the Runway membership is not cheap.

I recommend the middle tier (eight items, $135 per month) for the most value. At this price you get access to Rent the Runway’s full closet and a decent number of pieces per month. Also, you can also rent more than your allotted number of items for an extra cost.

Another major downside is that you can only rent four items at a time no matter your membership level. It seems like a major hassle to manage four shipments per month at the highest membership level. That’s a lot of work to make your membership worth it.

How Does Rent the Runway Compare to Other Clothing Rental Subscriptions?

I have also tried the Nuuly clothing rental subscription. Nuuly allows you to rent six items for $88 per month, which give you more and is a little cheaper than even Rent the Runway’s cheapest plan.

However, Nuuly has a much smaller selection and is lacking the big name designer fashion houses.

Nuuly seems to be aiming for a younger customer, while Rent the Runway is more fit for the fashion connoisseur.

Try Rent the Runway Today

Interested in trying out Rent the Runway? If you use my link (right here) you’ll get $30 off your first month. (I’ll get $30 off too so it’s a win-win!)

Unique Valentine’s Day Gifts for Your Partner That are Insanely Relevant for 2021

woman-in-red-dress-on-leopard-print-couch

Valentine’s Day, like most holidays this year, will look a little different. Since we’re skipping the hors d’oeuvres served elbow-to-elbow with a bunch of strangers in a cramped eatery, let your gift reflect the best this past year had to offer. Namely, Valentine’s Day this year is all about cozying up, getting closer with your loved ones and staying indoors.

This year doesn’t have to put a damper on romance. These Valentine’s Day gift ideas will not only demonstrate your love for your partner, but help you alleviate cabin fever, deepen your connection, and help you stick to social distancing rules while having fun.

Make this Valentine’s Day one you will never forget, and hopefully we can have a normal one next year.

Donate to a charity in their name – If the past year taught us anything, it’s that there are many people out there that need our help now more than ever. Pick a cause your partner cares about and make a donation in their name. My partner and I are gifting donations this year, and I think this will be a fantastic tradition to continue.

Fire Pit – Colder temperatures make safer gatherings outdoors uncomfortable, if not downright impossible. A fire pit will be a gift that keeps on giving beyond this unique time. I’ve found that a fire pit is an amazing excuse to spend more time outdoors, spark up a conversation with a neighbor and linger over a beer.

We’re Not Really Strangers Card Deck – If you’ve been stuck indoors with your partner for the past few months, you may feel like you’ve run out of things to talk about. Maybe you’ve fallen into a routine where the only conversations seem to be about what’s for dinner and who’s taking the trash out. This deck of cards is meant to pose questions that will actually deepen your relationship.

Tie Dye Kit – Tie dye kits were exceptionally trendy in 2020, but I’m here to tell you they are still worth the hype. If nothing else, it’s a fun date for you and your partner where you can be creative together.

Juniper Ridge All-Natural Campfire Incense – Set the mood with these woodsy scents. Gone are the days of associating incense with regrettable college parties. This is the only brand of incense I buy–the smell is like someone just lit a very sexy campfire.

Make their favorite childhood treat – Does your partner have a soft spot for Pop Tarts? Were they super into Cosmic Brownies? Missed out on Girl Scout cookies this year? Trying making a gourmet version of their favorite treat at home. It’s a fun challenge that shows you know them, and are willing to put in the effort. 

Milk Frother – If your partner got super into making coffee at home this year, a milk frother is sure to take their barista skills to the next level. No need to invest in an expensive espresso machine, just froth whatever milk you have laying around, add brewed coffee, and voilá! You have a fancy coffee drink at home.

Bar Kit – There are a few tools every aspiring home bartender needs to make the perfect cocktail. Just add alcohol. 

Back and Neck Massager – Help your partner loosen up after a long day of work with this portable massager. This thing is especially good at relieving the neck and shoulder tension that comes along with a long day hunched over a computer.

Picnic To-Go Backpack – This past year has forced many of us to get creative with socially distanced hangs outside. This picnic backpack is basically a fancy date that you can carry on your back and even includes a wine holder and tiny cheese board. It’s perfect for a short hike out to that romantic overlook.

Sourdough starter culture – Bread making has become a bit of a trend recently, but I hope more people get into it for the long-term. I swear, my partner loves me a bit more each time I bake a loaf of crusty sourdough bread. Try it–it might just be the best thing that happened to your relationship.

Ring Light – Support your partner’s TikTok stardom with this handy ring light. Useful for regular work calls as well.

Get a Cameo from their favorite star – Gift your partner a personalized message from their celebrity crush. Cameo works with a variety of stars from YouTube, sport and entertainment. You offer them an idea of what to say and you get a personalized short video in return.

This post is all about unique Valentine’s Day gifts for your partner, although these ideas make great gifts for anytime of year! 

7 Easy Tips for More Eco-Friendly Laundry–Sustainability Series

woman-with-laundry

The average American family does 8 to 10 loads of laundry per week. At about 31 gallons of water per load, this is no small feat. In fact, laundry consumes almost 20 percent of the average household’s water usage, making the wash an important area to tackle in your pursuit of a more sustainable home.

Aside from water usage, doing the laundry takes a considerable amount of energy and materials. Think of the products we typically need to run the laundry; many of them are single use–Tide pods, dryer sheets, etc. Single use products not only fill landfills, but also end up costing us more money.

Making your laundry habits more eco-friendly not only save you money but can also save the planet.

In this article you will learn several tips and DIY hacks to help you make your next load of laundry more sustainable.

  1. Pre-treat stains – Pre-treating any stains ensures you get them out the first time, minimizing the number of times you need to run the wash. Just make sure you pick the appropriate treatment for the job. Organic stains from things like grass, blood, and foods do well with stain removers formulated with enzymes. Oils and fats do well with gels and even basic dish soap (like my favorite Dr. Bronner’s Sal Suds).
  2. Use cold water – Washing your clothes in cold water saves you money, saves the planet, and keeps your clothes in better condition. About 90% of the energy your washing machine uses goes to heating the water. According to the organization Cold Water Saves, running just 80% of your loads in cold water could cut 842 points of CO2 emissions over the course of a year. Skipping the hot water altogether could save you over $200 a year in utility costs. Plus, hot water doesn’t actually make your clothes any cleaner (it’s the detergent that does that).
  3. Make your own laundry detergent – Making your own laundry detergent is easy and reduces the amount of plastic that needs to be disposed of each time you run out. Most laundry detergent recipes call for a mixture of water softeners (washing soda, borax) and soap. This can be problematic for your clothing, as soap is made with fat and oils that can make fabrics oily and dingy over time. Instead, we replace the soap with a plant-based detergent (like the household cleaning workhorse Dr. Bronner’s Sal Suds.)

    Laundry Detergent Recipe
    1.5 part Dr. Bronner’s Sal Suds
    1 part washing soda
    6 parts water

    Mix together well until the washing soda dissolves. Use as you would laundry detergent by filling the soap dispenser of your washing machine.
  4. Fill the washing machine – This may seem like an obvious one but it’s worth saying: wait until you have a full load to run the washing machine! This reduces the number of loads you need to run overall. Remember, regardless of how many pounds of clothes you put in, your washing machine is going to use about 30 gallons of water. Make them count.
  5. Let it air dry – Line-drying your clothes will keep them in better shape for longer, and it is better for the environment. Running the clothes dryer uses a considerable amount of energy–the typical dryer uses about 3000 watts of energy per cycle. I keep this drying rack by my washing machine to easily hang clothes as I work. During the summer, we put out a clothes line on the back porch. It’s cute and quaint.
  6. Swap out the dryer sheets – Swap out single-use dryer sheets for wool laundry balls to soften fabrics and cut down time in the dryer. The balls work by bouncing around in the dryer, separating and fluffing your clothes so they dry faster with less wrinkles.
  7. Dry with lavender satchel – Missing the scent your dryer sheets lent to your clothes, linens and towels? Try throwing in a dryer-safe lavender satchel instead. I love these lavender dryer bags from Trader Joe’s for making my bed sheets smell like a luxury hotel experience.