Home Blog Page 2

Garden Decor Ideas Trending for 2024

garden decoration

These garden decor ideas are absolutely perfect for the urban homesteader who cares about both sustainability and style.

Now that you have your garden (maybe you read my guide to no dig gardening, or my vegetable garden ideas) it might be time to think about decorating!

Or, at least think about ways you can make your garden a space where people can thrive too–in addition to the plants.

For instance, I like see my garden decor as a way to make space for reflection and socialization.

To do this, I’ve nestled a couple Adirondack chairs by the native pollinator garden in my backyard. There is nothing better than a morning cup of coffee or an afternoon spent chatting with a friend out in the garden!

I needed more inspiration though, so I looked to my friends on the internet for more garden decor ideas. Read on for some of my favorite outdoor decorating inspiration that I found!

This post is all about garden decor ideas.

Top Tips for Garden Decor

  1. Shop vintage and thrift. As you’ll see in the inspiration images from my internet friends below, there are probably plenty of garden decorating options at your local thrift or vintage store! Often, these are the coolest pieces that you’ll be proud to display every year! Yes, this post contains links to retail stores, but I encourage folks to see if they can find the item thrifted first!
  2. Encourage visits from beneficial insects and other wildlife. I love garden decor that doubles as habitat for beneficial insects and other wildlife! Of course, birth baths can be beautiful, but did you know that bees and other pollinator friends need water too? Consider adding something like a bee drinking garden ball or other water feature.

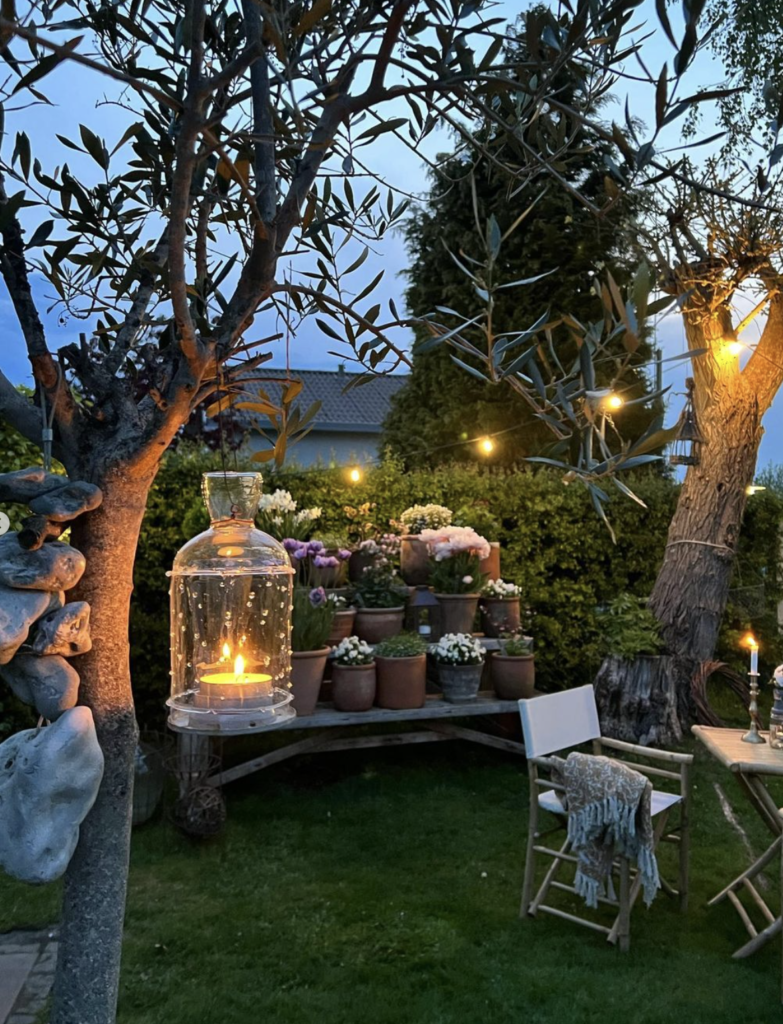
#1 Garden Decor Idea: Tiered Plant Stand
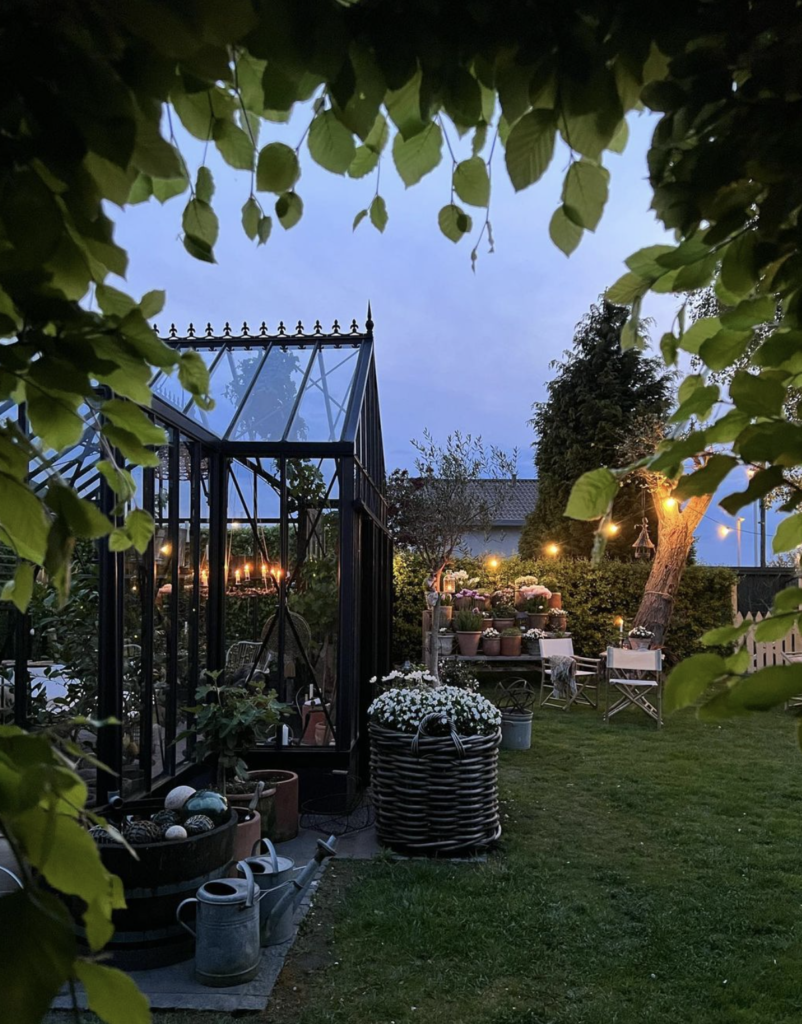
Wow, I’m obsessed with the visual interest the three-tiered plant stand adds to @villa.pax‘s backyard. The plant stand looks vintage or potentially handmade, so I scoured the internet for a reclaimed wood version you could feel good about adding to your backyard sanctuary.

The lantern, fairy lights and candles only add to the coziness of this idyllic scene.

Get the Look:

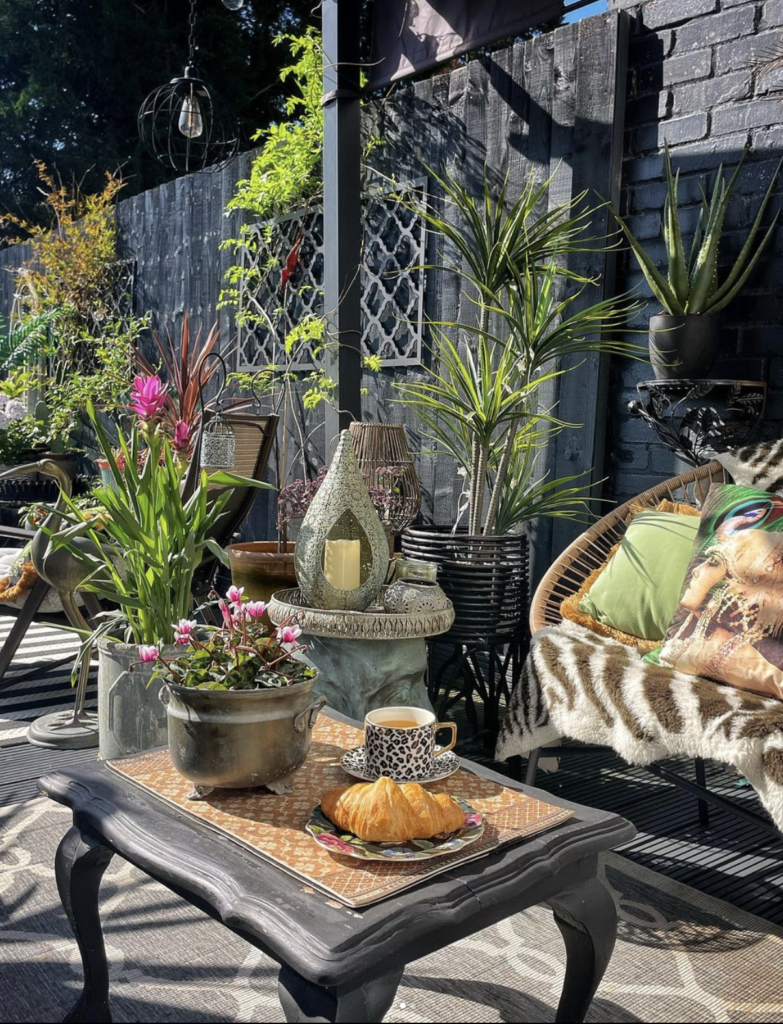
#2 Garden Decor Idea: Mixed Patterns

Photo credit: @violetmayhome

These clashing prints in @violetmayhome‘s cozy garden nook are so my style! I love the tiger throw with the cheetah cup and saucer. In my opinion, you can never have too much animal print!

I’m also a fan of the eye catching details, like the unique pillows and funky lanterns.

Get the Look:

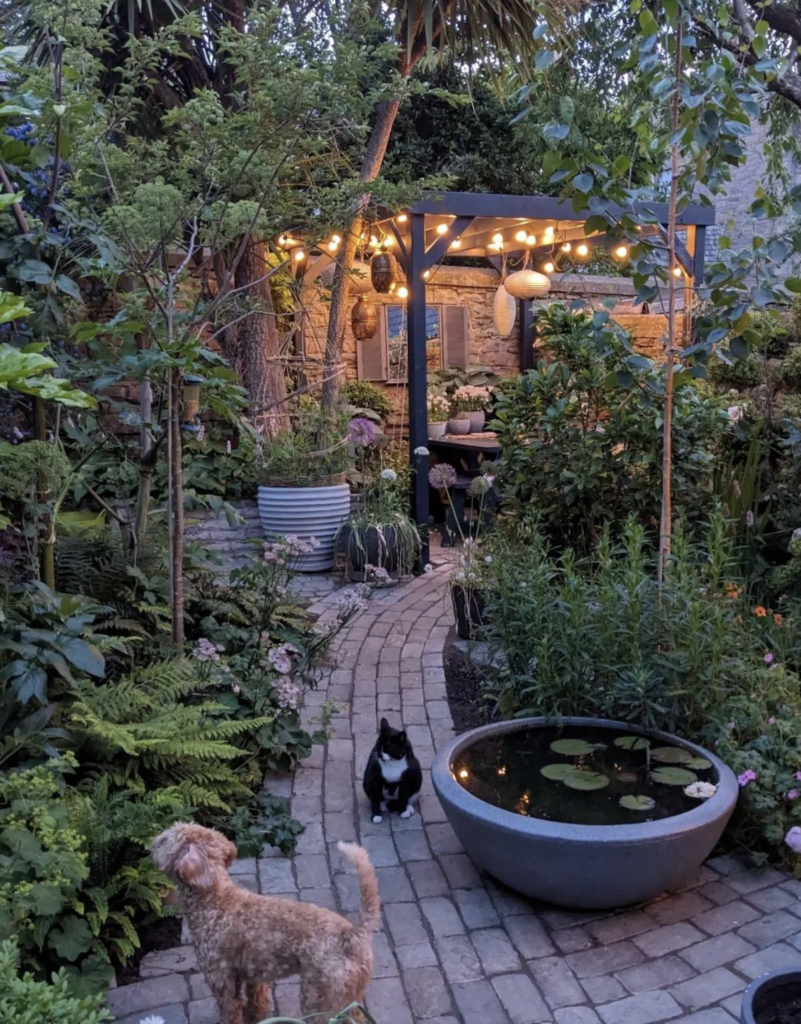
#3 Garden Decoration Ideas: Secret Pergola
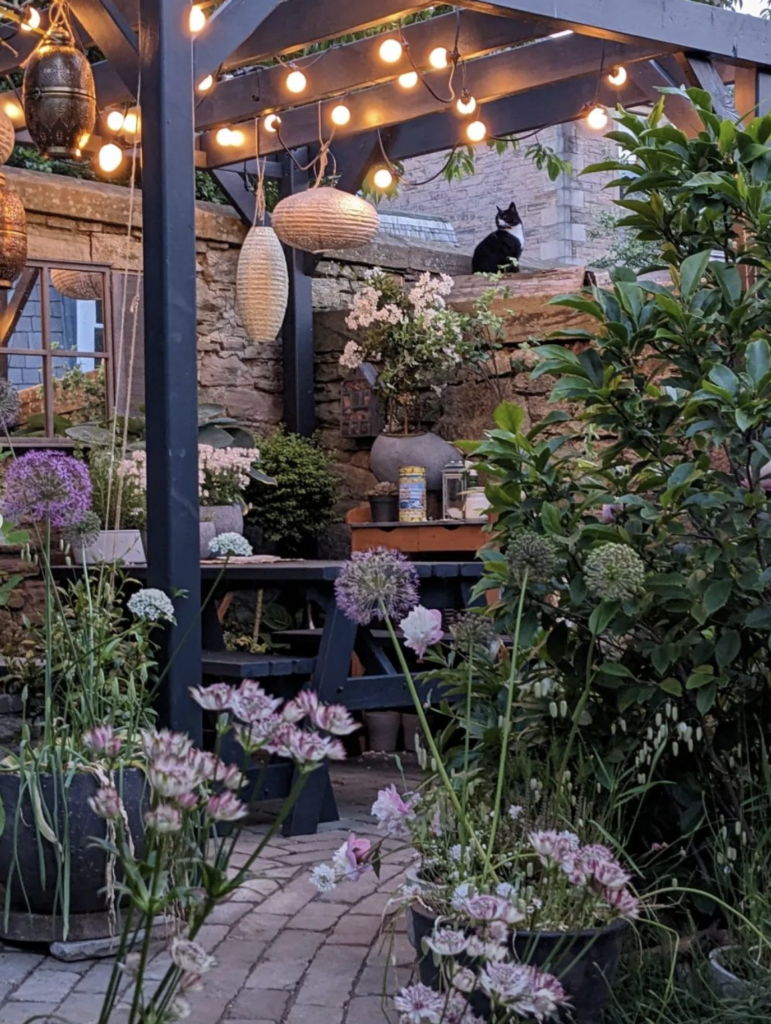
I truly cannot get over this hidden pergola at the end of @docleaves garden. Imagine hosting a dinner party here under the twinkle lights!

From @docleaves: “This little corner genuinely transforms how the garden looks and feels. All you need is a hard stand, a structure overhead and plants 🌿🌿🌿. Winter is the perfect time to crack on with projects like these as the space forgets to look horrible by Summer.”

Get the Look:

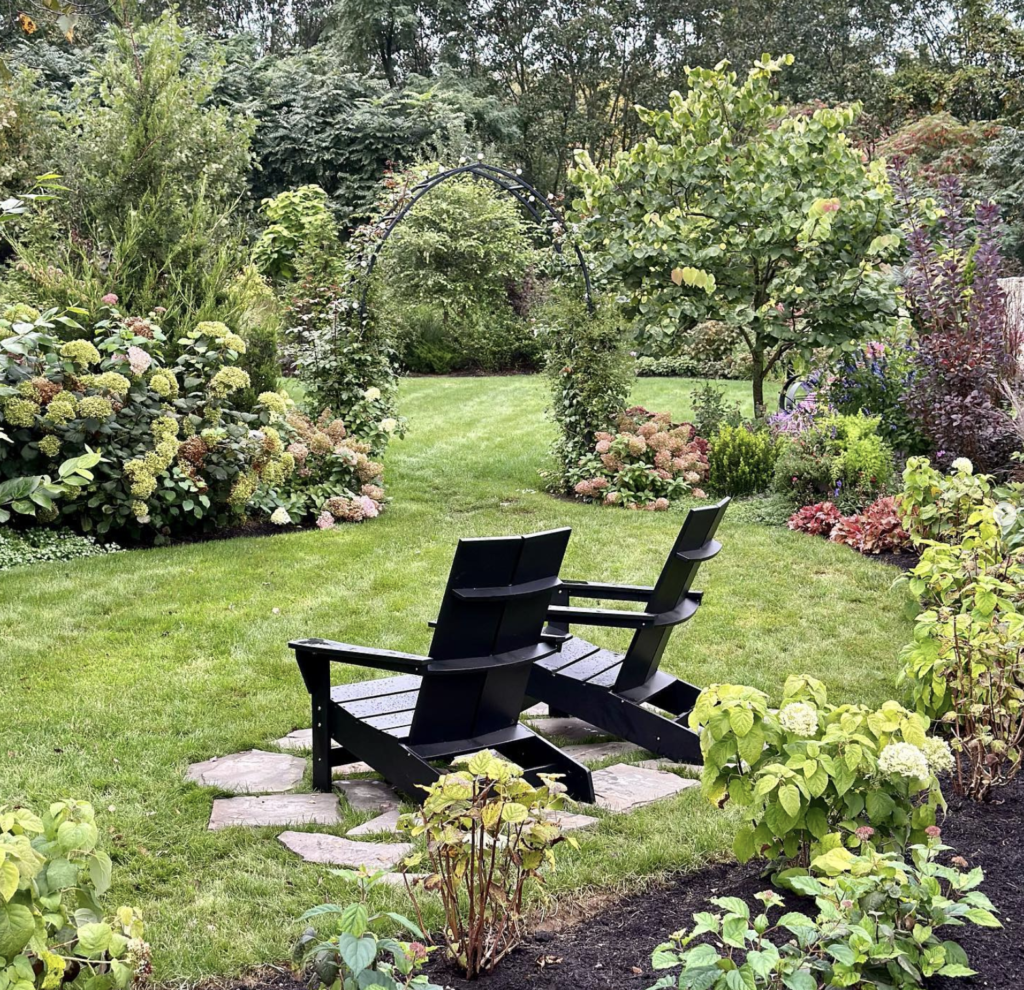
#4 Garden Decor Idea: Rose Trellis

Photo credit: @growformegardening

This spot in @growformegardening‘s yard is so romantic, thanks in part to the dreamy rose arch. Plus, they have hydrangeas growing at the base, which happen to be one of my favorite flowers.

Also, being a girl from the Northeast–I love an Adirondack chair. I would love to spend a morning sipping coffee with my sweetie in these side-by-side chairs.

Get the Look:

#5 Outdoor Decor Idea: Bunting Flags
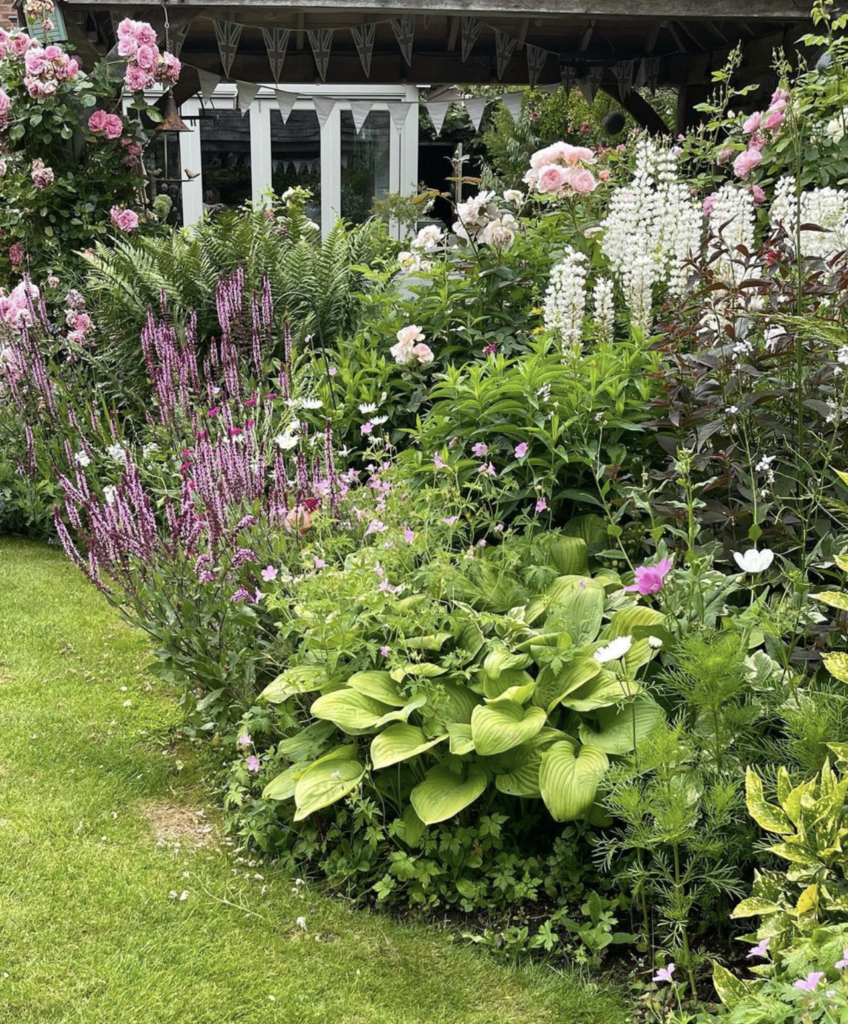
I’m such a sucker for bunting as decoration, but I never thought to bring them outside! Here, @lorainescottage adds white bunting flags to her pergola for a whimsical look.

Get the Look:

#6 DIY Outdoor Decor: Barbecue Area
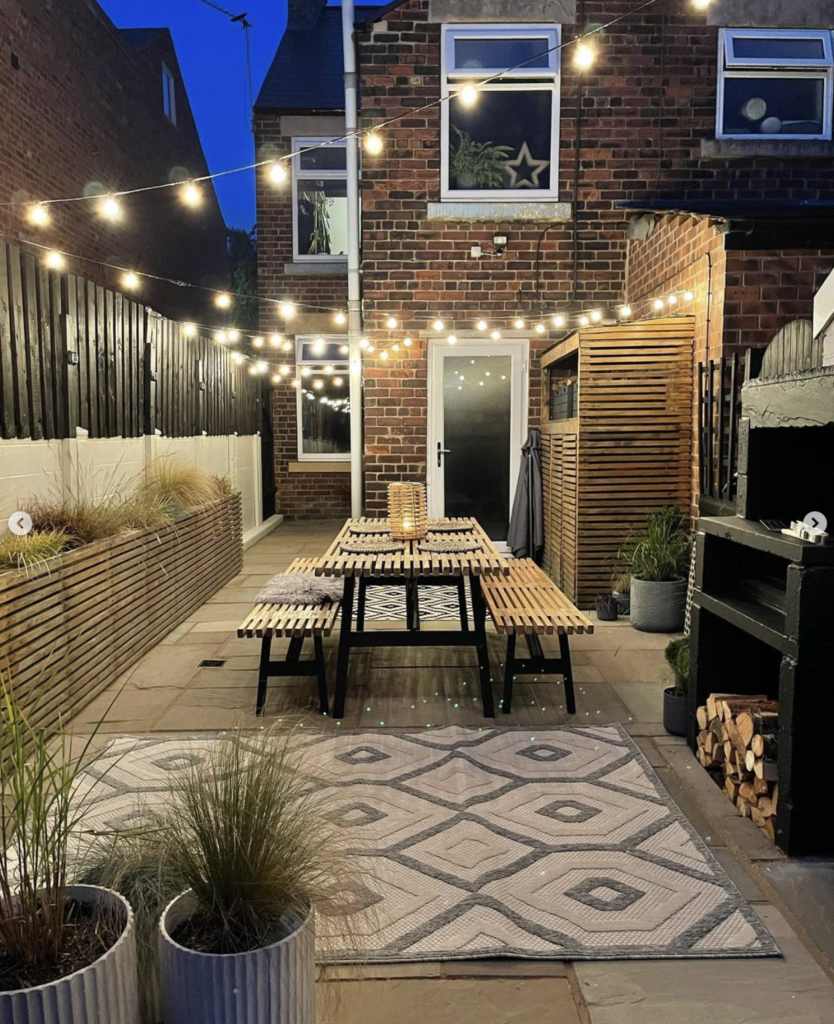
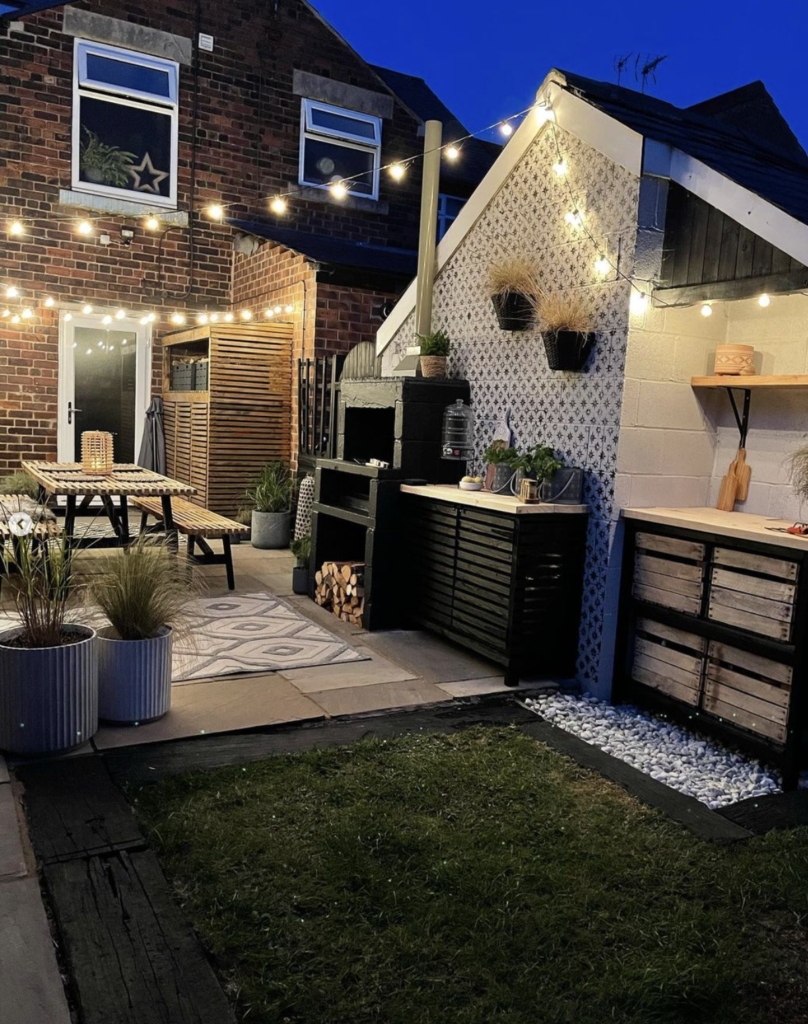
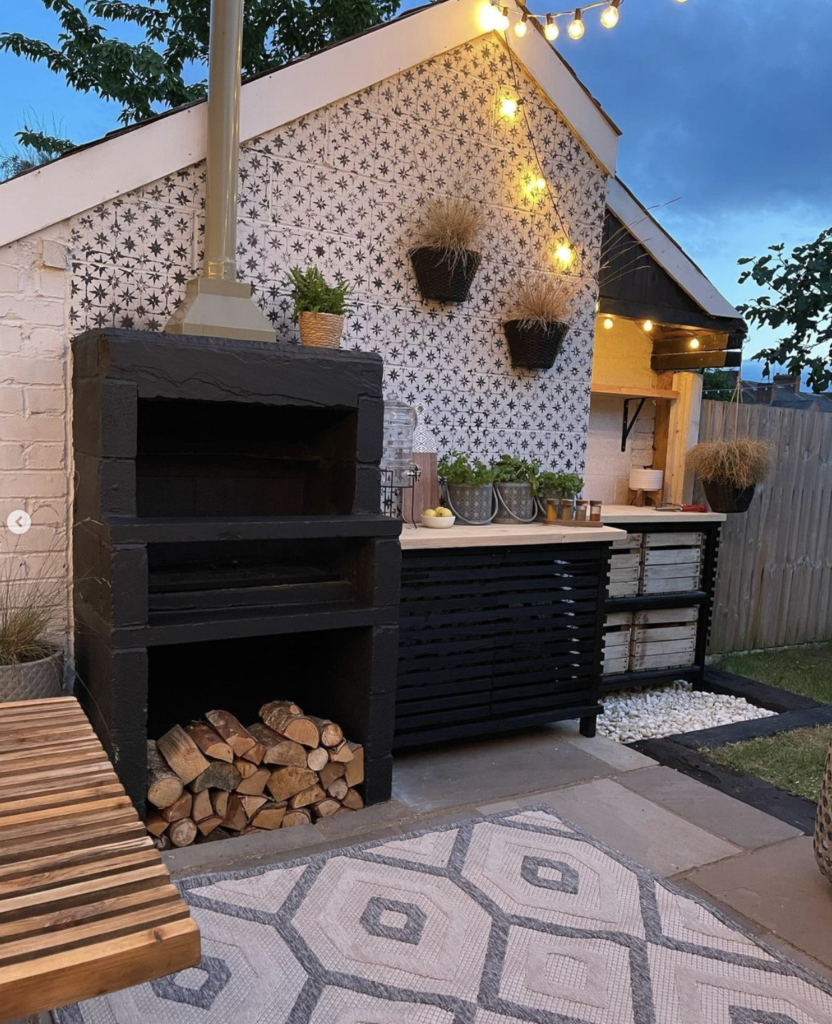
This backyard DIY barbecue area by @houseatnumber30 is truly stunning, and there are so many ideas that we can take away from the transformation of the space.

First, don’t underestimate what a little paint can do. Kelly started with painting the brick face of the garage wall white, and traced over the layer of paint with a stencil to give it a tile-like appearance. The brick pizza oven was also painted black.

Finally, the addition of the natural wood and black furniture give the space a more modern feel.

Get the Look:

#7 Garden Decor Ideas: Cozy Chair
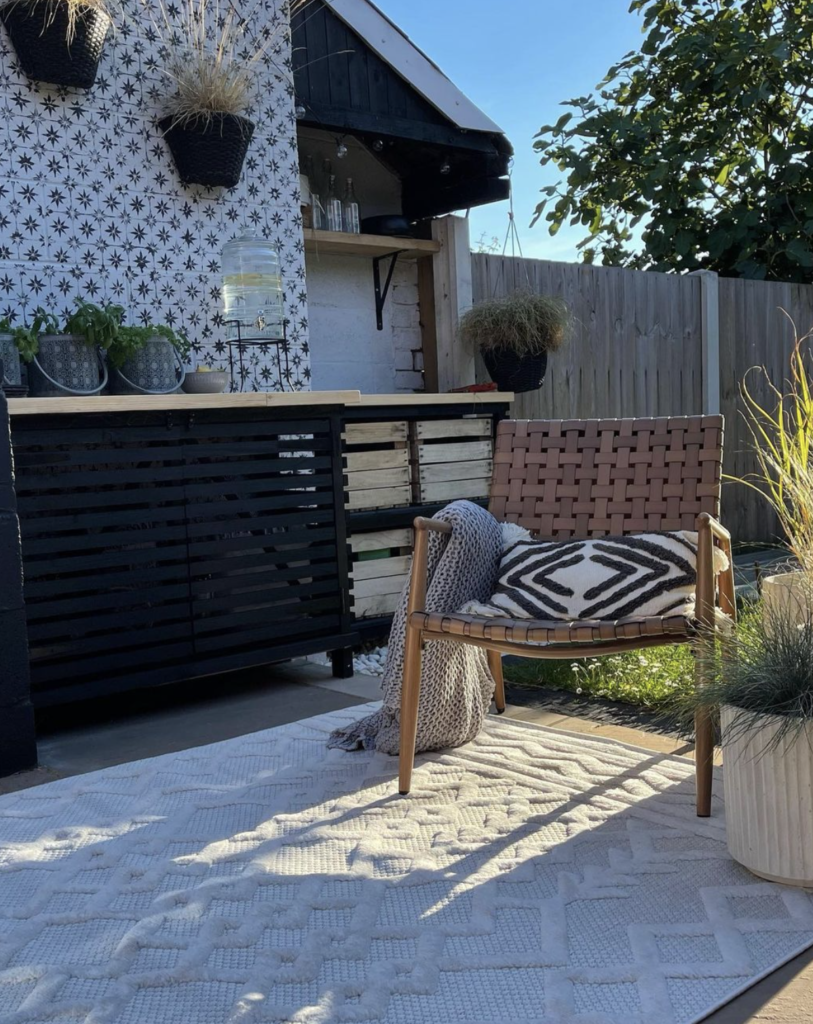
Photo credit: @houseatnumber30

Every gardener needs their special chair where they can relax after a hard day’s work. I love this woven chair @houseatnumber30 styled with the graphic pillow and cozy blanket. Just remember to bring all non-waterproof items in before a rain!

Get the Look:

#8 Outdoor Decor Idea: Cottage Core
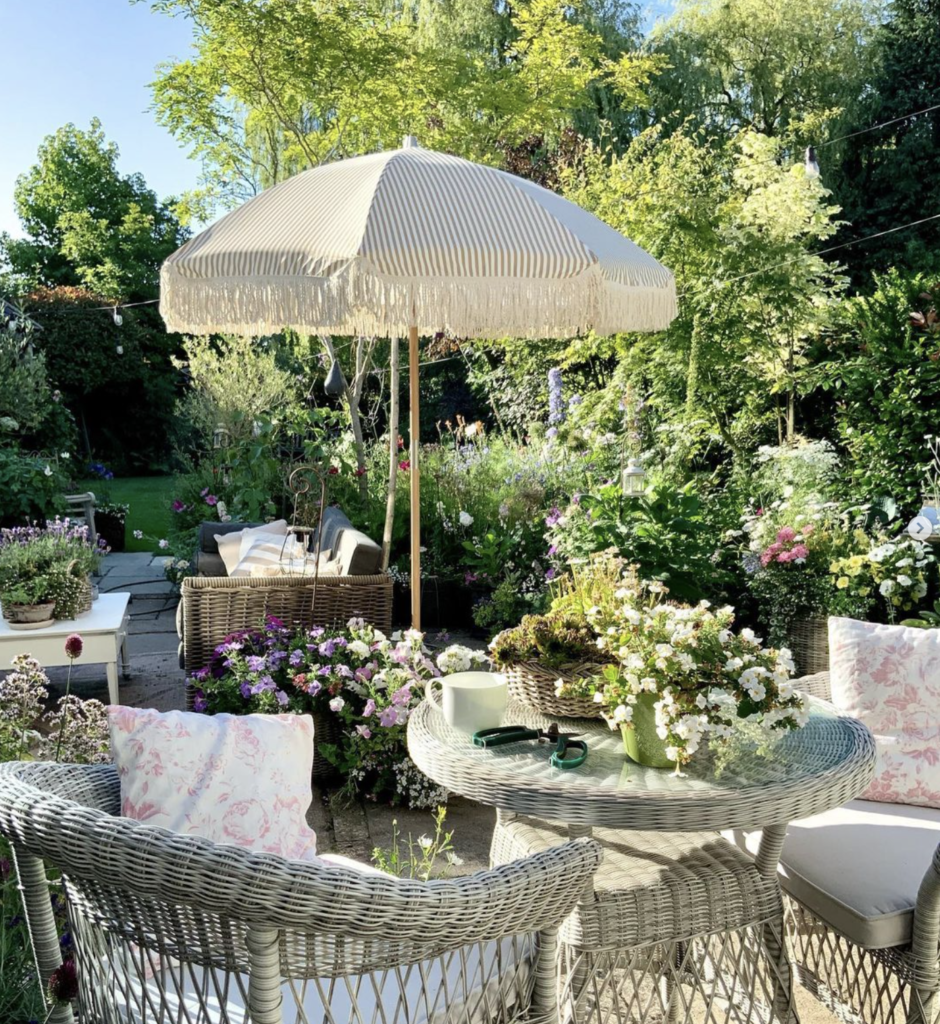
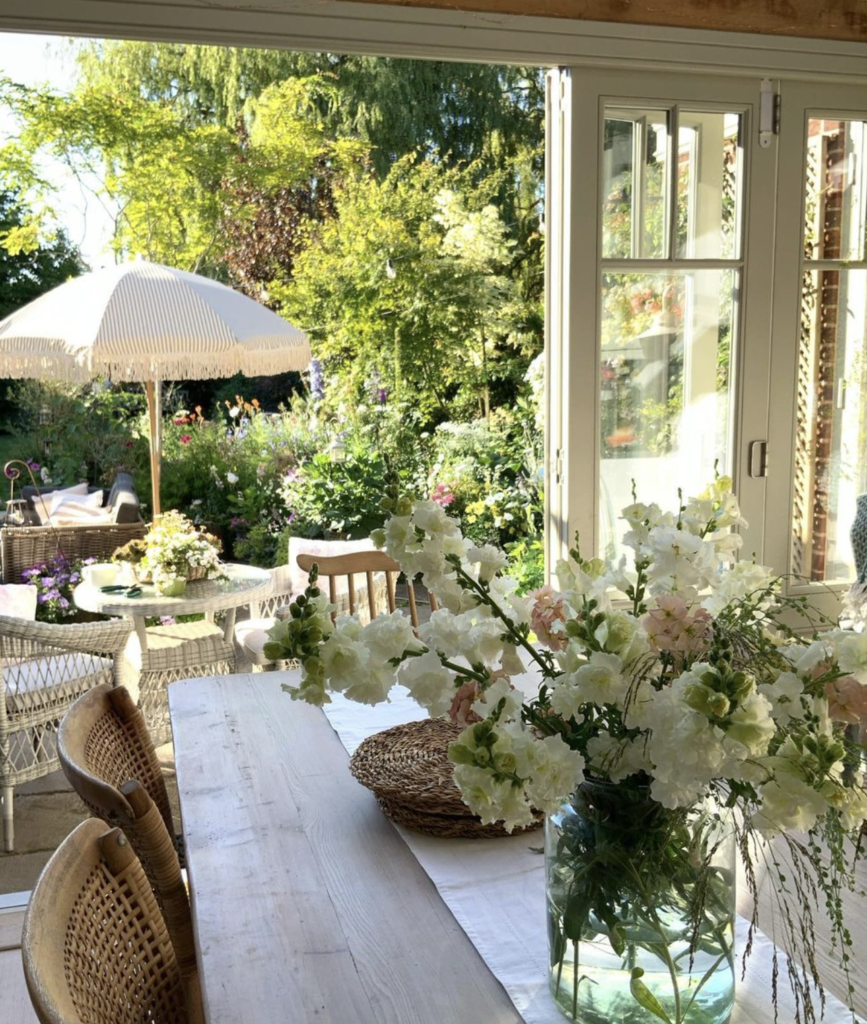
“Cottage core” style is all the rage right now, and I think this scene from @lorainescottage absolutely nails the aesthetic.

Details like the frilled umbrella and woven patio furniture set bring a certain whimsy to the backyard garden.

Get the Look:

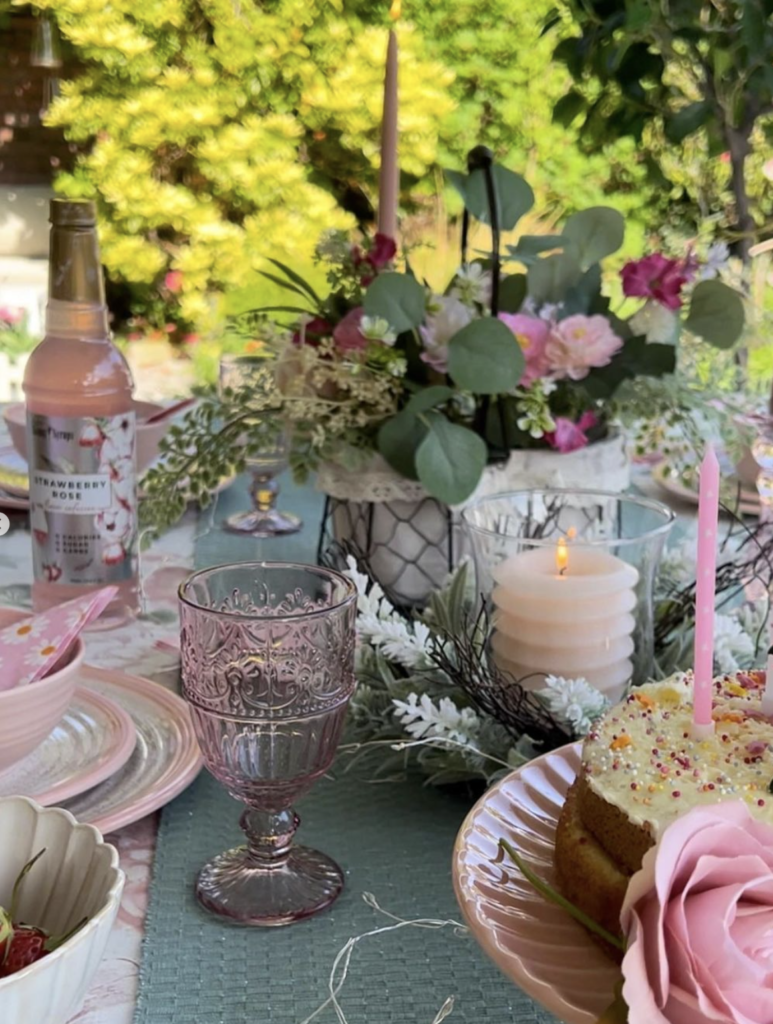
#9 Outdoor Decor Idea: Strawberry Shortcake
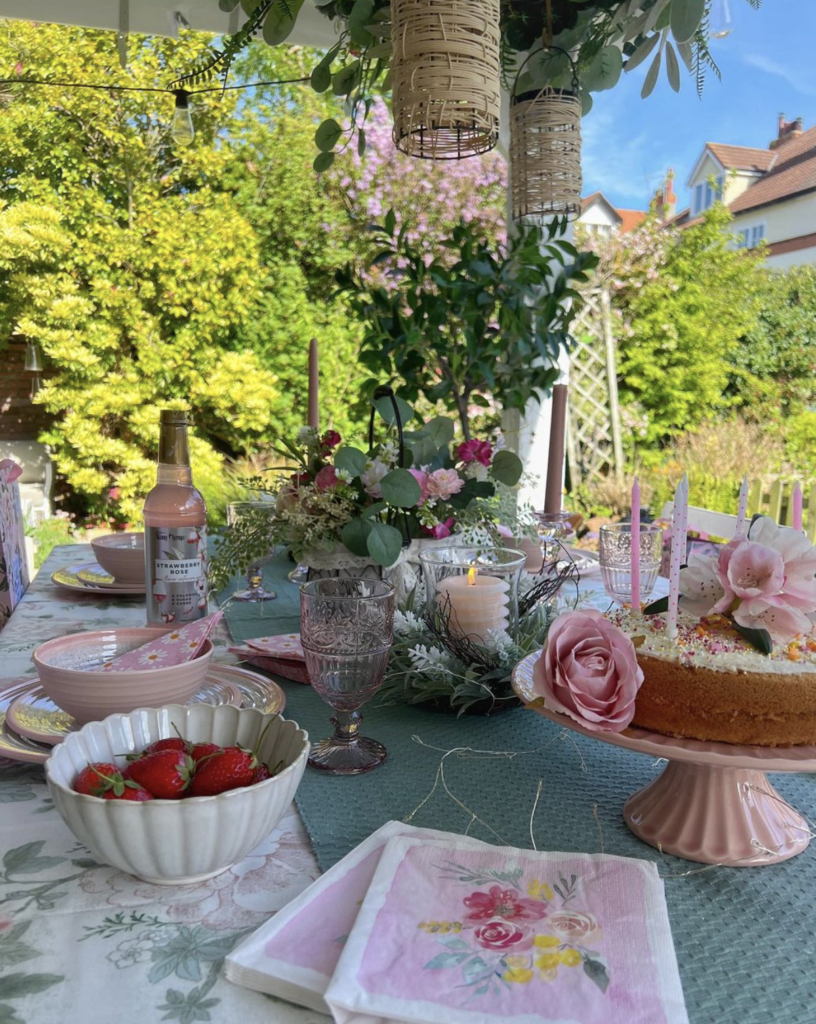
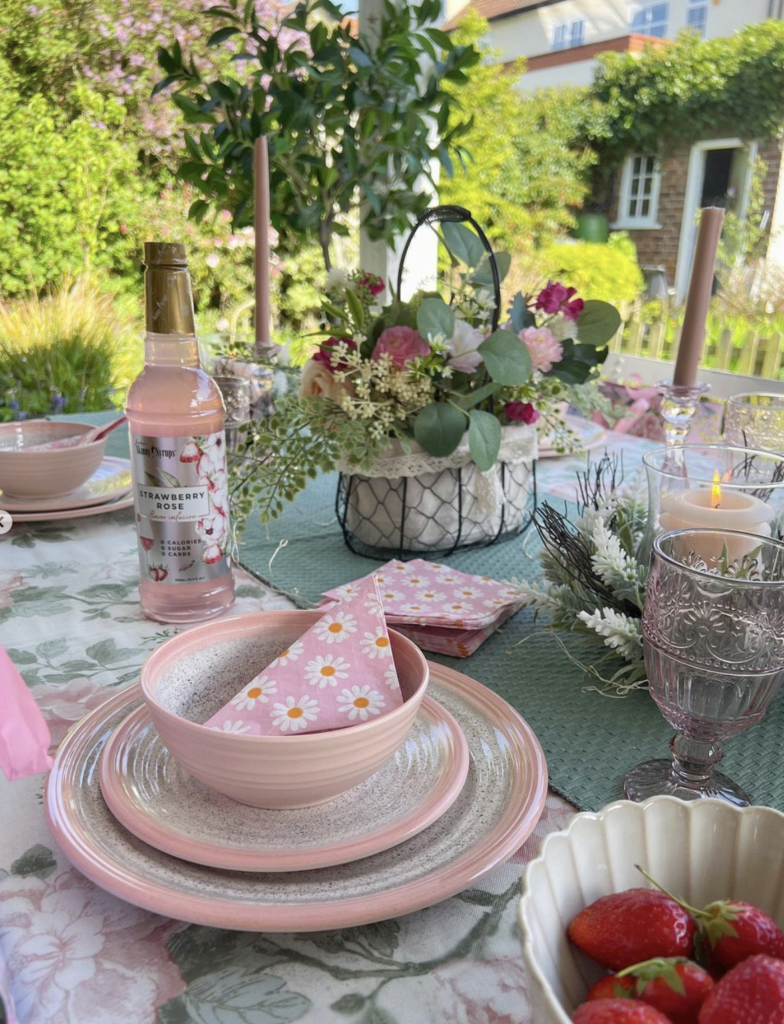
The backyard garden is the perfect setting for a spring picnic. This tablescape from @hearts_at_claremont is so cute, I just had to share! I love the woven laterns and pink tableware.

Get the Look:

#10 Garden Decoration Idea: Vintage Birdbath
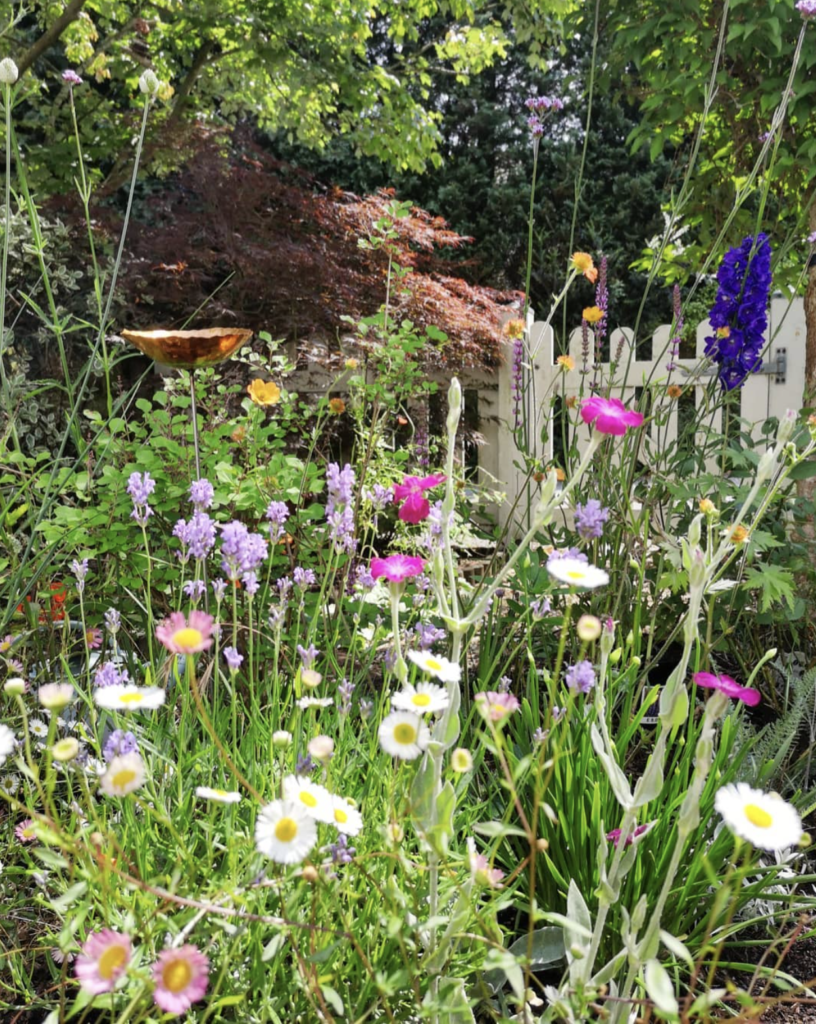
I love this vintage copper birdbath @clairefox_journalist placed in their wildflower garden! This setup is certain to attract birds, beneficial insects, and other wildlife.

Get the Look:

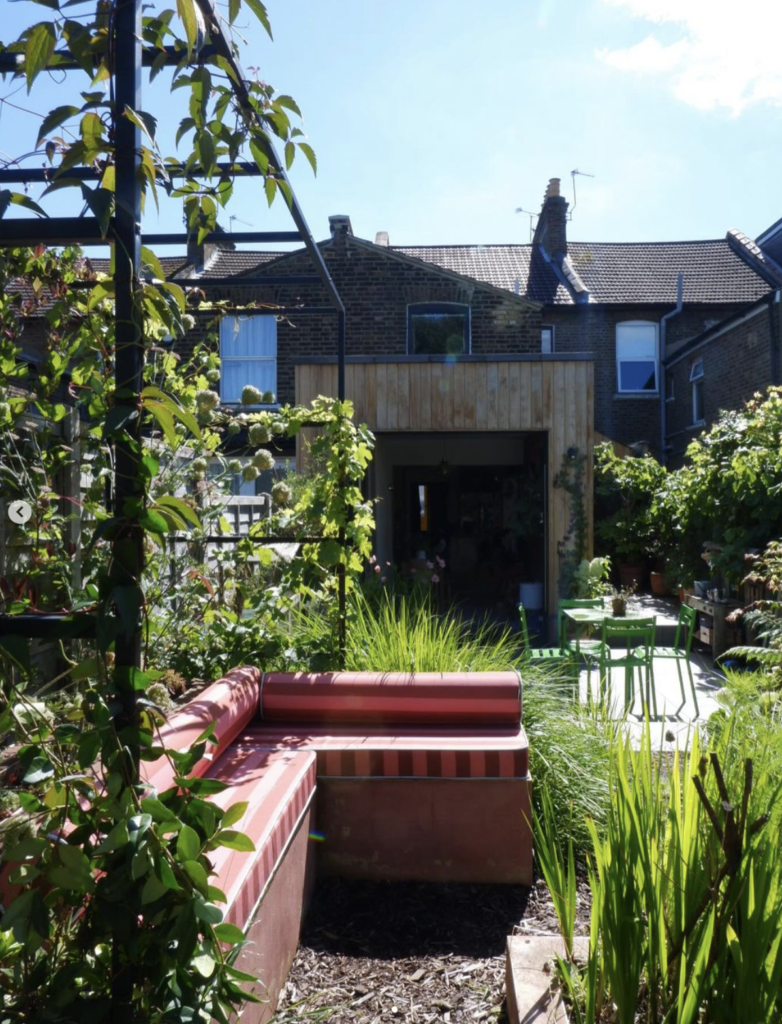
#11 Outdoor Decor Ideas: French Connection
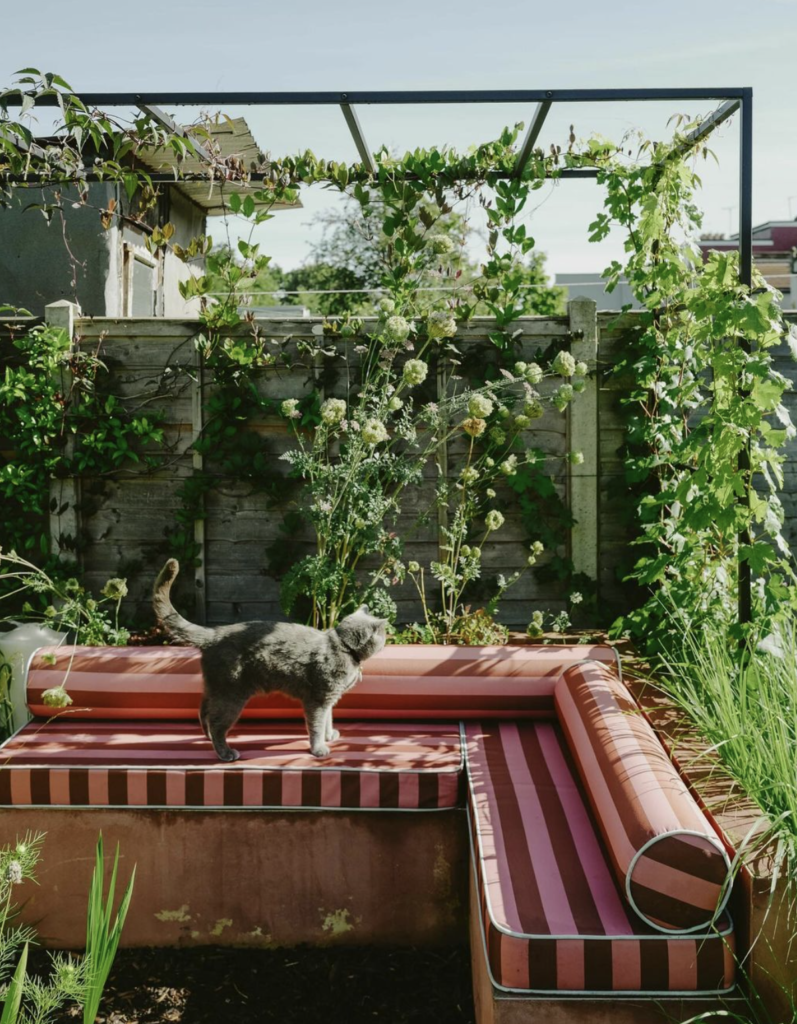
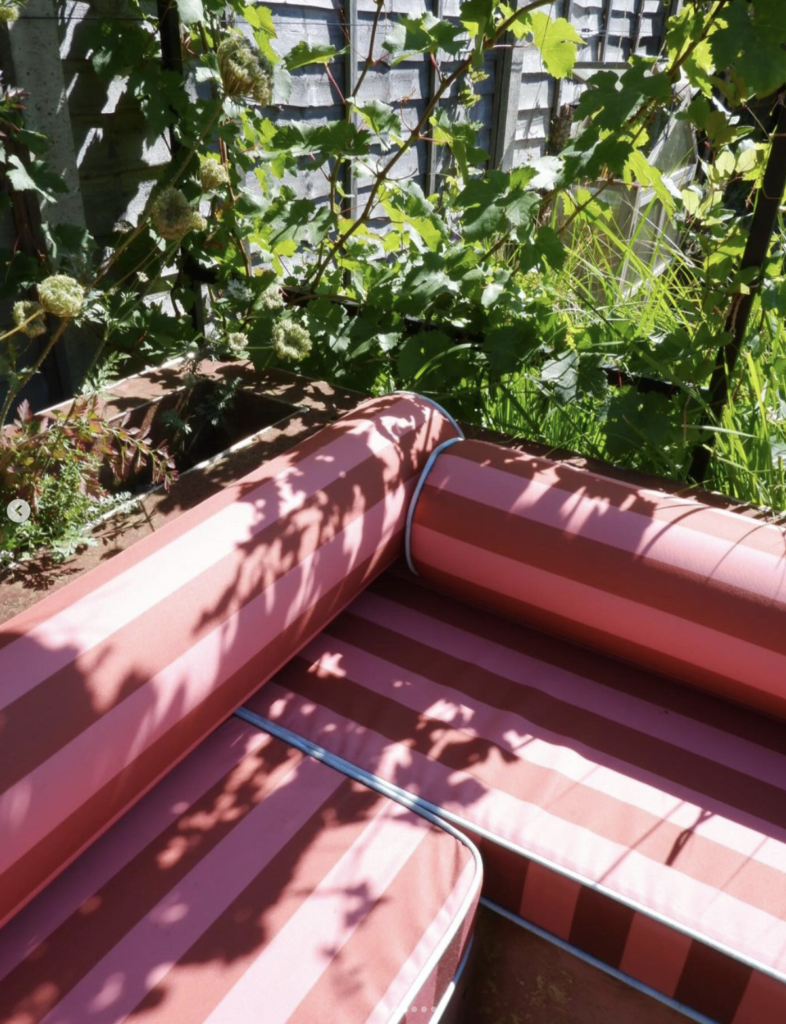
I am so in love with this South of France-inspired outdoor nook crafted by @jessalaviellis. The angular bench is perfectly complemented by a square arch holding a vine, and planters lining the headrests. Imagine taking a nap here!

Get the Look:

Hi, I’m Leslie, the founder of PunkMed

Hello friend! I’m so glad that you stopped by my blog today. I had a blast sharing garden decor ideas with you, from outdoor design enthusiasts around the world. If you’re into vegetable gardening, urban homesteading, or living a more sustainable life–stick around! Be sure to join my email list, or come hang out on Instagram

This post was about garden decor ideas.


What to Read Next:

Did you enjoy my roundup of garden decoration ideas? I love that! Below, I’ve shared a few other posts of mine that I think you’d find helpful!

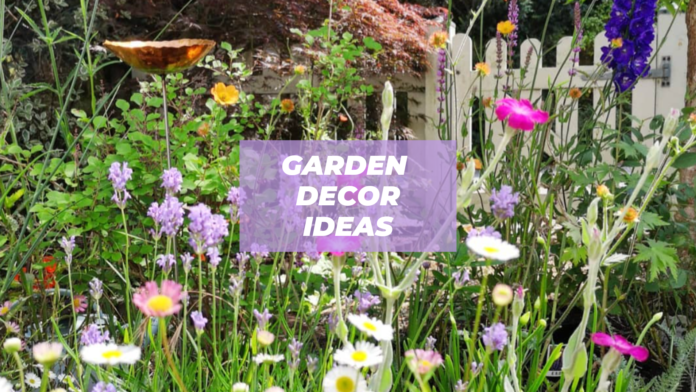
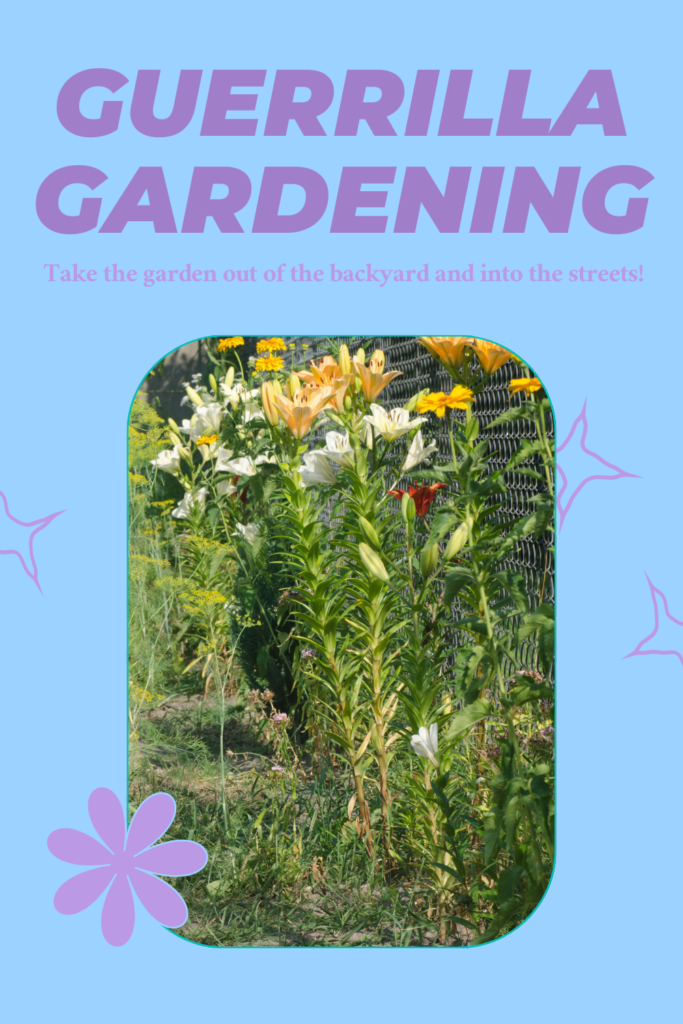
Complete Guide to Guerrilla Gardening 2024

guerrilla gardening ideas

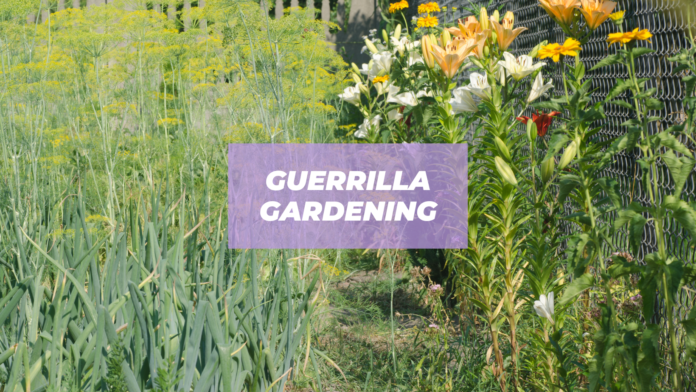
Don’t have your own garden? No problem. Guerrilla gardening takes gardening out of the backyard and into neglected urban and suburban spaces.

I lived in the city without access to my own garden for many years. (Now I know there are alternatives like container gardens.)

It was around this time that I was learning about herbs and foraging, and I long to get my hands in the dirt and grow some plants of my own.

Luckily, it was also around this time that I learned about guerrilla gardening, which opened up my world to the possibilities of growing plants without your own garden. The practice of guerrilla gardening satisfied my budding green thumb while also revitalizing neglected urban areas in my neighborhood.

Guerrilla gardening is a very rewarding practice that helps to combat urban decay. I hope you try it out, and maybe create your own community of gardening bandits!

Hi, I’m Leslie!

Hi, I’m Leslie!

My name is Leslie, and I’m the founder of PunkMed! On my blog, I and my team share my info, experiences, and recommendations in the area of sustainability, urban homesteading, and gardening. Our goal is to make it less overwhelming for you to live a fun and sustainable life!

I’ve been guerrilla gardening for almost 10 years now, and I’m so excited to share my top tips! Let’s get into it!

This post is all about guerrilla gardening.

What is Guerrilla Gardening?

Guerrilla gardening gets its name from ‘guerrilla warfare’, a military tactic that involves ambushing the opponent, typically used by smaller rebel groups.

Guerrilla gardening is much more peaceful, but it does involve some sneakiness.

Guerrilla gardening is the practice of growing plants in vacant lots, highway meridians, and other neglected urban and suburban areas. Basically, it’s gardening on land that you don’t own. Many see guerrilla gardening as a form of activism that rehabilitates otherwise abandoned spaces lost to urban decay.

Indeed, while this practice is usually not authorized (hence the “guerrilla”), there are ways to go about it that are pretty harmless and fun. While guerrilla gardening ideas below are pretty hands-off, I still recommend getting permission beforehand. Always guerrilla garden wisely.

Benefits of Guerrilla Gardening

There are many benefits to starting a guerrilla gardening practice, or even a collective:

  1. Beautification of Urban Areas: Guerrilla gardening can transform neglected or unsightly urban spaces into green areas, adding beauty and vibrancy to neighborhoods.
  2. Community Building: It fosters a sense of community ownership and pride as neighbors come together to improve shared spaces.
  3. Food Production: Guerrilla gardens can grow fruits, vegetables, and herbs, providing fresh produce to local communities, especially in food deserts where access to fresh produce is limited.
  4. Environmental Benefits: The addition of green spaces helps to improve air quality, reduce urban heat islands, and provide habitat for wildlife, contributing to biodiversity conservation.
  5. Promotion of Local Food Systems: By growing food locally, guerrilla gardening supports local food systems and reduces reliance on long-distance transportation and the global food supply chain.
  6. Fostering Resilience: Guerrilla gardening can help communities become more resilient to economic downturns or food shortages by promoting self-sufficiency and community cooperation.
  7. Political Activism: In some cases, guerrilla gardening is a form of political activism, challenging property laws and advocating for access to green spaces in urban environments.

Best Plants for Guerrilla Gardening

The best plants for guerrilla gardening will always be plants that are native to your area. Native plants are naturalized to the climate of your region, and will be able to grow with minimal intervention or watering.

If you don’t know which plants are native to your area, I recommend visiting your local nursery to ask which seeds grow best in your area without watering.

Native plants will also provide the proper habitat for local beneficial insects, particularly pollinators, and other wildlife. Plus, using native plans ensures you are not introducing invasive plants to the area.

Still, the common choices for guerrilla gardening that provide shelter for beneficial insects include:

  • Mustard
  • Buckwheat
  • Fennel
  • Dill
  • Clover

Wildflowers for Guerrilla Gardening

  • Echinacea
  • Yarrow
  • Goldenrod
  • Sunflower

Guerrilla Gardening Ideas

Seed Balls

Making seeds balls are a fun afternoon guerrilla gardening project!

Seed balls are a fun and easy guerrilla gardening project. While the concept of using seed balls for planting is not entirely new, the idea has been embraced by many guerrilla gardeners.

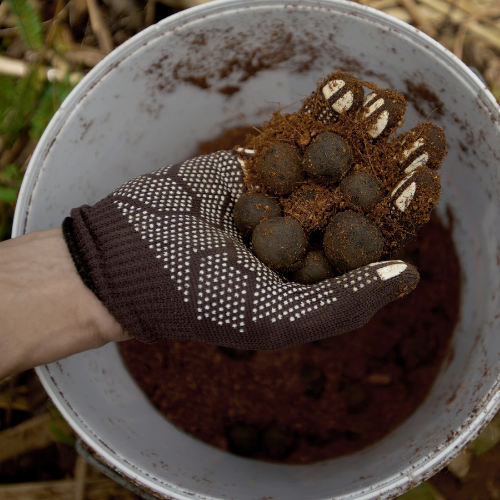
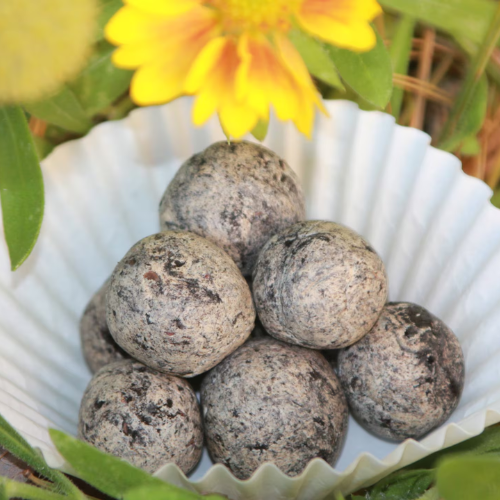
Seeds balls are simply a mixture of seeds, compost, and clay that is packed tightly into smalls balls and allowed to dry. Then, the portable balls can be thrown in the nearest abandoned lot or neglected urban space.

Eventually, rainfall will re-hydrate the dried ball of clay, freeing the seeds and allowing them to germinate and grow. (Again, make sure to use native plants that will be able to thrive without your intervention!)

I love using wildflowers for seed balls! Wildflowers are sure to make any space more attractive, and they will provide food and shelter for pollinators. I think this pollinator mix from High Mowing Seeds would be a fabulous choice for seed balls!

See below for my foolproof seed ball recipe. This is such a fun project to do with friends, and even makes a great party favor!

Materials for Seed Balls

How to Make Seed Balls

  1. Mix on part seeds with three parts compost.
  2. Add five parts dry red clay to the seed/compost mixture.
  3. Add a little water slowly to the mixture, until it becomes a dough-like consistency.
  4. Shape the “dough” into marble-sized balls.
  5. Let the seed balls dry out on a cookie sheet in a shaded place for a couple days.
  6. To distribute, throw about ten balls per square yard of a ground.

If you’re not ready to make your own seed balls, there are a few options that you can buy pre-made online. Again, make sure you are buying those with seeds that are compatible and native to your area!


I love these Bee Seed Bombs from D’s Seeds and Blooms, as they contain wildflowers that are native to most of the U.S., including echinacea, anise hyssop, and purple prairie clover.

This post was all about guerrilla gardening.


What to Read Next:

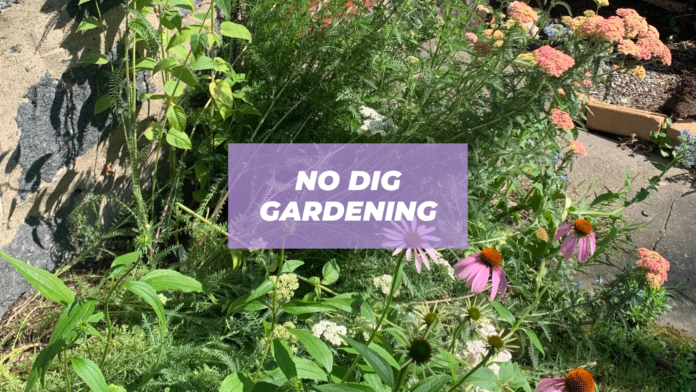
Ultimate Guide to No Dig Gardening

how to start a no dig garden

No dig gardening is the lazy gardening method that is better for your back (no more weeding!) and for your plants. Learn how to start a no dig garden and watch your plants thrive!

Growing up, gardening always seemed like such a chore.

Every spring, my dad would grumble about turning over the garden–which was an all-day event of backbreaking work. Back then, the theory was “turning over” garden, or turning over the soil so that deeper layers get worked to the top with a shovel, was an essential step at the start of the growing season.

Now that I have my own garden and have learned about the benefits of no dig gardening, I want to go back in time and shake my dad out of his misery. You don’t have to live like this!

Once you witness firsthand the benefits of no dig gardening (for you and your plants), you’ll never turn back.

Hi, I’m Leslie!

Hi, I’m Leslie (she/her)! I hope you find the inspiration to start your own no dig garden on the blog today!

My name is Leslie, and I’m the founder of PunkMed! On my blog, I and my team share my info, experiences, and recommendations in the area of sustainability, urban homesteading, and gardening. Our goal is to make it less overwhelming for you to live a fun and sustainable life!

I am proud to say that I’ve been practicing no dig gardening for almost 10 years now, and I’m so excited to share my step-by-step process for starting a no till garden today on the blog!

Let’s get into it!

This post is all about no dig gardening.

What is No Dig Gardening?

No dig gardening offers an easier method to boosting soil health, and therefore the health of your plants.

Tilling, or “turning over” of the home garden, was thought to be beneficial because it introduces oxygen to the microbes in the soil. Indeed, soil microbes love the infusion of oxygen, and there is an observable frenzy of microbial life that does benefit your plants–at first.

Unfortunately, the overzealous microbes cannot sustain the rate of metabolism and the soil is depleted over time. In addition, weed seeds that were buried deep within the earth can now grow with the exposure to air and sunlight.

On the other hand, no dig gardening feeds the soil from the top down without disturbing the delicate balance of microbial life underneath.

With no dig gardening, you will feed the soil through layers of nutritious material, like compost, that will break down over time and feed your plants at the same rate nature does.

Think of your garden as mimicking the forest floor, where the trees and other plants are fed from the decomposition of fallen leaves slowly over time. These plants thrive without the intervention of humans, and so can your garden!

Benefits of No Dig Gardening

No dig gardening, also known as no-till or lasagna gardening, is an approach to gardening that minimizes soil disturbance. There are many benefits of practicing no dig gardening:

  1. Soil Health: No dig gardening preserves the soil structure and encourages the development of healthy soil ecosystems. By not disturbing the soil, you allow beneficial organisms like earthworms, fungi, and bacteria to live in balance, which in turn improves soil fertility and structure.
  2. Weed Suppression: No dig gardening suppresses weed growth by layering organic materials like mulch, compost, and cardboard on top of the soil, which blocks weed seeds from essential oxygen and sunlight. This reduces the need for manual weeding and minimizes the spread of weed seeds.
  3. Moisture Retention: The layering of organic materials helps to retain moisture in the soil, reducing the need for frequent watering. This is especially beneficial in arid or drought-prone regions.
  4. Nutrient Retention: By not disturbing the soil structure, nutrients are retained within the soil instead of being leached away. This ensures that plants have access to essential nutrients for healthy growth.
  5. Reduced Soil Compaction: Traditional tilling can lead to soil compaction, which restricts root growth and water infiltration. No dig gardening avoids this problem, allowing roots to penetrate the soil more easily and deeply, improving overall plant health.
  6. Time and Labor Saving: No dig gardening requires less time and effort compared to traditional gardening methods. There’s no need for tilling, which can be labor-intensive, and there’s generally less of a need for weeding throughout the growing season.
  7. Environmental Benefits: By minimizing soil disturbance, no dig gardening reduces the carbon footprint associated with gardening activities. It also promotes sustainable gardening practices by emphasizing the use of organic materials and reducing reliance on chemical fertilizers and pesticides.

How to Start a No Dig Garden

Step #1 Pick a Location

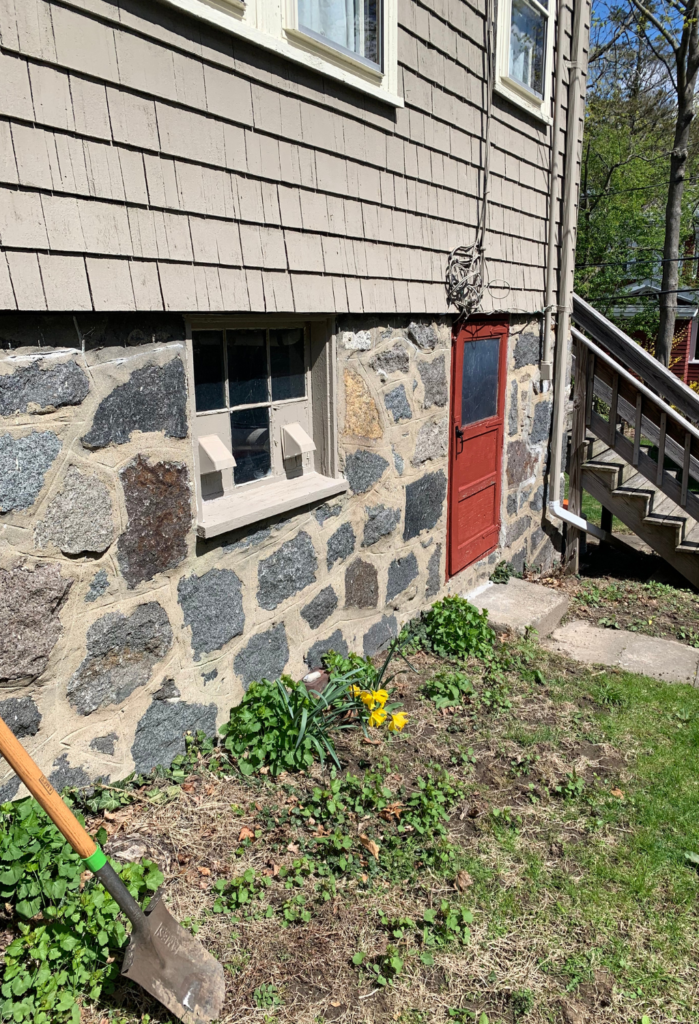
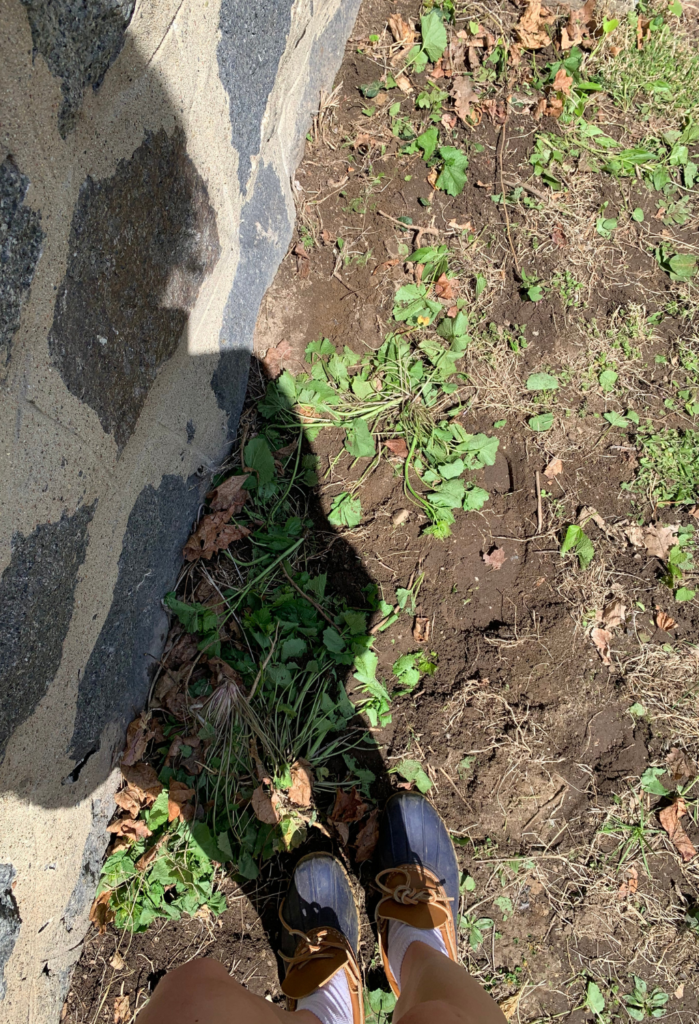
I chose this southwest facing side of my house for a new, no till flower bed. I need to mow down these weeds first! (And move the daffodils.)

First, you’ll need to pick a spot for your new no dig garden. The ideal location will be dependent upon what you are growing and how much sun each plant requires. The general rule of thumb is that vegetable gardens need need full sun, which is around 6 to 8 hours a day.

Don’t worry about any existing vegetation in your selected location. In the coming steps, we will stamp or mow this down!

A no dig garden can be placed almost anywhere, including a meadow, lawn, or weedy area. You can also apply the principles of no dig gardening to raised beds or container gardens.


Step #2 Fertilize and Add Soil Amendments

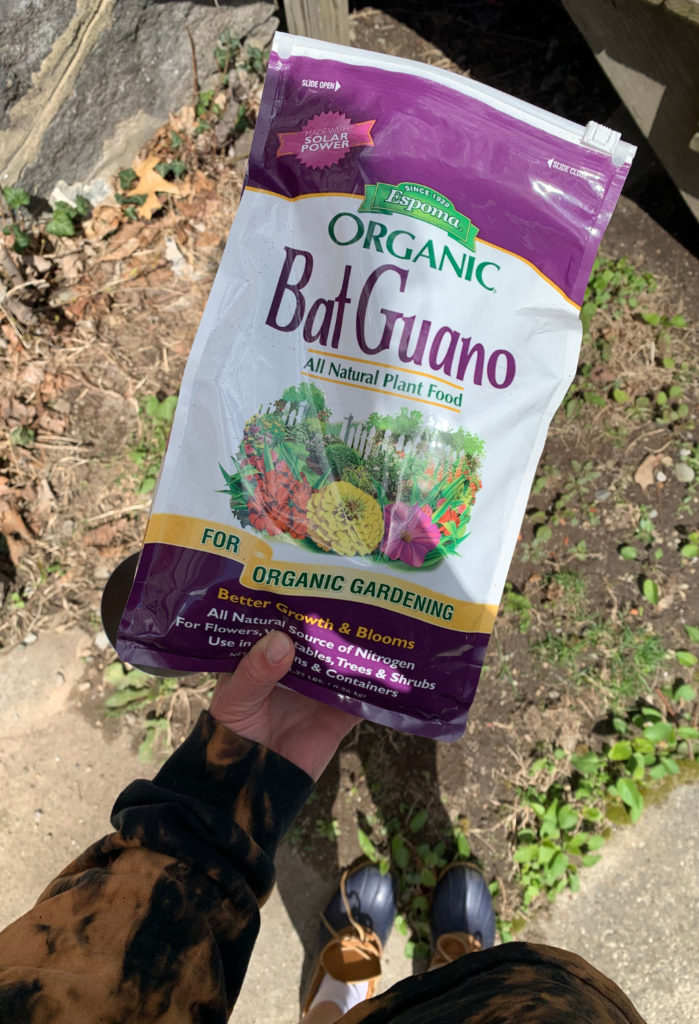
I chose bat guano for my fertilizer. This bat guano is 10% nitrogen, so I spread 3 cups for every 100 square feet of my new no till garden.

Next, fertilize the selected area for your no dig garden. You could also add other soil amendments (calcium, etc.) as needed at this stage, depending on the needs of your soil. Obtain a soil test to assess the quality of your soil and help you determine which fertilizer and soil amendments to choose.

There are many types of fertilizers. Any complete fertilizer that contains nitrogen, phosphorus, and potassium (often called “NPK”) will work.

Check the NPK values on your chosen fertilizer, often prominently displayed as three digits on the front of the packaging. For example, a 4-4-4 fertilizer contains 4% nitrogen, 4% phosphorus, and 4% potassium.

Here I added bat guano as a fertilizer because it’s high in nitrogen, but you can use an organic, all-purpose fertilizer.

Down To Earth All Natural Fertilizers Organic Bat Guano Mix 7-3-1, 2 lb

Fertilize the area using the following formula: for every 100 square feet of planted area, spread 6 cups of any fertilizer that contains 5 percent nitrogen. Adjust the formula for your fertilizer’s specific nitrogen value.


Step #3 Cut, Mow or Stamp Down Vegetation

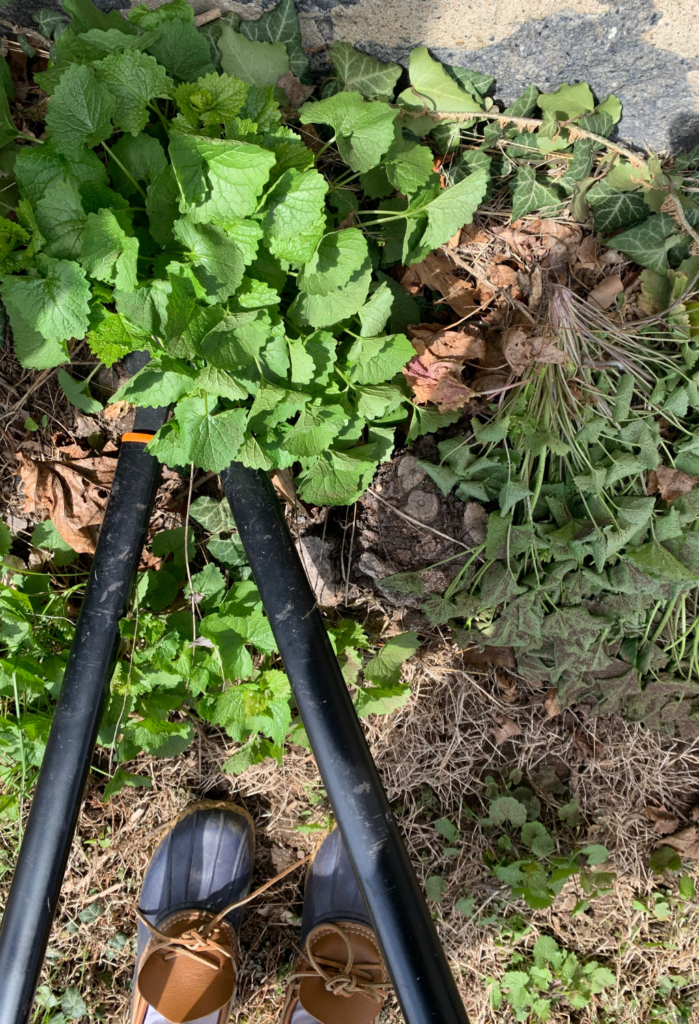
Cutting bigger weeds.

Next, you will need to create level ground for planting your new no dig garden.

Cut, mow, or simply stomp down any existing vegetation to make an even surface as close to the earth as possible.

Often a variety of methods works best. I cut down larger weeds and vines with a heavy branch cutter, stomp down the remaining plants, and mow for a closer shave. A power mow is not necessary, but the clippings do jumpstart the decomposition process.

Leave all the plant trimmings where they are! They will become part of the milieu that feeds your garden as they decompose.


Step #4 Lay Down Paper

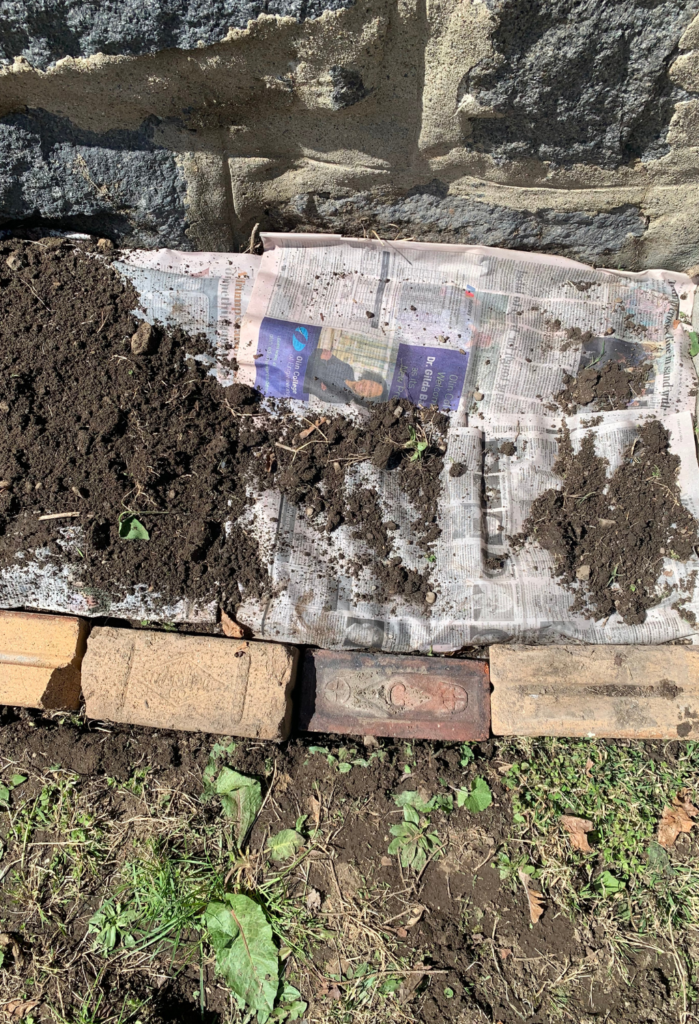
I placed a layer newspaper down (4 sheets thick) to kill the weeds underneath.

So far, you have cut down the existing vegetation in your chosen location, but you have not killed it. The roots of nasty weed plants remain alive and ready to put out new shoots and leaves.

To prevent this, place a layer of paper down over your new garden plot. This will starve the roots of necessary sunlight, and they’ll die within a few days.

Newspaper works well for this task, if you happen to have any laying around. (If not, ask your neighbors, or visit a local recycling center!)

Four layers of newspaper should do the trick, and make sure the sheets are overlapping so weeds underneath are completely smothered. Make sure they

If you can’t find any newspaper, you can use a single layer of cardboard or landscape barrier paper.

If you are transplanting established plants, cut X’s in the newpaper layer with a knife, shovel, or other sharp tool. This is where you will place the transplants later, tucking their roots underneath the newspaper.’

Step #5 Water

Grab your hose and wet the newspaper or cardboard layer to weigh it down and kickstart the decomposition process.

If you are covering a large area, it will be easier to layer down paper and water in sections, so to avoid stepping on areas you have already covered and jostling things around so you don’t have 100% coverage.


Step #6 Add Compost or Other Mulch Layer

Next, depending on what you are planting in your new no dig garden, you will need to add a compost or other mulch layer.

Mulch is a general term that refers to materials that act as ground cover to protect your plants’ roots from the elements. There are many mulch options, including:

  • Compost
  • Wood chips
  • Straw
  • Leaves
  • Grass clippings
  • Sawdust
  • Seaweed

The mulch layer serves multiple purposes. First, the mulch layer will weigh your layer of paper down so it doesn’t get blown away by the wind.

Second, it will feed your plants essential nutrients as the organic materials continue to decompose.

For the ultimate mulching recipe, learn more about my guide to sheet mulching.

No Dig Garden Compost

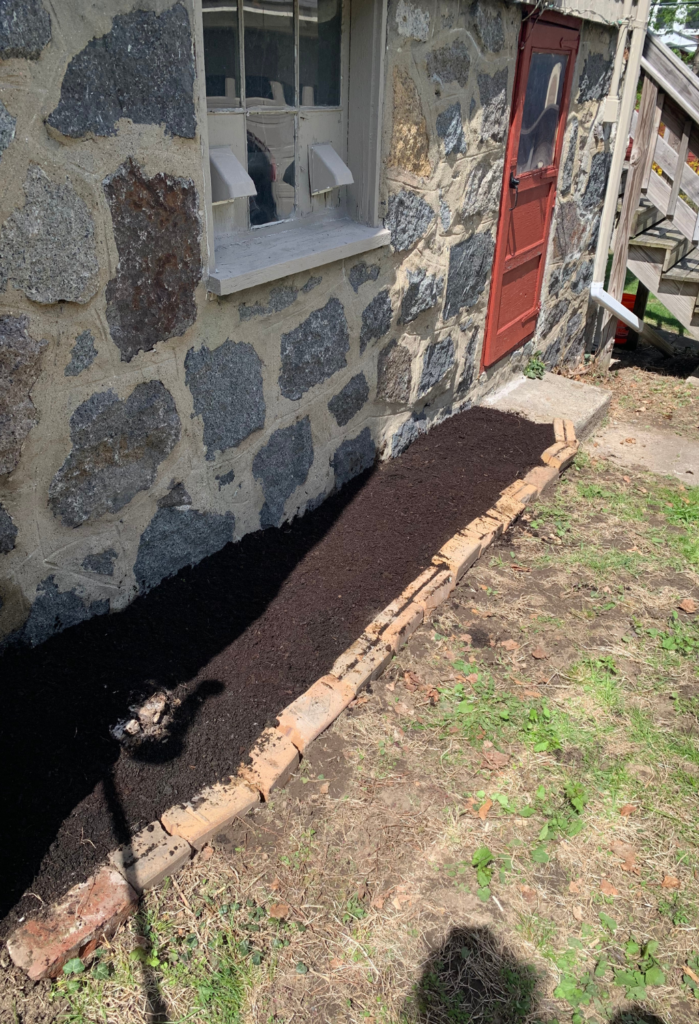
Importantly, if you are planting seeds or small transplants you will need a layer of compost to act as your growing medium on top of previous layers. You’ll need a layer of compost thick enough to plant in (about 3″ deep).

Coast of Maine Quoddy Blend Lobster and Crab Organic Compost Plant Potting Soil Blend Bag for Container Gardens and Flower Pots, 1 Cubic Foot

If you’re not already home composting, I recommend using my favorite Coast of Maine Compost.

Trees, shrubs, and established plants do well with an additional layer of a heartier mulch. One of my favorite mulches is straw.


Step #7 Plant

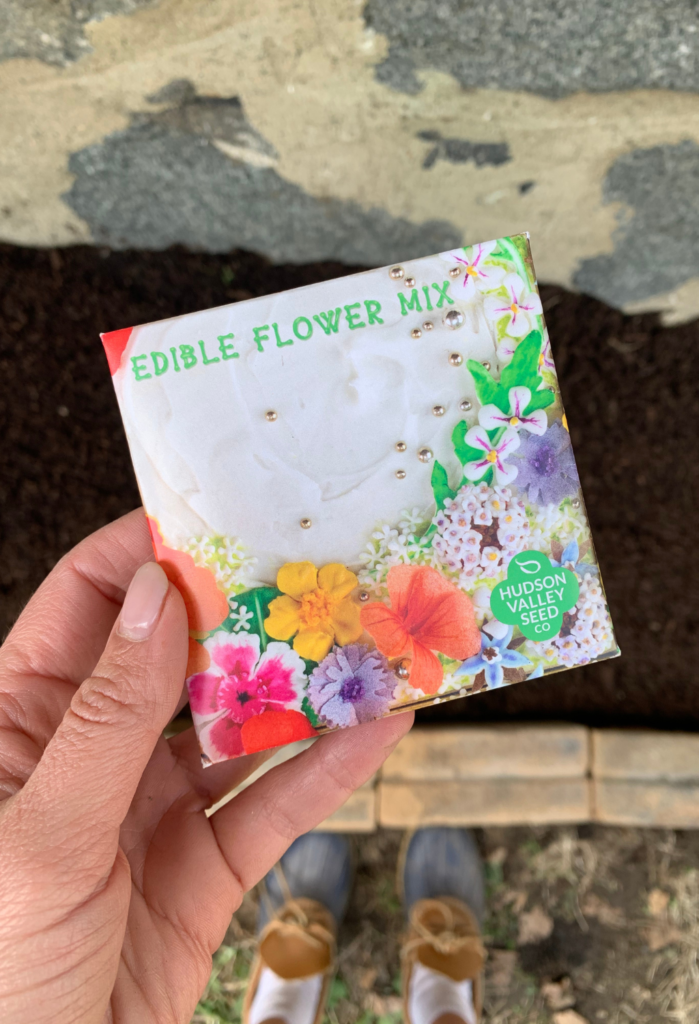
I’m starting flowers from seed in this no till garden bed!

If you’re planting seeds, bury your seeds into the compost layer at the depth specified on the seed packet.

If you’re transplanting establish plants, tuck the roots underneath the newspaper layer through the X-shaped holes you made in Step #4. Mulch as necessary.

Water, and enjoy your new no till garden!

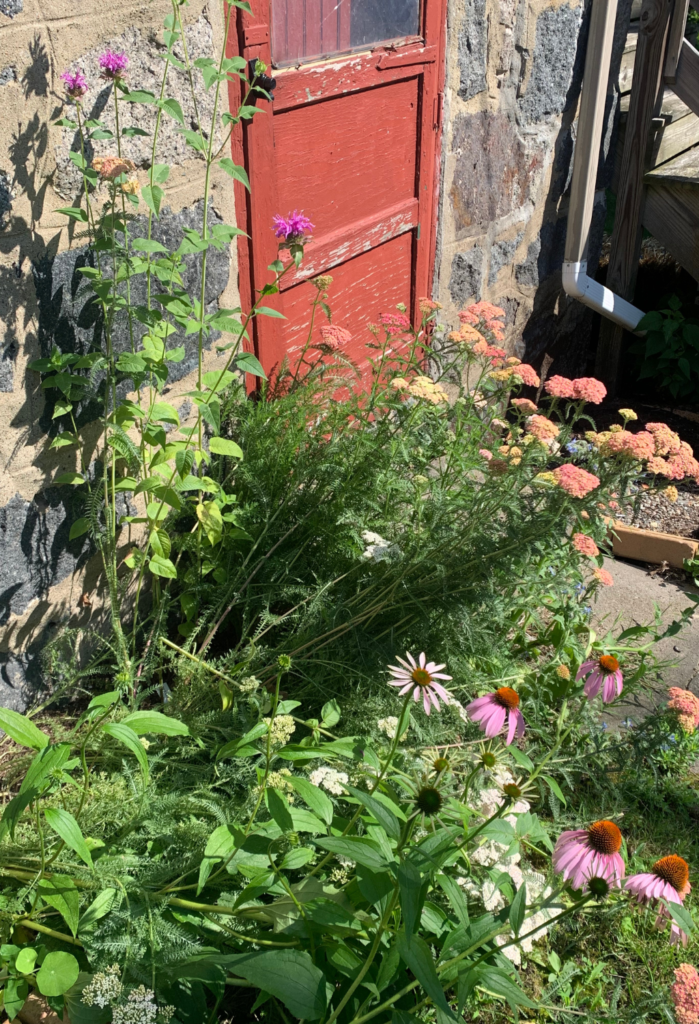
Here is my no dig flower garden during the summer!

This post was all about no dig gardening.


What to Read Next:

How to Make Homemade Compost the Right Way

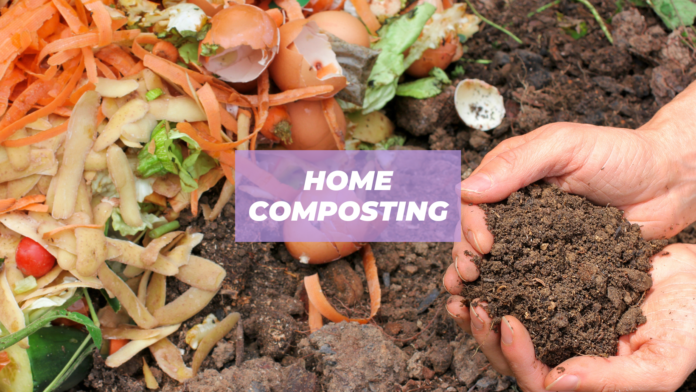
home composting

Homemade compost is the some of the most nutritious material you can feed your garden. Learn how to make homemade compost the right way with this complete guide.

Ever since I starting my home gardening journey many years ago, I have known the power of compost to boost plant productivity in the garden.

When I first started, I added a top dressing of store-bought Coast of Maine Compost to my gardens each year. It is a great product that I still recommend to beginner gardeners, and those without the resources to make their own compost.

However, it wasn’t until I started making my own homemade compost (see my exact compost recipe below!) that I began to discover the true power of composting.

Not only did I see my plants thrive more than ever before, but I began to see my home and garden as a more sustainable ecosystem. Food waste produced in my kitchen was now recycled into compost to grow more food.

There is a lot written about the science of making homemade compost, but don’t be intimidated. With a few simple steps, you too can discover the power of home composting!

This post is all about how to make homemade compost.

What is Compost?

Sometimes referred to as “black gold”, compost is essentially just the result of the decomposition of organic (AKA containing carbon) matter. Compost contains essential nutrients that boost plant growth and is a common additive to garden soil.

Finished compost is moist, crumbly and deep brown–almost black. (I’ve heard that the best finished compost will look like crumbled chocolate cake!) However, it may takes months to years to become this finished product.

There are several applications of homemade compost. Compost can be added as a yearly top dressing to established gardens. It should also be added on top of a newly established no till garden. Finally, compost is an essential ingredient in sheet mulch.

Benefits of Homemade Compost

There are many benefits to using homemade compost in the garden.

  1. Supercharged Soil Power: Compost transforms your garden soil into a nutrient-packed powerhouse, ready to fuel your plants with everything they need to thrive. Homemade compost is like nature’s own multivitamin for soil, packed with essential nutrients like nitrogen, phosphorus, and potassium, all in perfect balance.
  2. Goodbye Non-Organic Fertilizers!: Toss those synthetic fertilizers aside because homemade compost is all about natural goodness. No more worrying about harmful chemicals seeping into your veggies or wreaking havoc on the environment. With compost, it’s all about organic, eco-friendly goodness straight from your own backyard.
  3. Weed Wars, Begone!: Ever feel like you’re locked in an endless battle with weeds? Well, say goodbye to those pesky invaders because homemade compost helps suppress weed growth. That rich, fluffy compost layer acts as a natural barrier, smothering weeds and keeping your garden looking pristine. This is especially true if your using compost as a layer in sheet mulch.
  4. Water Conservation: In today’s world, water conservation is key, and homemade compost is here to help. Thanks to its sponge-like texture, compost helps your soil retain moisture like a pro, meaning you’ll spend less time watering and more time kicking back and enjoying your flourishing garden oasis.
  5. Goodbye, Garden Pests!: Nobody likes uninvited guests, especially when they’re munching on your prized plants. But fear not, because homemade compost promotes healthy soil teeming with beneficial microorganisms that act as your garden’s own personal security detail, warding off pests and diseases like superheroes of the soil.
  6. Reduce, Reuse, Recycle: By making homemade compost, you are recycling your kitchen and yard waste into usable energy for your plants. Those kitchen scraps, yard trimmings, and cardboard boxes? They’re all fair game for the compost bin, turning trash into treasure with every flip of the compost pile.
  7. Cost-Effective Brilliance: Who says going green has to break the bank? With homemade compost, you’re not only saving money on pricey fertilizers and soil conditioners, but you’re also investing in the long-term health and vitality of your garden. Talk about a win-win!

Homemade Compost Recipe

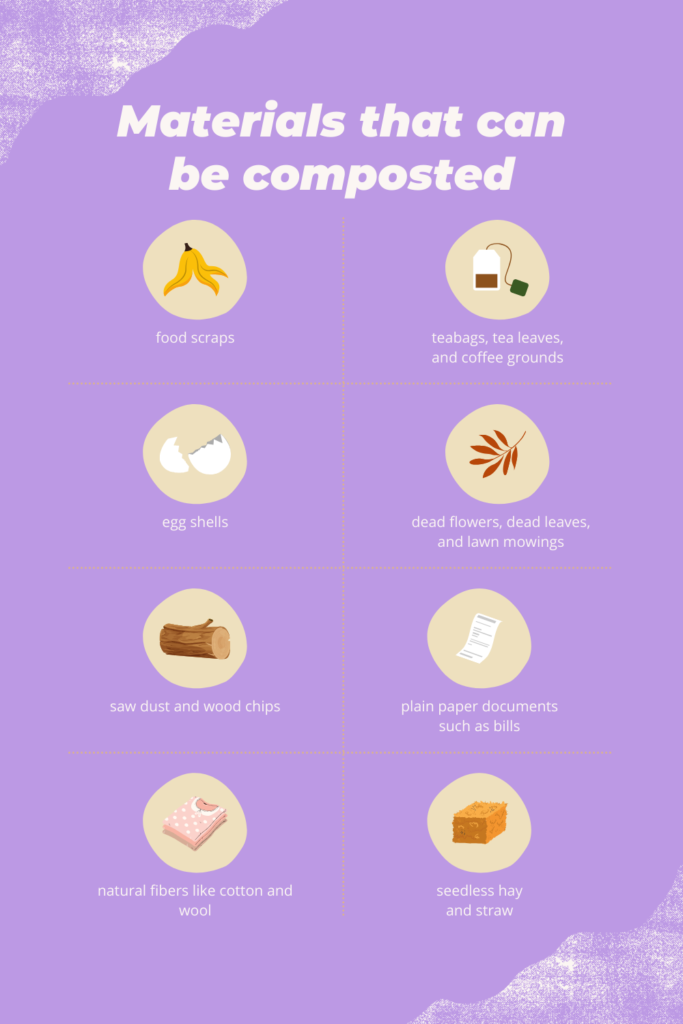
Compost should be fed a good mix of high carbon-containing materials (called “browns” because they are often dry, brown materials) and high nitrogen-containing materials (called “greens” because they are often fresh, tender materials like food scraps and lawn clippings).

The ideal ratio of high-carbon “browns” to high-nitrogen “greens” is 30:1. However, this can be approximated by mixing roughly half-and-half.

My hack for this is to add an equal layer of high-carbon materials on top whenever I add a layer of high-nitrogen materials. I usually keep a pile or leaves or straw bale around for this purpose.

High Carbon “Browns”

Straw
Seedless hay
Paper
Cardboard
Sawdust
Sticks and twigs
Wood chips
Dry leaves
Natural fibers like cotton and wool

High Nitrogen “Greens”

Food scraps
Lawn clippings
Garden weeds
Fresh leaves
Coffee grounds

What Not To Compost

Meat
Fish
Bones
Dairy products
Oils
Dog or cat poop

How to Make Compost Step-By-Step

#1 Choose a Composting Method

There are various composting methods to suit different preferences and available space. Traditional outdoor compost bins, tumblers, and vermicomposting (using worms) are popular options. Select a method that aligns with your lifestyle and available resources.

These instructions will focus on traditional compost bins.

Outdoor Composting

If you have access, it’s best to compost on dirt or lawn. Composting on earth allows for friendly worms to aid the decomposition process and add their beneficial worm castings (AKA worm poop.) 

Ideally, an outdoor compost pile should be at least about three feet (3′) high and three feet (3′) wide. A compost pile this size or larger will be able to achieve the internal temperatures required to sterilize weed seeds and kill pests–about 130-150°F.

To achieve this shape, I recommend using a compost bin. These can be makeshift–I have seen very successful outdoor compost bins made of four pallets nailed together. You could also create a circular bin by shaping chicken wire or hardware cloth into a tube and securing with wire.

You can certainly also buy an outdoor compost bin. I like this cedar wood compost bin.

Greenes Fence Cedar Wood Composter, 23.25 Cu ft / 173.92 gallons - Made in USA with North American Cedar

Compost Tumbler/Bin/Container

However, believe it or not, you can compost right on pavement, cement, your back porch–anywhere really–especially if you have chosen a compost tumbler as your composting method.

If you’re worried about pests, or don’t have a patch of land on which to compost, a sealed compost bin may be the best option for you. These containers can be set up anywhere–even on your porch.

Lifetime 60309 Outdoor Double Bin Rotating Composter, 100-Gallon, Pack of 1, Brown

#2 Collect Compostable Materials

Understanding what materials can and cannot be composted is essential. Compostable items include kitchen scraps (fruit and vegetable peels, coffee grounds, eggshells), yard waste (leaves, grass clippings), and some paper products (unbleached cardboard, newspaper). I recommend collecting kitchen scraps in a compost caddy that sits on your countertop.

Avoid composting meat, dairy, oily foods, and pet waste, as these can attract pests and slow down the composting process.

#3 Achieving the Right Balance

The ideal ratio of high-carbon to high-nitrogen materials in a compost pile is about 30:1. However, I don’t recommend getting to caught up with maintaining this ideal ratio. Instead, focus on maintaining a good mix by adding alternating layers of “browns” and “greens” to your compost.

A good rule of thumb is to put down a brown layer each time you add a green layer. Too much green material, and you’ll end up with a stinky, mucky mess that is especially inviting for maggots. I usually keep a pile of leaves or straw bale around for this purpose.

#4 Turning and Aerating:

Regularly turning the compost pile ensures proper aeration, helping microbes break down the organic matter efficiently. Use a pitchfork or compost aerator to mix the materials and introduce oxygen into the pile. A well-aerated compost pile accelerates decomposition and reduces the risk of unpleasant odors.

Turn your compost pile any time you notice any unpleasant smells or maggots. Otherwise, you can probably get away with turning your pile at least once a year.

#5 Keep Compost Moist

Compost also needs to be kept moist. The ideal moisture level is that of a damp, wrung-out sponge. During the hot summer months this means you may need to manually water your compost with a hose.

When Is Compost Ready?

Finished compost is moist, crumbly and deep brown. There may be a few twigs and rocks you can sift out, but otherwise there should be no identifiable materials left in your finished compost.

It may take anywhere from a few months to years for your compost to finish. The speed with which compost decomposes depends heavily on temperature. Compost typically finishes faster in warmer climates and in the summer months.

How to Use Compost

I recommend dressing your gardens with at least a couple of inches of compost every year at the start of the spring before you plant.

You can also use your homemade compost as an ingredient in your sheet mulch.

This post was all about homemade compost.

Hi, I’m Leslie, the founder of PunkMed

Hi, I’m Leslie (she/her!) I hope after reading this post you will be confident enough to make your own homemade compost!

Hey friend! I’m so glad that you stopped by the blog today.  I had a blast sharing my complete guide to making homemade compost.

If you’re into composting, gardening, urban homesteading, or living a more sustainable life–stick around! There are a good number of resources on my blog, and I always love to hear from my readers (that’s you!) Feel free to send me a DM on Instagram!

I so enjoyed sharing my complete guide to homemade compost. Below, I’ve shared a few other of my composting resources and guides that share my experience on other important gardening topics!

Best Drip Irrigation System | 2024 Reviews

best drip irrigation system for raised beds

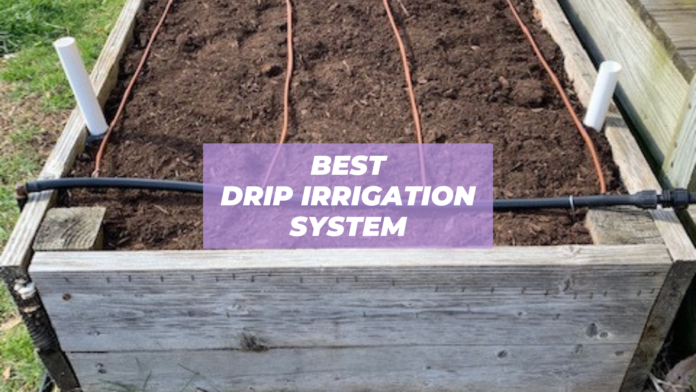
Looking for the best irrigation system of 2024? Here are the top drip irrigation kit picks for a variety of needs and all types of gardeners (including beginners!)

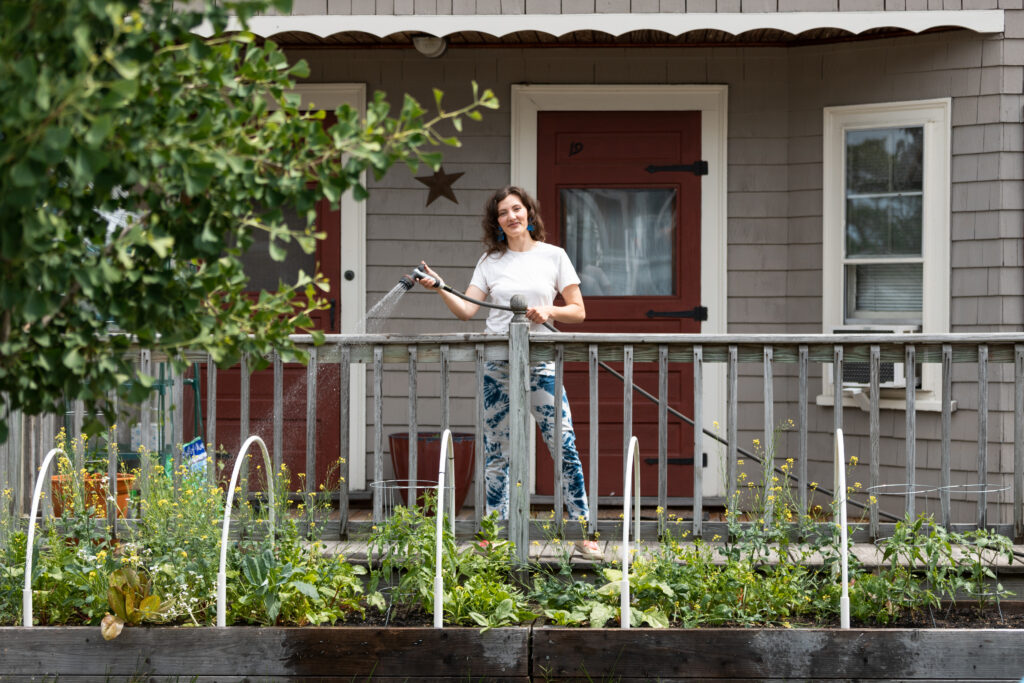
I spent many years in the beginning of my home gardening journey hand watering my raised bed gardens.

I only had two 4’x8′ raised bed gardens along the front porch of my apartment. but it would take me nearly an hour in the morning to hand water my vegetables deeply enough with the hose.

It wasn’t until I read Weedless Gardening by Lee Reich that I learned about the virtues of drip irrigation. I opted to build a DIY drip irrigation system, but there are many drip irrigation system kits that make the process easier.

We’ll get more into the benefits of drip irrigation, but suffice it to say a drip irrigation system has saved me hours of work in the garden. With a little assembly, you’ll soon have a drip irrigation system that waters your plants without lugging a hose around the yard.

This post is all about the best drip irrigation systems.

What is Drip Irrigation?

Drip irrigation brings water from the tap directly to the base of your plants via a system of tubing and emitters.

There are several ways water can be delivered to your plants. Water can be emitted from dripperline, which is basically tubing that has evenly spaced holed (“emitters”) that leak water. Dripperline is good for evenly spaced rows of plants, like in a vegetable garden.

Alternatively, water can come from individual drip emitters. This is a good solution for single trees, shrubs, and smaller plant pots or grow bags.

Finally, these two emitter types can be combined in a system that serves garden beds and individual plants.

Why Use Drip Irrigation?

There are many benefits to using drip irrigation for home gardening.

  1. Water Efficiency: Drip irrigation delivers water directly to the roots of plants, minimizing evaporation. This targeted approach can reduce water usage by up to 60% compared to traditional watering methods like sprinklers. (Think about all the water that is wasted by misfire via a sprinkler system!)
  2. Precise Watering: Drip irrigation allows for precise control over the amount of water each plant receives, ensuring optimal hydration without overwatering or underwatering.
  3. Reduced Weed Growth: Since drip irrigation delivers water directly to the root zone of plants, it helps to minimize moisture on the soil surface, which can reduce weed growth.
  4. Flexibility and Automation: Drip irrigation systems can be automated with timers or controllers, allowing for precise scheduling and reducing the need for manual watering. This is particularly useful if you plan on going on vacation!
  5. Conservation of Time and Labor: Once installed, drip irrigation systems require minimal maintenance and supervision compared to manual watering methods, saving time and effort for gardeners. You can even leave most of your system outside in the winter. (Just make sure to take in any electronics, like a timer, and more sensitive pieces of the head assembly at the tap.)
  6. Healthy Plants: Consistent and controlled moisture levels provided by drip irrigation promote healthier plant growth. Unlike traditional watering methods, water does not land on plant leaves with drip irrigation, preventing fungal growth on vulnerable foliage.
  7. Environmental Benefits: By conserving water, drip irrigation contributes to environmental sustainability and reduces the ecological footprint of your home garden.

Components of a Drip Irrigation System

You may or may not find these common components in your drip irrigation system.

Best Drip Irrigation System

Rain Bird LNDDRIPKIT Drip Irrigation Landscape/Garden Watering Kit with Drippers, Micro-Bubblers, Micro-Sprays

Rain Bird LNDDRIPKIT Drip Irrigation Landscape/Garden Watering Kit with Drippers, Micro-Bubblers, Micro-Sprays
  • Comprehensive 108-piece kit for flower beds, gardens and landscaped areas; eliminates hand watering, saves time and money
  • Ultimate watering efficiency for all plants, shrubs and trees; up to 80% water savings
  • Simple 3-step installation: connect to faucet, insert fittings into tubing, attach watering devices
  • Includes 3 differnet types of watering devices: drippers, micro-bubblers and micro sprays
  • Pressure-compensating technology ensures all plants receive same amount of water

This drip irrigation system from Rain Bird is a great all-purpose kit for watering most garden types: raised beds, in-ground beds, and even for watering individuals plantings of trees, shrubs, and landscaping.

That’s because it comes with three different types of watering devices: drip emitters, micro-bubblers and micro-sprays. (For the most targeted watering, I would recommend using the drip emitters.)

This drip irrigation kit comes with everything you need to get water from your outside faucet to your plants: including a 25 psi pressure regulator, a backflow preventer, a 50’ roll of 1/2” tubing, a 50’ roll of 1/4” tubing, 20 drip emitters, four micro-sprays, two staked micro-bubblers, an emitter installation/removal tool, and complete instructions.

Best Drip Irrigation System for Raised Beds

Rain Bird GARDENKIT Drip Irrigation Raised Bed Garden Watering Kit

Rain Bird GARDENKIT Drip Irrigation Raised Bed Garden Watering Kit
  • Convenient Drip irrigation kit has everything needed to water up to a 4’ x 8’ raised bed garden
  • Ideal for all types of raised garden beds with professional-grade components that are built to last
  • Waters at low volume near roots for healthier plants, higher yields and up to 80% water-savings
  • Pressure-compensating emitters deliver even watering throughout garden beds
  • Easy-to-install: detailed user manual features illustrated instructions with various system layouts

This drip irrigation kit is best for beginner gardeners that want to start with a smaller project like irrigating a raised bed garden.

This kit has everything you need to water a 4’x8′ raised bed garden: a tubing adaptor to help fit the tubing to your faucet, a 25 psi pressure regulator, a mesh filter, a 35’ roll of 1/4” dripperline (or emitter tubing), a 25’ roll of 1/4” distribution tubing, and a detailed user manual that makes installation easy.

I especially love dripperline for watering raised beds, as it’s easy to organize in rows and doesn’t clog.

Best Drip Irrigation System with Timer

Sale
Rain Bird 1ZEHTMR Professional Grade Electronic Digital Hose End Timer/Controller, One Zone/Station, Battery Operated
  • Robust professional grade digital hose-end timer for use with hose-end sprinklers, Drip irrigation and soaker hose
  • Simple-to-set automatic programming, 7-day scheduling and sophisticated functions provide worry-free watering convenience
  • Extra-large dial and readout screen provide easy set-up and review of watering schedules
  • One-touch override buttons for “Cancel Watering” (doubles as up to 96-hour rain delay) and “Water Now” (manual watering)
  • Conveniently displays program status such as next scheduled water cycle, and time remaining on current cycle

Unfortunately, neither of my favorite drip irrigation systems come with a timer. Both recommend that you buy the Rain Bird 1ZEHTMR Hose-End Timer (sold separately, of course.)

This timer is easy and intuitive to use, proving a maximum run time of 6-hours with up to two starts times per day.

Sale
DIG BO9D – Battery Powered Digital Hose End Irrigation Watering Timer Clamshell Single Station
  • 3/4″ FHT inlet and MHT outlet
  • Easy programming using six buttons and large LCD display
  • Watering duration from 1 minute to 12 hours 59 minutes in 1 minute intervals

However, I personally opted for the DIG Outlet Hose End Programmable Timer. It has a longer run time of 12 hours and 59 minutes and up to four start times per day.

Plus, its protective cover protect the display from the elements. (Several customers noted the hot sun can damage the Rain Bird 1ZEHTMR Hose-End Timer LCD display.)

Hi, I’m Leslie, the founder of PunkMed

Hi, I’m Leslie (she/her!) I hope after reading this blog you’ll be able to skip hand watering in favor of drip irrigation. Even though it can be fun. 🙂

Hey friend! I’m so glad that you stopped by the blog today.  I had a blast sharing my top picks for drip irrigation systems.

If you’re into vegetable gardening, urban homesteading, or living a more sustainable life–stick around! There are a good number of resources on my blog, and I always love to hear from my readers (that’s you!) Feel free to send me a DM on Instagram!

This post was all about the best drip irrigation systems.


I so enjoyed sharing my favorite drip irrigation systems. Below, I’ve shared a few other gardening guides that share my experience on other important gardening topics!

Raised Bed Garden DIY | Build Your Own in an Afternoon

diy raised bed garden

Looking for a simple raised bed garden DIY project? With a few materials and a drill, you can make your own customizable raised bed garden in an afternoon.

Building a raised bed garden may seem intimidating, but I promise you it shouldn’t be. Even if you’ve never built anything from scratch, I promise you can handle this raised bed garden DIY project!

Yes, it requires a trip to the hardware store for some lumber–but don’t let that stop you. I barely knew what “two by four” meant before I built this raised bed garden. (FYI, it refers to a piece of wood that is two inches thick and four inches wide.)

That’s why I describe this raised bed garden DIY as a “leveled-up” beginner’s project. Basically, this is a good project for you if you’re ready to graduate from plants pots or other smaller container gardens, or you just want to fully customize your raised beds.

What is a Raised Bed Garden?

As the name suggests, a raised bed garden is simply a garden that has been raised off the ground. (As opposed to a traditional garden bed sown right into the earth.)

Raised bed gardens can be built on top of the earth, as this one is. I recommend this approach if you have a yard or other piece of land you can build on. If you don’t have access to a patch of soil, check out some other ideas for container gardening on a porch, stoop, or balcony, etc.

This raised bed garden is essentially a bottomless container for soil. That way, worms and other beneficial insects and microorganisms can make their way up into your raised bed and boost your plants’ growth.

Why Build a Raised Bed Garden?

Raised bed gardens are great for several reasons:

  1. Raised beds often grow healthier plants and higher yield. The fluffy, rich soil imported into a raised bed will help your plants thrive.
  2. Raised beds offer a solution for poor and/or contaminated soils. Soil in urban areas and other settings can be contaminated with lead, gasoline, and other runoff from traffic and industry. Building a raised bed garden allows you to fill that garden with uncontaminated soil, like this raised bed mix.
  3. Raised beds are ergonomic. Because raised beds are raised nearly a foot (or more) off the ground, they can offer easier access to your plants without the back strain. This means easier weeding–yay!
  4. Raised bed are warmer and allow you to start plants earlier. The soil is raised beds warms faster than the ground, giving you a head start in the spring.
  5. Raised beds have good drainage. Water drains from raised beds quicker than compacted ground soil.
  6. Raised beds offer protection from creatures (and humans!) Raised bed gardens give your plants a stage, protecting them from dogs, children, and other animals. I have found that rabbits do not bother hopping into my raised bed gardens, despite the tasty treats that await them there! They are happy to munch on my neighbor’s ground-level garden bed.

Raised Bed Garden DIY Tips

Before we get into the step-by-step instructions for building your own raised bed garden, here are a few of my top tips!

  1. Place your raised bed garden in an area where it can get six to eight hours of full sunlight.
  2. Allow access to your raised garden bed from all sides. Allow space for pathways between multiple garden beds.
  3. Don’t build your garden bed wider than four feet. This allows you to access all the plants in your garden.
  4. Enlist a friend or two to help you. This DIY raised bed garden may be simple to build, but it is helpful to have a few extra helping hands to put it together.
  5. Make sure your car can fit the lumber required before you make a trip to the hardware store. My Nissan Altima sedan could fit the longest wooden boards needed for this project (8 feet), but it’s worth double-checking with your particular car (especially if you are customizing the size of your garden bed to be longer than these specific plans!)
  6. Consider skipping the pressure-treated lumber. There is some controversy as to whether pressure treated lumber is safe to use near plants grown for food. I recommend opting for untreated cedar or pine.

This post is all about raised bed garden DIY plans.

DIY Raised Bed Garden Materials

  • Patch of lawn or dirt that get a minimum of 6 hours of sunlight per day
  • Drill
  • Drill bit for #14 screws
  • Shovel
  • (6) 2” X 8” board, eight feet long. Cut two of these boards in half for the short side of the raised bed.
  • (1) 4”X 4”, six feet long. Cut into four equal parts, 18” each. These are the corner posts of your garden. The 2” X 8” boards will be screwed to the posts for easy assembly.
  • 3½“ #14 wood screws

DIY Raised Bed Garden Plans

  1. Start with two of the 2” x 8” boards that were cut in half (these should be 4’ long) for the short side of the garden. Drill two guide holes on each end of each board where they will be screwed to the corner post.
  2. Line the boards up so they are flush with the top and side of a corner post.
  3. Screw the boards to the corner post. The corner posts should be a couple inches longer than the two plank boards on one end. This is good. Those corner posts will be going into the ground to keep your garden in place.
  4. Drill the other side of the planks to another corner post.
  5. Repeat the process with the other two side planks and corner posts. You should have the two short ends of the garden now with the four corner posts attached.
  6. Drill two guide holes on either end of the 8-foot long planks.
  7. Line two of the 8-foot long boards so they are flush to the corner post of one of the sides. It is easiest to do this with the legs of the corner posts sticking up in the air.
  8. Screw the long boards to the corner posts.
  9. Repeat the process with the other two long boards. Now you should have an upside-down garden box!
  10. Right the garden box and use the legs of the corner posts to mark where they will go in the ground. Note here that it is find to place your garden over pre-existing lawn. No need to dig up the grass or turnover the dirt. This will all be killed by the weight of the soil you’re about the throw on it. Plus, all the decaying organic matter will act as compost to your plants growing above.
  11. Dig a few inches into the soil to make room for the four legs of your garden box. You may need to loosen up the dirt beforehand.
  12. Place your garden box into the holes, making sure your planks are reasonably flush to the ground. You can use a level here. It may take a few attempts and re-digging to get this right. It doesn’t have to be perfect; it just needs to hold soil!
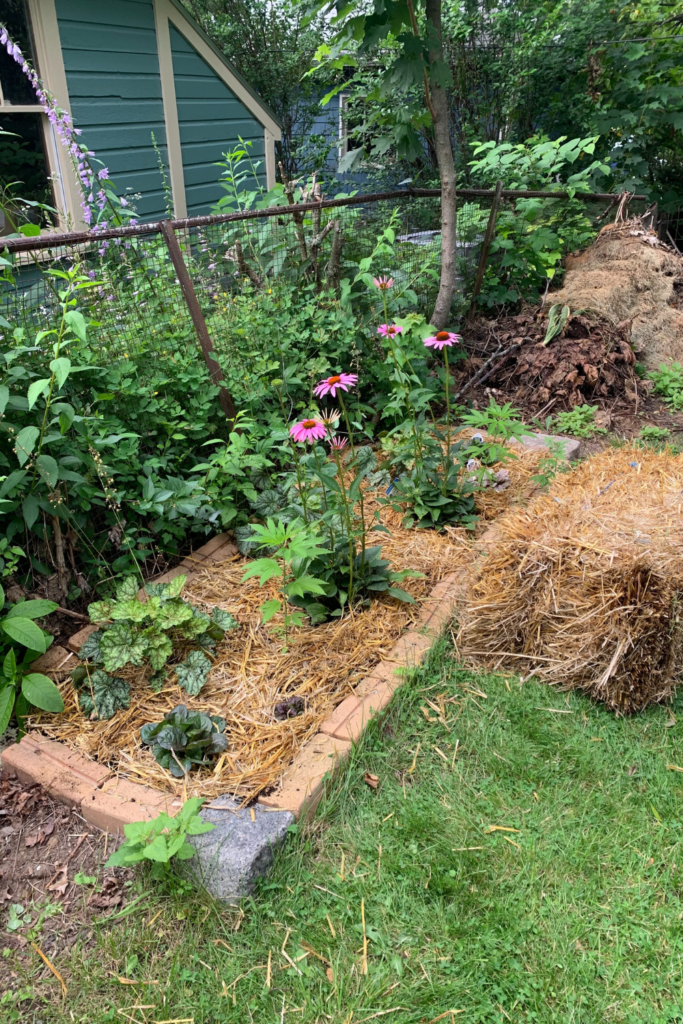
  13. Fill your garden box with the highest quality, organic soil you can find. I like Coast of Maine Organic Raised Bed Mix for this purpose. Fair warning, this will be expensive, but in subsequent growing seasons you should be able to simply supplement your existing soil with some compost and replant. In other words, your initial investment will pay off for years. Fill the box to the top, as it will settle after watering. Reserve some soil to cover your seeds.
  14. I do not subscribe to the notion of neat, little garden rows organized by species. Instead, we encourage survival of the fittest and throw a mix of seeds all over the garden. The result is a beautiful, tangled burst of green that you thin out by eating over the course of the season. See below for the exact seeds I use in my raised bed gardens. The plants in this mix will reach maturity at different times so you will have a harvest throughout the spring, and potentially even into the winter. Grab your seed packets and spread evenly over the soil. Do not premix the seeds—spread them out one by one!
  15. Cover your seeds with ¼” or less of reserved soil.   
  16. Water gently, with your hose on the lowest sprinkle setting.
  17. Keep your seeds moist until the seeds germinate, then begin daily, deep watering.
  18. Enjoy the fruits of your labor! Read more about vegetable garden ideas while you wait for your plants to grow!

Hi, I’m Leslie, the founder of PunkMed

Hey friend! I’m so glad that you stopped by today.  I had a blast sharing my step-by-step instructions to build your own DIY raised garden bed.

If you’re into vegetable gardening, urban homesteading, or living a more sustainable life–stick around! There are a good number of resources on my blog, and I always love to hear from my readers (that’s you!) Feel free to send me a DM on Instagram!

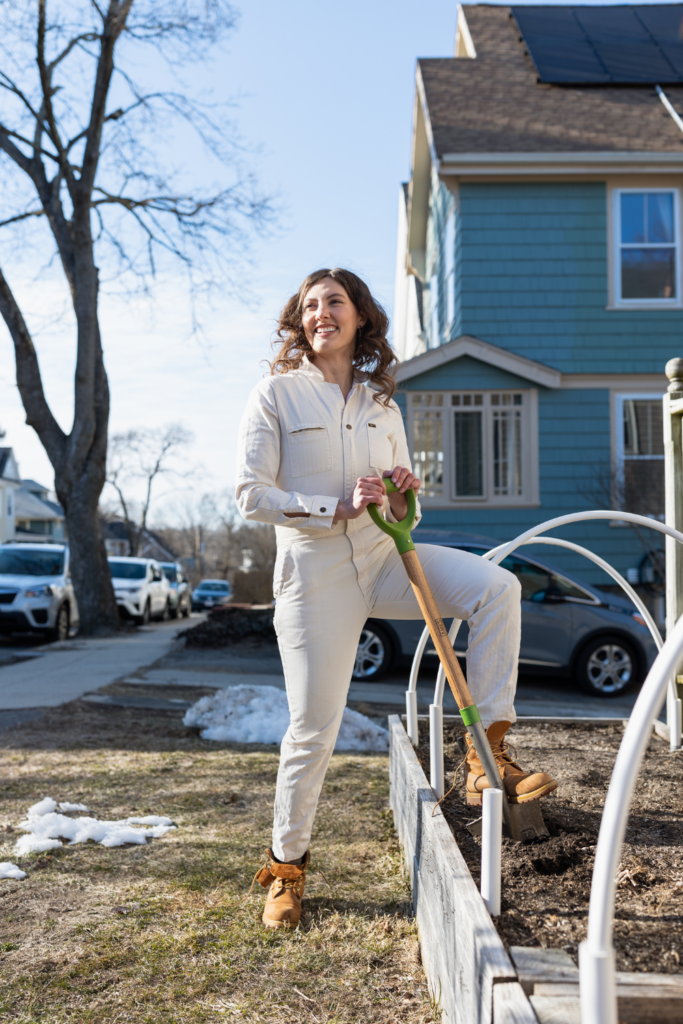
Hi, I’m Leslie! I hope you were inspired to build your own raised bed garden on the blog today! Here I am with my raised beds.

This post was all about raised bed garden DIY plans.


What to Read Next

I so enjoyed sharing my guide on how to make a raised bed garden. Below, I’ve shared a few other gardening guides that share my experience on other important gardening topics!

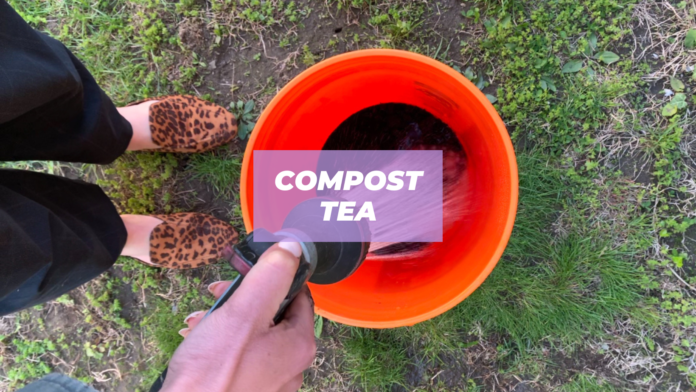
How to Make Compost Tea the Super Simple Way

fertilizer tea

Compost tea is a nutritious brew that helps your garden thrive. Make compost tea the easy way with materials you may already have on hand.

There are a few garden projects that are so simple that I recommend them for every gardener–even beginners. Making compost tea (also called fertilizer tea) is one of those projects. It’s so simple and so rewarding–you really can’t mess it up!

Beginner and advanced gardeners alike will see the benefit of adding compost tea to your gardens.

I’ve been making fertilizer tea every spring for years now, and I’m always impressed with the boost in growth and productivity a feeding of compost tea provides to my gardens.

Hi, I’m Leslie!

Hi, I’m Leslie (she/her)! I hope you make your own compost tea this year!

My name is Leslie, and I’m the founder of PunkMed! On my blog, I and my team share my info, experiences, and recommendations in the areas of gardening, urban homesteading, and eco-friendly living. Our goal is to make it less overwhelming for you to live a fun and sustainable life!

In today’s post, I’m sharing my steps making fertilizer tea. These ideas come from my years of experience making compost tea using this super simple recipe!

Let’s get into it!

This post is all about making compost tea.

What is Compost Tea?

Compost tea is a nutritious brew for your plants made from water and your choice of organic material in various stages of decomposition.

Left at least overnight to “steep,” the ingredients in this brew further decompose, unlocking the nutrients within and making those nutrients available to your plants.

Benefits of Compost Tea

There are several benefits to using compost tea in your garden:

  • Compost tea can replace chemical fertilizers. Fertilizer tea can act as a healthy, gentler replacement for chemical fertilizers in the garden.
  • Compost tea delivers critical nutrients to plants. Fertilizer tea is a concentrated, but still gentle nutrient delivery system that can be fed to plants during critical times during their lifecycle.
  • Compost tea contributes to the sustainability of your garden. Oftentimes, you can make compost tea with waste materials that may already have on hand. Furthermore, solid leftover from your batch of fertilizer tea can be added to sheet mulch or thrown in the compost pile.

Where to Use Compost Tea

Compost tea is a relatively gentle fertilizer, but different plants have different fertilizer needs. Be sure to research the needs of the individual plants before you go too wild with the fertilizer tea.

That being said, it’s pretty safe to use compost tea about once or twice in any garden bed or container garden with good drainage.

Do not use fertilizer tea in self-watering containers, as they do not drain and fertilizer can build up to harmful levels.

When to Use Compost Tea

There are two critical times during the plant lifecycle that I always recommend applying compost tea.

First, if you are starting seeds, I recommend feeding your seedlings as soon as they put out their first set of true leaves (i.e. the identifiable leaves of the adult plant, not the first set of baby cotyledon leaves.)

Second, I recommend applying fertilizer tea to plants that have been transplanted. This can mean seedlings from the nursery that are going into your garden beds, or the perennial that you’re moving to from one spot to another in your backyard. Adding compost tea at this critical time eases the stress of the move and supports the plant during the transition.

Compost Tea Materials

ePackageSupply, 5 Gallon Bucket with Gamma Seal Screw on Airtight Lid, Food Grade Storage, Premium HPDE Plastic, BPA Free, Durable 90 Mil All Purpose Pail, Made in USA (3 Count), Blue

How to Make Compost Tea

Steps to make fertilizer tea:

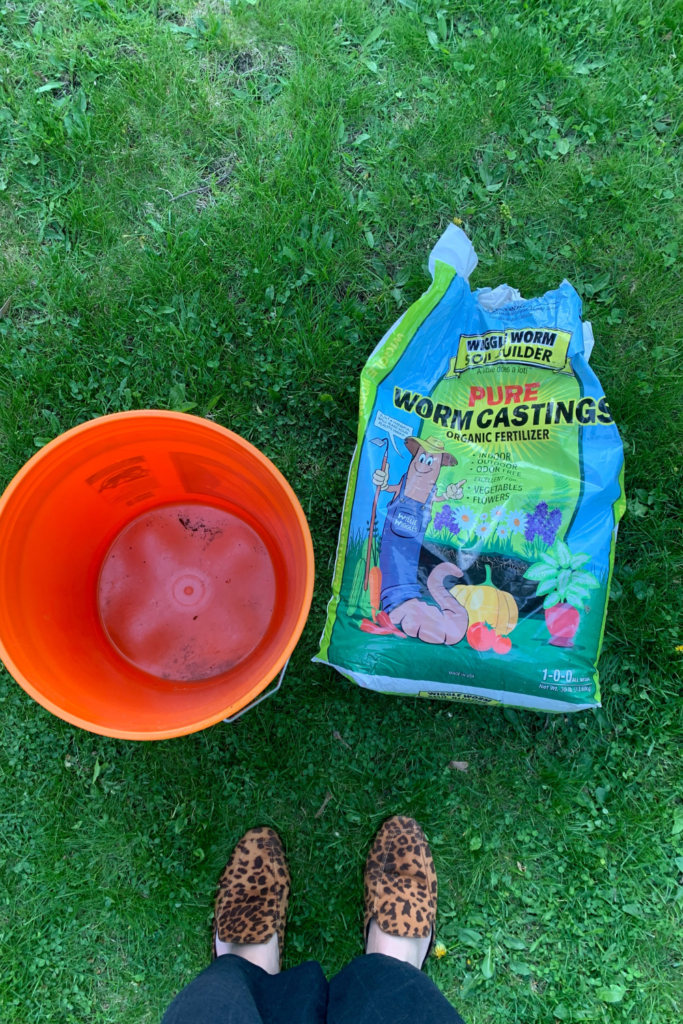
#1 Gather your materials. You’ll need one 5 gallon bucket and your chosen organic material (compost, worm castings, dry fertilizer, aged manure, etc.)

#2 Add your organic material to the bucket.

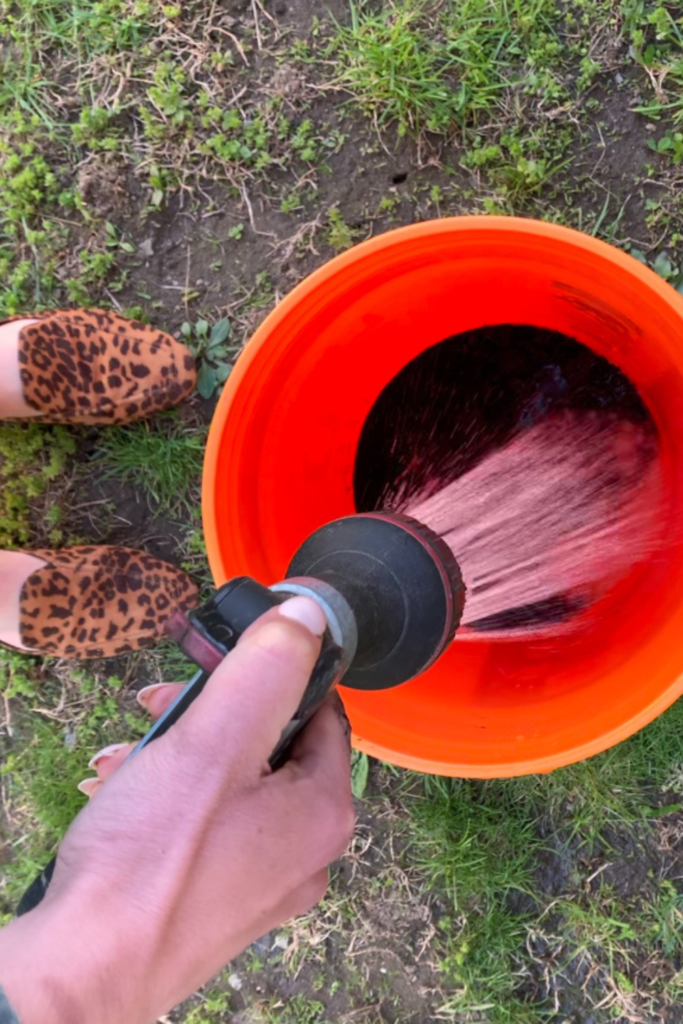
#3 Fill the bucket with water.

#4 Cover with lid to keep out bugs.

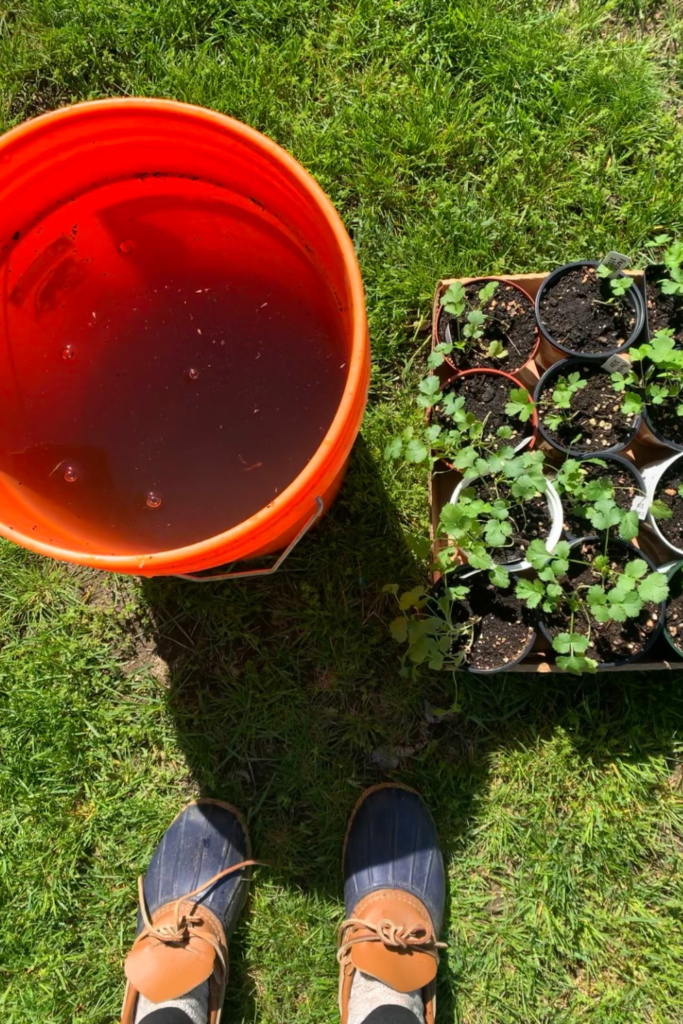
#5 Let it steep for about 24-48 hours, or at least overnight. I let mine steep in the garage for extra protection from curious creatures.

#6 Water your plants with this nutritious liquid!

Bonus: Any solids leftover from your batch of fertilizer tea can be added to sheet mulch or thrown in the compost pile.

This post was all about how to make compost tea.


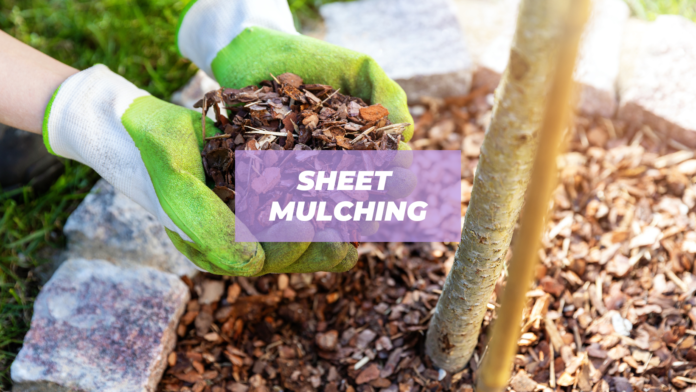
The Ultimate Guide to Sheet Mulching

sheet mulching

Looking to nourish your garden with sheet mulching? Learn all about this mulching technique that is guaranteed to boost your veggies, fruits, and flowers for seasons to come.

Listen, I love composting as much as the next urban homesteader (in fact, I wrote complete guides on home composting and apartment composting) but I recognize its limitations.

What are those, you say?! First, it’s difficult for a home composting operation to produce enough compost to supply multiple garden beds. Second, hauling the finished compost from the pile to the bed is a lot of work!

What if I told you there is an easier solution to providing your plants all the benefits they get from compost without the hassle? Enter: sheet mulching.

Hi, I’m Leslie!

Hi, I’m Leslie (she/her)! I hope you find the perfect compost bin for your needs on the blog today.

My name is Leslie, and I’m the founder of PunkMed! On my blog, I and my team share info, experiences, and recommendations in the area of sustainability, urban homesteading, and all things gardening. Our goal is to help you slow down and savor the small joys in life through sustainable practices (including sheet mulching!)

In today’s post, I’m sharing my steps to sheet mulching in the garden. These recommendations come from my years of experience using sheet mulching techniques to make new garden beds in my tiny apartment backyard in the city.

Honestly, my veggies and flowers have never looked healthier. I’m a firm believer in the power of sheet mulch!

Let’s get into it!

This post is all about sheet mulching.

What is Sheet Mulching?

Like many sustainable gardening practices, sheet mulching mimics the power of nature. Sheet mulching, also known as lasagna gardening or composting in place, consists layers of organic materials allowed to decompose in place. Sheet mulch feeds soil from the top down–much like the soil in a forest is naturally fed from decomposing leaves.

In its simplest form, sheet mulching consists of two elements:

  1. First, there must be a weed suppressing layer that will kill any existing vegetation and dormant weed seeds. This is usually a thick layer of newspaper or cardboard.
  2. Second, there should be about a foot of soil-building organic mulch. The exact materials in this layer will depend on the materials you have on hand and the unique needs of your soil.

Over time, these materials break down to provide your plants the benefits of decomposition: readily available nutrients, a diverse microbial community, and habitat for worms and other beneficial insects.

Benefits of Sheet Mulching

There are numerous benefits of sheet mulching:

  1. Efficiency: Sheet mulching you to cover a lot of ground. There is nothing more satisfying than admiring the swaths of freshly laid newspaper that will be your new gardens!
  2. Ease: Sheet mulching removes the need for tilling. (FYI, if you’re new here–tilling destroys soil ecology. Learn more about how to start a no till garden with a stripped-down version of sheet mulching.) By smothering vegetation with a layer of newspaper or cardboard, you’ll be amazed by how little weeding you’ll need to do throughout the growing season!
  3. Soil improvement: Sheet mulching contributes to soil fertility by providing a continuous supply of organic matter. As the mulch breaks down, it adds nutrients to the soil, enhancing its structure and fertility. This process also encourages beneficial microbial activity in the soil.
  4. Biodiversity: The plants in your garden benefit from the intact soil ecology provided by sheet mulch. The layers of decomposition become a healthy habitat for a diverse set of microbes, fungi, worms, and other beneficial organisms.
  5. Water retention: The mulch acts as a natural moisture barrier, reducing water evaporation from the soil. This helps to retain soil moisture, making it more resilient to drought conditions and reducing the need for frequent watering.
  6. Temperature regulation: Sheet mulching provides insulation to the soil, helping to regulate temperature extremes. It keeps the soil cooler in hot weather and warmer in cold weather, creating a more stable and favorable environment for plant roots.
  7. Low maintenance: Once established, sheet mulch requires minimal maintenance. It suppresses weeds, retains moisture, and provides ongoing benefits to the soil without the need for frequent interventions.

Sheet Mulch Materials

The volumes listed below cover about 100 square feet. Adjust the volumes according to your own needs.

  • Two-foot stack of newspaper (glossy pages removed) OR 200 square feet of cardboard (staples and plastic tape removed)
  • Soil amendments like lime, rock phosphate, or bonemeal (optional, dependent of the needs of your soil)
  • Bulk organic matter like stray, spoiled hay, dried leaves, yard waste, or finely ground bark (108 cubic feet)
  • Compost (6-15 cubic feet)
  • Manure (6-27 cubic feet, depending on the concentration of the manure–e.g. 6 cubic feet of steer manure is plenty)
  • Top layer of seed-free material like straw, dry leaves, wood shavings, bark, etc. (27 cubic feet)

Steps to Sheet Mulching

#1 Determine your sheet mulching site. Sheet mulch can be placed on an existing bed or used to start a new garden–even top of on existing vegetation, like a lawn.

#2 Mow down existing vegetation. If you are starting a new garden, cut, mow, or stomp down any existing vegetation to make an even surface close to the earth. Short cut grass can be left as is. Use heavy branch cutters to take down woodier plants. Clippings can be left where they are–they will contribute their nutrients to the mulch as they decompose.

#3 Add soil amendments. This step is optional, depending on the needs of your soil. Obtain a soil test to assess the quality of your soil.

#4 Add a thin layer of manure. Highly concentrated manure (like steer manure without a lot of bedding) can go on about 1/4″ thick. Pro tip: You can substitute the manure layers for other high-nitrogen material like blood meal, grass clippings, or fresh greens. Blood meal is highly concentrated an should be spread just to cover the ground. Grass clippings and fresh greens can go on about 1″ thick.

#5 Law down newspaper or cardboard. Lay down a 1/4″ thick layer of newspaper or cardboard. The paper should overlap by at least 6″ so that it completely blocks light from reaching the plants and dormant seeds below, thus suppressing weeds.

#6 Wet the paper layer. Use a hose to wet the newspaper or cardboard layer as you work. If you’re covering a large area, you’ll want to work in sections so you don’t step on the paper. This step jumpstarts the decomposition process, as microbes in the soil need moisture to work.

#7 Add another thin layer of manure. Again, this will be about 1/4″-1″ thick depending on the concentration.

#8 Lay down bulk organic matter. Add about 8-12″ of your chosen bulk organic matter, like stray, spoiled hay, dried leaves, yard waste, or finely ground bark. I personally love straw for this–is so easy to peel layers of straw from the bales!

#9 Water the bulk organic matter every few inches. You want this layer to be damp, but not wet–like a wrung out sponge. Again, the microbes in the sheet mulch love a little moisture.

#10 Add 1-2″ of compost. If you don’t have any compost, but you do have time this layer can be substituted with manure or other easily compostable material. However, if you plant to plant on top of the sheet mulch within a couple weeks you need the layer of compost to act as a seedbed (i.e. where you will plant the seeds.)

#11 Add 2″ of seed-free material. You can use straw here again, as it is seed-free–but you wouldn’t be able to use hay. For planting seeds and starts, push aside the top layer to plant in the compost below.

When to Sheet Mulch

The short answer is you can sheet mulch anytime! Many people lay down sheet mulch in the fall so it has time to decompose by planting tim ein the spring.

This post was was all about sheet mulching.


Best Compost Bins of 2024 for Eco-Friendly Gardening

best compost bins

Look for the best compost bins of 2024 to jumpstart your eco-friendly garden? These are the best compost bins for all types of living situations and experience levels.

When beginner composters come to me all stressed out with a million questions, I try to reassure them that composting is actually a pretty simple process. All organic matter eventually rots and turns into compost.

That being said, there are a few key steps to home composting and/or apartment composting.

One of the first steps is choosing your composting method. This decision is partially informed by where you’ll be composting (in your spacious backyard, on your deck, etc.), and will determine which type of compost bin is right for you and your lifestyle.

This post will cover the different types of compost bins, which compost bins work best for different lifestyles, and my favorite compost bins in each category!

P.S. This blog post focuses on outdoor compost bins. If you’re looking for a solution to collect kitchen scraps before bringing them out to your compost, read more about the best compost caddy for kitchen countertops.

Hi, I’m Leslie!

Hi, I’m Leslie (she/her)! I hope you find the perfect compost bin for your needs on the blog today.

My name is Leslie, and I’m the founder of PunkMed! On my blog, I and my team share info, experiences, and recommendations in the area of sustainability, urban homesteading, and all things gardening. Our goal is to help you slow down and savor the small joys in life through sustainable practices (including composting!)

In today’s post, I’m sharing my favorite compost bins for every type of space and lifestyle. These recommendations come from my years of experience composting in my tiny backyard in the city. I’m here to convince you that you can really compost anywhere with the right compost bin!

Let’s get into it!

This post is all about the best compost bins.

Types of Compost Bins

Open Compost Bin

As the name suggests, open air compost bins allow your compost to be exposed to the elements. Open air compost bins are usually made from wood or steel wire and therefore allow a good deal of airflow. Unfortunately, this extra exposure to the elements can also be attractive to rodents and other pests, so these systems may not be the best for city-dwellers.

However, these compost bins are super low maintenance and easy to set up! Once you’re compost bin is set up, start throwing materials on top, and occasionally give it a turn. (Learn more about home composting.)

Open air compost bins produce finished compost relatively slowly (3-12 months depending on temperatures).

Note: You can easily DIY your own open air compost bin by nailing four pallets together. Alternatively, create a circular bin by shaping chicken wire or hardware cloth into a tube and securing with wire.

Best For: Those with lots of space, access to a patch of dirt or lawn, not worried about pests.

Closed Continuous Compost Bin

Closed continuous compost bins allow you to continuously add food scraps, yard waster, and other compost materials to the top of bin, while finished compost settles to the bottom. A door of the bottom of the bin allows you to collect finished compost.

These bins also have lids, which keep rodents and pests out.

Closed continuous compost bins produced finished compost relatively slowly. Usually finished compost can be collected a few times each year.

Best For: Apartment/city dwellers that have access to land but are worried about pests.

Compost Tumbler

Compost tumblers also created compost in a closed system that keep pests out. However, these compost bins are also set to rotate on an axis with a handle. These compost bins are a little bit more hands on–you’ll need to rotate

Routinely rotating the compost bin causes a flurry of microbial activity that speeds up the composting process. Depending on temperatures, finished compost can be ready in as little as four to eight weeks.

Best For: Apartment/city dwellers that want access to finished compost relatively quickly.

Multi-Bin Composter

The multi-bin composter allows you to have several compost bins in differing stages of “doneness.” One compost bin in this multi-system may contain finished compost, while you continually add materials to the other.

The multi-bin composter allows you to have access to finished compost while still having an active pile to throw kitchen scraps and other waste.

Best For: Heavy waste producers

Best Compost Bins

Best Outdoor Compost Bin

Greenes Fence Cedar Wood Composter, 23.25 Cu ft / 173.92 gallons - Made in USA with North American Cedar

This open air compost bin from Greenes Fence may look simple, but it actually has some genius design features. First, it’s extremely easy to assemble: simply slide boards and spacers into posts for a secure frame–no tools needed!

Second, it’s a completely modular system–composters can be connected together to create a multi-bin system as your operation grows. Corner posts are routed on all four sides for easy assembly and expansion.

Finally, this compost bin is made to last in the USA with 100% chemical-free and sustainably-sourced cedar.

Material: Cedar
Dimensions: 36″L x 36″W x 31″H

Best Compost Bin With Lid

Gardener's Supply Company Demeter Metal Compost Bin | Weatherproof Powder-Coated Galvanized Steel Large Outdoor Composter | 36' W x 20' D x 32' H - Steel Blue

This galvanized steel compost bin from Gardener’s Supply Company features a locking base door and vent holes on the sides to promote air flow as your compost cooks. This genius design allows you to continually feed your compost from the top, as finished compost is collected from the bottom. When you’re ready to harvest, a metal bar keeps the base door up and out of your way.

The two-part hinged lid comes off entirely when adding materials to the bin, and keeps pests out when not in use. I love this compost bin for city dwellers and others that are worried about attracting critters (or catching flak from neighbors!)

Plus, the powder-coated galvanized steel that is weather-resistant and made for any season. 

Material: Powder-coated galvanized steel
Dimensions: 36″W x 20″L and 32″H

Best Compost Tumbler

Lifetime 60309 Double Bin Rotating Composter, 100 Gallon

Many compost tumblers on the market are simply too small to produce a meaningful amount of compost–not the case with this 100-gallon tumbler from Lifetime.

This ultra-durable high-density polyethylene tumbler features two 50-gallon tumblers to allow for continuous composting. Continue feeding one barrel while harvesting from a finished batch of compost in the other!

The ergonomic design puts the tumblers at the perfect loading height, and allows for extremely easy turning. No knobs and handles–and no more back-breaking work trying to aerate your compost pile with a pitchfork!

Material: Plastic
Dimensions: 65″L x 31″W x 43.3″H

Best Multi-Bin Composter

Greenes Fence Cedar Wood Composter, 24' W x 72' L x 31' H / 231.9 Gallons - Made in USA with North American Cedar

For those looking to scale their composting operation, or who already need a lot of compost, the multi-bin composter is the way to go.

This multi-bin system allows you to have a continuous stream of compost is varying stages doneness, so you’ll always have compost when you need it (if you plan correctly!)

This multi-bin composter is made with rustic, untreated 11/16″- thick cedar boards that simply lock into corner posts without tools for a durable, open-bottom frame.

Material: Cedar
Dimensions: 72″L x 24″W x 31″H

This post was all about the best compost bins.


The Complete Guide to Home Composting in 5 Easy Steps

home composting

Want to start composting at home but don’t know where to start? Recycle your food scraps and yard waste into nutrient-dense fuel for your garden right in your backward with this complete guide to home composting.

I view home composting as an essential urban homesteading project. I might even say that it’s one of the most essential projects after learning to grow your own food.

To me, composting closes the loop of the mini urban homestead ecosystem. The waste produced by your garden, yard, and kitchen is transformed into nutrient-dense compost that will fuel your plants’ growth in coming seasons.

Through composting, you learn that nothing is truly wasted and that energy is merely recycled. It’s really a meditation on the cycle of life.

Plus, composting fun and really simple to do! I’ve been composting in my small backyard in the city for years now, and I’m always pleasantly surprised with what my compost pile is able to produce with a relatively small amount of real estate.

There is much written about the science of composting that can be intimidating, but remember–it is the nature of organic matter to decompose. By following a few simple rules of thumb, you’ll be composting in no time!

Hi, I’m Leslie!

Hi, I’m Leslie (she/her)! I hope you find the inspiration to start your own no till garden on the blog today!

My name is Leslie, and I’m the founder of PunkMed! On my blog, I and my team share my info, experiences, and recommendations in the area of sustainability, urban homesteading, and gardening. Our goal is to make it less overwhelming for you to live a fun and sustainable life!

In today’s post, I’m sharing my steps to home composting. These ideas come from my years of experience composting in Boston, MA!

Let’s get into it!

This post is all about home composting.

What is Compost?

Sometimes referred to as “black gold” in the gardening world, compost is the result of the decomposition of organic (AKA containing carbon and a product of organisms) matter.

Finished compost is moist, crumbly and deep brown–almost black. However, it may takes months to years to become this finished product.

The Benefits of Home Composting

  1. Waste Reduction: Home composting is an effective method to divert organic waste from landfills. Organic matter, such as kitchen scraps and yard waste, makes up a significant portion of household garbage. By composting at home, individuals can contribute to reducing the overall waste burden on landfills.
  2. Soil Enrichment: Compost is a nutrient-rich organic material that enhances soil structure and fertility. When added to garden soil, compost improves water retention, aeration, and nutrient content. Plants thrive in well-amended soil, resulting in healthier and more productive gardens.
  3. Cost Savings: Composting at home eliminates the need for store-bought fertilizers and soil amendments. By recycling kitchen and yard waste, you can create your own nutrient-dense compost, saving money at the garden supply store and promoting a sustainable, cost-effective approach to soil enrichment.

Steps to Home Composting

#1 Choose a Composting Method

There are various composting methods to suit different preferences and available space. Traditional outdoor compost bins, tumblers, and vermicomposting (using worms) are popular options. Select a method that aligns with your lifestyle and available resources.

These instructions will focus on traditional compost bins.

Outdoor Composting

If you have access, it’s best to compost on dirt or lawn. Composting on earth allows for friendly worms to aid the decomposition process and add their beneficial worm castings (AKA worm poop.) 

Ideally, an outdoor compost pile should be at least about three feet (3′) high and three feet (3′) wide. A compost pile this size or larger will be able to achieve the internal temperatures required to sterilize weed seeds and kill pests.

To achieve this shape, I recommend using a compost bin. These can be makeshift–I have seen very successful outdoor compost bins made of four pallets nailed together. You could also create a circular bin by shaping chicken wire or hardware cloth into a tube and securing with wire.

You can certainly also buy an outdoor compost bin. I like this cedar wood compost bin.

Greenes Fence Cedar Wood Composter, 23.25 Cu ft / 173.92 gallons - Made in USA with North American Cedar

Compost Tumbler/Bin/Container

However, believe it or not, you can compost right on pavement, cement, your back porch–anywhere really–especially if you have chosen a compost tumbler as your composting method.

If you’re worried about pests, or don’t have a patch of land on which to compost, a sealed compost bin may be the best option for you. These containers can be set up anywhere–even on your porch.

Lifetime 60309 Outdoor Double Bin Rotating Composter, 100-Gallon, Pack of 1, Brown

#2 Collect Compostable Materials

Understanding what materials can and cannot be composted is essential. Compostable items include kitchen scraps (fruit and vegetable peels, coffee grounds, eggshells), yard waste (leaves, grass clippings), and some paper products (unbleached cardboard, newspaper). I recommend collecting kitchen scraps in a compost caddy that sits on your countertop.

Avoid composting meat, dairy, oily foods, and pet waste, as these can attract pests and slow down the composting process.

Compost Ingredients

Compost should be fed a good mix of high carbon-containing materials (called “browns” because they are often dry, brown materials) and high nitrogen-containing materials (called “greens” because they are often fresh, tender materials like food scraps and lawn clippings).

High Carbon “Browns”

Straw
Seedless hay
Paper
Cardboard
Sawdust
Sticks and twigs
Wood chips
Dry leaves

High Nitrogen “Greens”

Food scraps
Lawn clippings
Garden weeds
Fresh leaves
Coffee grounds

What Not To Compost

Meat
Fish
Bones
Dairy products
Oils
Dog or cat poop

#3 Achieving the Right Balance

The ideal ratio of high-carbon to high-nitrogen materials in a compost pile is about 50:50. However, I don’t recommend getting to caught up with maintaining this ideal ratio. Instead, focus on maintaining a good mix by adding alternating layers of “browns” and “greens” to your compost.

A good rule of thumb is to put down a brown layer each time you add a green layer. Too much green material, and you’ll end up with a stinky, mucky mess that is especially inviting for maggots.

#4 Turning and Aerating:

Regularly turning the compost pile ensures proper aeration, helping microbes break down the organic matter efficiently. Use a pitchfork or compost aerator to mix the materials and introduce oxygen into the pile. A well-aerated compost pile accelerates decomposition and reduces the risk of unpleasant odors.

Turn your compost pile any time you notice any unpleasant smells or maggots. Otherwise, you can probably get away with turning your pile at least once a year.

#5 Keep Compost Moist

Compost also needs to be kept moist. The ideal moisture level is that of a wrung-out sponge–damp but not soaking. During the hot summer months this means you may need to manually water your compost with a hose.

When Is Compost Ready?

Finished compost is moist, crumbly and deep brown. I’ve heard really good compost described as the texture of crumbled chocolate cake. (Sounds yummy!) There may be a few twigs and rocks you can sift out, but otherwise there should be no identifiable materials left in your finished compost.

It may take anywhere from a few months to years for your compost to finish. The speed with which compost decomposes depends heavily on temperature. Compost typically finishes faster in warmer climates and in the summer months.

How to Use Compost

I recommend dressing your gardens with at least a couple of inches of compost every year at the start of the spring before you plant. This layer will act as a mulch and provide essential nutrients to your plants throughout the growing season.

This post was all about home composting.