Home Blog Page 3

Beginners Guide to Apartment Composting

apartment composting

Are you tired of throwing your food scraps in the trash? This beginners guide to apartment composting covers everything you need to know to successfully start putting your food and yard waste to good use.

This post is the result of my many years of frustration with feeling like I couldn’t live up to my “zero waste” aspirations while living in an apartment in the city.

I was frustrated that I kept having to throw away food scraps and those forgotten bags of greens in the back of the fridge, when I knew these kitchen remnants could serve as energy for my small garden outside.

Why couldn’t I compost? First, I lived in a building with six units, and I was certain the landlord and other tenants would be skeptical of a rotting pile of scraps in their already limited backyard space.

Second, I wasn’t aware of the wide array of composting options that could have offered solutions to the non-starter of traditional outdoor composting like sealed compost bins and worm composting (AKA vermicomposting.) We’ll cover these varied apartment composting methods in this post, along with traditional outdoor composting if you can swing it.

I still live in an apartment, but I’m lucky enough to have a landlord now that allows us to have a compost pile out back.

What is Compost?

Sometimes referred to as “black gold” in the gardening world, compost is the result of the decomposition of organic (AKA containing carbon and a product of organisms) matter.

Finished compost is moist, crumbly and deep brown–almost black. However, it may takes months to years to become this finished product.

The rotting of almost any organic matter will eventually turn into compost. As they say, “compost happens.”

Compost Ingredients

However, a well-maintained compost pile follows a few simple rules. Compost should be fed a good mix of high carbon-containing materials (called “browns” because they are often dry, brown materials) and high nitrogen-containing materials (called “greens” because they are often fresh, tender materials like food scraps and lawn clippings).

High Carbon “Browns”

Straw
Seedless hay
Paper
Cardboard
Sawdust
Sticks and twigs
Wood chips
Dry leaves

High Nitrogen “Greens”

Food scraps
Lawn clippings
Garden weeds
Fresh leaves
Coffee grounds

The ideal ratio of high-carbon to high-nitrogen materials in a compost pile is about 50:50. However, I don’t recommend getting to caught up with maintaining this ideal ratio. Instead, focus on maintaining a good mix by adding alternating layers of “browns” and “greens” to your compost.

A good rule of thumb is to put down a brown layer each time you add a green layer. Too much green material, and you’ll end up with a stinky, mucky mess that is especially inviting for maggots.

What Not To Compost

Meat
Fish
Bones
Dairy products
Oils
Dog or cat poop

Keep Compost Moist

Compost also needs to be kept moist. The ideal moisture level is that of a wrung-out sponge–damp but not soaking. During the hot summer months this means you may need to manually water your compost with a hose.

Benefits of Compost

Compost holds the nutrients your plants need to thrive. Importantly, compost contains an active community of microbes that are ready to continue the decomposition party, and provide your plants’ roots with nutrients in the meantime.

Compost can also hold a lot of water, tiding over thirsty plants in moments of drought. However, it’s airy enough to bring vital oxygen to subterranean life.

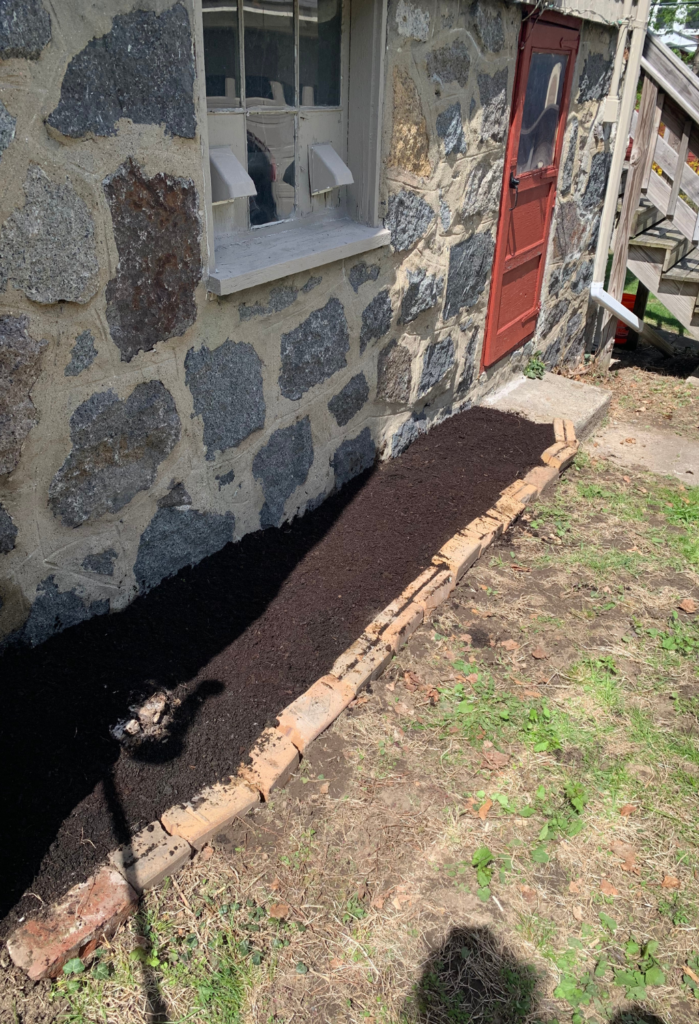
I recommend dressing your gardens with at least a couple of inches of compost every year at the start of the spring before you plant. This layer will supercharge your plants throughout the growing season.

This post is all about apartment composting.

Apartment Composting

Apartment composting certainly comes with challenges, but you might be pleasantly surprised with what you are able to accomplish with just a container on your back porch, for example. You don’t need a backyard, and you certainly don’t need to be an expert. Remember, the nature of organic matter is to decompose, and “compost happens.”

Apartment Composting Logistics

Before you begin your apartment composting journey, I recommend you consider some logistics that may help you decide which type of composting will be best for you.

If you have access to a patch of dirt or lawn (and even if you don’t!) you may be able to work an outdoor compost pile. I would recommend checking in with your landlord, and–if the land is a common area–your fellow tenants.

Importantly, a compost pile may attracts pests and wildlife. If you’re worried about vermin, it might be best to choose a self-contained compost bin rather than an open pile. Never throw dairy, meat, or bones, as these are unlikely to break down properly and will certain attract visitors.

Types of Composting

Outdoor Composing

Outdoor, open air composting is traditionally what may of us think of when we think composting. It’s best to start composting on dirt or lawn. Composting on earth allows for friendly worms to aid the decomposition process and add their beneficial worm castings (AKA worm poop.) However, believe it or not, you can compost right on pavement or cement–anywhere really.

Ideally, a compost pile should be at least about three feet (3′) high and three feet (3′) wide. A compost pile this size or larger will be able to achieve the internal temperatures required to sterilize weed seeds and kill pests.

To achieve this shape, I recommend using a compost bin of some kind–even outside. These can be makeshift–I have seen very successful outdoor compost bins made of four pallets nailed together. You could also create a circular bin by shaping chicken wire or hardware cloth into a tube and securing with wire.

Greenes Fence Cedar Wood Composter, 23.25 Cu ft / 173.92 gallons - Made in USA with North American Cedar

You can certainly also buy an outdoor compost bin. I like this cedar wood compost bin.

Greenes Fence Cedar Wood Composter, 24' W x 48' L x 31' H / 154.6 Gallons - Made in USA with North American Cedar

To ensure they always have finished compost, many gardeners keep multiple compost bins–one they are actively adding to, and the others with finished compost. I like this cedar multi-bin composter.

Compost Bin or Container

If you’re worried about pests, or don’t have a patch of land on which to compost, a sealed compost bin may be the best option for you. These containers can be set up anywhere–even on your porch.

A simple DIY compost bin can be made with a lidded garbage can (plastic or galvanized steel) with a few holes punched into the sides.

Lifetime 60309 Double Bin Rotating Composter, 100 Gallon

More fancy contraptions can be purchased that come with the added benefit of a door form which to harvest your finished compost.

Worm Composting (Vermicomposting)

If you want to keep the composting process indoors, speed up the process, or have thousands of new friends–worm composting may be for you! Worms make dutiful workers, and can turn kitchen scraps into compost in as little as three months.

Only a certain type of worm is up to the task–that is redworms (Eisenia foetida). These case be found online, in bait shops, and occasionally farmers markets.

You can keep worms in a plastic bin small enough to fit under your kitchen sink. They thrive at room temperature, but can be kept on a back porch, in a mudroom, garage, etc.

Inside their plastic bin home, worms only need a few things to survive: bedding and food. Use shredded newspaper as bedding. You will feed them a few times a week with kitchen scraps. Anything vegan will do: fruits, vegetables, coffee grounds, etc. except the occasional eggshell for calcium.

FCMP Outdoor - The Essential Living Composter, 2-Tray Worm Composter, Grey

I recommend going with a two-bin worm composter system that allows you feed the worms in the top bin, and collect the finished compost in the lower bin.

This post was all about apartment composting.

Hi, I’m Leslie, the founder of PunkMed

Hey friend! I’m so glad that you stopped by today. I had a great time sharing my top tips for apartment composting! If you’re into gardening, urban homesteading, or living a more sustainable life, stick around! There are a good number of resources on my blog, and I always love to hear from my readers (that’s you!) Feel free to send me a DM on Instagram!

Hi there! I’m Leslie! I hope you feel confident in your apartment composting journey.

Mushroom Chai Tea | Slow Cooker Recipe

This cozy mushroom chai tea not only tastes delicious, but may also have immune boosting properties and other health benefits.

The word “chai” simply means “tea” in Hindi, so I’m acknowledging right away that the title of this recipe is a little redundant (mushroom tea tea!)

What Westerns commonly refer to as chai is actually a derivative of masala chai (“spiced tea”), a popular beverage throughout South Asia. Masala chai uses black tea as a base, and is brewed with spices such as ginger, clove and cardamom.

In our mushroom chai tea recipe, we are inspired by the warming spices of marsala chai, but swap out the black tea for a mushroom decoction (sometimes referred to as a mushroom tea.)

The mushrooms we use for our tea, chaga and reishi, are used in traditional medicine across the world, mainly to boost immunity and overall health.

This decoction makes a perfect, un-caffeinated base for our mushroom chai tea. However, if you like, you can brew the mushroom tea with Darjeeling or other black tea for a caffeinated and more traditional chai.

This post is a recipe for mushroom chai tea.

Jump to Recipe

Hello, I’m Leslie

Hi, I’m Leslie (she/her)! I hope you enjoy this mushroom chai tea recipe.

My name is Leslie, and I’m the founder of PunkMed! On my blog, I and my team share my info and recommendations in the area of sustainability, urban homesteading, and the occasional recipe. Our goal is to slow down and savor the small joys in life through sustainable practices.

In today’s post, I’m sharing my favorite mushroom chai tea recipe. I pretty much drink this every day throughout the fall and winter here in New England for a tasty and cozy immunity boost!

Let’s get into it!

This post was all about mushroom chai tea.

Mushroom Chai Tea Ingredients

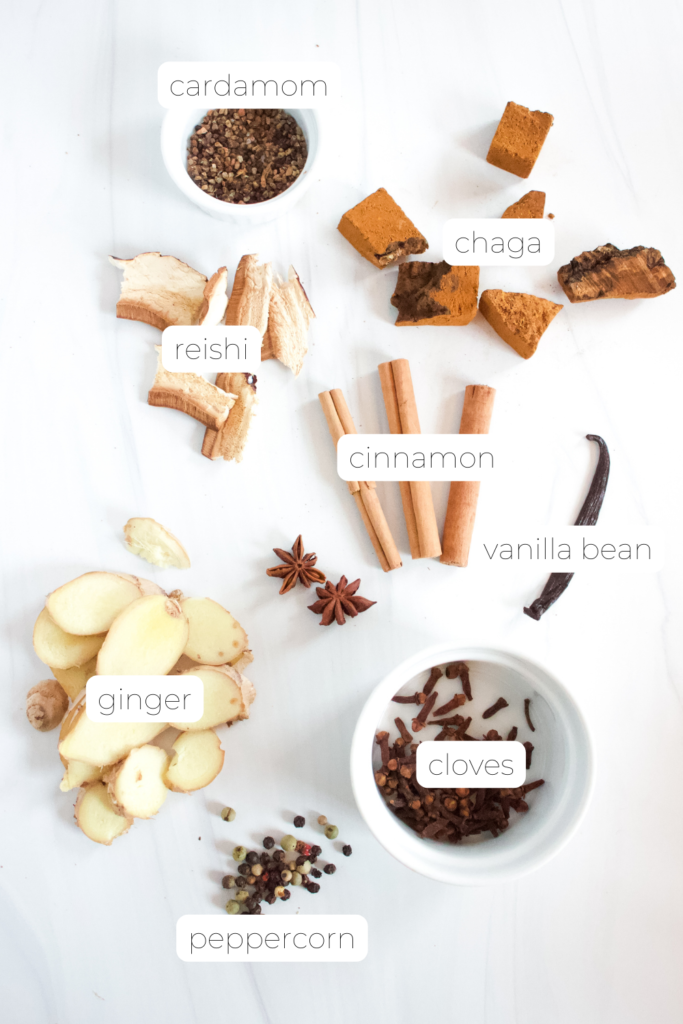
Chaga

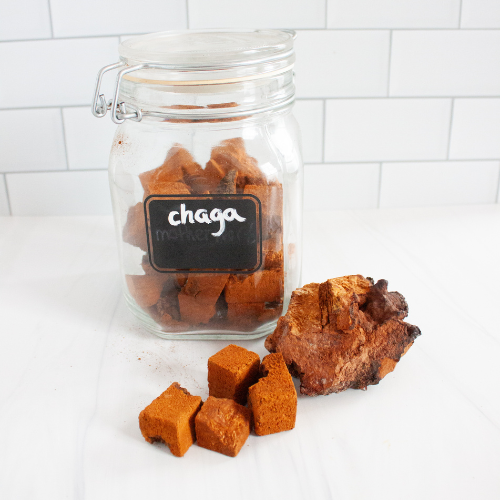
Chaga (Inonotus obliquus) is a type of fungus that grows on the bark of trees in colder climates. Chaga doesn’t look like what we traditionally picture when we think of a mushroom–rather, it looks more like clump of burnt charcoal. That is because chaga is not a fruiting mushroom body, but rather the root-like structure of fungus that grows beneath the surface.

When brewed in water slowly over several hours, chaga mushroom creates a deep-brown coffee-like liquid that has flavor reminiscent of vanilla and birch beer. (Fitting perhaps, as chaga is often found growing on birch trees!)

I have been able to forage my own chaga near my home in New England. However, if you can’t find your own chaga it is fairly easy to buy online.

Finally, you will often see chaga sold as a powder. Because this is a slow cooker recipe that requires a long decoction time, be sure to buy chunks of chaga, not chaga powder.

mushroom chai tea

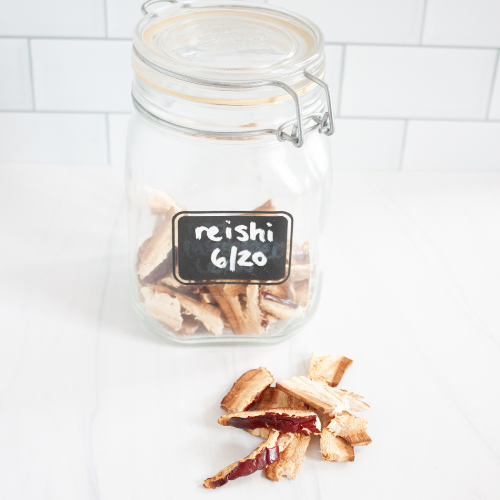
Reishi

The reishi mushroom (Ganoderma lucidum) is a fungus that grows in various locations in Asia. It’s used in Chinese medicine and other traditional Asian medicinal practices as a health-building and immunity-boosting tea.

There is a version of reishi that grows here in New England (Ganoderma tsugae), AKA hemlock varnish shelf or the hemlock reishi, as it is commonly found on hemlocks. I have been able to forage this mushroom myself.

On its own, reishi tastes pretty bitter and medicinal. I would not recommend adding more reishi than called for in this recipe.

Finally, you will often see reishi sold as a powder. Because this is a slow cooker recipe that requires a long decoction time, be sure to buy slices of reishi, not reishi powder.

You can also buy reishi mushroom from a trusted seller like Mountain Rose Herbs.

mushroom chai tea

Disclaimer: This post is not intended to help readers identify mushrooms. Do not attempt to forage for/consume mushrooms you do not feel confident identifying.

Ginger

Ginger is a flowering plant originating in Southeast Asia. However, the part we use in the kitchen is actually the rhizome, or the underground part of the plant. Ginger is known for its health benefits, especially as an aid for nausea and digestive upset.

This recipe calls for fresh ginger, which you can find at most grocery stores in the produce aisle. There is no need to peel the outer skin off the ginger for this recipe, but make sure you slice it fairly thinly to maximize the extraction of its flavors into the tea.

Cinnamon

Cinnamon is a spice that is made from the bark of trees. It is a powerful antioxidant, and some research suggest it may help with regulating blood glucose.

There are two main types of cinnamon used in home cooking: Ceylon and Cassia. Ceylon is known as “true cinnamon” but Cassia cinnamon is more available in most grocery stores. Cassia cinnamon is often what people mean when they refer to cinnamon. Either type of cinnamon can be used in this recipe.

Mushroom Chai Tea Recipe

mushroom chai tea crock pot

Mushroom Chai Tea Slow Cooker Recipe

This cozy mushroom chai tea not only tastes delicious thanks to the addition of warming spices like ginger, clove, and cardamon, but it also has potential health benefits from the mushroom tea base. To extract the beneficial properties of the mushrooms, we decoct chaga and reishi (along with the spices) on low in a slow cooker for several hours.
Prep Time 15 minutes
Cook Time 2 hours
Servings 12

Equipment

  • 1 Slow cooker I have a 6-quart slow cooker, but adjust the recipe based the volume in quarts of your own slow cooker.

Ingredients
  

  • 1-3 chaga chunks (about 1") per quart of water
  • 1 dried reishi, sliced per quart water
  • 3 inches fresh ginger, sliced per quart of water
  • 2-3 cinnamon sticks
  • 2-3 star anise pods
  • 1 whole vanilla bean pod
  • 1 tbsp cloves
  • 1 tsp cardamom
  • 1 tsp peppercorn

Instructions
 

  • Determine how many quarts your slow cooker can hold and adjust the recipe based on the amount of water you will be adding.
  • Combine ingredients in the slow cooker.
  • Cover with water to fill line, or to the desired amount of water. A small amount of water will be lost to evaporation.
  • Turn the slow cooker to highest setting and heat for at least two hours, but up to 24 hours. I often simmer the tea on high for a couple hours, and then reduce to warm for the day, and portion out tea with a soup ladle throughout the day.
  • Add sweetener and milk as desired. I especially like maple syrup in my chai mushroom tea.
  • To store, turn off the slow cooker and allow to cool. Strain out ingredients and store mushroom chai tea in the refrigerator for up to 3-4 days.

Notes

*For a caffeinated and more traditional chai, steep Darjeeling or another black tea in a cup of hot mushroom chai tea for 3-5 minutes, or until desired strength. Do not include black tea in the ingredients that go in the slow cooker, as it will be steeped too long.

How to Make Mushroom Chai Tea – Step by Step Photos

mushroom chai tea crock pot
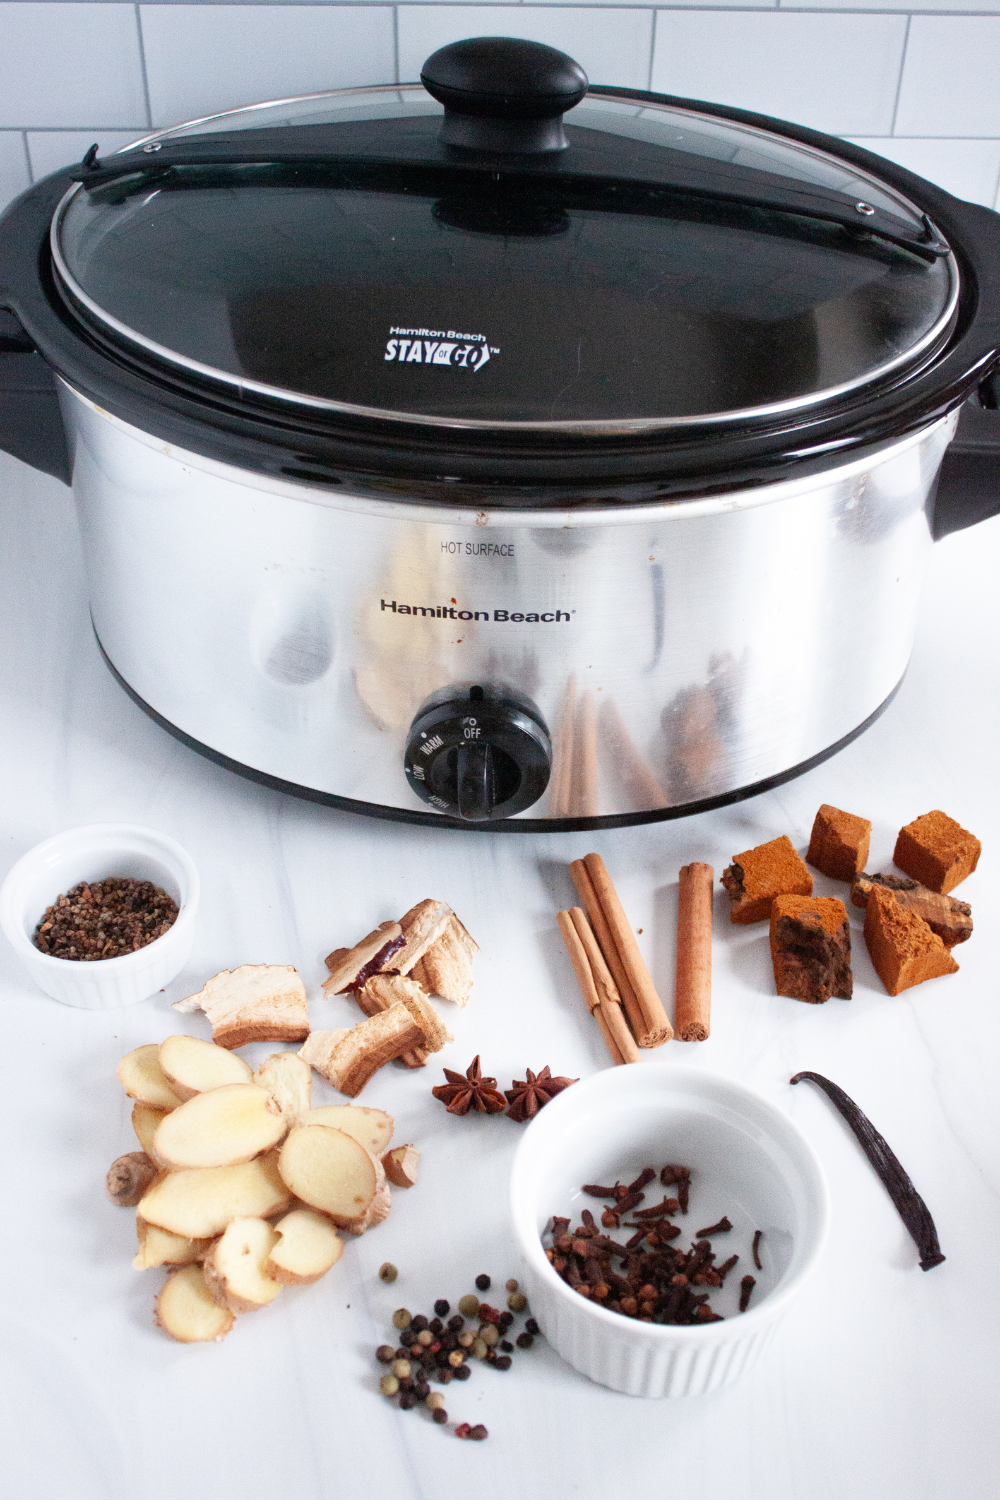
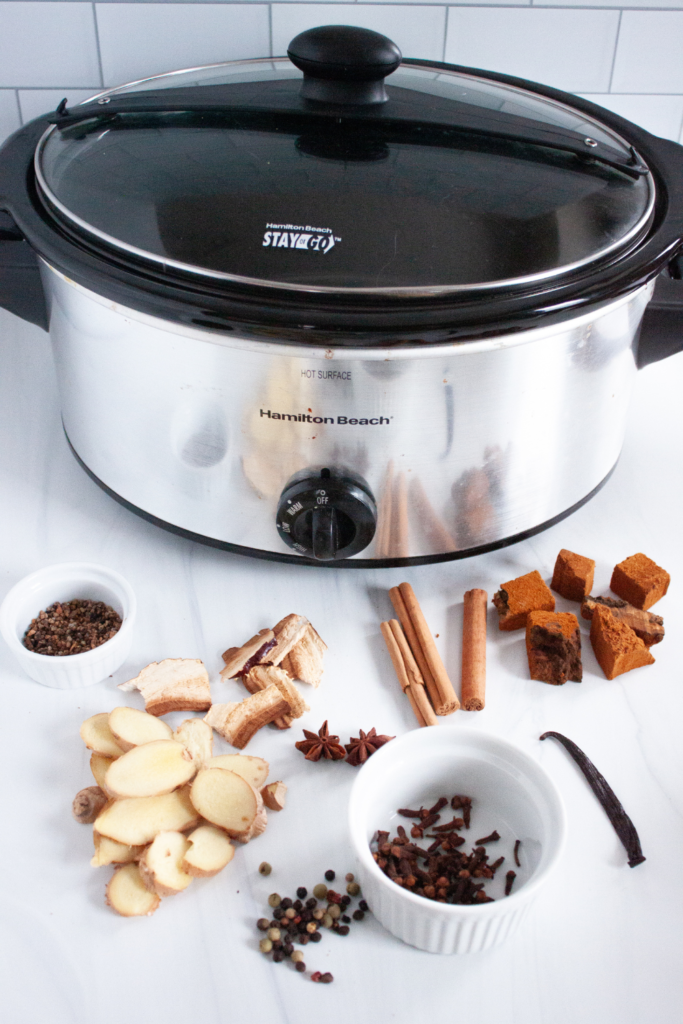
My six quart slow cooker with all the ingredients.

Step #1 – Determine how many quarts your slow cooker can hold and adjust the recipe based on the amount of water you will be adding. My slow cooker can hold six quarts, so I am adding at least six chunks of chaga (but up to 18 chunks), six one-inch slices of reishi, and three inches of sliced ginger.

Step #2 – Combine ingredients in the slow cooker.

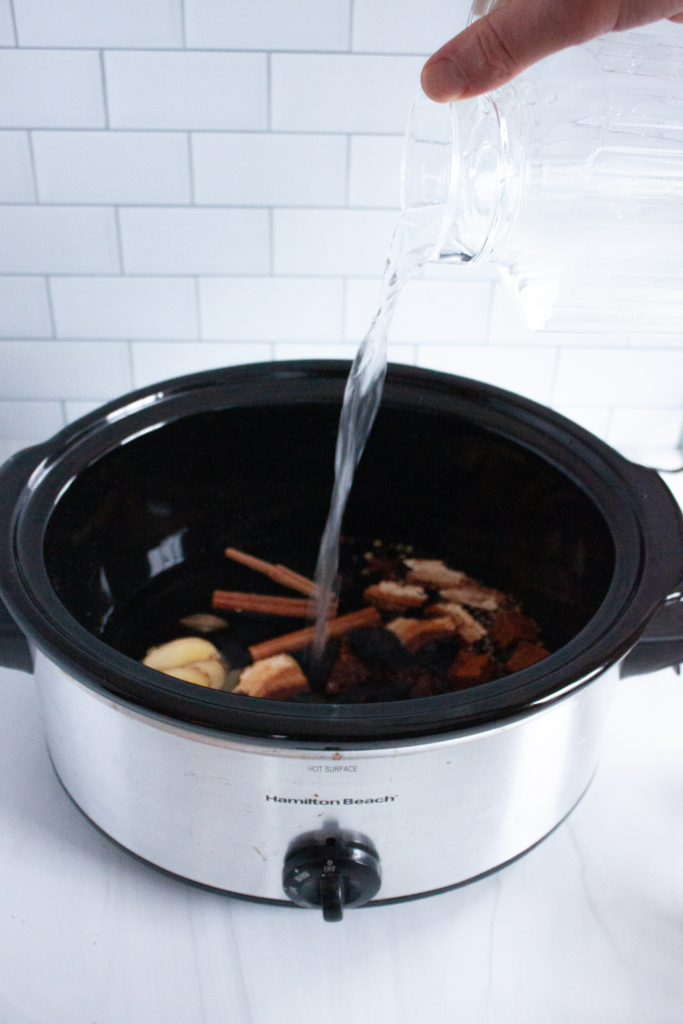
Step #3 – Cover with water to fill line, or to the desired amount of water. A small amount of water will be lost to evaporation.

Cover ingredients in the slow cooker with water.

Step #4 – Turn the slow cooker to highest setting and heat for at least two hours, but up to 24 hours. I often simmer the tea on high for a couple hours, and then reduce to warm for the day, and portion out tea with a soup ladle throughout the day.

Step #5 – Add sweetener and milk as desired. I especially like maple syrup in my chai mushroom tea.

Step #6 – To store, turn off the slow cooker and allow to cool. Strain out ingredients and store mushroom chai tea in the refrigerator for up to 3-4 days.

Read these recipes next:

Looking for more homesteading-friendly recipes? Below, I’ve shared a number of recipe posts and how-to guides:

Join Me on Pinterest

Pinterest is a great platform for finding new recipes! Join me on Pinterest here, to get all of my recipes, garden to table cooking adventures, and homesteading tips.

Ultimate Guide to Starting Seeds Indoors

starting seeds indoors

Starting seeds indoors can extend your growing season, ensure greater success with germination, and make healthier plants–especially if you live in a colder climate. Learn how to start seed indoors with this ultimate guide.

Some plants are best sown indoors, where they will germinate and grow in the safe and warm environment of your home until they can be transplanted outside.

Starting seeds indoors is a rewarding process that requires a little investment in some equipment up front, but will serve your garden in the long run!

Let’s get into it!

Plants to Start Indoors

Generally speaking, there are two types of plants that are best sown indoors:

  • Heat-loving plants (like tomatoes, eggplants, and peppers)
  • Long-season plants (like brussel sprouts, celery, and cabbage)

Note: these categories are NOT mutually exclusive. For example, the tomato is both a heat-loving and long-season vegetable. Long-season plants take a long time to grow before they can be harvested.

If I tried to sow tomato seed outdoors in New England (where I live), I would would likely be hampered by cold temperatures in the spring. If I waited longer for temperatures to warm, the tomatoes would not have enough time in the growing season to produce fruit (or not as much as I would like!) before the fall set in.’

Of course, there is some nuance around which plants should be started indoors. Decisions to start indoors should be based on the plant, your climate, and your experience. Some experimentation will reveal which plants are best sown indoors and outdoors in your specific garden!

When to Start Seeds Indoors

Determining when to start seeds indoors depends on the plant you are intending to grow. The best place to find this information is on the seed packet.

Generally, the packet will say something like “Sow indoors X weeks before last frost.” This gives you the number of weeks before last frost to start these specific seeds indoors. To determine the last frost date for your specific area, ask a gardening neighbor or look up the date of last frost by your zip code here.

Where to Start Seeds Indoors

Deciding where to put your seed starting operation when starting seeds indoors can be a challenge–especially if you’re an urban homesteader like me and gardening in a small space or apartment!

Your exact setup will depend on how large your operation is (I recommend starting small) but you will at least need at least one flat surface with room to hang grow lights above the plants. See below for the exact seed starting equipment I recommend.

However, I do have some tips regarding where in your home to start seeds:

  1. Choose a place in your home where the temperature is consistently 60°F or above. For the most part, this means NOT starting seeds in a garage or unfinished basement. The exception would be if you know your garage or basement stays above 60°F and you can prove it with a temperature monitor.
  2. Find a place away from children and pets. Seed starting setups are like magnets to curious children and pets–I don’t know why this is but it is the truth! Plus, it’s dangerous. You don’t want anyone knocking trays of water into your artificial light setup. For this reason, I have my seed starting setup in the office which can be closed off from the rest of the house and the cats.
  3. You don’t actually need a ton of light. It’s not necessary to have your setup by a window or light source, because a window will never provide sufficient light for your seedlings. Instead, we will be relying on artificial light to optimal plant growth.
  4. You DO need to start near an outlet. You need to be able to plug in your artificial grow lights nearby.

Seed Starting Equipment

Starting seeds indoors requires some investment in some specialized products and equipment. However, I promise the investment in pay off in healthier plants that produce more throughout the extended growing season!

Seed Starting Medium

Coast of Maine Sprout Island Organic Seed Starter- 2 CU FT

Give your seeds the best chance at growing healthy and strong by using special seed starting medium. This is NOT soil! Seed starting medium is specially formulated to germinate and grow seeds.

DO NOT start seeds in your regular soil! There could potentially be pests and pathogens lurking in untreated soil that could squash germination or harm your seedlings.

Seed Tray with Humidity Dome and Flood Tray

10 Each - 1020 Trays with Humidity Dome NO Holes

Listen, I’m all for avoiding plastic where possible, but believe me I have tried every compostable seed pot and they just DO NOT get the job done!

Instead, I recommend a standard, plastic seed tray with a humidity dome and flood tray without holes. Luckily, these can be reused if properly sanitized between seasons and handled gently.

There are two important components of a seed starting tray besides the seed starting cells where you actually plant your seeds:

  • HUMIDITY DOME – helps protect the seeds and helps move along the germination process. Cover the seed tray with the humidity dome until the seeds have germinated and then remove.
  • FLOOD TRAY – holds the seed starting cells. A flood tray is essential for a practice I recommend called ‘bottom watering.’ Bottom watering basically means instead of watering your seedlings directly, you’ll fill the flood tray with about a 1/4 inch of water, and that water will be wicked up into the soil. This practice encourages root development.

Heat Mat

iPower GLHTMTS Durable Waterproof Seedling Heat Mat Warm Hydroponic Plant Germination Starting Pad, 1020, 10' x 20', Black

Most seeds like it warm in order to germinate! The optimal germination temperature for heat-loving plants like tomatoes is 65° to 85°F. I don’t know about you, but that is just a little bit warmer than my apartment in the early spring! (Especially with my husband constantly turning down the thermostat!)

This heat mat warms the rooting area 10-20°F above ambient temperature.

(Plus, this heat mat actually doubles as a sourdough starter jumpstart and bread-proofer in my house!)

Grow Lights

Unfortunately, windows will not provide enough light to grow seedlings inside. Instead, you’ll need to invest in artificial lights, sometimes called “grow lights”.

You’ll need a 2-foot grow light for every tray of seeds.

Best Type of Grow Lights for Starting Seeds Indoors

I recommend T5 fluorescent or full-spectrum LED 6500K lights. The K stands for Kelvin, which is a measure of the ‘color temperature’ of the light. Generally, lights higher on the Kelvin scale (i.e. white-blue) emulate daylight and are best for vegetative growth. Ignore those pink lights–they’re pretty but NOT the best for seed starting!

The grow lights should ideally come with hooks to hang from above, as well as a pulley system to move the lights up and down. You’ll pull the lights up as the seedlings grow, so you don’t scorch their tender leaves.

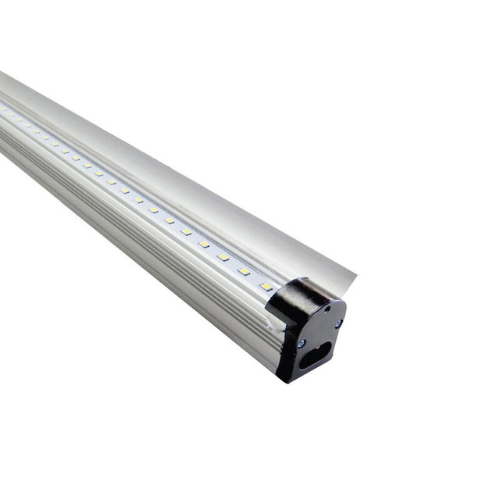
I like the SunBlaster LED Strip Light Kit – 36″.

Shelving

Amazon Basics 4-Shelf Adjustable Heavy Duty Steel Wire Rack Storage Shelving Organizer for Kitchen, Garage, 36' L x 14' W x 54' H, Chrome Silver

I like basic, heavy-duty steel storage shelving for seed starting purposes.

The steel wire material will allow you to hang your grow lights safely from the shelf above your seed trays. (Again, ideally your grow lights came with hooks and a pulley system for this purpose.)

The exact size of your shelving will depend on the amount of trays you plan on growing. I recommend starting out small! This 4-shelf unit will allow you to have three shelves of seed trays with grow lights hanging from the shelf above.

Reminder: be safe when using electricity and water in the same area!

How to Start Seeds Indoors

By now, you’ve picked the seeds, and you know where and when you’re starting your seeds. You’ve got your equipment and you’re ready to grow, so here are the actual step to starting seeds indoors.

#1 Set Up Shelving Unit/Seed Starting Station

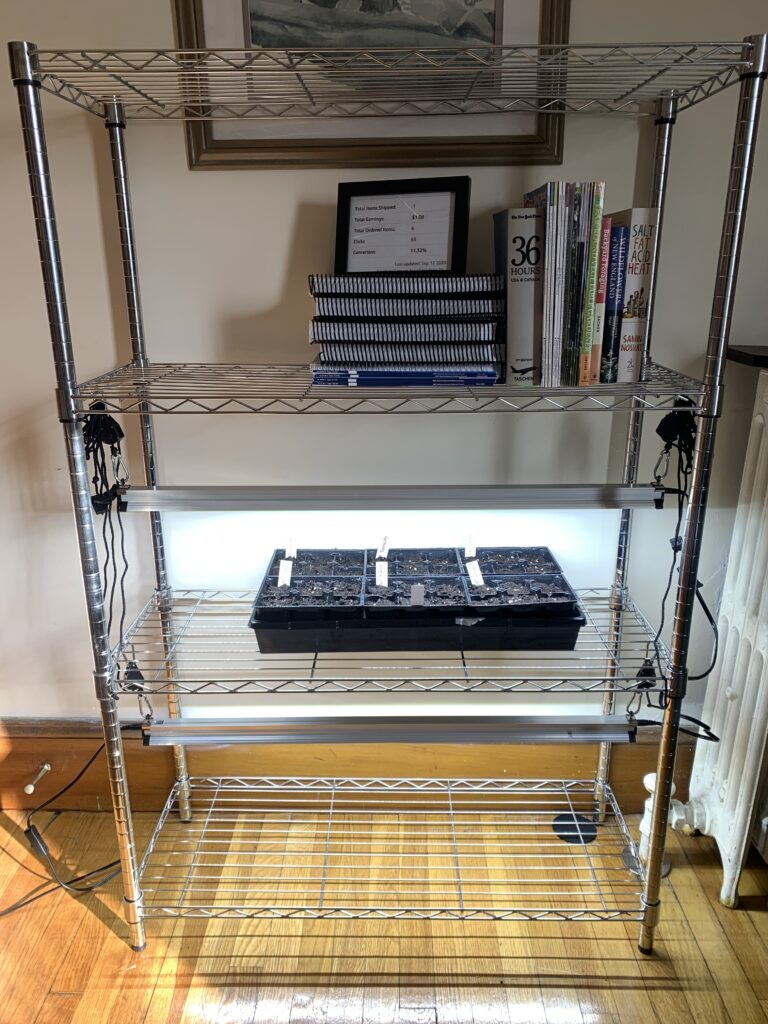
Heavy duty shelving unit I keep in my office! (The doors close so I can keep the cats out.)

Setting up your seed starting station is going to look different based on your space and the number of trays you’ll be planting. Make sure your space is near an outlet, as you will need to plug in the electronics.

I recommend using heavy-duty steel shelving units in whatever size works best for you. I use the Amazon Basics 4-Shelf Adjustable, Heavy Duty Storage Shelving Unit (36L x 14W x 54H). This allows me to grow on three of the shelves, with grow lights hanging from the shelf above.

#2 Hang Grow Lights

Grow lights are hung from the shelf above.

After you’ve got your shelving set up, you’ll want to hang your grow lights.

Ideally you’ve purchased grow lights that come with hanging hooks and clips. I like the SunBlaster LED Strip Light Kit – 36″ for this reason, and because they are the same length as my shelving unit! This model comes with hanging clips, but you’ll need to buy the adjustable hanger separately. (This allows you to adjust how the the lights hang over the plants as they grow.)

You will need at least one 2-foot light for each standard 10″x20″ tray of seedlings you want to start. I like to double up with two LED lights over each seed tray.

Using the hanging clips and hooks, hang the light strips from the steel wire of the shelf above where you will keep your seed tray(s).

You won’t need to turn the lights on until the seeds have germinated, but it’s good to have your space set up in advance.

#3 Plant Seeds

Testing the setup. This was pre-germination, so the lights will be turned off.

Okay, now for the fun part–time to actually plant the seeds! I like to do this outside on my front porch so as to not make a huge mess indoors.

Make sure your seed tray and supplies are sanitized if reusing them from last growing season.

Fill each cell with seed starting medium, leaving about a 1/4″ inch at the top.

Poke a 1/4″ hole in the top of the soil with a pen tip or finger, drop your seed in, and sprinkle with grow medium to cover.

Spray gently with water. I like to use a super gently spray bottle for this step.

#4 Add Heat Mat and Humidity Dome

Alright, now time to set up the optimal conditions for your seed to germinate.

Plug in the heat mat and set it to the optimal germination temperature for most heat-loving seeds–65° to 85°F. Keep an eye on the ambient temperature in your house–the heat mat may not need to be on 24/7.

Make sure each of your seeds has been sprayed with water. You’ll want to keep them hydrated throughout the germination process, so keep spraying them with water when the growing medium starts looking a little dry. (We won’t be bottom water with the flood tray quite yet.)

Cover the seed tray with the humidity dome. If it ever looks like it’s getting a little TOO wet in there (and maybe getting moldy) offset the dome a bit to let in some air.

#5 Wait for Germination!

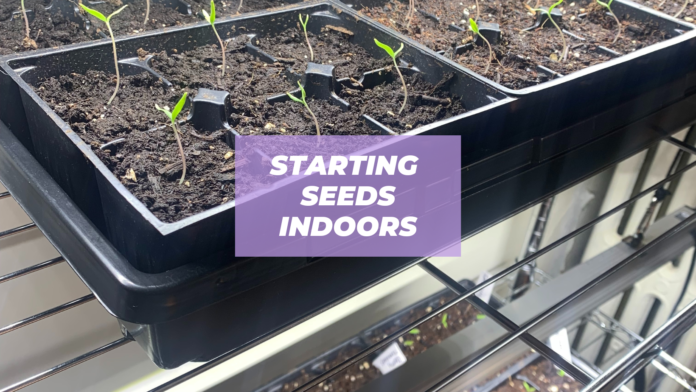
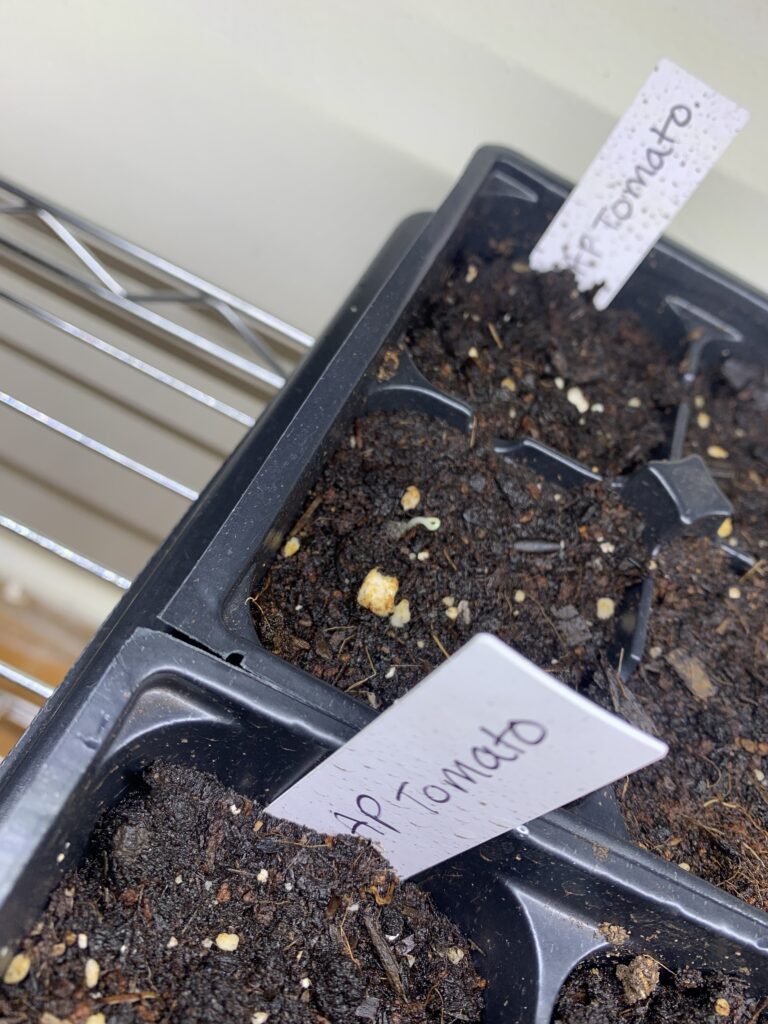
My tomatoes have germinated!

Now we wait! Keep the seed starting medium moist by spraying gently with water whenever you notice it getting a little dry.

Remember: you don’t turn the grow lights on during the germination phase! Those seeds are underground and don’t require light to germinate–just moisture and warmth.

Check the seed packet for specific germination times. For example, tomato seeds should germinate in about 5-6 days if you can keep the soil temperature around 80°F.

#6 Turn on Grow Lights

Once your seeds have germinated, it’s time to turn on the grow lights!

In general, seedlings should get 14-16 hours of light a day under LED grow light, and 16-18 hours of light a day under fluorescent lights.

[2 Pack] NEARPOW Digital Timer For Lamp With Dual Outlets, Programmable Timer In Door, Outlet Timer For Lights,10 On/Off Programs, 24-Hour And 7-Day Programmable Electric Plug Timer,3 Prong, 15A/1875W

Bonus tip: use a digital outlet timer (like a one you use for Christmas tree lights) to automatically turn your grow lights off and on.

Keep your seedlings 2-4″ away from the grow lights, using the adjustable hooks to raise the lights as the seedlings grow.

#7 Water Your Seedlings from the Bottom

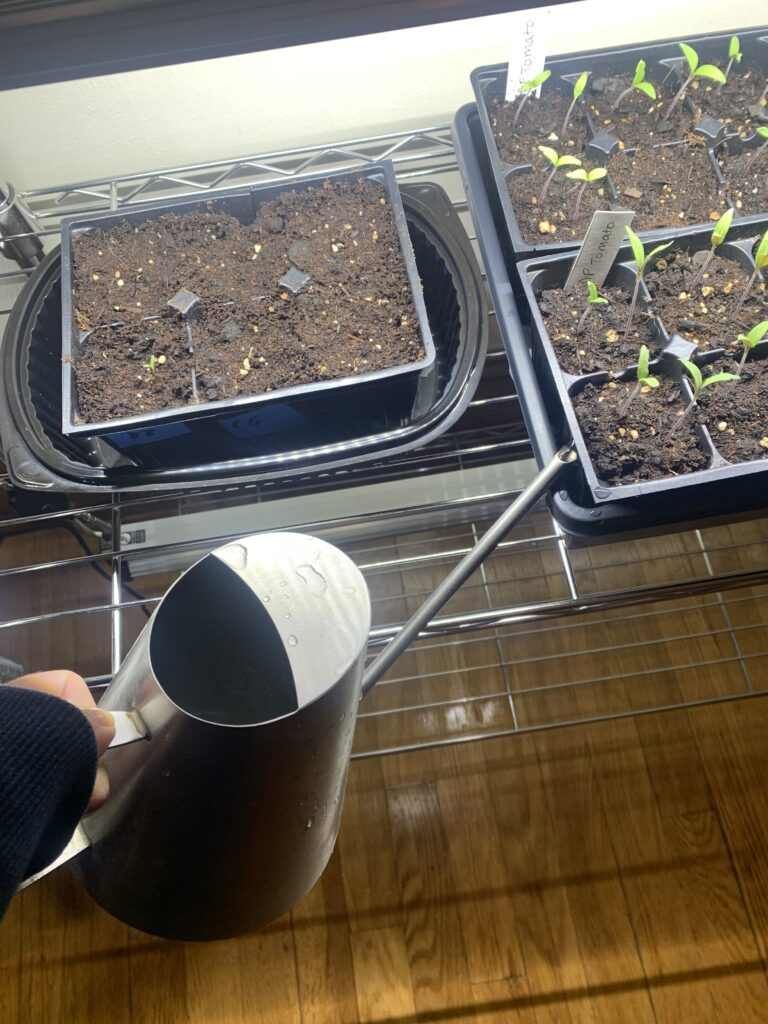
Bottom watering.

Now that your seeds have sprouted, it is time to swap out the spray bottle for “bottom watering.” Bottom watering is easier than spraying your seedlings with water, and encourages your seedlings to grow deeper roots.

Bottom Watering Your Seedlings

Water your seedlings by keeping the flood tray beneath the seed starting cells filled with about 1/4″ of water. I use the regular old watering can I use for house plants for this purpose. The water will be “wicked up” by the growing medium through the holes in the seed tray.

You can turn the heat mat off and remove at this point.

#8 Feeding

Plant Fertilizer Soil Liquid Nutrient: Big Bloom + Twin Canaries Chart (32 oz Bottle)

This is optional, but your seedings may benefit from a 50% diluted organic liquid fertilizer about a week or so before hardening off. Simply add the diluted fertilizer to the flood tray as you would during a watering.

#9 Hardening Off

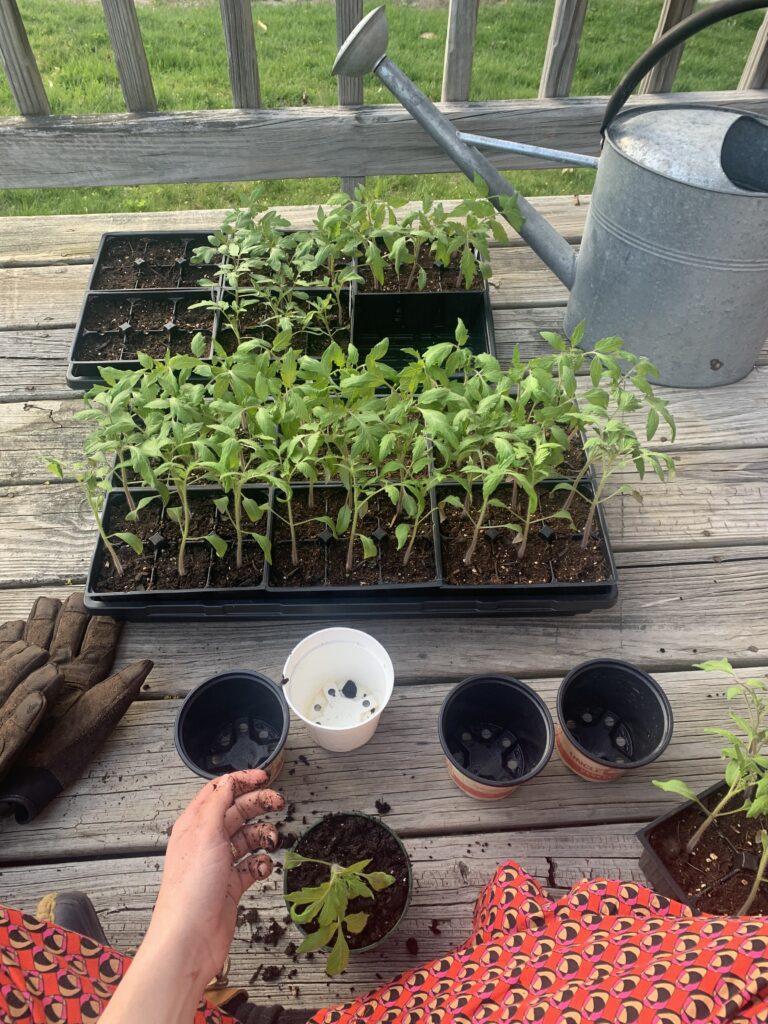
Hanging out outside with my tomato seedlings.

Hardening off is the process of transitioning your seedlings to the outside world before they are transplanted. You can begin the hardening off process when the seedlings have put out 3-5 sets of true leaves (i.e. the identifiable leaves of the adult plant, not the first set of baby cotyledon leaves.)

Start the hardening off process on a warm, clear day when the temperatures are above 45°F. Place your seedlings outside in a place where they are protected from wind and direct sunlight. (A greenhouse with the door open or other semi-sheltered space would be perfect for this!) Leave them out for an hour.

Increase time outside by an hour over the course of the next week or so, never leaving your seedlings outside in the harsh wind or rain!

After max two weeks, your seedlings are ready to be transplanted into your garden and live the rest of their days outside! Great job!

This post was all about starting seeds indoors.

Hi, I’m Leslie, the founder of PunkMed

Hey friend! I’m so glad that you stopped by today. I had a great time sharing my top tips to starting seeds indoors! If you’re into vegetable gardening, urban homesteading, or living a more sustainable life, stick around! There are a good number of resources on my blog, and I always love to hear from my readers (that’s you!) Feel free to send me a DM on Instagram!

Hey there! I’m Leslie! I hope you feel confident in your seed starting journey after reading this post.

What to Read Next:

Useful Gifts for Husband That He Actually Wants

useful gifts for husband

Looking for useful gifts for your husband that he actually wants (maybe even needs?!) Check out these husband-approved gifts ideas for the next birthday, anniversary, or holiday.

Look, we talk a lot about sustainable gift giving here at PunkMed, and I can talk all day about sustainable, non-toxic, and ethically-sourced products all day.

But, at the end of the day, often times the most sustainable gift is going to be the one that is actually used.

I rather a not-so-sustainably-made item be well-loved and used for years, than be made with maybe some recycled materials and almost immediately thrown in the trash.

This is at least what I tell myself especially when shopping for my husband and the other men in my life because I almost never know what they want. I rather get them something useful than something that will end up in a landfill!

I finally broke down, and literally bribed my husband to help me come up with the following list of gift ideas that he would actually use. (I bribed him with burritos!) So, indeed, the following gift ideas for husbands are truly husband-tested and approved.
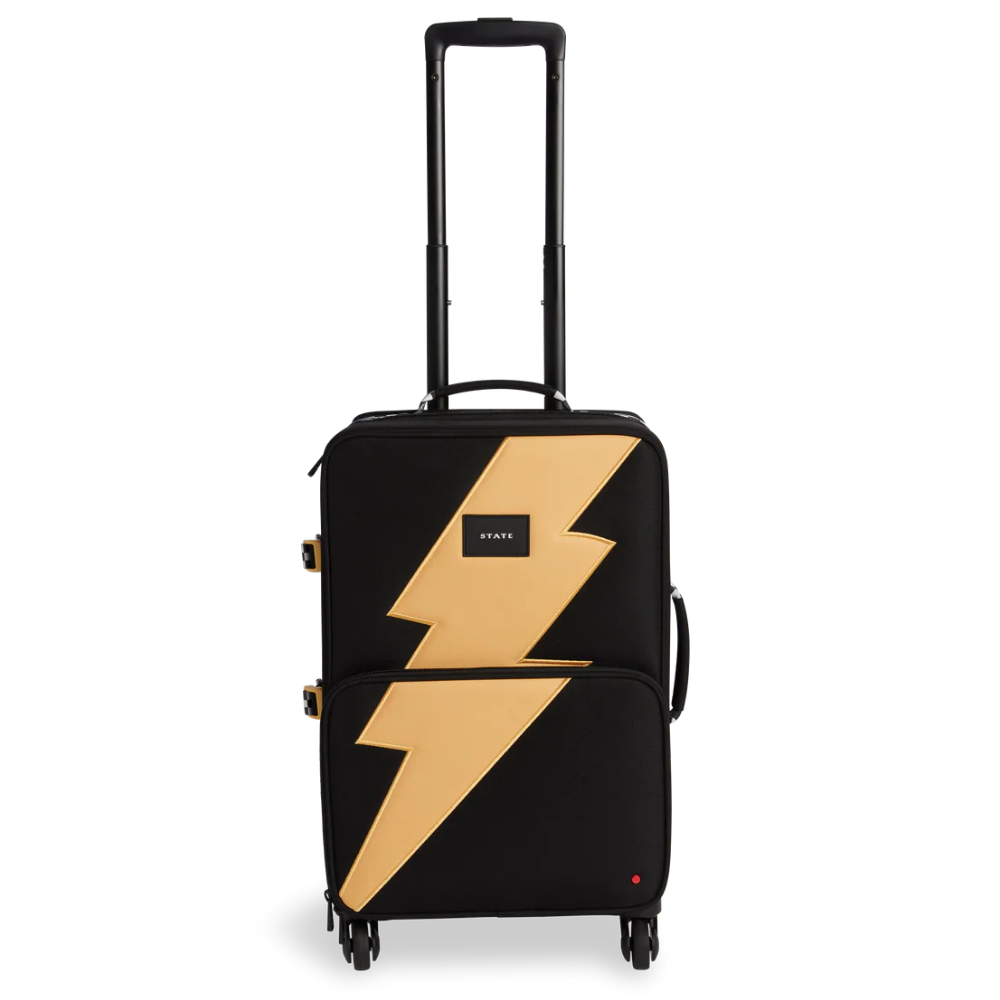
Catch me referring to this list later myself when his birthday comes up!

This post is all about useful gifts for husband.

Useful Gifts for Husband

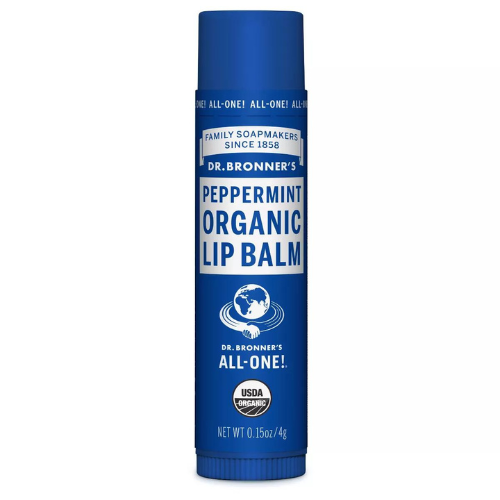
#1 Gift for Husband: Dr. Bronner’s Organic Lip Balm Peppermint

This lip balm is the actual OG lip balm for husbands everywhere. If you’re husband hasn’t tried this one, I promise–it will be a winner. Formulated with avocado, jojoba, and hemp seed oils, this lip balm feels hydrating without being sticky or overly glossy. Plus, it has peppermint oil for an extra kissable minty touch!


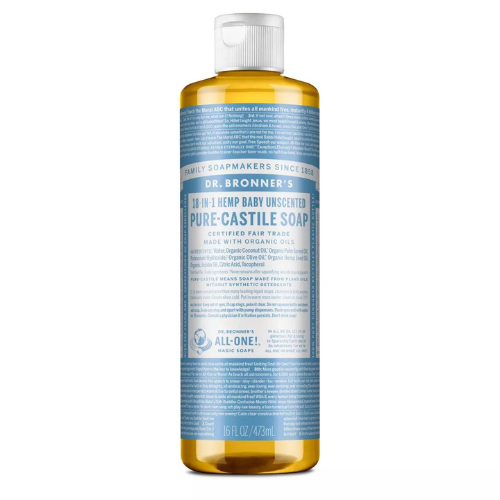
#2 Useful Gifts for Husband: Dr. Bronner’s Baby Unscented Pure-Castile Liquid Soap

Alright, you’re seeing what an absolute chokehold Dr. Bronner has on our household. But, I know several men, including Übermensch Tim Ferriss, that swear by the unscented Dr. Bronner’s soap. It’s reliable, natural, and the smaller bottles can be refilled easily with their gallon jugs of the stuff.

My husband uses it for both face and body, and somehow has fewer wrinkles than me. We also use it in all the hand soap dispensers in the house.


#3 Gift Ideas for Husband: Goodr OG Sunglasses

goodr A Ginger's Soul Polarized Sunglasses

If your husband loves a good deal, these sunglasses are surprisingly high-quality for how affordable they are. These shades from Goodr feature a special grip coating that will eliminate slippage when sweating. Plus, the polarized lens with UV400 make these the perfect sunglasses for the super active man in your life!


#4 Husband Gifts: Ultra-Compact Flashlight

Streamlight 66604 MicroStream 250-Lumen EDC Ultra-Compact Flashlight with USB Rechargeable Battery, Box, Black

This is the kind of gift I wouldn’t think of myself, but my husband swears your man definitely will love this gift! It has a super powerful beam for being so tiny at 250 lumens that can cast up to 68 meters. Plus, it’s completely rechargeable via USB. Trust us, this is super handy to have on hand–especially as part of a safety kit in the car, while traveling, etc.


#5 Best Husband Gifts: LectroFan High Fidelity White Noise Machine


LectroFan High Fidelity White Noise Machine with 20 Unique Non-Looping Fan and White Noise Sounds and Sleep Timer

My husband and I literally don’t know how we lived before we had this white noise machine in our lives. We now own a couple–one for home and a few we can take on the road for traveling. This white noise machine offers 20 unique non-looping sounds, including fan sounds, white, pink and brown noise.


#6 Gift for Husband: Pocket Knife

CIVIVI Baby Banter Pocket Knife for EDC, Ben Petersen Folding Knife with 2.34 in Nitro V Blade Green Micarta Handle, Titanium Thumb Stud Opener C19068SB-1(Green)

Okay, my husband is a self-professed knife guy, but the truth is almost everyone could benefit from having a pocket knife! They are super useful to have on hand when you quickly need to cut something, break down boxes, or just generally look like a badass! This knife has a sturdy 2.34 inch Nitro V blade and caged ceramic ball bearing pivot, deploying smoothly and securely so you can cut and slice with confidence.


#7: Useful Gifts for Husband: Sport-Brella Premiere UPF 50+ Umbrella Shelter

Sport-Brella Premiere UPF 50+ Umbrella Shelter for Sun and Rain Protection (8-Foot, Blue)

My husband got this Sport-Brella as a gift from my parents, and he hasn’t stopped talking about it since! If your husband loves long days on the beach, this umbrella shelter will make the perfect gift.

It can comfortably fit two people and a cooler, and protects you from both the wind and sun. It’s held in place by an auger, and you can also fill the side compartments with beach sand for extra security. This thing will NOT blow away!


#8 Gift Ideas for Husband: Squatty Potty The Original Bathroom Toilet Stool

Squatty Potty The Original Bathroom Toilet Stool, 7 Inch height, White

Husbands sure know how to spend time in the bathroom. Get things moving along with this bathroom toilet stool from Squatty Potty. If you’re unfamiliar with the concept, this stool acts as a foot rest while you’re doing your business. By having your feet slightly elevated, the idea is that you are in a more natural position for, uh, #2.


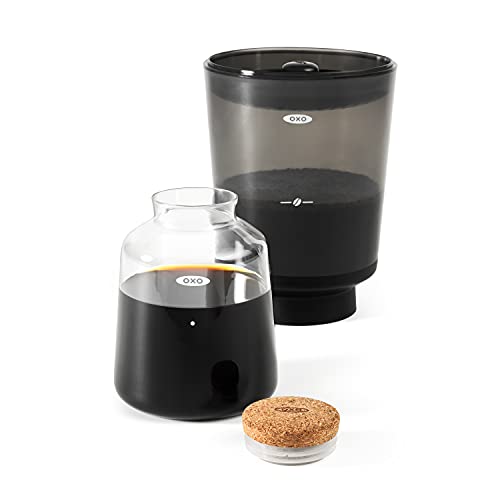
#9 Husband Gifts: OXO Brew Compact Cold Brew Coffee Maker

OXO Brew Compact Cold Brew Coffee Maker,Black

For the husband that loves his caffeine fix, check out this convenient solution for always having cold brew on hand. Take out the guess work of making perfectly bold coffee with this handy-dandy cold brew maker from one of our favorite kitchen gadget brands, OXO.


#10: Best Husband Gifts: Nutrafol Men’s Hair Growth Supplements

Nutrafol Men's Hair Growth Supplements, Clinically Tested for Visibly Thicker Hair and Scalp Coverage, Dermatologist Recommended - 1 Month Supply

If your husband’s hair is looking a little sparse up top (hey, no shame!) it might be time to look into solutions. Both my husband and I use Nutrafol products, and we’ve both noticed a difference in the density of our hair! Be mindful, this is not an overnight solution and will take at least a few months. But, the bonus is these hair growth supplements happen to double as pretty good multi-vitamins as well, covering for daily needs for Vitamins A, D and more.


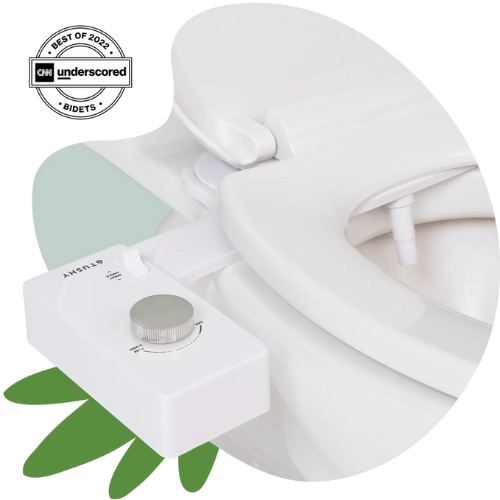
#11: Gift for Husband: TUSHY Classic Bidet 3.0

Once your husband goes for a bidet, he’ll never go back to regular old toilet paper for his behind! This bidet has a slimmer design, easier installation, and improved nozzle spraying for a much cleaner feeling with a lot less installation hassle.

Plus, bidets help restore forests by providing a clean and sustainable alternative to miles of toilet paper going to waste in the bathroom. Tushy proudly helps save up to 1 million trees with one installation.

Hi, I’m Leslie!

Hi, I’m Leslie! I hope you find the perfect gift for your husband on the blog today!

Hello there! My name is Leslie, and I’m the founder of PunkMed. I regularly share my best info on eco-friendly celebration, urban homesteading, gardening, and, of course, very thoughtful and helpful gift guides for the special people in your life.


This post was all about useful gifts for husband.

Read these eco-friendly gift guides (written with men in mind!) next:

Looking for more helpful gift ideas for your husband, or the other men in your life? Below, I’ve shared a number of posts that are packed with the very best gift ideas for men:

Valentines Gifts for Husband That Will Bring You Closer

valentines gifts for husband

Looking for sustainable Valentines gift for husband that will actually bring you closer together as a couple? These gifts will encourage connection, conversation, and maybe a little spiciness this Valentine’s Day!

Valentine’s Day is low-key one of my favorite holidays because it’s a time to unabashedly show your love!

Of all the holidays, I also think Valentine’s Day is one that really lends itself to sustainable gift giving. Because it’s a time of love and connection, it’s a great time to gift experiences rather than things.

For example, my husband and I cook a special dinner together every Valentine’s Day. But, because my love language is gifts, we usually get each other a few special treat as well.

Still, if cooking together isn’t your thing, or you want to give a gift that will bring you closer year-round–read on.

These Valentines gift ideas for the man in your life emphasize connection, quality time, and thoughtfulness.

Hi, I’m Leslie!

Hi, I’m Leslie! I hope you find the perfect gift for your husband on the blog today!

Hello there! My name is Leslie, and I’m the founder of PunkMed. I regularly share my best info on eco-friendly celebration, urban homesteading, gardening, and, of course, very thoughtful and helpful gift guides for the holidays.

This post is all about Valentines gifts for husband.

Valentines Gifts for Husband

#1 Foria Awaken Arousal Oil with Organic Botanicals

Foria Awaken Arousal Oil | Organic, All-Natural Oil Designed for Women, Safe for Sensitive Skin | 1 Fl Oz

Give the gift of a tantalizing couple’s massage this Valentine’s Day. Take turns rubbing each other down with this organic oil, infused with ginger and other botanicals and watch things steam up.


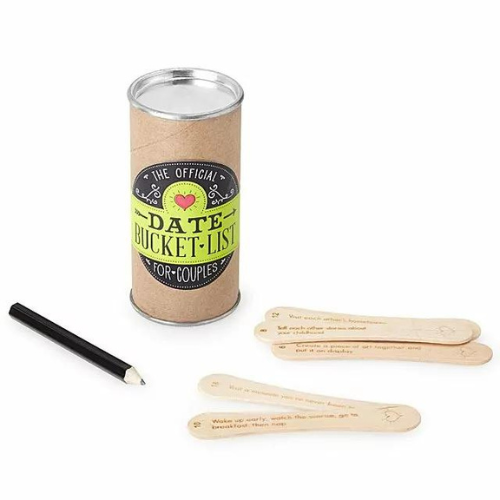
#2 Date Night Bucket List

Feel like you never have any ideas come date night? Keep this Date Night Bucket list close, and when you think of ideas write them down on one of the pieces. Then, when date night comes you’ll have a repository of ideas to pull from!


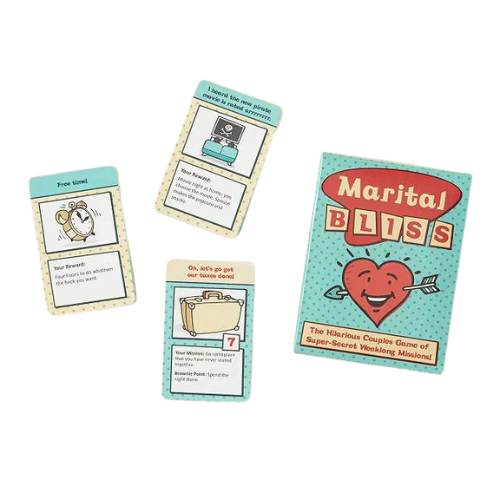
#3 Marital Bliss Game

This game challenges couples to complete certain tasks and missions throughout the week. Each mission will make you a better partner and strengthen the relationship. If the task is completed, the “winner” gets to reap the reward listed on the card!


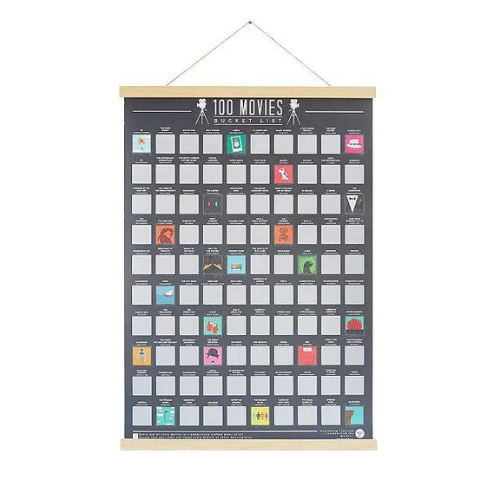
#4 100 Movies Scratch Off Poster

Is your husband a move lover? This fun poster will make sure you never run out of movie date night ideas. Use this poster like a scratch ticket, and simply scratch at one of the squares to reveal your move for the night! Your biggest decision will be who is making popcorn!


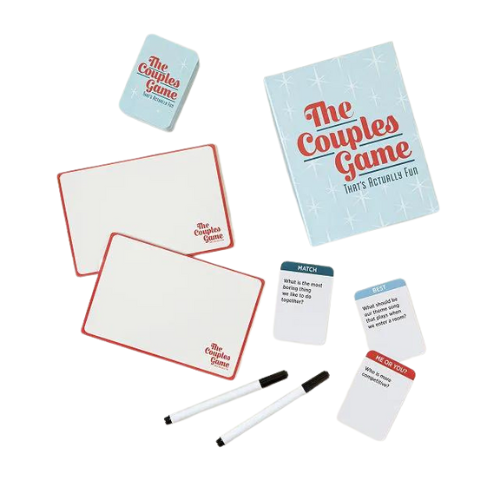
#5 The Couples Game

This fun couples game can be played with just the two of you, or with other couple friends! It’s like a wackier version of the Newlyweds game–get ready for lots of laughs!


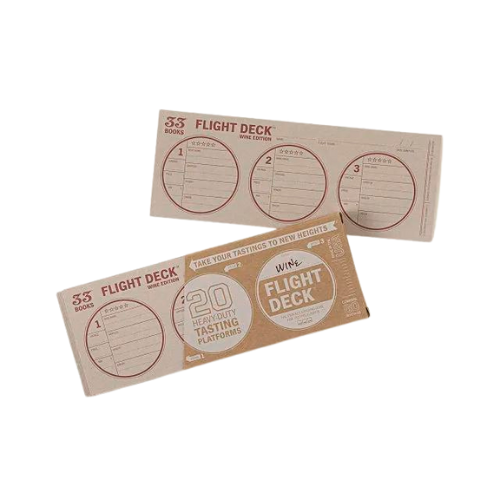
#6 Flight Deck: Wine Tasting Cards

Let these wine tasting cards inspire your inner sommelier. Use them to set out a flight of new-to-you wines for you and your husband to try next date night. Make sure to write down tasting notes, and what you liked and didn’t like about each wine!


#7 Where Should We Begin – A Game of Stories

Connect with your husband through the power of storytelling and more than 200 encouraging conversation suggestions. Features cards with unique opening lines that the storyteller must answer, like “I’ll never forget the day that” and “A rule I secretly love to break.”


This post was all about Valentines gifts for husband.


Other posts you may like:

Eco Friendly Pet Products for More Consciously Cute Fur Babies

eco friendly pet products

Looking for eco friendly pet products for your furry friends? These sustainable toys, beds, and other pet goods are made to last, and with earth-friendly materials.

According to the Pet Sustainability Coalition, the pet industry in North America creates more than 300 million pounds of flexible plastic packaging each year. And that is just packaging alone!

It’s a hard pill to swallow, but the 163 million dog and cat owners in the U.S. produce a lot of waste in the name of their furry friends.

Personally, I find that pet products are often an overlooked area when friends and family are overhauling their lives to be more sustainable. In my opinion, this is a major oversight, as pet products are often rapidly replaced and go straight to landfill (just think of how quickly your pet’s favorite toy get destroyed!)

But, it doesn’t have to be this way! More and more, there are pet companies coming onto the market with sustainability, ethics, and durability as part of their core values. Read on for some of my favorite eco friendly pet products.

Hi, I’m Leslie!
eco friendly pet products
Hi, I’m Leslie (she/her)! I hope you enjoy this chicken broth recipe.

My name is Leslie, and I’m the founder of PunkMed! On my blog, I and my team share info, experiences, and recommendations in the area of sustainability, urban homesteading, and occasionally, taking care of our pets! Our goal is to help you make informed choices about the products your bring into your home–making sure they align with your values!

In today’s post, I’m sharing my favorite eco friendly pet products. These recommendations come from my many years as a pet owner myself! I have two cats (Tuna and Hugo!) that love their recycled cat beds and eco friendly cat nip toys.

Let’s get into it!

This post is all about eco friendly pet products.

Best Eco Friendly Pet Products

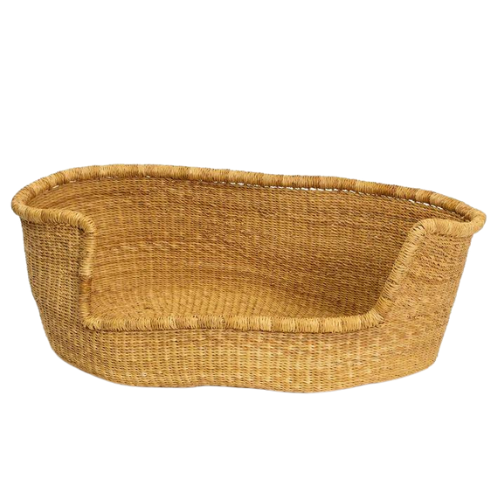
Small All Natural Pet Bed

This is the most special pet bed your furry friend will ever sleep in! It honestly could double as home decor. Handwoven by artisans in Ghana, this all natural pet bed is made of pure elephant grass and dyed with organic dyes.


Recycled Knit Dog & Cat Sweater

Okay, do they make this sweater in human? Because, it’s actually really cute. Plus, this heathered turtleneck sweater is made with 60% minimum post-consumer recycled polyester from recycled water bottles. Let this more eco-conscious sweater keep your pet friends warm this winter!


Eco Friendly Pet Products for Dogs

Organic Cotton Dog Bandana

Hand made by artisans in India, this adorable bandana just happens to be crafted with 100% GOTS Certified Organic Cotton. The company is woman-owned and completely fair trade. The bandanas come in small, medium, and large.


Natural Dog Soap Bar

The Natural Dog Shampoo Bar Soap for Itchy Skin Relief - Twin Pack - Dog Soap for Sensitive Skin with Manuka and Neem Oil to Ease Allergies and Itching

I’m such a huge fan of bar soap because it completely skips the plastic packaging! It makes sense to use bar soap to pamper your dog as well. This natural, anti-itch shampoo soothes dry skin using the very best ingredients, like Manuka oil.


Recycled Reflective Dog Harness

This eco-friendly dog harness from Pawtitas is made using recycled bottles collected from the ocean. Coming in four sizes, it’s suitable for all life stages and in sizes to fit a variety of breeds. Plus, this harness features an adjustable design so you can easily get the paw-fect fit.


Ethically Hand Woven Dog Beds

Is this a dog bed, or a super chic floor pillow?! These handcrafted dog beds are ethically hand woven by artisans in India using a traditional weaving technique. The bed is stuffed with eco-friendly PlanetFill® filler, which is made from 100% post-consumer recycled plastic bottles.


Recycled Dog Bed

This is a new spin on a classic dog bed! No one would even suspect it’s made of recycled materials! Plus, it’s ultra-soft for some serious dog snoozing.


Freeze Dried Raw Single Ingredient Dog Treats

Vital Essentials Freeze Dried Raw Single Ingredient Dog Treats, Chicken Breast, 2.1 oz

This is not your typical dog treat. Vital Essentials treats are single ingredient, so you know exactly what you are feeding your furry friend–no fillers, grains, and other additives. These treats contain only the vital nutrients to keep your dog looking and feeling their best!


Eco Friendly Pet Products for Cats

Wool Cat Caves

Yeti Pet Cave Pet Bed for Cats and Small Dogs, 100% New Zealand Wool, Grey

Cat caves give your feline friend a safe place to escape for some R&R. Luckily, these cat caves are hand made with 100% New Zealand wool, which is soft, comfortable, and keeps your pet warm in the winter and cool in the summer. Plus, this company only uses vegetable dyes, so these beds are non-toxic and non-allergenic.


Scratch Lounge Cardboard Cat Scratcher

Scratch Lounge Cardboard Cat Scratcher & Lounger for Large Cats - XL 13x22 with Reversible Floor & Catnip - Heavy Duty Durable Bed Lasts 10x Longer Than Conventional Scratchers

Having issues with your kitty scratching up your furniture? (I’ve been there.) Give them a suitable alternative like this eco-friendly cardboard cat scratcher. The Original Scratch Lounge is the first 3-sided cat scratcher that your cat can use as both a scratch post and a place to lounge, sleep and nest. Plus, when your cat is done with this scratcher it can be recycled!


Refillable Hemp Mouse Catnip Toy

From The Field Shelby the Refillable Hemp Mouse Catnip Toy Gift Kit

Our cats LOVE these refillable hemp mouse catnip toys. Truly, we’ve had them for years and they have not gotten sick of them. The beauty of these toys is that the all-natural hemp fabric pouch can be continually refilled with loose catnip to keep your cats coming back. I promise this will be the longest lived cat toy you have in your collection!


K.T. Manufacturing Kuddle Kup Cat Bed

This innovative cat bed is made from 100% recycled ultra-soft fibers that work as an insulator, to absorb and hold heat, keeping your kitty warm and cuddly all year round. Handcrafted in the US, these cat beds are made from scraps from the textile industry. Nothing goes to waste!


Feline Greenies Treats

FELINE GREENIES SMARTBITES Skin & Fur Health Crunchy and Soft Textured Adult Natural Cat Treats, Chicken Flavor, 16 oz. Tub

These all-natural feline treats are a favorite in my household. These bite-sized snacks contain fish oil as a natural source of omega-3 fatty acids, and ground flaxseed. They’re made with natural ingredients, plus added vitamins, minerals, and other nutrients, and without artificial flavors, artificial preservatives, or fillers.


This post was all about eco friendly pet products.


Other posts you may like:

How to Make Chicken Broth in 8 Easy Steps

how to make chicken broth

Looking for a foolproof chicken broth recipe to get you through the fall and winter? Learn how to make chicken broth in just eight easy steps.

Chicken broth goes by many other names: chicken stock, chicken bone broth, etc. No matter what you call it–a good chicken broth recipe is an absolute essential for every kitchen!

As an urban homesteader, I love the practice of making your own chicken broth at home for many reasons.

Jump to Recipe

Why Make Chicken Broth?

First, it is a great way to use leftover chicken bones and limit the food waste you produce in the kitchen. In my house, we roast a whole chicken once a week and save the carcass in the freezer for when it’s time to make bone broth.

You can also collect vegetable scraps from throughout the week to throw in the stock. Trimmings from onions, carrots, herbs, etc. are good candidates for this.

Second, chicken broth is absolutely delicious and very good for you. Chicken stock is high in vitamins and minerals, including calcium. It also contains gelatin, which is nourishing for the hair, skins, nails, and gut mucosa. Plus, sipping bone broth is an excellent remedy when you are sick.

Where to Get Chicken Bones?

The star ingredient of chicken broth is of course, chicken bones! But where do you get them?

The easiest (and most delicious) way to score chicken bones is to cook some bone-in chicken and then save the bones! As I mentioned, we roast a chicken every week and save the carcass in the freezer until it’s time to make chicken stock.

You can easily store any bones (backbone, thigh, leg, etc.) in the freezer until it’s time to make your broth.

Alternatively, you could visit your local butcher to see if they have any leftover chicken scraps. They will often have chicken carcasses or backbones for you to purchase.

Chicken Stock Equipment

To be honest, making chicken broth is a pretty low-tech operation, but there are a few essentials you’ll need to make your own at home with ease.

You’ll need a good stock pot to make chicken broth. I like this 12-quart stainless steel stock pot from All-Clad because it comes with a perforated insert to easily strain the bits from your chicken broth when it’s done.

You’ll also want a ladle to portion your broth out into containers if you’re storing in the fridge or freezer.

Regency Soup Sock *Triple Pack*- total 9 Socks

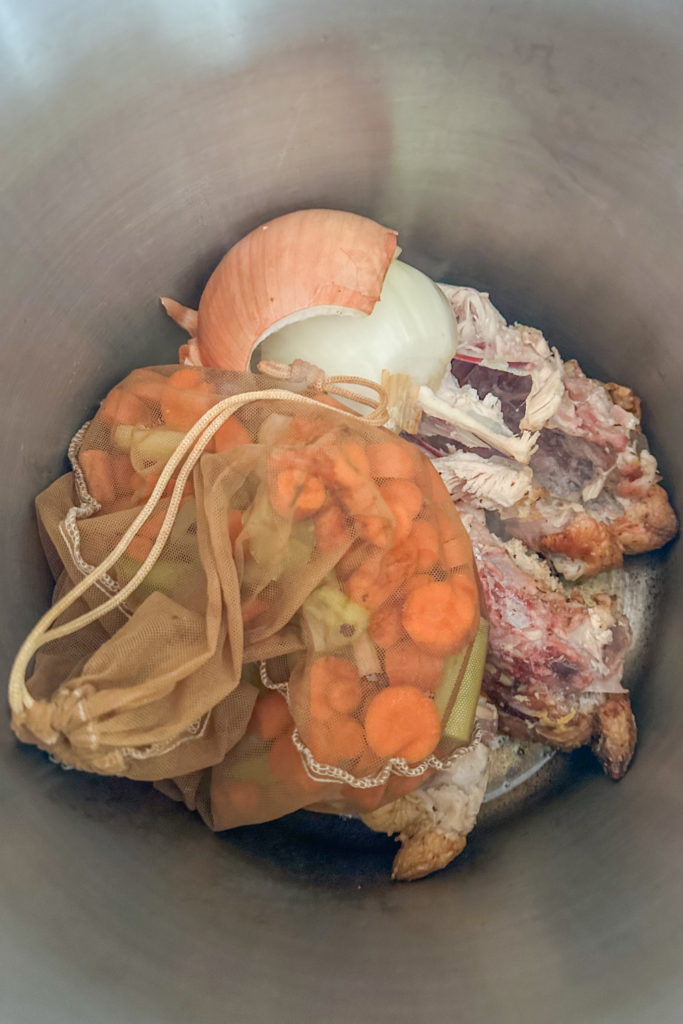
This Soup Sock is optional, but I love this handy tool for those of you that don’t have a stock pot with a built in strainer (like myself).  I usually keep loose ingredients (like carrots, celery, bay leaves, etc.) in this mesh bag or “Soup Sock” to make straining and clean-up easier.

Hi, I’m Leslie!

Hi, I’m Leslie (she/her)! I hope you enjoy this chicken broth recipe.

My name is Leslie, and I’m the founder of PunkMed! On my blog, I and my team share info, experiences, and recommendations in the area of sustainability, urban homesteading, and the occasional recipe. Our goal is to help you slow down and savor the small joys in life through sustainable practices (including making bone broth!)

In today’s post, I’m sharing my favorite foolproof chicken broth recipe for those chilly winter nights (or anytime really!) I’ve been making this chicken stock for the past 10 years, and it never fails.

I pretty much sip on this broth just straight almost every day throughout the fall and winter here in New England! It’s so good for you–and I swear it can kick a cold!

Let’s get into it!

This post is all about how to make chicken broth.

Chicken Broth

The easy chicken broth is simple and nutritious.
Prep Time 15 minutes
Cook Time 4 hours
Maximum Cook Time 2 days

Equipment

  • 1 12-quart stock pot

Ingredients
  

  • 1.5 lb chicken bones carcass, backbones, leg, thigh bones, etc.
  • 1 gallon water water to cover ingredients
  • 1 yellow onion halved, skin on
  • 2 cloves garlic
  • 4 stalks celery roughly chopped
  • 4 carrots roughly chopped
  • 2 bay leaves
  • 1 tsp peppercorn
  • 1/4 cup acid apple cider vinegar, white vinegar, lemon juice, etc.
  • 1 bunch herbs (parsley, rosemary, thyme, etc.) optional
  • 2 tbsp cooking oil extra virgin olive oil, ghee, etc.
  • 1 tbsp salt

Instructions
 

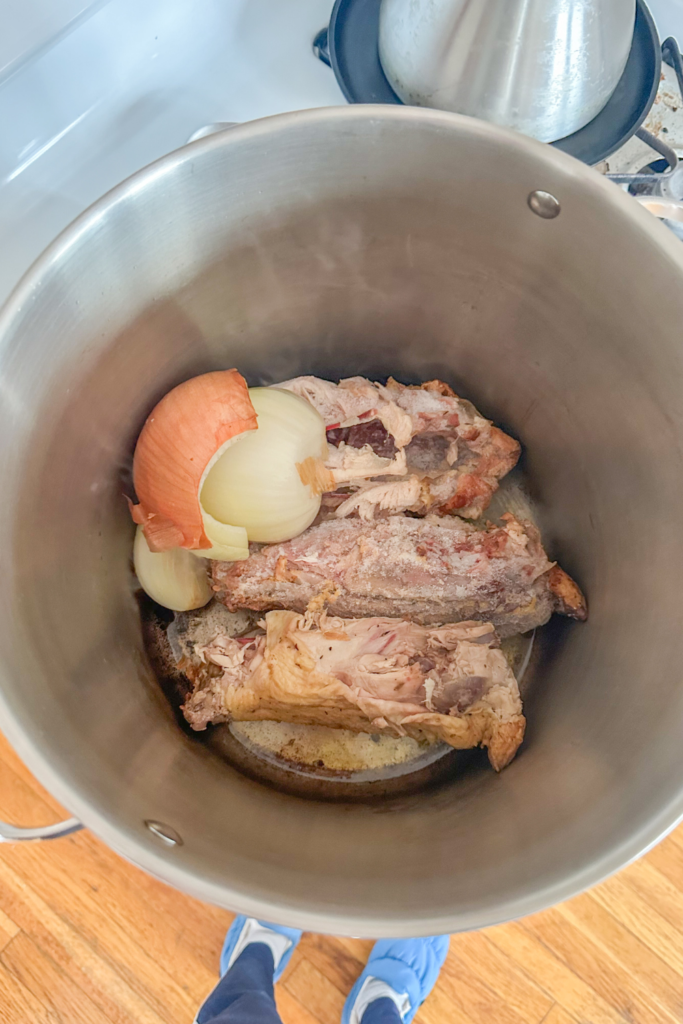
  • Cut the onion in half leaving the skin on. Onion skin will lend a yellow hue to the broth. Add the onion skin side down to a stock pot with the cooking oil and cook over medium heat until browned.
  • Smash the garlic cloves on the countertop, removing skin. Add to the stockpot and cook until fragrant, about 1 to 2 minutes.
  • Add chicken bones to the stock pot. Optional: cook bones until browned. Browning the bones will lend a nice color and flavor. If the bones have already been cooked, do not bother.
  • Add carrots, celery, bay leaves, peppercorn, salt, herbs, and other optional add-ins to the stock pot.
  • Cover ingredients by 4 inches of water, at least 1 gallon.
  • Add vinegar or other acid to stock pot.
  • Bring to a boil.
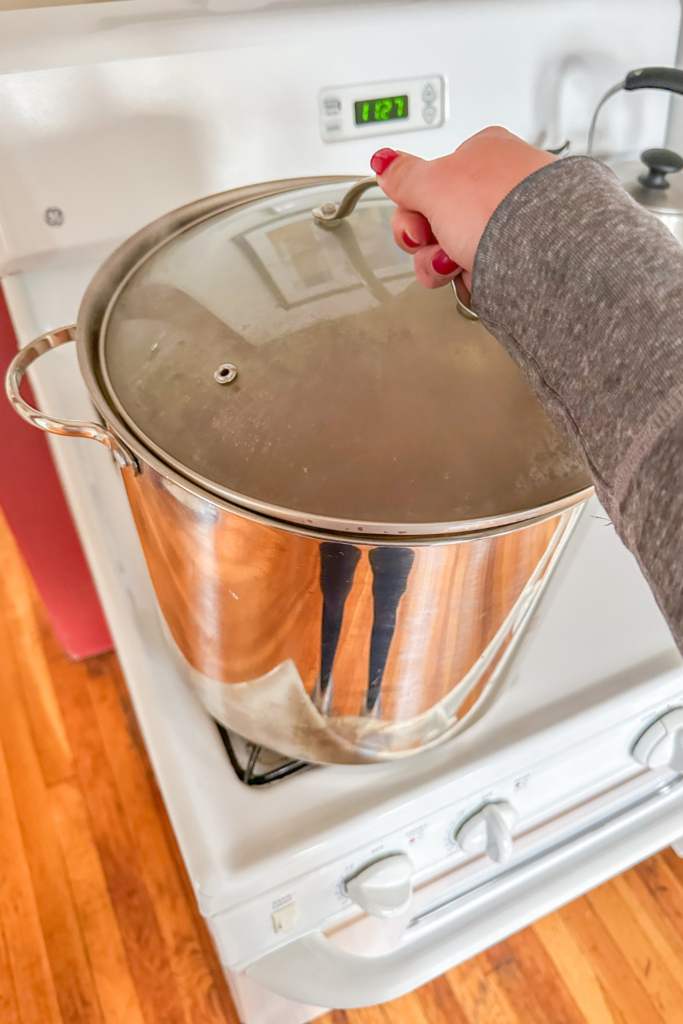
  • Reduce heat to low. Place a lid on the pot and allow it to simmer over a low flame for at least 4-6 hours.

Notes

This recipe is very flexible.
Feel free to double or triple based on the size of your stock pot, etc.
Making chicken broth is a good way to use kitchen scraps. Good food scraps to add to chicken broth are vegetable trimmings (carrot, celery, root vegetables, etc.), herbs (parley, rosemary, thyme, tarragon stalks, etc.) and even Parmesan cheese rinds.
This recipe can be made in a crock pot and simmered on low for 1-2 days. Longer cook times will extract the most nutrients from the bones!

How to Make Chicken Broth – Step by Step Photos

Step #1 – Cut the onion in half leaving the skin on. Onion skin will lend a yellow hue to the broth. Add the onion skin side down to a stock pot with 2 Tbsp cooking oil and cook over medium heat until browned, about 5 minutes.

Step #2 – Smash the garlic cloves on the countertop, and remove the skin this time. Add the smashed garlic cloves to the stockpot and cook until fragrant, about 1 to 2 minutes.

Step #3 – Add chicken bones to the stock pot. It is optional to cook the bones until browned. Browning the bones will lend a nice color and flavor. If the bones have already been cooked (e.g. you’re using leftover bones from a roast chicken) do not bother.

Step #4 – Roughly chop the carrots and celery. Add the carrots, celery, bay leaves, peppercorn, salt, herbs, and other optional add-ins to the stock pot. It’s helpful to put the add-ins in a mesh bag or “Soup Sock”, or other type of strainer, to make straining out your stock easier later.

Step #5 – Cover ingredients by 4 inches of water. This should be about a gallon, but the exact volume of water necessary will depend on the shape of your pot, the volume of the ingredients, etc. This does not need to be exact.

Step #6 – Add 1/4 cup of vinegar or other acid to stock pot. Acid is essential to the nutritive value of bone broth, as it is the acid that breaks down the bones and pulls out minerals as the broth cooks.

Step #7 – Turn heat on high and being the broth to a boil.

Step #8 – Reduce heat to low. Place a lid on the pot and allow it to simmer over a low flame for at least 4-6 hours.

How to Make Chicken Broth in a Crock Pot

Again, this recipe is super flexible and can easily be adapted for a crock pot.

In fact, using a crock pot is one of my favorite ways to make bone broth because it allows for a longer cook time, extracting the most nutrients from the bones.

To make chicken broth in a crock pot, simply throw all of the ingredients above in a crock pot and cover well with water. You won’t be able to brown the onions and bones in the crock pot, but that’s okay.

Let simmer on low for up to 1-2 days, but at least 4-hours.

How to Store Chicken Stock

For the most part, this recipe will produce large enough batch of chicken broth that you will need to store some for later.

Chicken broth can be refrigerated for 3-4 days and frozen for 2-3 months.

Wait until your chicken stock has cooled and transfer it to glass or plastic quart containers. Be aware that the liquid broth will expand when frozen, which may cause the glass to crack. I prefer to use plastic containers in the freezer for that reason.


This post was all about how to make chicken broth.

Other posts you may like:

How to Prepare Your Garden for Winter to Ensure Healthy Soil Next Year

how to prepare garden for winter

Wondering how to prepare your garden for winter so that the soil is healthy as possible for the next growing season? Follow this complete guide to preparing your garden for winter.

In my first year of gardening, I didn’t give too much thought to how to prepare my garden for winter. To be honest, there is so much excitement and work to do during the growing season that it honestly didn’t occur to me until the first frost set in.

It felt wrong to just leave the soil bare out in the freezing cold, but I didn’t know any better at the time.

Now, with nearly a decade of gardening and urban homesteading under my belt, I am sharing the simple steps I learned along the way to properly prepare your garden for winter to ensure the healthiest soil for next year.

Why Prepare Your Garden for Winter?

Here in New England, (I grow in Zone 6b) there is not much to grow in the winter. Of course, there are ways to extend your growing season, but for the most part, winter is a time of rest and reset for the garden.

As a urban homesteader, I personally use the winter to focus on other practices, such as sourdough bread baking and cold water therapy.

Still, there are a few steps you can take at the end of the growing season (in the fall) to ensure the soil is in your garden is as healthy as possible for the next year.

These simple steps will protect beneficial insect and microbial life and add nutrient-dense matter to build your soil through the harsh winter.’

When to Prepare Garden for Winter

Generally, you should begin preparing your garden for winter after you’ve harvested all your crops before the first frost of the year.

It’s important to harvest everything in your garden before the first frost because the freezing temperatures can kill the plant and damage the integrity of the edible parts.

I recommend finding the estimated first fall frost date for your area in the Farmers Almanac. Use the estimated date to plan ahead, but pay attention the weather forecast in case you need to harvest early.

As discussed below, I also recommend taking in any electronics that you may use in the garden before the first frost, as these can be damaged in the cold.

Hi, I’m Leslie, Urban Gardener!

Hi, I’m Leslie (she/her)! I hope you learn how to prepare your garden for winter on the blog today!

My name is Leslie, and I’m the founder of PunkMed! On my blog, I and my team share my info, experiences, and recommendations in the area of gardening, urban homesteading, and natural living. Our goal is to make it less overwhelming for you to live a fun and sustainable life!

In today’s post, I’m sharing my steps to preparing your garden for winter. These ideas come from my years of experience no till gardening in New England–which is known to have some pretty harsh winters!

Let’s get into it!

This post is all about how to prepare garden for winter.

How to Prepare Garden for Winter

#1 Clear Out Annuals

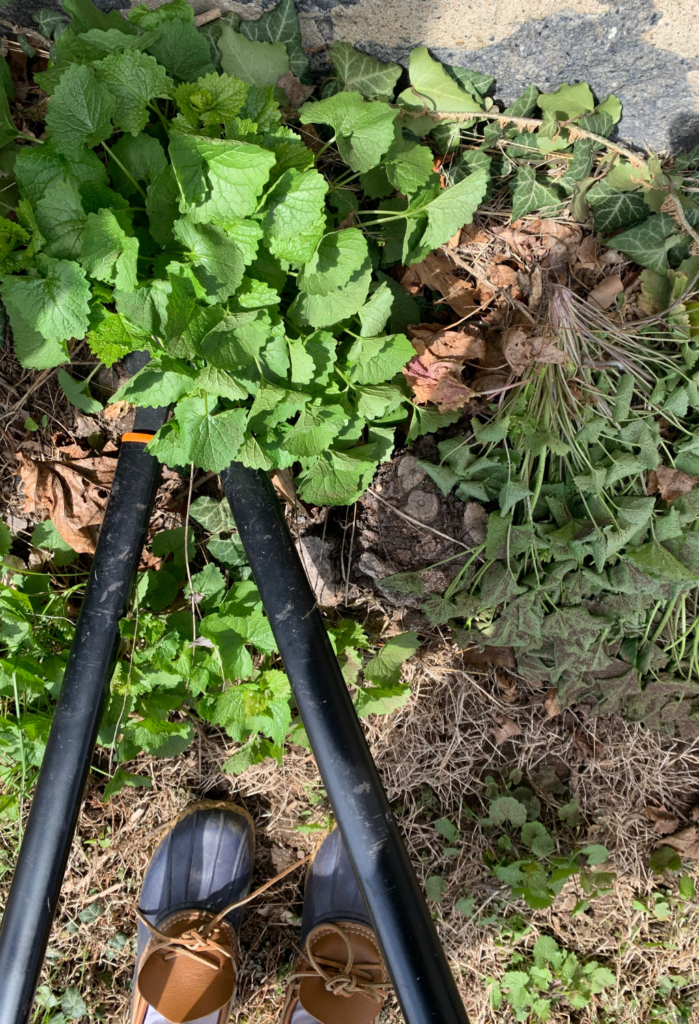
Cut plants at the base of the stem.

First, as a practitioner of no-dig gardening, I like to disturb the soil as little as possible when preparing my garden for winter. This practice leaves beneficial microbial and insect life intact. Plus, the decomposing plant matter of last years’ plants will provide nutrients to your garden next year. It’s the circle of life!

But, how do we remove the annual plants in the winter to make room for new plants next year without disturbing the soil?

Corona Clipper BP 4214D Flex Dial Bypass Pruner With Comfort Gel Grips, 3/4 Inch, Red/Black

Use a good pair of gardening shears to clip smaller plants at the base, where the stem meets the soil.

NISAKU NJP650 The Original Hori Hori Namibagata Japanese Stainless Steel Weeding Knife, 7.25-Inch Blade

You may need to remove larger plants entirely. Use a hori hori knife (AKA a gardening knife) to cut around the base of the stem, and use a ‘twist-and-pull’ motion to remove the plant.

#2 Clean Up Perennials

Next, perennial plants should not be removed from your garden (that is, if you want them to grow again next year!) However, you should clean them up a bit to ensure good growth next year.

Use gardening shears to prune away any spent flowers or dead/diseased foliage.

#3 Take in Irrigation Equipment

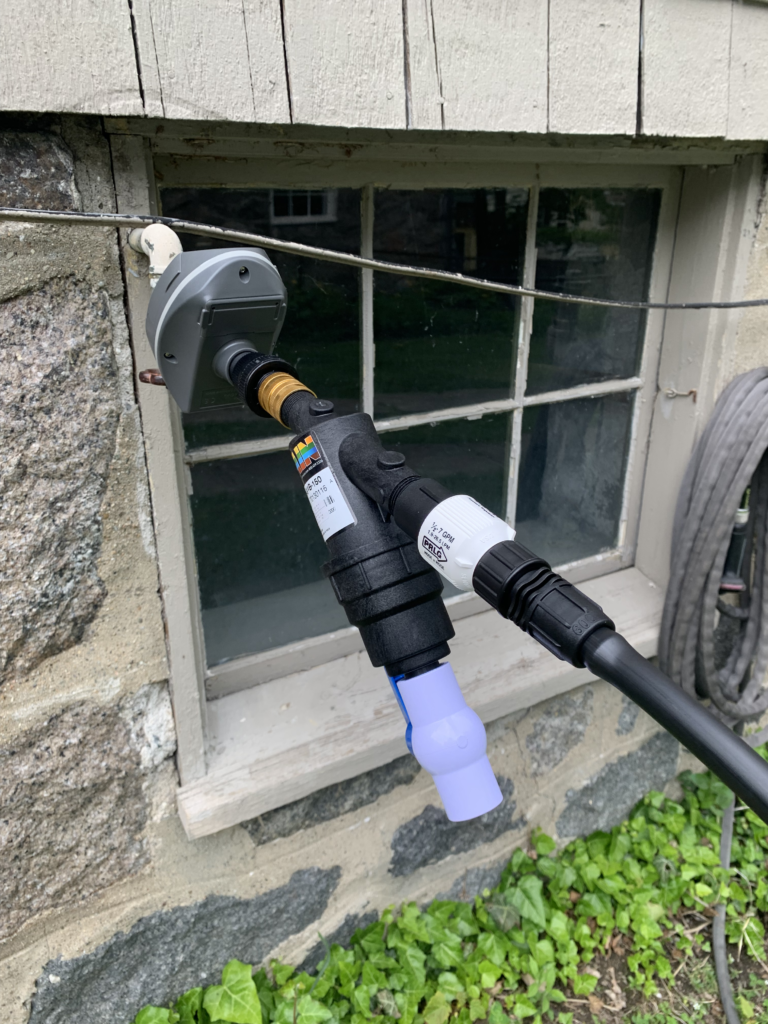
Take in the head assembly for winter to protect the electronics and delicate equipment from freezing temperatures.

Next, if you have a drip irrigation system in place like me, it’s critical to bring in any electronics and delicate equipment that could be damaged by freezing temperatures. I bring in the entire head assembly at the hose tap for the winter (including the water timer,  check valve, water filter, and pressure regulator.)

The drip tubing can stay outside for the winter.

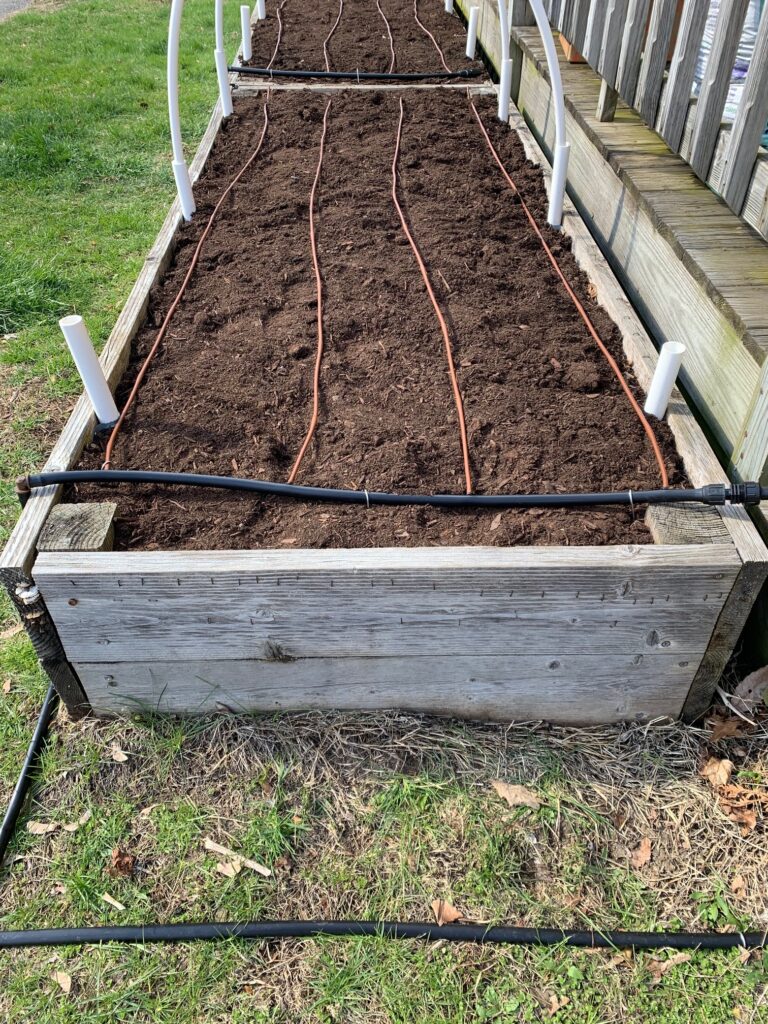
Generally, it’s okay to leave the ground irrigation system out for the winter (including the drip line, drip tape, drip emitters, etc.) Basically, the tubing that actually brings the water to the plants can be left outside for the winter.

#4 Put Down Layer of Compost

Spread a one inch (1″) layer of compost over your entire garden bed.

After harvesting, removing dead plant matter, and taking in irrigation equipment, you’re ready to prepare your soil for next year.

Next, spread a layer about one inch (1″) thick of compost across your garden.

Compost is the brown, crumbly byproduct of decayed organic matter. You can buy compost, or make your own.

I always use my favorite Coast of Maine Compost.

Coast of Maine Quoddy Blend (1 cu ft) Organic and Natural Compost Blend with Lobster and Crab - Improves and Revitilizes Soil

Compost is the most nutrient-dense additive you can provide your soil. Think of it as a nice healthy meal your soil can enjoy all winter along, so it’s strong and ready to go for next year!

#5 Cover with Leaves

how to improve garden soil over the winter
Cover your garden bed with leaves.

Finally, the last step is like tucking in your garden for a long rest, and will ensure it’s reenergized for the next growing season.

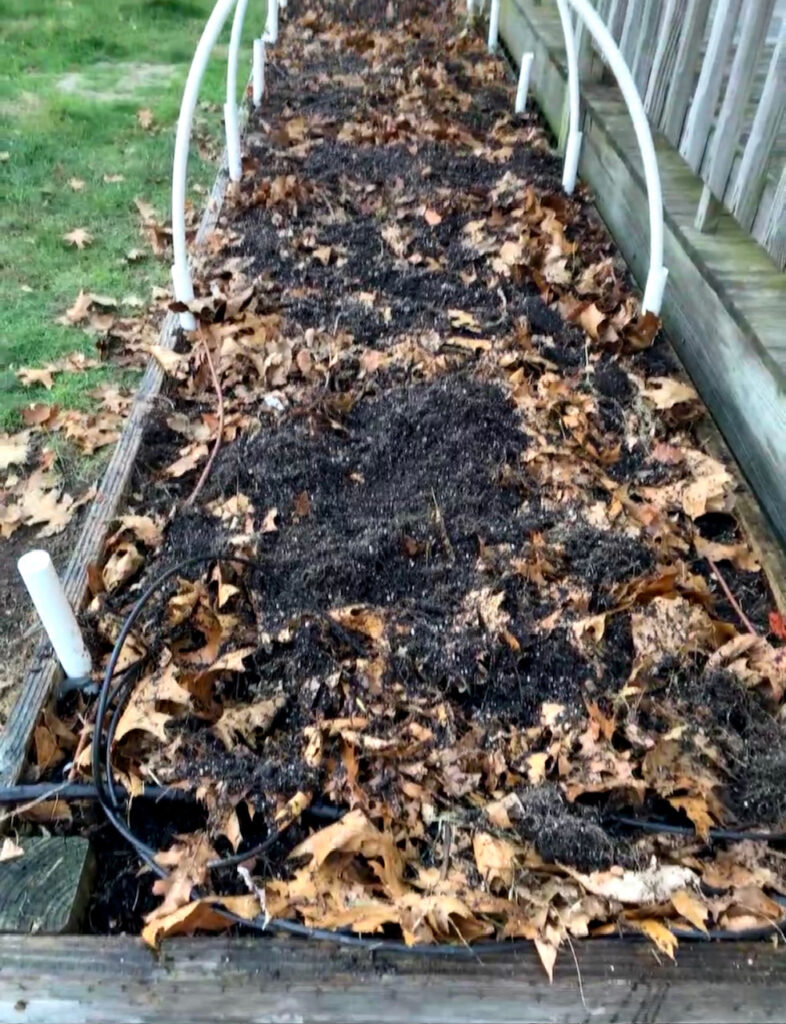
Lay down about three inches (3″) of leaf litter over your compost layer, completely covering your garden area.

These leaves can be collected from elsewhere in your yard. (Don’t throw those leaves away!) I like to run the collected leaves over with a lawn mower a few times to shred them a bit, making it easier for the leaves to break down in the garden.

Plus, this layer of leaves insulates your garden and the life it sustains over the winter, and provides important habitat for beneficial insects.

This post was all about how to prepare garden for winter.

What to Read Next:

12 Cutest Sustainable Slippers Ethically Made for Staying In

best sustainable slippers

Looking for sustainable slippers that are made out of environmentally friendly materials and are actually cute? Here are some of my favorite eco friendly slippers.

As an avid thrifter myself, I’ll be the first to say there are some items that you’re just not going to want to thrift–slippers are one of them.

I find that slippers get dingy pretty fast, and they are a clothing item I usually want to replace every couple years.

Unfortunately, conventional slippers are made with less-than-ideal materials like polyester, synthetic rubbers, and more. These materials are often made from petroleum byproducts, and sit in landfills for years when tossed in the trash.

I don’t know about you, but I don’t want to be contributing to our landfills every time I replace my house shoes!

That’s why, this fall I set out to find the best sustainable slippers I could feel good about purchasing.

What are Sustainable Slippers?

As always, I’m prioritizing durable products that will last longer in the first place, and are made from eco-friendly or recycled materials.

Sustainable slippers may be made from eco-friendly materials like ethically sourced wool, shearling, and leather (for my non-vegans!), or plant-based materials like organic cotton, hemp, or cork. Some of the sustainable slippers below are made in part with recycled plastic materials like polyester.

How to Clean and Care for Slippers

Before I share my favorite sustainable slippers, here are a few tips to consider to best care for your new eco-friendly slippers:

  1. Wear socks! Listen, I know you want to throw your slippers on first thing in the morning without thinking, but putting your bare feet in slippers from day-to-day will get nasty–fast! (Stinky feet+ dead skin build-up=EW!) Socks provide a protective barrier and an extra layer of warmth.
  2. Consider buying washable slippers. Not all slippers are machine-washable, so consult the manufacturer’s instructions before throwing in the wash. If the care instructions don’t specify they can be put in the washing machine, assume they will need to be hand-washed with a mild, natural laundry detergent.
  3. Keep your slippers in the house! I know it’s tempting to run to the mailbox in your slippers, but committing your slippers as house shoes ONLY will keep them in the best shape for longer.

This post is all about sustainable slippers.

Best Sustainable Slippers

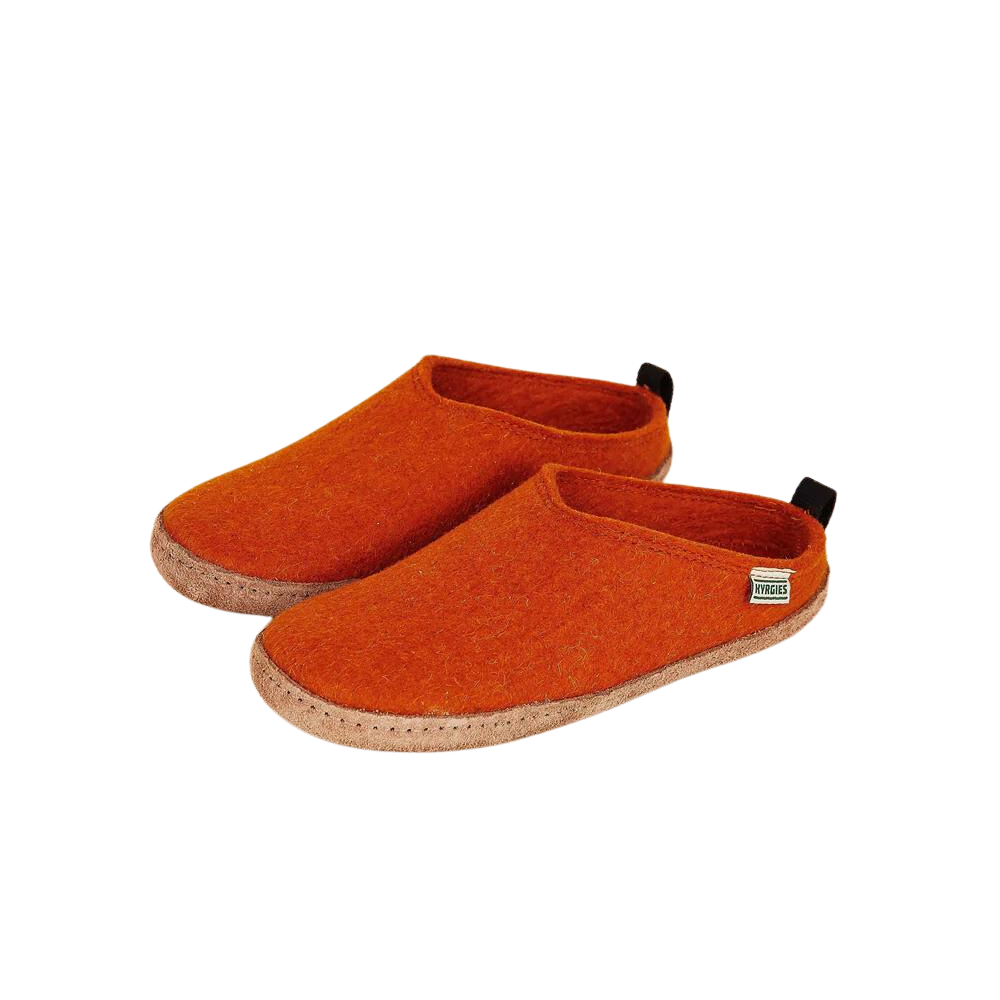
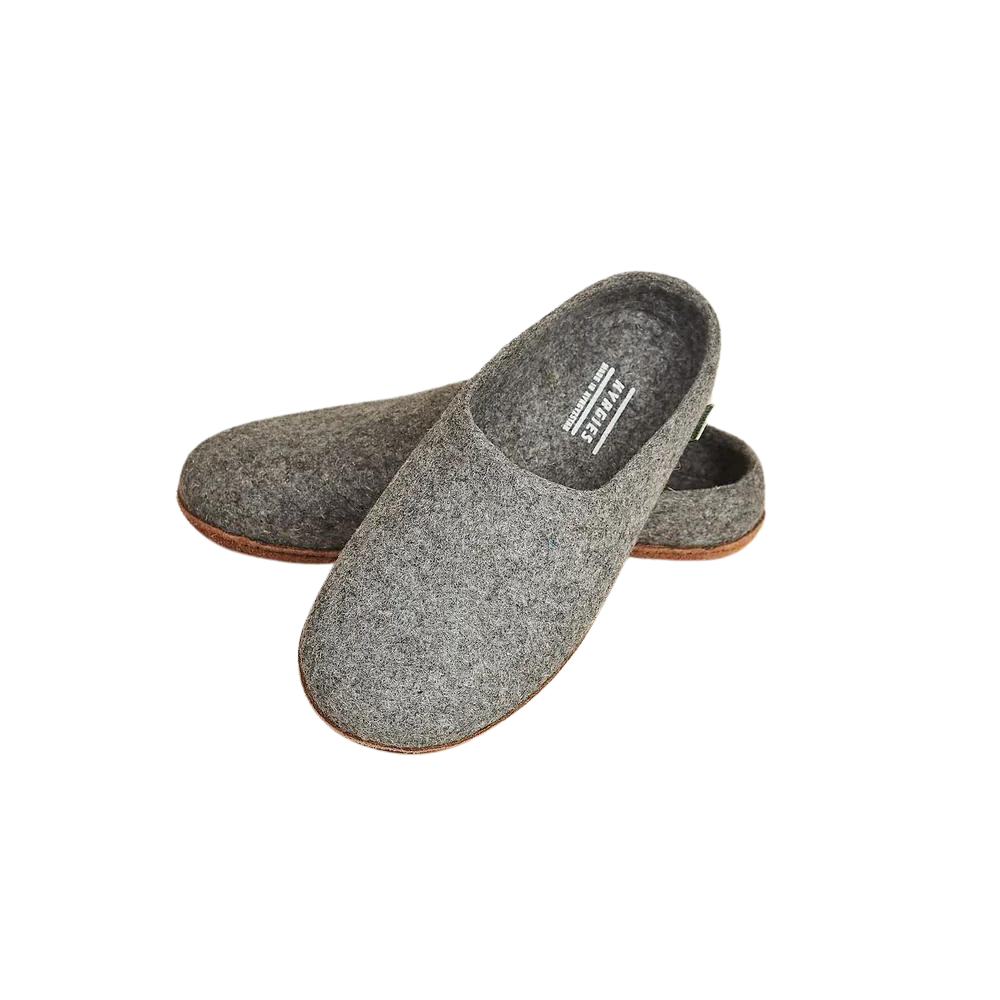
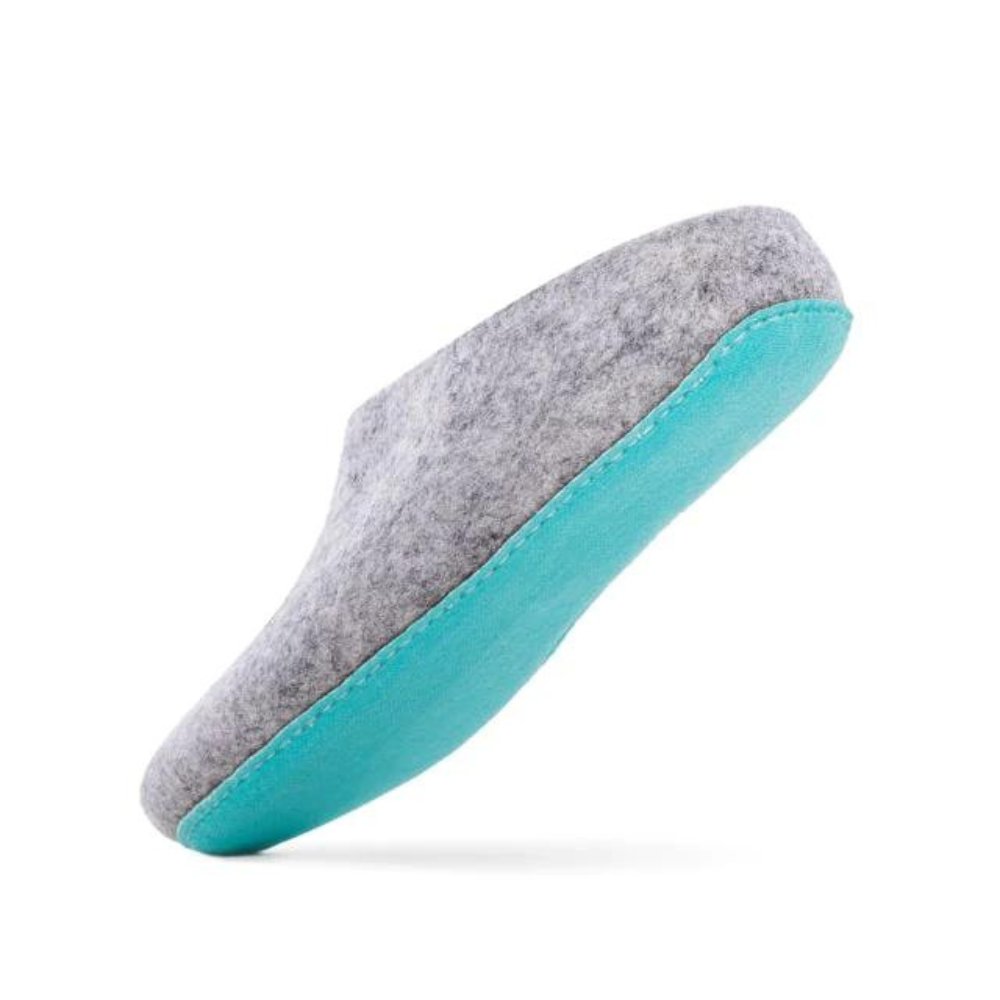
#1 Sustainable Slippers – Kyrgies

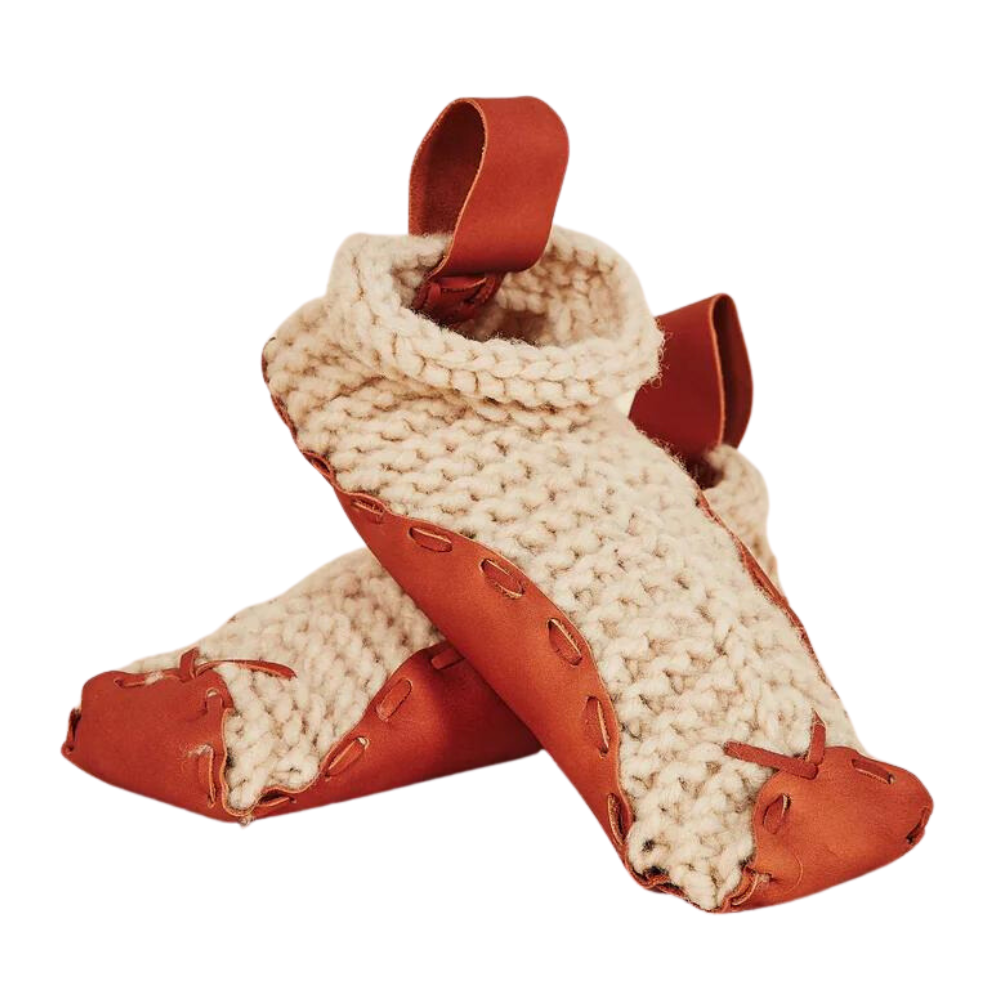
Made using centuries-old techniques by the best wool felters in the world, Kyrgies slippers are made with craftsmanship in every stitch. It takes about six weeks to produce to craft these slipper from raw wool to shoe! Each slipper is made from the wool of happy, pastured sheep, and vegetable-tanned leather.


#2 Eco Friendly Slippers – Allbirds

I mostly know this brand from Instagram ads, so I was pleasantly surprised to learn more about their commitments to sustainability! These slippers are made with reused wool scraps, recycled polyester, and FSC® certified natural rubber. As a company, they are halfway to their goal of zero carbon emissions by 2023.


#3 Best Sustainable Slippers – Chilote

Made by local artisans with 100% Patagonian sheep’s wool and salmon leather, these slippers are a reflection of the place they are made in Patagonia, Chile. Yes, you read that right–the soles of these slippers are made with byproducts of the Chilean salmon fishing industry.


#4 Sustainable Slippers – Baabushka

For those of you that like a sturdier house shoe, Baabushka offers slippers made with latex rubber soles and 100% all-natural wool from New Zealand. (Yes, they even have arch support!) Handmade by artisans in Nepal, these durable house shoes are sure to last longer than your average conventional slipper.


#5 Eco Friendly Slippers – L.L. Bean

As a New Englander, I must admit–I have a soft spot in my heart for this brand. I’ve owned many a pair of L.L. Bean slippers over the years, and can personally attest to their durability. Their most popular “Wicked Good Moccasins,” make an excellent Christmas gift–so much so that the brand apparently sells 7 pairs a second in December! L.L. Bean is making sustainable strides as a company, building solar panels to power their stores, recycling most of their company waste, and eliminating PFAS and plastic packaging materials.


#6 Recycled Slippers – Land’s End

I love when brands even your grandma knows (no shade to Land’s End!) take steps toward sustainability! These super cozy house shoes are made with recycled insole with jersey upper and polyester blend sock. I don’t usually love to see the polyester, but I looked further and found that 100% of Land’s End polyester fibers are from a recycled source.


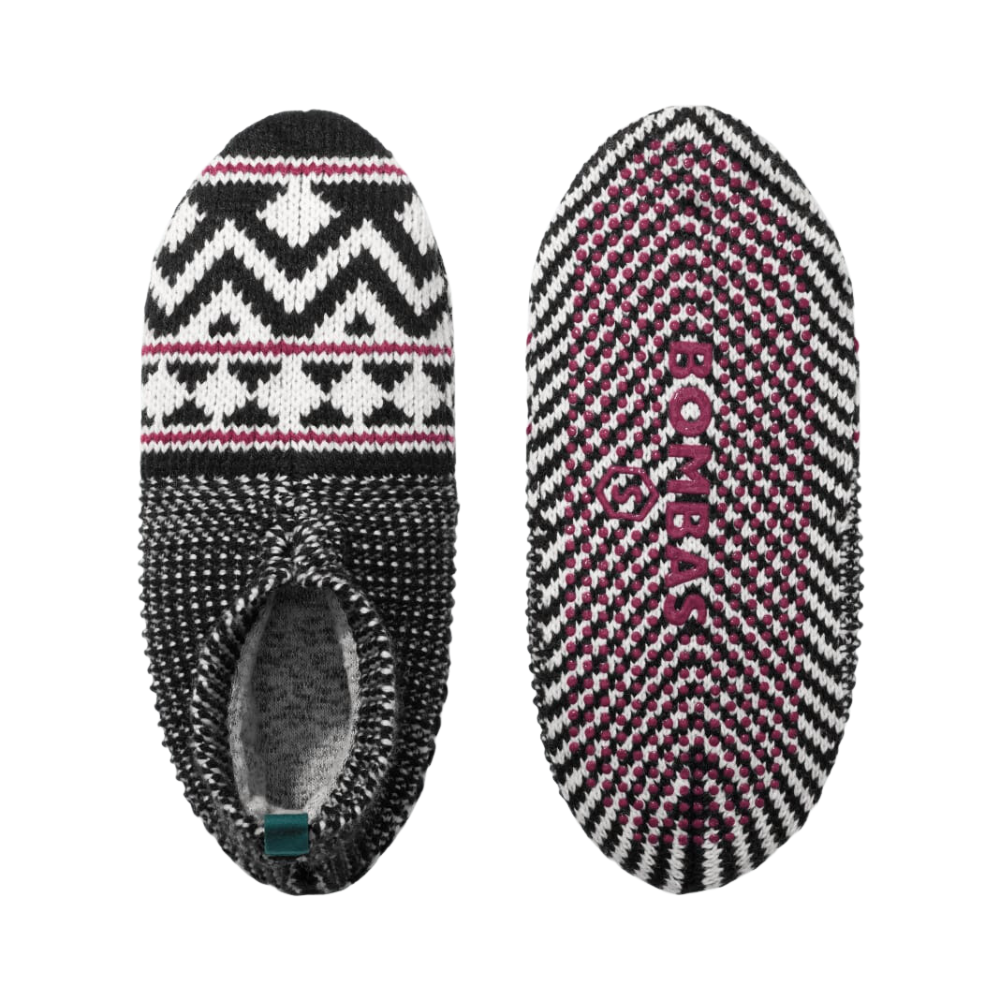
#7 Best Sustainable Slippers – Bombas

I absolutely love the mission of this company. For every item purchased, Bombas donates one of the top most requested items to their homeless shelter partners (socks, undergarments, etc.) Luckily for us, they also make the coziest, sock-like slippers! Bombas makes a point to use recycled materials in their products, and also offers customers a service to recycle their old clothing to keep them out of landfills.


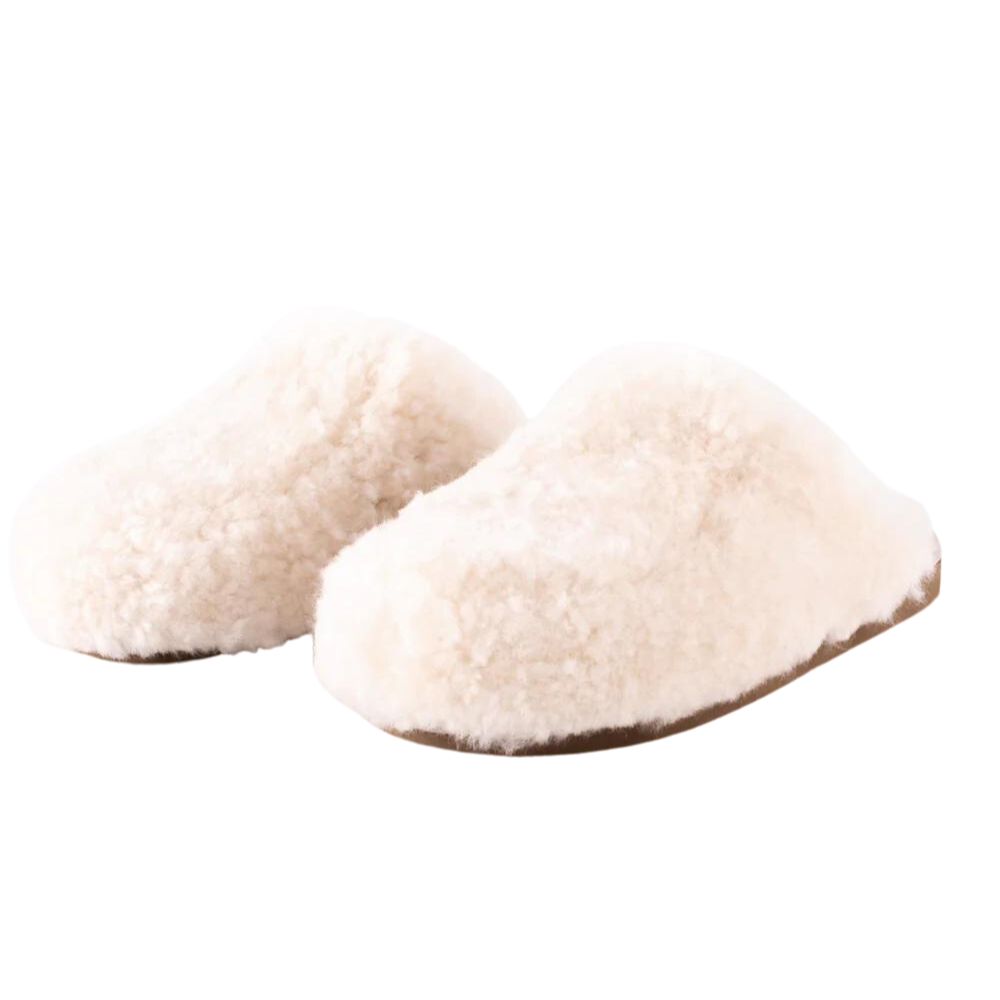
#8 Best Eco Friendly Slippers – Quince

As a brand, Quince promises to offer luxury quality at more reasonable prices. They also put sustainability at the forefront, choosing organic materials, environmentally conscientious packaging and ethical business practices wherever possible. Their shearling slippers are made from 100% Australian shearling lining in in BSCI certified factories (which aim to improve working conditions throughout the supply chain.)


#9 Sustainable Slippers – Faherty

All of Faherty’s clothing line comes with a quality guarantee, meaning if your item has a performance issue wihtin 5 years of purchase, they will intervene to make it right! Looking at their materials sourcing though, I doubt they have too many issues. These slippers are made in Sweden with 100% Sheepskin.


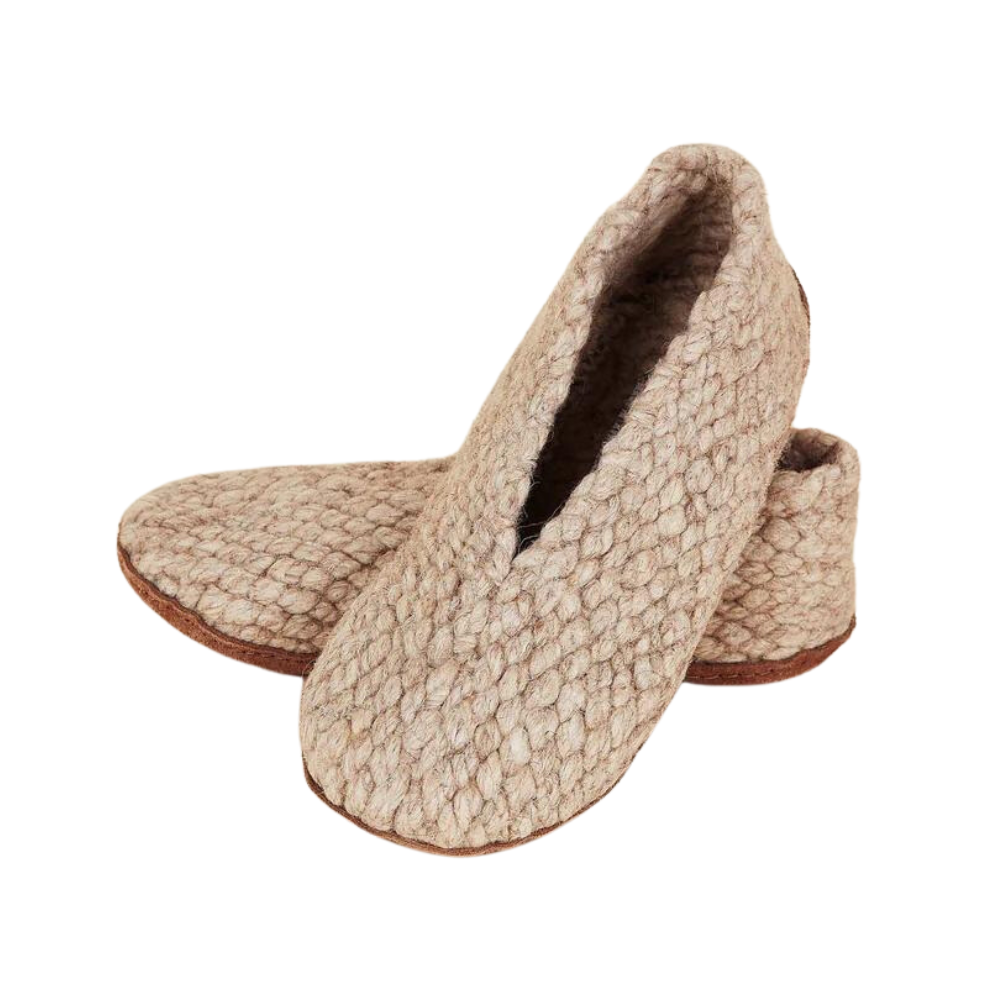
#10 Eco Friendly Slippers – Coyuchi

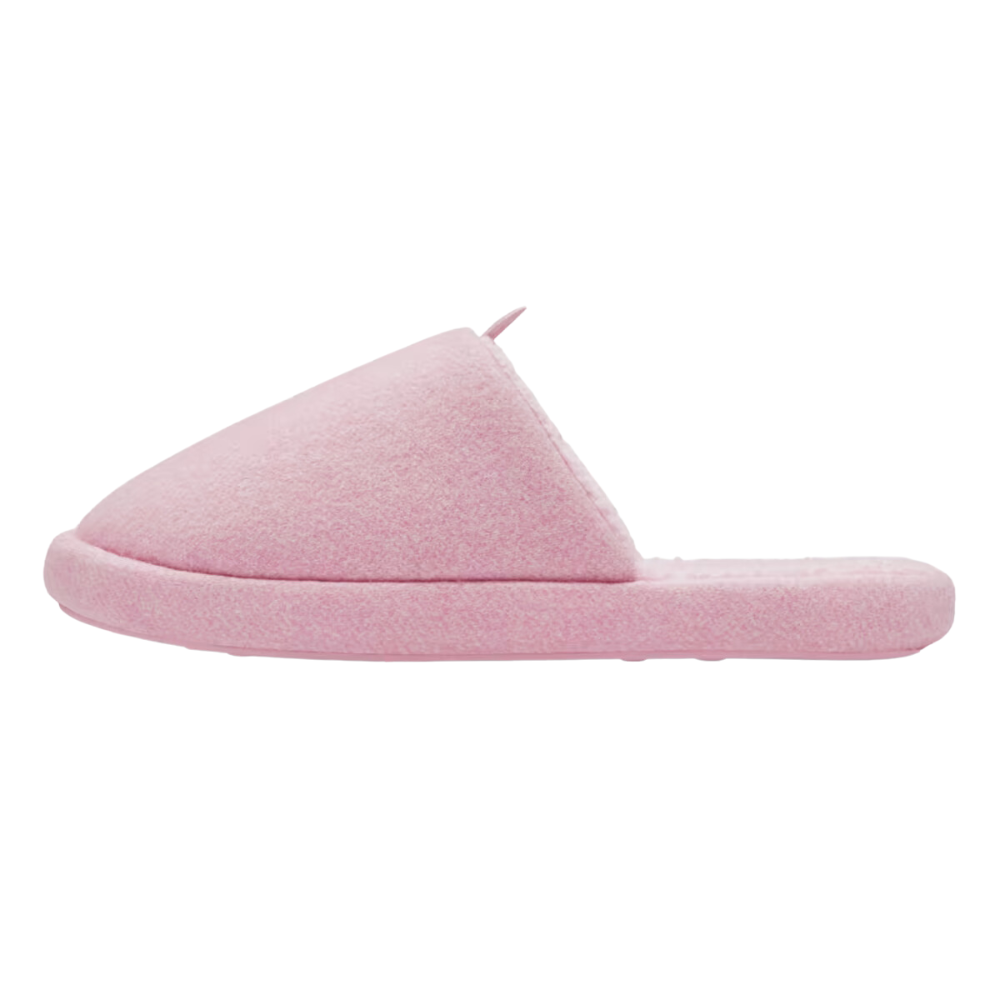
This brand is actually known for their bedding, so leave it to them to make some of the comfiest looking “room shoes.” Inspired by Japanese Uwabaki house slippers, these cloud-like shoes are made from GOTS Certified organic cotton. Plus, they are machine washable!


#11 Best Sustainable Slippers – MadeTrade

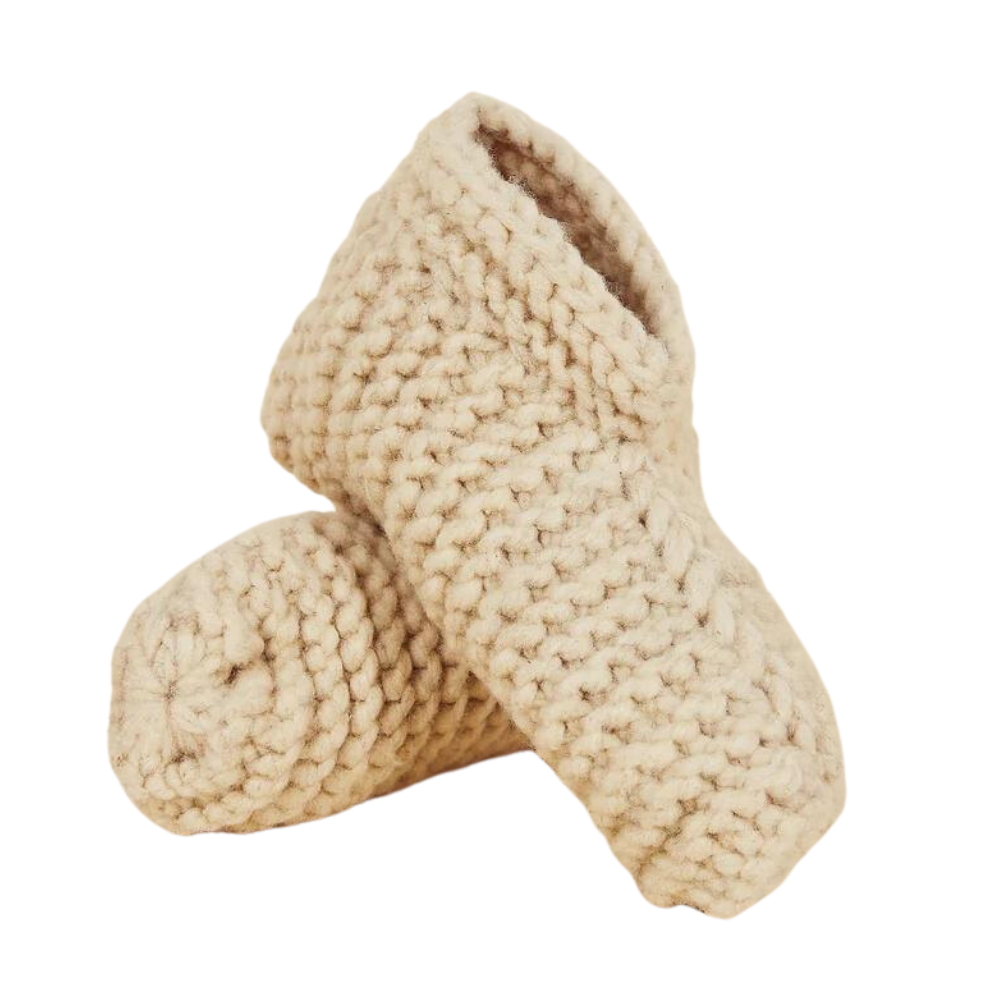
I consider MadeTrade my hub for all things sustainable and ethical. If your looking for the sustainable version of pretty much anything, from clothing to home goods, they probably have it on MadeTrade. MadeTrade has a number of eco-friendly slipper options, ethically made by artisans from around the world!


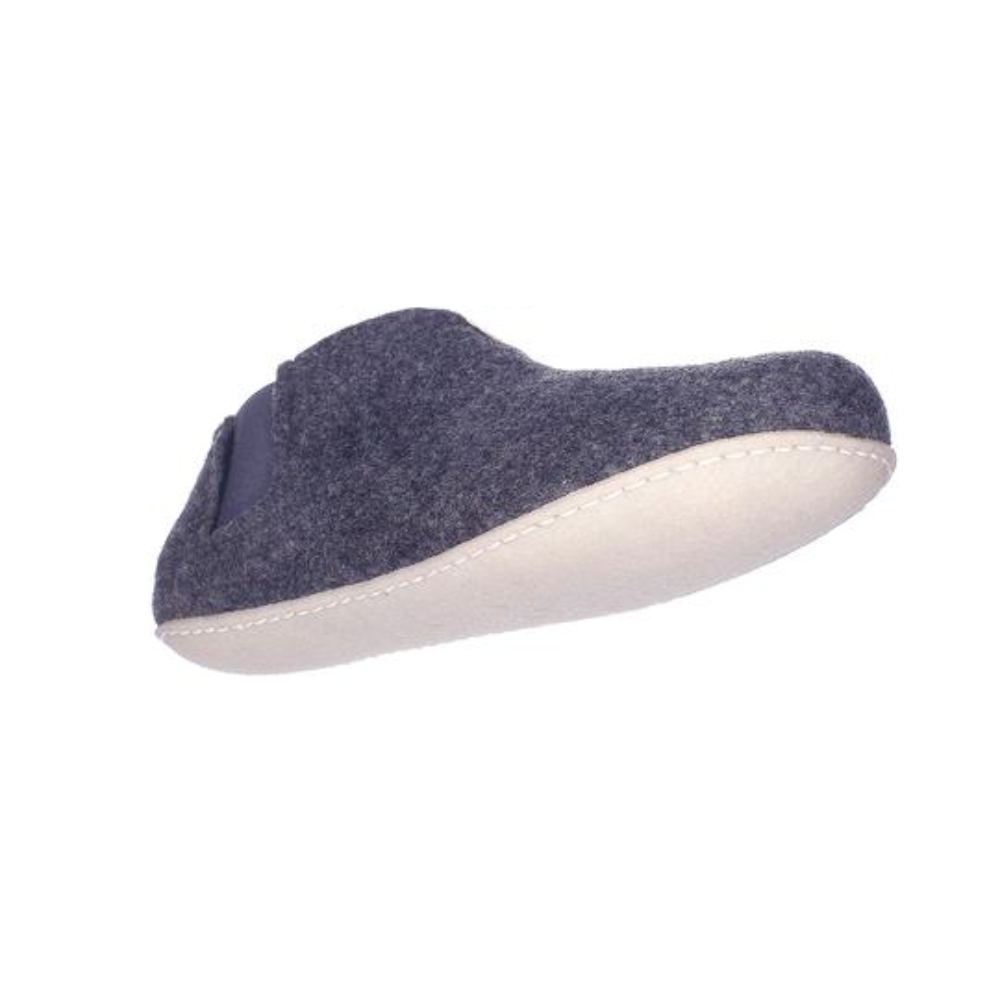
#12 – Sustainable Slippers – Baabuk

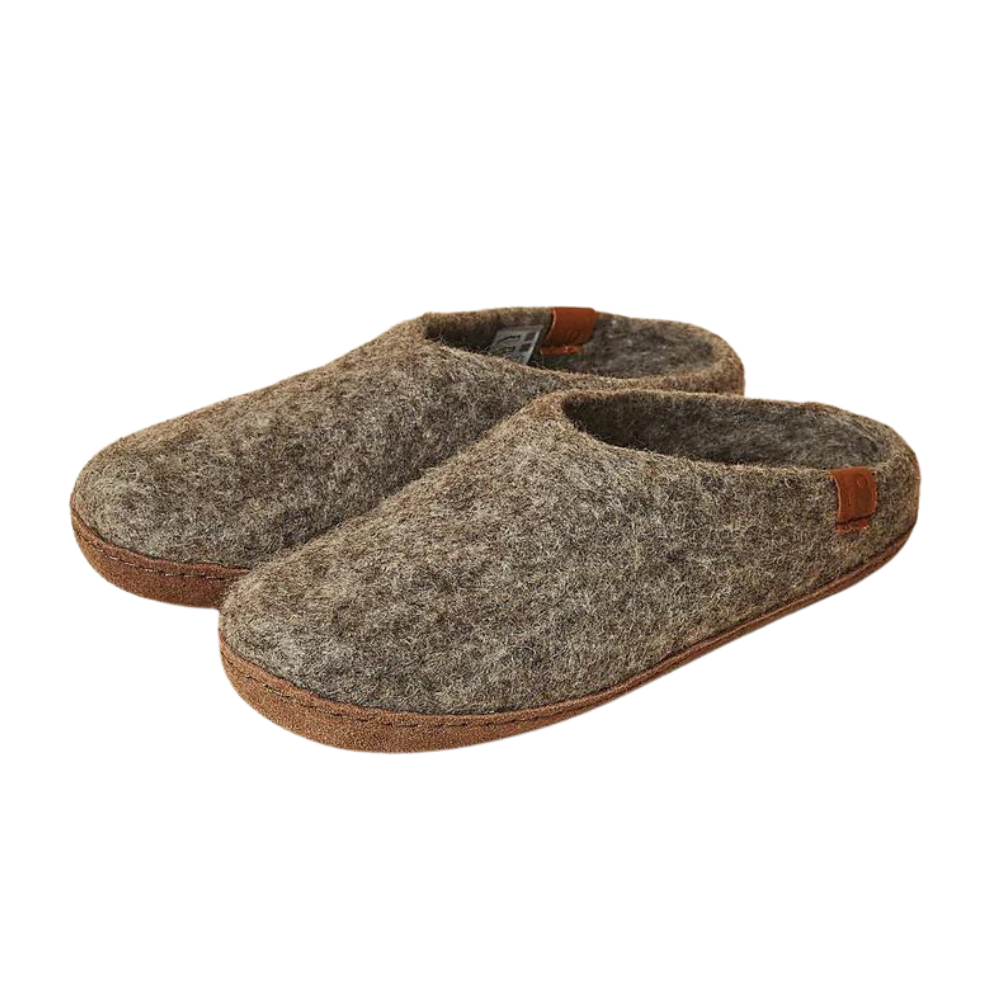
It’s clear this company has considered ways to make each step of the slipper lifecycle more sustainable. Baabuk even recycles the water used to wash the 100% New Zealand wool they source for their slippers! The company also offers a recycling program for your old Baabuks. I also love their “upcycled” slippers, made from old ski skins.


This post was all about sustainable slippers.

Hi, I’m Leslie!

Hi, I’m Leslie!

My name is Leslie, and I’m the founder of PunkMed! On my blog, I and my team share my info, experiences, and recommendations in the area of sustainability, non-toxic products, and natural living. Our goal is to make it less overwhelming for you to live a fun and sustainable life!

In today’s post, I’m shared my top picks for sustainable slippers. These suggestions come from my years of experience trying to find durable house shoes made from more eco-friendly materials.


What to Read Next:

10 Sustainable Luggage Brands for Conscious Travelers

SUSTAINABLE LUGGAGE BRANDS

Looking for sustainable luggage to invest in before your next big trip? These sustainable luggage brands create eco-friendly gear for the conscious traveler.

Today on my blog, I’m sharing my top picks for sustainable luggage brands on the market.

This post comes out of my own personal research on the heels of my trip to the South of France, where my cheap, plastic luggage luggage was literally falling apart at the seams. At one point, my bag burst open on a busy subway, leaving me scrambling to collect my underwear as strangers looked on! Not fun!

Anyway, I came home knowing I needed to replace my current luggage with something made with durable, eco-friendly materials.

Luckily, in my research, I found multiple options for sustainable luggage that fit a range of budgets! I knew I had to share my findings with my readers. Note, however, that products that are made to last will often have a higher price point overall.

Before I share my favorite sustainable luggage brands, here are a few tips to consider when shopping sustainable luggage:

  1. When shopping for eco-friendly luggage, you will come across brands that use vegan leather. I don’t consider most vegan leather sustainable. This is because most vegan leather is made from polyurethane, AKA plastic, and just NOT better for the planet. However, I understand that comfort around using animal products varies, and many of the brands below use at least some plastics (most are recycled.) There are alternative vegan leathers that are truly eco-frendly, like these bags made from plants.
  2. When buying luggage, I find it’s best to invest in an entire set from one single brand. This means buying a checked bag, carry on, and packing accessories all from the same brand. That way, you know the products work well together for maximum ease while you travel.

Hi, I’m Leslie!

Hi, I’m Leslie!

My name is Leslie, and I’m the founder of PunkMed! On my blog, I and my team share my info, experiences, and recommendations in the area of sustainability, non-toxic products, and natural living. Our goal is to make it less overwhelming for you to live a fun and sustainable life!

In today’s post, I’m sharing my top picks for sustainable luggage. These ideas come from my years of experience in sustainable travel, and more recently, my luggage experience during my two-week road trip in the South of France!

Alright, let’s get into it!

This post is all about sustainable luggage.

#1 Sustainable Luggage – Paravel

I’m super excited about the luxury sustainable luxury brand Paravel. This brand is playing at a pretty advanced level when it comes to prioritizing eco-friendly materials; all of their products use upcycled materials in some way, including nylon and canvas made from recycled plastic bottles. For those who feel weird about real leather, Paravel uses a unique vegan leather (which I typically don’t consider necessarily eco-friendly) made from recycled materials.

Also, the entire business has been climate neutral since 2020. Per the company, “we offset all of the emissions from sourcing, assembly, shipping, and delivery and include the estimated carbon emissions of [your] first plane trip.”


#2 Sustainable Luggage Brands – Monos

With colors like “purple icing” and “banana pudding,” it sounds more like Monos is selling tasty treats rather than sustainable luggage.

It’s almost too good to be true that a company offering such on-trend colors also be sustainable, but believe it! Monos is a climate neutral company, is committed to producing products that last, and donates 1% of profits to verified non-profit organizations that are dedicated to preserving and restoring the natural world.


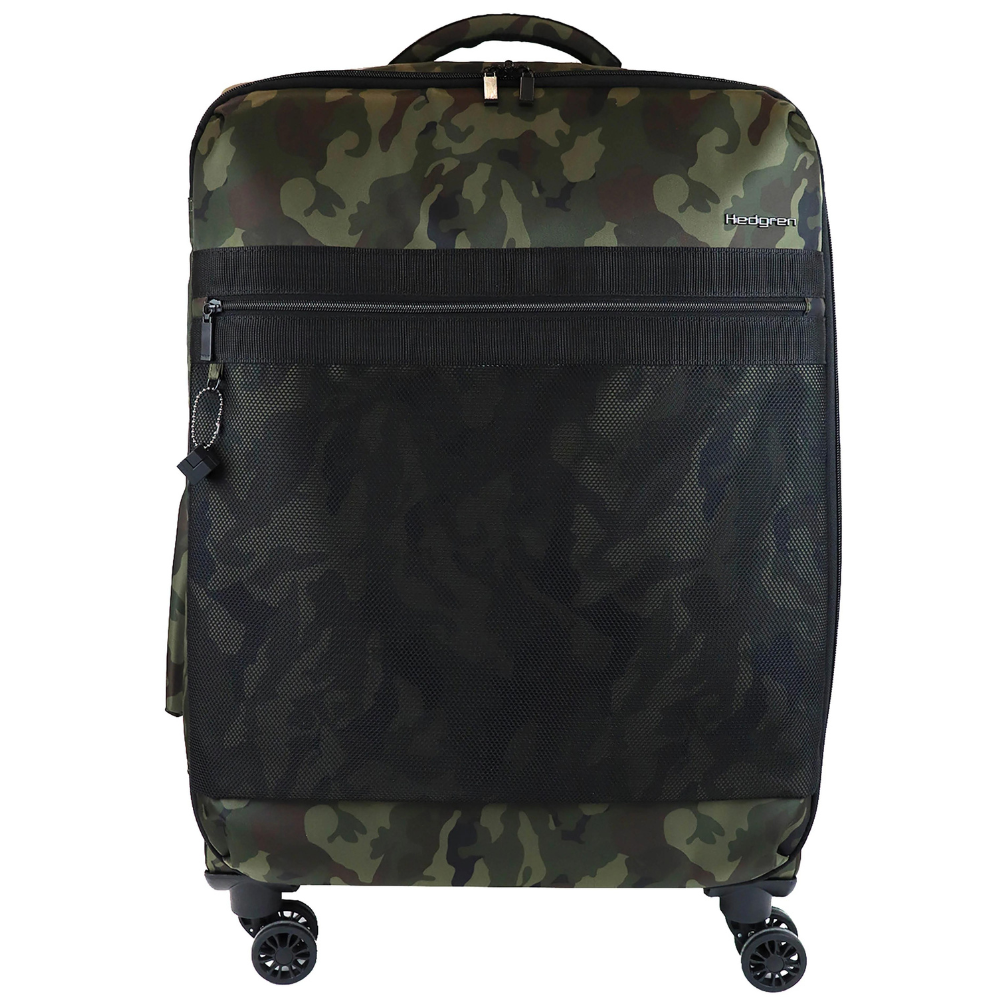
#3 Eco Friendly Luggage – Hedgren

Hedgren specializes in bags of all types, not just luggage. Seriously, from cross-body to tote–they have it all!

Luckily for us, they also have a sustainably-made line that includes luggage and utilizes fabric made from recycled plastic bottles. This special type of polyester uses 20 plastic bottles to create a square yard of fabric.


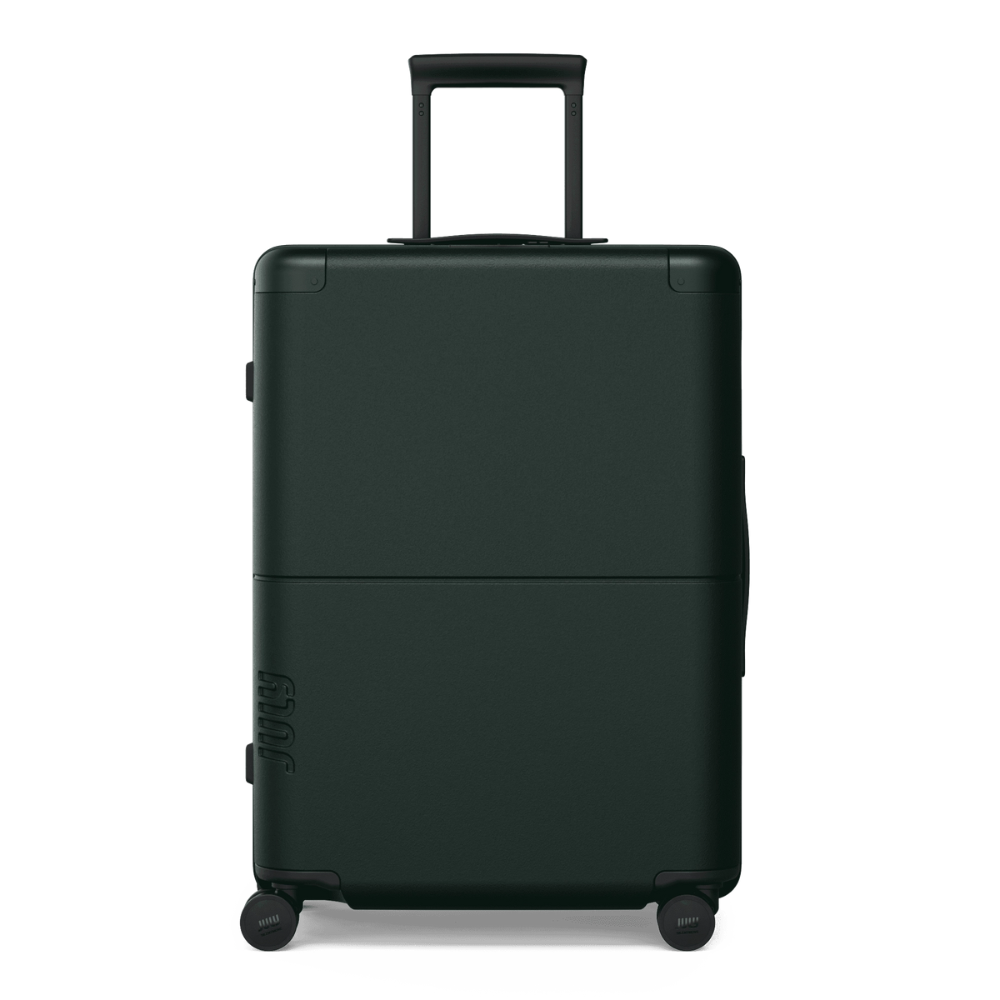
#4 Eco Friendly Luggage Brands – July

I always make sure to consider longevity when assessing a product for sustainability. After all, if you need to continually replace a product, it’s not very sustainable, and adding to our every-growing landfills.

July is committed to making sustainable luggage that lasts a lifetime, and they mean that literally: all July luggage comes with a guaranteed limited lifetime warranty. july’s innovative design features scratch-free coating and aluminum bumpers for added protection.


#5 Eco Friendly Luggage Sets – Away

I’ll be honest, I primarily know Away as being one of the premier Internet darling brands a couple years back. I hadn’t check in on them lately, and it sounds like they are making some significant changes with regards to their business practices, including using 100% recyclable packaging and increasing the portion of recycled content in many of their luggage components.

I do like that they make an entire line of aluminum luggage for those that want to avoid plastic altogether.


#6 Sustainable Luggage – State

State describes itself as “the family bag company,” and they are unique among this list for making travel gear for both kids and adults.

Many of their products use a significant portion of recycled materials. However, more impressive to me, is that they have a separate “pre-loved” shop where you can purchase items secondhand at reduced prices and resell products you might not get enough use out of. We love options that keep products of of landfills!


#7 Sustainable Luggage Brands – Solgaard

Okay, I’m really excited about this sustainable luggage brand for a couple of reasons! First, their luggage is made from unique materials mage from ocean-bound plastics.

Second, they partner with organizations like Sungai Watch, which works to keep plastics out of the mangroves of Bali. Solgaard estimates that 1.1M pounds of plastic have been diverted from our oceans with their current plastic removal partnerships.

Finally, they have a unique product called the “Carry On Closet,” which is their patented built-in shelving system, now available in two sizes and two collections.


#8 Eco Friendly Luggage – Samsonite

Like several of the brands on this list, Samsonite offers a line of more sustainable luggage made with recycled plastic bottles.

What’s more exciting, Samsonite is able to repair any accidental damage or wear and tear to your Samsonite luggage at their repair centers. They have more than 200 repair centers in 65 countries worldwide. The ability to repair products when they are damaged is a major key to longevity, and therefore, sustainability!


#9 Eco Friendly Luggage Brands – BRIC’S MILANO

To be honest, I did not know anything about this brand before researching eco-friendly luggage on the market, but I liked what I found! BRIC’S MILANO is a sustainable brand in the sheer craftsmanship and attention to detail.

This is definitely and luxury product, and not one for vegans! BRIC’S MILANO uses vegetable tanned leather, which is the most ecological and environmentally friendly way to tan leather.


#10 Sustainable Packing Cubes – Quince

As a bonus, I wanted to include these eco-friendly packing cubes from Quince, crafted from durable, water-resistant twill made from recycled water bottles.

They have a whole packing cube system that features a space-saving design so you can pack more and stay organized. Each packing cube can be compressed by up to 60%, so you never have to worry about overpacking again!


This post was all about sustainable luggage.


What to Read Next: