Home Blog Page 4

South of France Road Trip 7 Days Itinerary | Slow Travel Guide

south of france road trip 7 days

Looking for the ultimate 7-day itinerary for your south of France road trip with an eye toward sustainable travel? Follow along for an action-packed adventure taking you from opulence of Nice, to the foothills of the Alps, and back to the sparkling blue waters of Côte d’Azur.

When planning our honeymoon in France, my husband and I knew we wanted a mix of good food, outdoor adventures, and relaxing beach time. After some research, we discovered the south of France, or more specifically, the Provence-Alpes-Côte d’Azur had everything we were looking for.

I’m sharing our exact itinerary and recommendations because honestly it was the trip of a lifetime! I want others who enjoy local food, hiking, and natural beauty to experience all that this region has to offer.

I’ll also offer some tips and tricks, as well as potential “side quests” if you want to extend your trip.

Where Is the South of France?

While technically the South of France covers a much larger area, this itinerary is specific to the Provence-Alpes-Côte d’Azur region.

The Provence-Alpes-Côte d’Azur region is an area in southeastern France bordering Italy and the Mediterranean Sea, known for its dramatic landscapes.

This region seriously has it all: turquoise waters, dizzying mountains, and rolling hills of lavender and olive.

What is Slow Travel?

Slow travel is ultimately about traveling with care, curiosity, and respect for the culture and the environment.

As a blogger who talks about sustainability for a living, I try to make sure my ethics apply to my travels as well! Of course, none of us are perfect! I did get to France on a big airliner propelled by jet fuel after all.

Here, I use slow travel to mean taking the time to really get to know the place and people that you encounter on your travels. I’m always looking for ways to support small businesses, invest my money in the local economy, and learn more about the culture.

Who This Itinerary Is NOT For

One thing about us is we are not really resort people–so if you’re looking to plop on a beach for a week with a drink in hand (respect!) this itinerary probably is not for you!

This itinerary also includes multiple long hikes (up to 10 miles long). If that isn’t your thing, I’ll offer some ways alternative ways to enjoy the natural beauty of the area.

Hi, I’m Leslie!

My name is Leslie, and I’m the founder of PunkMed! On my blog, I and my team share my info, experiences, and recommendations in the area of sustainability, urban homesteading, and natural living. Our goal is to make it less overwhelming for you to live a fun and sustainable life!

In today’s post, I’m sharing my ultimate slow travel guide to the South of France. These ideas come from my years of experience in sustainable travel, and more recently, my honeymoon in the Provence-Alpes-Côte d’Azur region.

Alright, let’s get into it!

This post is all about the ultimate south of France road trip.

South of France Road Trip 7-Day Itinerary


Days 1-3 South of France Road Trip: Nice

View of Nice and the Mediterranean from Hôtel Petit Palais.

Nice is the largest city in this itinerary and the second largest city in the the Provence-Alpes-Côte d’Azur region after Marseilles. The Nice Côte d’Azur International Airport makes it the major travel hub of the region.

Like many cities in the Western world, there are levels of wealth on display here that don’t always seem to match with its otherwise real-city grit. After all, Nice is the gateway to some of the most famously posh locales in the world, like Saint-Tropez.

Still, there is a lot to experience (and eat!) in Nice for the average traveler. However, I would recommend setting aside a significant portion of your budget for this city!

Where to Stay in Nice

Hôtel Petit Palais

After your flight into Nice, you’ll need a comfortable place to relax before your whirlwind trip around Southern France begins! Look no further than the 4-star luxury Hôtel Petit Palais. With 25 unique Victorian-inspired rooms (some with views of the Mediterranean), a pool, and delicious breakfast buffet–this is the perfect spot to escape while still being within walking distance of the old town.

Things to Do in Nice

Cours Saleya Market
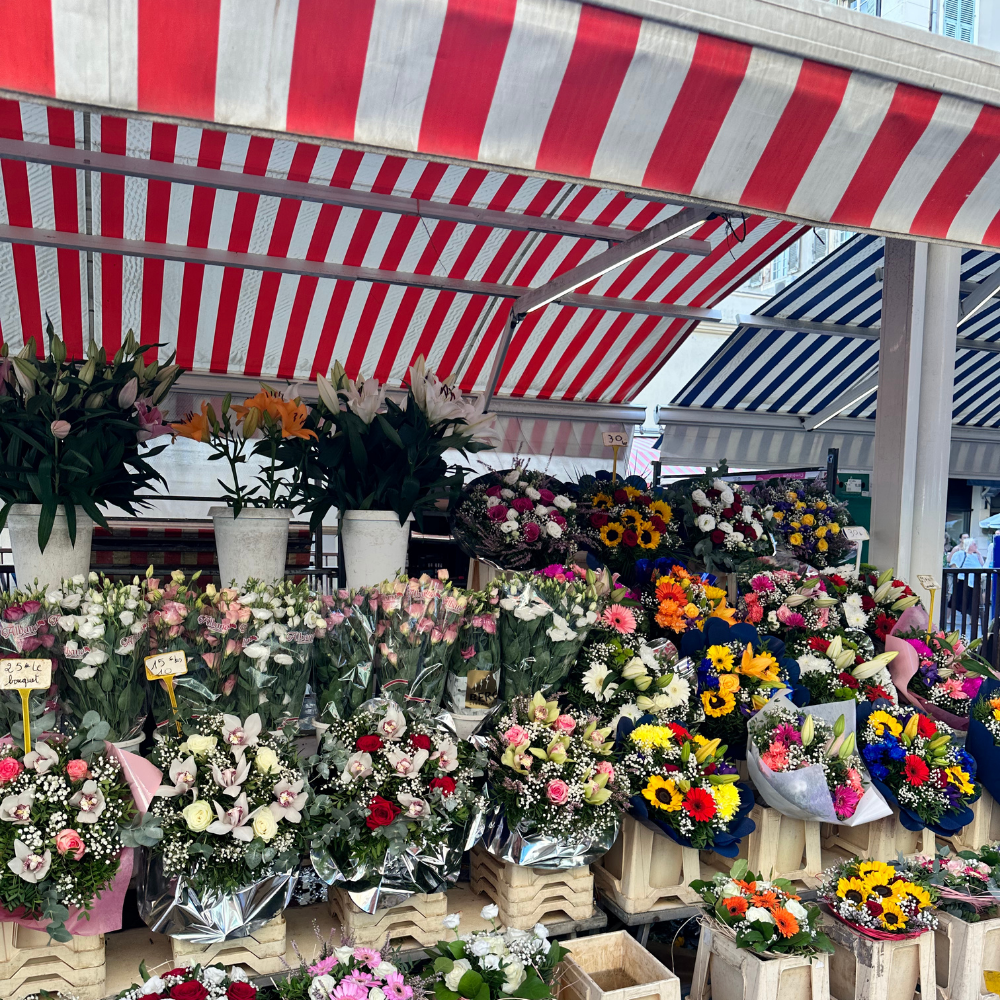
The flower market.

The Cours Saleya Market is a daily open-air market in Old Nice featuring the freshest fruits, vegetables and flowers from the surrounding region. The market is open daily except Mondays from 9 a.m. – 1 p.m.

Promenade des Anglais

The Promenade des Anglais is a paved, walkable 7-kilometer stretch of the Mediterranean coastline, from Old Nice to essentially the airport. Rent a bike (or better yet rollerblades!) to explore this stretch, which is named after the many English ex-pats who have taken up residence here over the years. Be on the lookout for the landmark hotel Le Negresco with its iconic pink dome.

Best Restaurants Nice

Jan
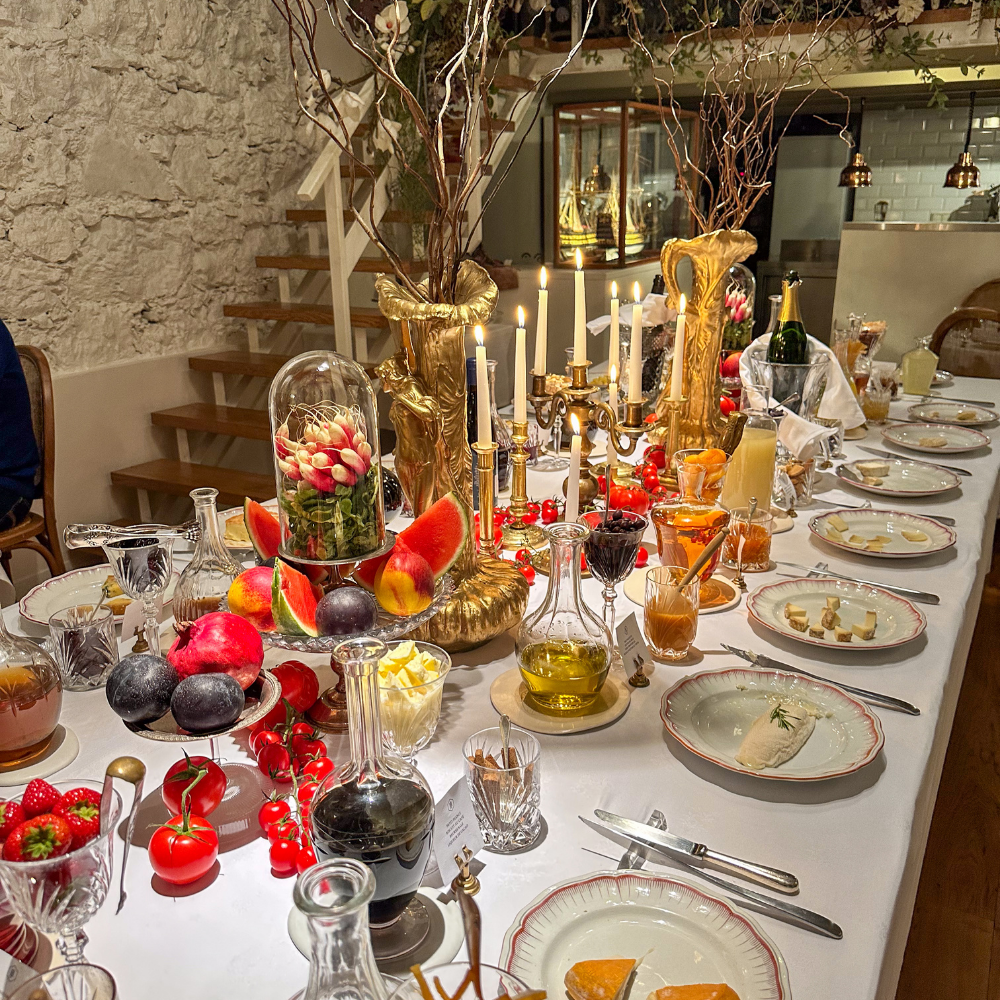
Cheese course at Jan.

Remember when I told you to set aside some serious coin for Nice? Well, be prepared to spend it at this haute French-South African fusion restaurant! It’s all worth it though–the 9-course tasting menu with paired wines was seriously one of the best eating experiences I’ve ever had.

Olive&Artichaut

On any given day you’ll find head chef Thomas Hubert serving up Mediterranean cuisine in this hole-in-the-wall spot in the heart of Old Nice. As the name suggests, dishes highlight Provençal flavors and local produce.


Days 3-5 South of France Road Trip: Moustiers-Sainte-Marie

Point Sublime.

Two hours inland from Nice is the tiny village of Moustiers-Sainte-Marie, which sits almost precariously at the foothills of the French Alps. It’s the prettiest of only a couple of villages that cater to tourists looking to visit the Verdon Gorge, which is an absolute must-see.

Where to Stay in Moustiers-Sainte-Marie

Hôtel de la Ferme Rose
View from the pool at Hôtel de la Ferme Rose.

If you’re looking for French countryside charm complete with a luxury poolside view, but without the big price tag, check out Hôtel de la Ferme Rose. Each of the 11 rooms has lofty wooden beams, terracotta floors and colorful bathroom tile work (we stayed in the stunning Almond room). The hotel is not without its quirks–check out the owner’s extensive collection of 1950’s gadgets and decor.

Things to Do in Moustiers-Sainte-Marie

Verdon Gorge

In my opinion, the so-called “Grand Canyon of Europe” should be on everyone’s bucket list. Drive along the switchback roads that hug the gorge as it plunges a dizzying 1,000+ feet at some of its highest points to Point Sublime (perhaps the best viewing point).

At the bottom of the gorge runs the Verdon River, which is famous for its impossibly turquoise waters. After your thrilling drive atop the gorge, enjoy some outdoors time closer to sea level by renting a paddle boat or kayak where the river drains into Lake of Sainte-Croix.

Blanc-Martel Trail
Along the Blanc-Martel trail.

The Blanc-Martel trail is a spectacular 10-mile, one-way hike into the Verdon Gorge. You’ll walk along the crystalline waters of the Verdon River for the majority of the hike until you climb out again to the resplendent views of Point Sublime.

There’s no parking at the trailhead at Chalet Maline, so you’ll need to either take a taxi or book a spot on the Blanc-Martel shuttle. I recommend the shuttle; in the morning, park in the village of La Palud-sur-Verdon and take the shuttle to the trailhead. The shuttle will then pick you up at Point Sublime at your reserved time in the afternoon and take you back to your car.

Best Restaurants Moustiers-Sainte-Marie

La Bastide de Moustiers

This Michelin-starred restaurant is the brainchild of famed chef Alain Ducasse, but don’t let the luxury cars in the driveway fool you: La Bastide is serving up pretty traditional Provençal flavors in this charming country manor. Many of the dishes highlight vegetables and herbs plucked from the gardens on the grounds. Stop by for lunch for the best value.

Ferme Sainte-Cécile

If you want to experience some true Provençal home-cooking, look no further than Ferme Sainte-Cécile. Eating at this restaurant feels like being invited over for dinner by the chef and his wife, who are there to greet you and walk you through the menu of the day, which always features local produce and products like goat cheese from La Palud-sur-Verdon.


Days 5-7 South of France Road Trip: Cassis

Calanques National Park.

Cassis was described to me as a place where the French go to vacation, and it was definitely the least touristy of all the stops on this trip. Cassis serves as the gateway to the Calanques National Park, but offers a beautiful bay and charming seaside town all on its own.

Where to Stay in Cassis

Chateau de Cassis

If you want to live like a king, this 13th-century hilltop chateau offers jaw-dropping views of the Bay of Cassis, a heated pool, and several rooms with private terraces to take in the scenery. Note that the Chateau de Cassis is technically not a hotel, as it does not have 24/7 service on-site. Think of it as the fanciest airBnB you’ve ever stayed in.

Things to Do in Cassis

Calanques National Park
Calanque de Port-Miou.

The main attraction of Calanques National Park is its series of seaside “calanques,” or inlets featuring beaches that are only accessible by foot or by sea (many rent kayaks).

We opted to hike from the town center to one of the more remote calanques, Calanque d’En-vau, which ended up being about a 6-mile hike roundtrip. The trek is not so bad, considering you can stop and plunge into the azure waters of the Mediterranean along the way! Pack a lunch to enjoy on the beach and bring plenty of water.

Best Restaurants Cassis

O Rev Cassis

The restaurant tucked in an alley a bit away from the tourist trap restaurants along the harbor offers French seafood staples in a laid-back, bohemian setting. The staff are super friendly, and the food and drinks are tasty and well-priced!


Days 7-8 South of France Road Trip: Antibes

Antibes Old Town at night.

Antibes is so much more than just a resort town. The culture, food, and public white sand beaches with views of the Alps make Antibes worth the stop on the return back to Nice.

Where to Stay in Antibes

Hôtel La Villa Cap d’Antibes

Technically in Juan-les-Pins on Cap d’Antibes (Cape Antibes), Hôtel La Villa Cap d’Antibes offers an upscale bohemian base from which to enjoy both the city and the beach. The Vieil Antibes, or the old town of Antibes, is just a short drive away. The beach is even closer.

Things to Do in Antibes

Cap d’Antibes Beach Hotel

Book a pretty pink sunbed for the day on the private beach of the posh Cap d’Antibes Beach Hotel (you’ll be able to walk from Hôtel La Villa Cap d’Antibes!) You can order drinks to your place in the shade and watch the yachts go by.

Marché provençal

This market in the heart of old Antibes has a wide selection of Provençal goodies like cheeses, olives, and local produce. Open daily except Mondays from 7:30 a.m. – 1 p.m.

Best Restaurants Antibes

Restaurant L’Arazur

Chef Lucas Marini brings his years of experience in multiple Michelin-starred restaurants to this cozy restaurant in the old town.


Getting to South of France

Fly into Nice Côte d’Azur Airport to begin your journey. Unfortunately, the only direct flights from the US to Nice are out of New York City and Atlanta. You’ll likely have a layover in Paris, but hey, maybe make it an extended layover?!

Getting Around South of France

While there is train service from Nice to Antibes (along with other popular cities on the coast like Saint Tropez and Cannes), you generally need a car in this region for maximum mobility and flexibility. I recommend renting a car from one of the vendors at the Nice Côte d’Azur Airport. Pick up your car on day 3 as you’re leaving Nice for Moustiers-Sainte-Marie–you won’t need it in the city.

French Rules of the Road

The French drive on the right side of the road, so US drivers will feel comfortable. However, be aware of the confounding French rule-of the-road called priorité à droite. This means drivers turning right onto a road have the right of way over the cars already on the road driving straight ahead. There are a number of signs that indicate exceptions to this rule so study the signage before your drive.

France Travel Essentials

Anker European Travel PowerExtend USB Plug International Power Adapter

Anker European Travel, PowerExtend USB Plug International Power Adapter with 2 USB Ports and 1 Outlet, US to Most of Europe EU Spain Iceland Italy France Germany, Compact for Travel, Office

This adapter works in most of Europe including France, Germany, Spain, etc. and allows you to charge multiple devices at once with 2 USB Ports and 1 outlet.

This post was all about the ultimate south of France road trip.


What to Read Next:

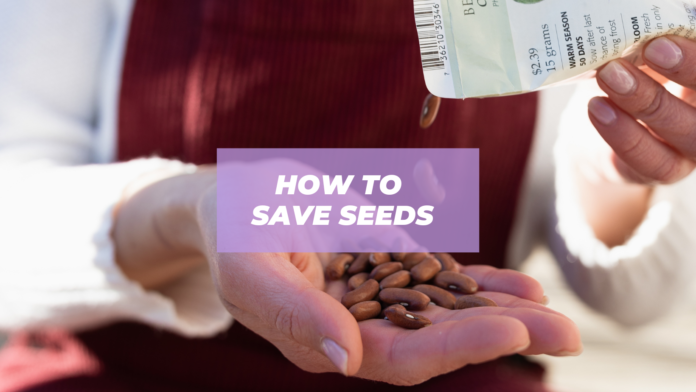
How to Save Seeds | My ULTIMATE GUIDE!

how to save seeds from vegetables

In today’s blog post, I’m sharing all the BEST info on how to save seeds!

I decided to start saving seeds mostly because I was tired of trying to track down and repurchase my favorite seeds varieties year after year.

I also quickly learned that seed saving is the ultimate money saver! As I always say, there is no need to buy seeds when mother nature produces them for you for free each year at the end of the growing season.

Plus, saving seeds from the best plants for the year means you get to carry on the genetics of particularly tasty or disease resistant plants.

You may be surprised to learn just how simple and rewarding the practice of seed saving can be!

This blog post is all about how to save seeds.

How to Save Seeds

I’ve saved seeds from tomatoes, carrots, kale, bok choy, rainbow tatsoi, green beans, and peppers.

Saving seeds begins at the end of the growing season. The seeds of vegetables are contained within the fruit of the plant. (I mean fruit in the scientific way, AKA the seed-bearing structure in flowering plants that is formed after flowering.)

Sometimes it is obvious which part of the plant is the fruit and therefore where you can find the seeds (e.g. the juicy red tomato), and sometimes it is less obvious (the bean pod is technically the fruit of the green bean.) 

The basic process to save seeds is as follows:

*Please note: saving the seeds of certain plants may require additional steps or specific considerations. See plant-specific considerations below for more information.*

  1. Select plants in your garden from which you will harvest seeds. This might be the most difficult step, as it means not eating some of the juiciest fruits of your labor! Choose a few of the healthiest plants that you will let “go to seed.” This means not pulling up the plant or eating the fruit, and letting the plant go through the cycle of flowering, fruiting, and putting out its seeds. Choosing the healthiest plants to go through this cycle ensure that their strong genes get passed on.
  2. Harvest the seeds. This will look a little different depending on the plant you are harvesting from, but you will need to extract the seed from the fruiting body using a spoon, or more often than not, just your hands.. For example, tomatoes will still be juicy when harvesting the seeds and may require a spoon (and some clean up!). In contrast, you can let beans and other vegetables that put out a seed pod dry on the plant and simply crack open the pod with your hands and scrape or shake to loosen the seeds.

    I like to harvest into a paper bag or other impermeable container. Remember, some seeds can be teeny tiny and you don’t want them falling through a wider mesh, etc.!
  3. Dry the seeds. It’s critical that seeds are fully dried before storage, otherwise you risk damage that will affect their germination rate the next year. Drying time will depend on the seed. Air dry the seeds in a mesh seed drying rack for up to a couple weeks. I like to hang this herb drying rack on my porch with the seeds inside so they don’t blow away!
  4. Store the seeds. Store seeds in a cool, dry place. Again, moisture and humidity are the enemies of seeds! Make sure to place in containers to keep seeds away from pests.

    Also, label the seeds with the variety and harvest year so you know what you’re looking at next year! I’ve written a whole blog post on seed storage ideas. One of my favorite ways to store seeds is to use a a transparent photo case with labeled compartments for different seed varieties.

Read on for more specific seed saving instructions for different types of vegetables!

Save Seeds – Beans, Peas, Kale, Bok Choy and Rainbow Tatsoi

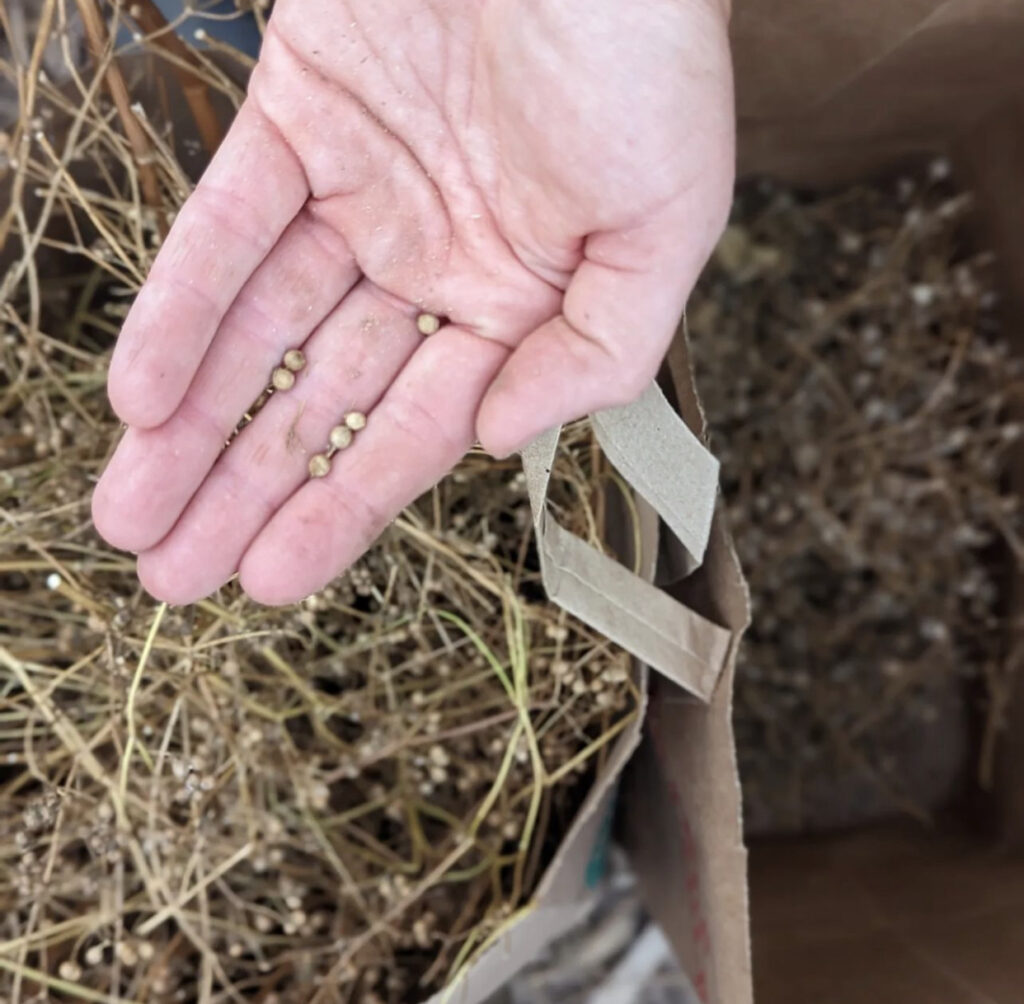
The seeds of plants that put out pods (like beans, peas, kale, bok choy and rainbow tatsoi) are ready to harvest when the pod is dried and inedible. Often the pod will have changed in color from green to brown. To harvest the seeds, crack open the pod and remove the seeds. You know the seeds are ready to go when they are hard, dried, and easily detach from the pod.

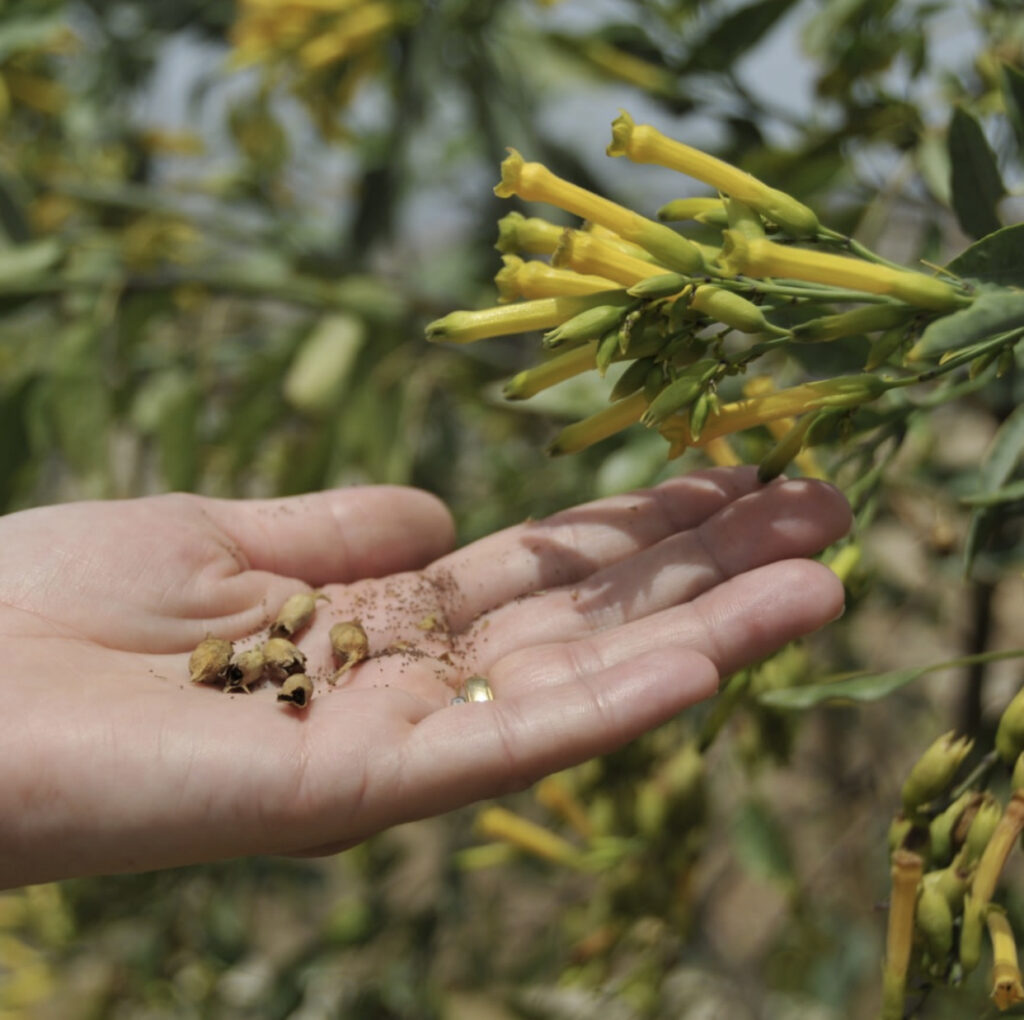
Save Seeds - Hand with Seeds Next to Plant
Image from @.AbundantMontana

Save Seeds – Tomatoes & Peppers

Tomato and pepper seeds can be harvested at peak ripeness (maybe even a little past peak ripeness) and dried.

I’ve written an in-depth blog post on how to save tomato seeds, as this process is more complicated than most and requires the extra step of fermenting the seeds.

Save Seeds – Root Vegetables

Root vegetables like carrots don’t have an obvious fruit. Rooting vegetables technically do have a fruiting body, but it is not obvious to the untrained eye. For simplicity’s sake, carrot seeds are the kernels that remain on the umbels after the carrot plant has flowered. The seeds are ready to be harvested when they are brown, dry and easily detach from the plant.

Seed Saving Ideas

I have been saving seeds for many years, but I certainly have not done it all! Read on for some seed saving inspiration from some of my favorite gardeners on the internet!

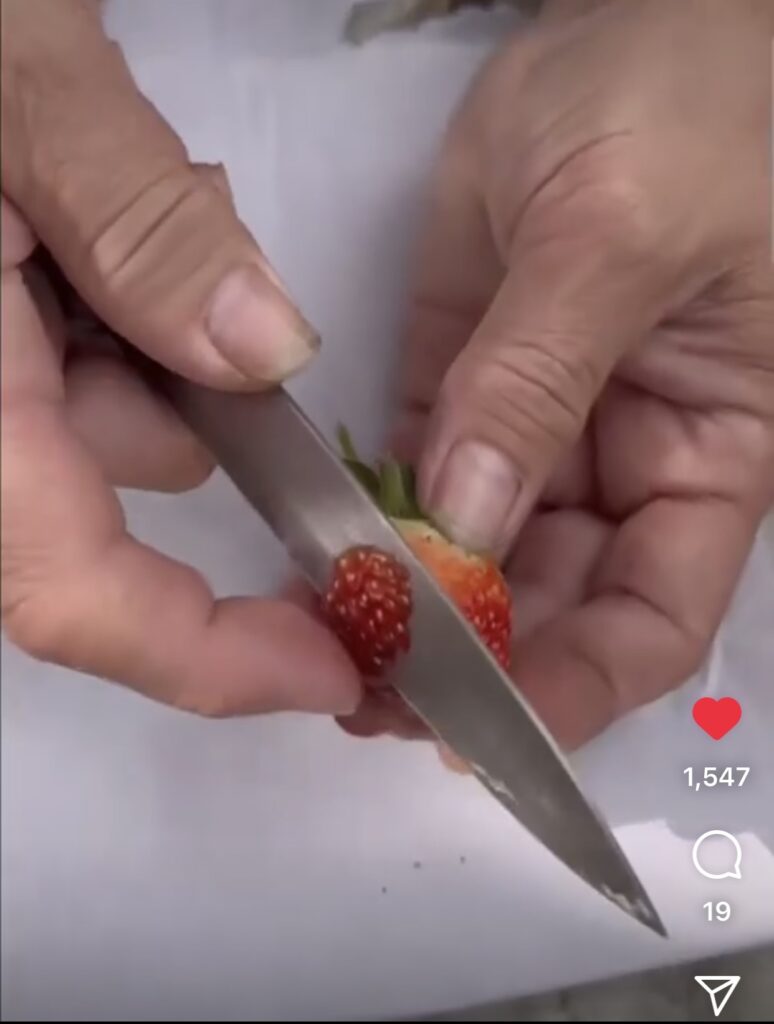
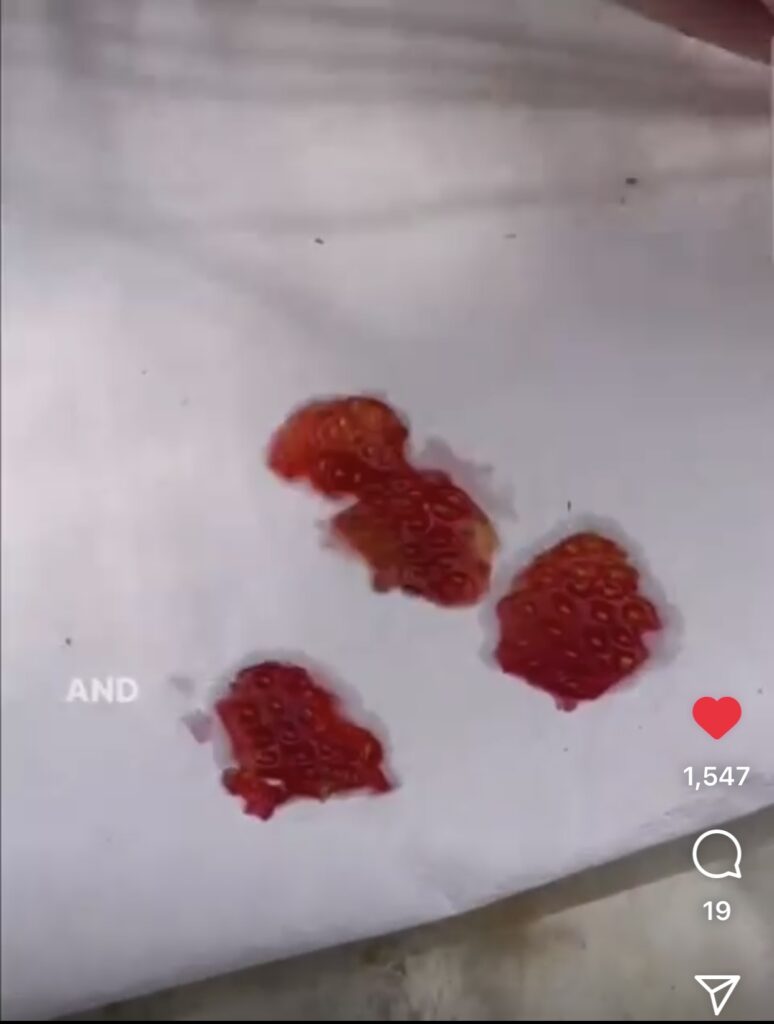
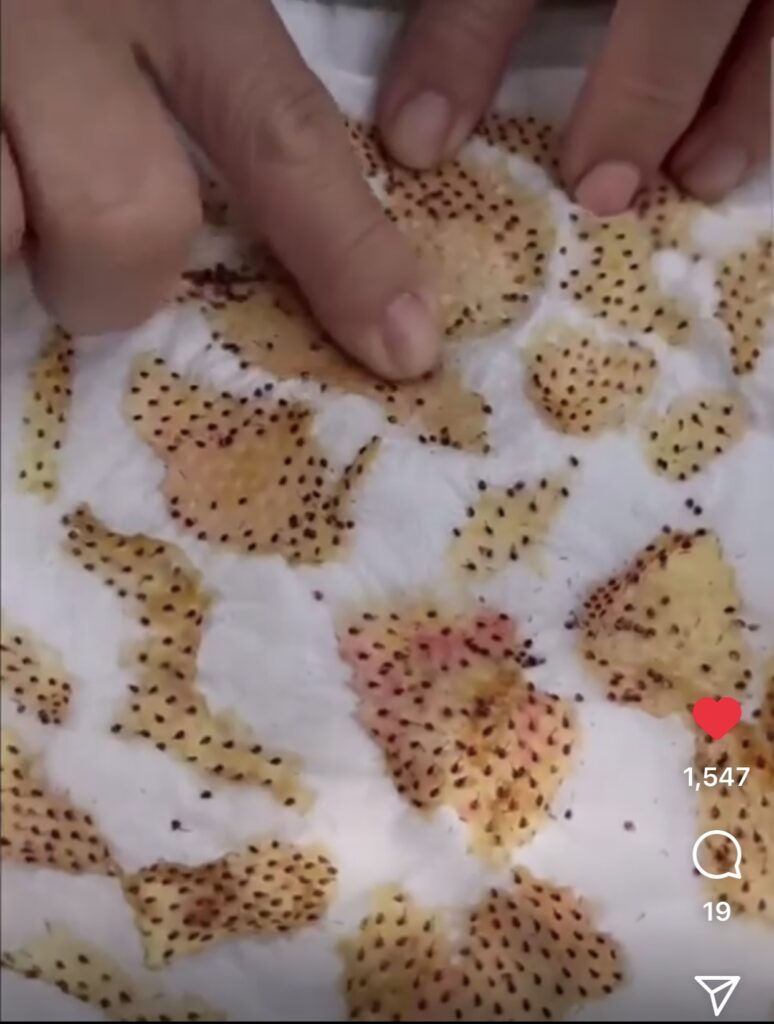
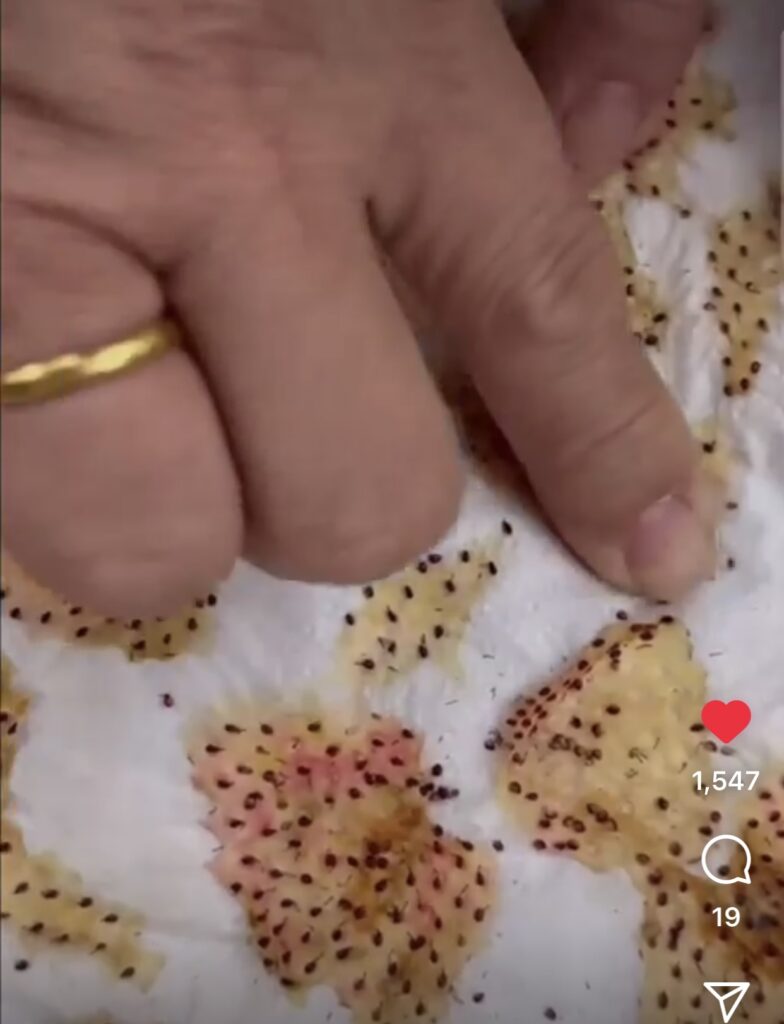
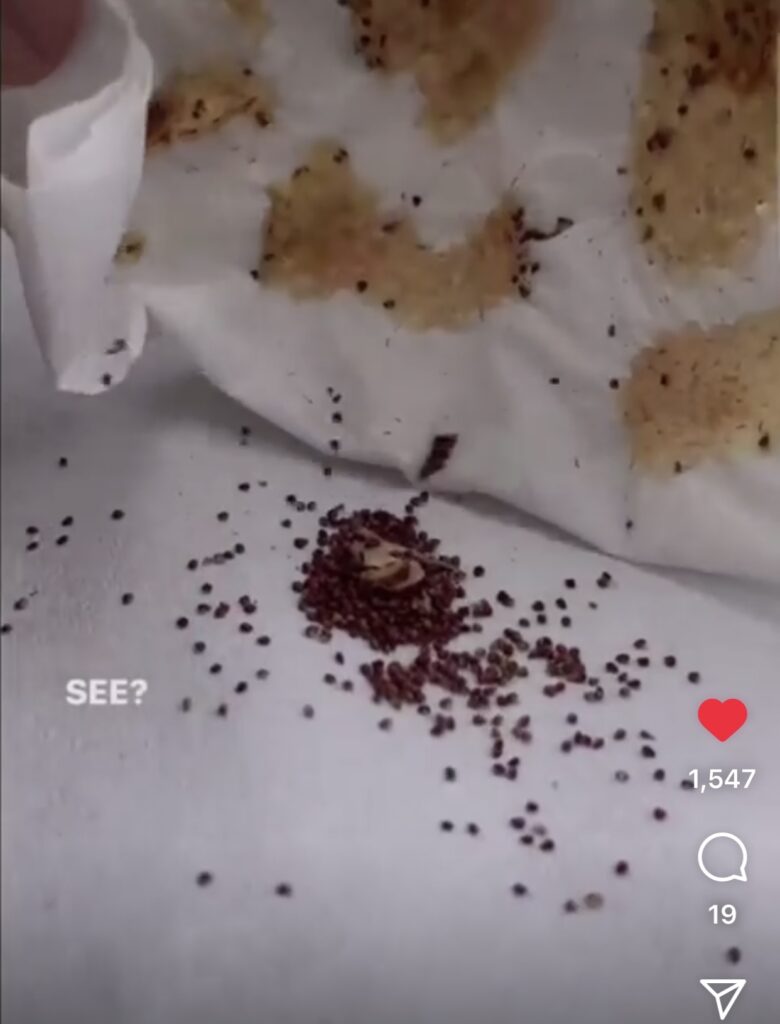
#1 Save Seeds: How to Save Strawberry Seeds

Our next tip on how to save seeds comes from @.sunnythefarmer! Here, Sunny shows us the process of saving seeds from fresh strawberries that are ready for eating!

Sunny’s Steps:

  1. Cut the flesh around the edge of the strawberry to get the seeds
  2. “Smoosh” the strawberry and seeds into the paper towel, trying to get it thin
  3. Let the fruit dry out
  4. “Brush” the seeds off the paper towel

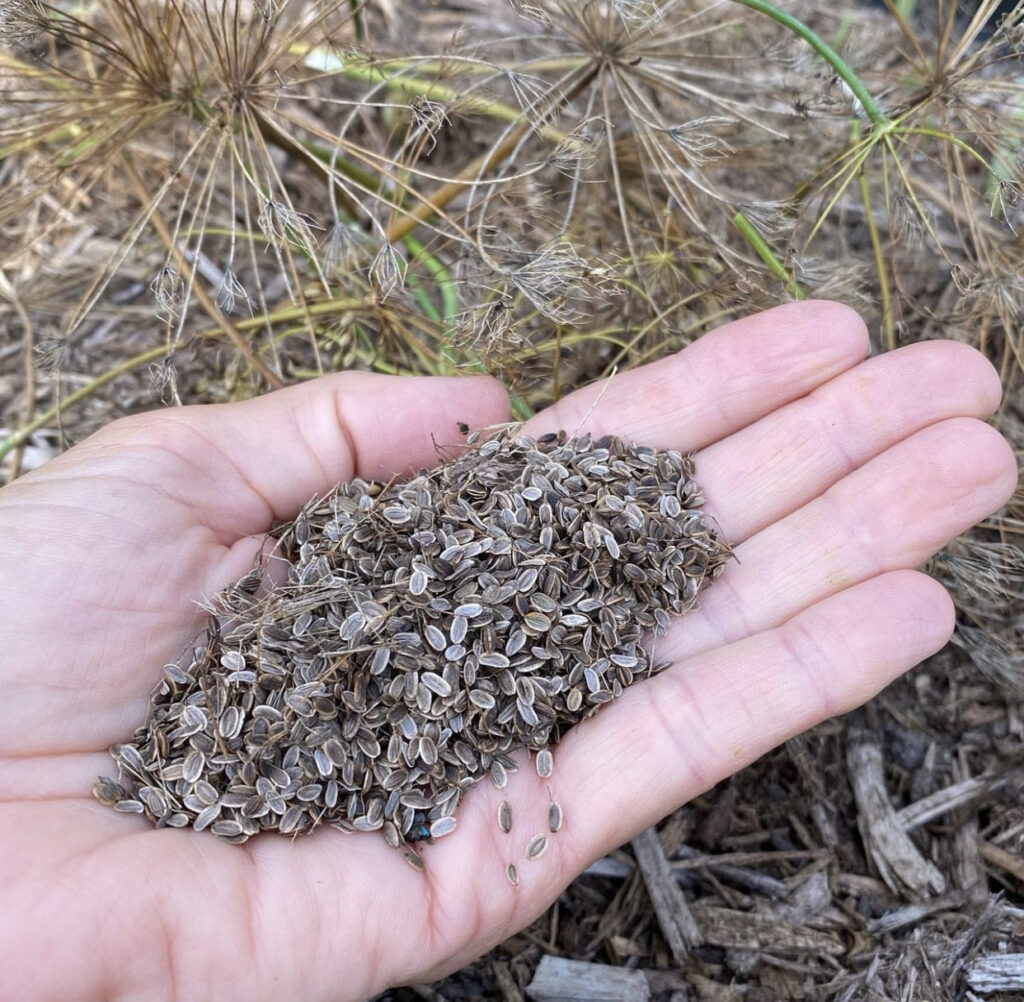
#2 Save Seeds: Dill Plant

Save Seeds  - Dill Seeds in Hand

This next tip on how to save seeds comes from @.ourgardengig. Lisa from Connecticut shares how cool it is to see a more self-sustaining garden through reseeding and seed gathering.

From Lisa:

“I just harvested all these seeds from one Dill plant that actually re-seeded itself from last year. This is one step in the right direction to a self-sustaining lifestyle. You feel so accomplished as a Home Gardener when you harvest your own seeds for next year.”

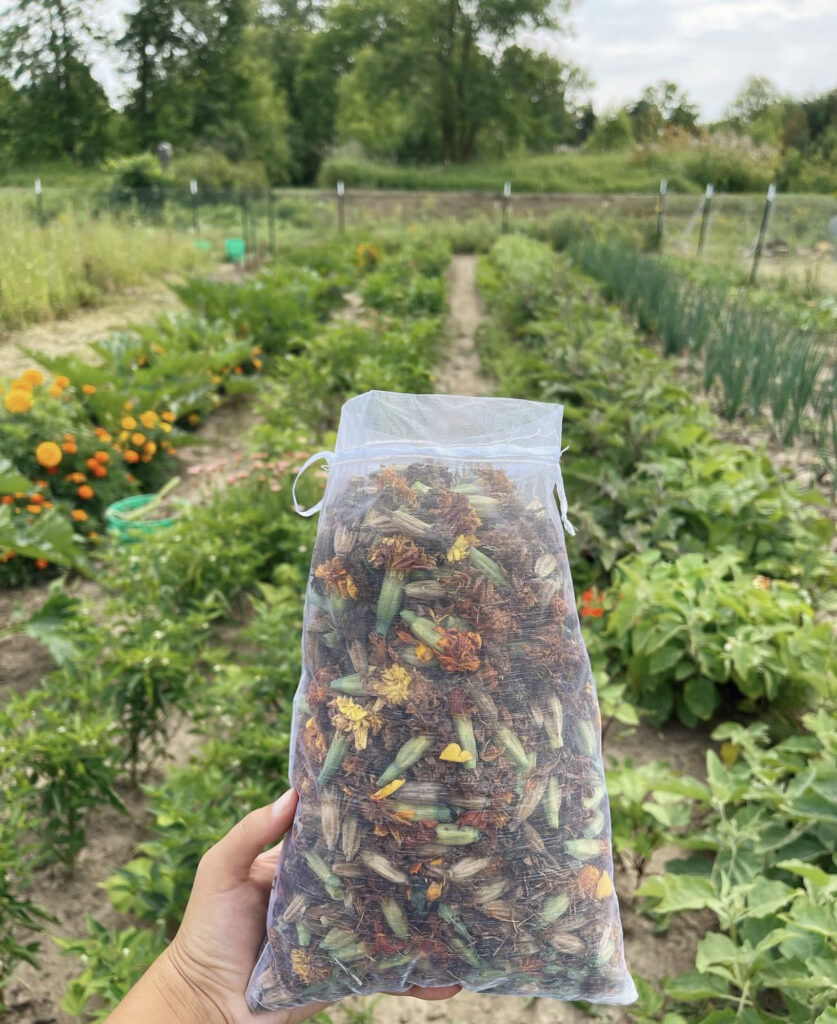
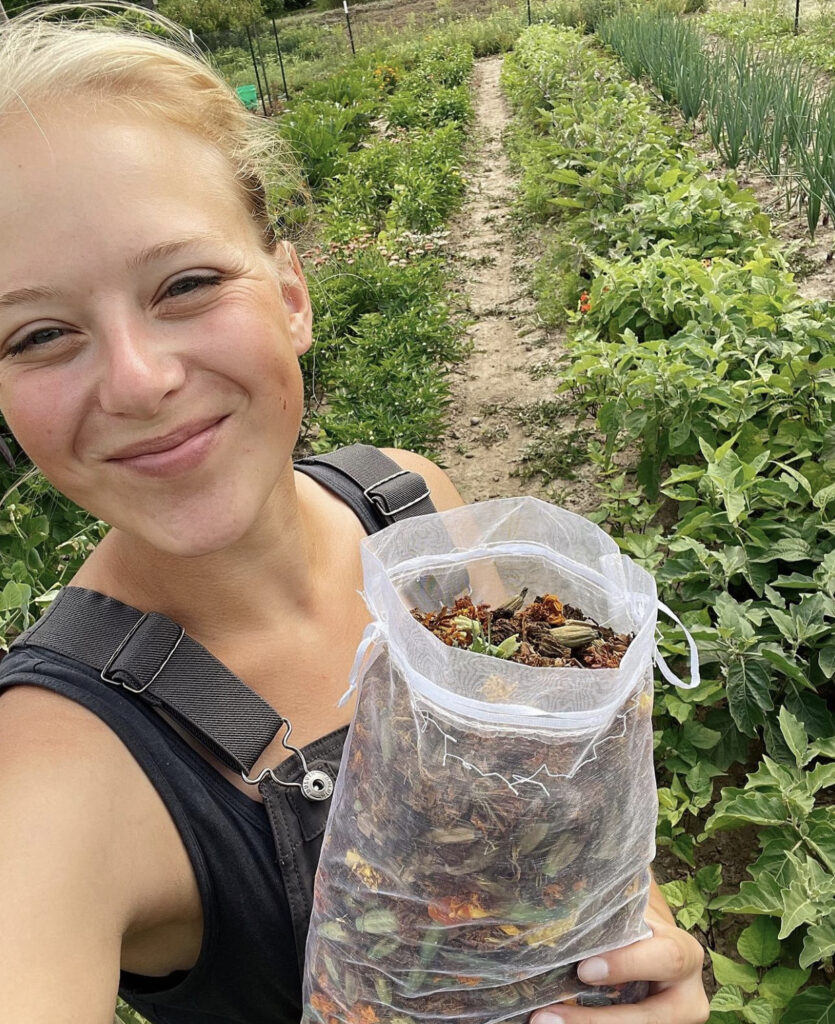
#3 Save Seeds: Saving Seeds from Marigold Flowers

I love this post on how to save Marigold seeds from @.Veggies_By_Reggie! Reggie put the flower pods in a drawstring bag that has aeration built in.

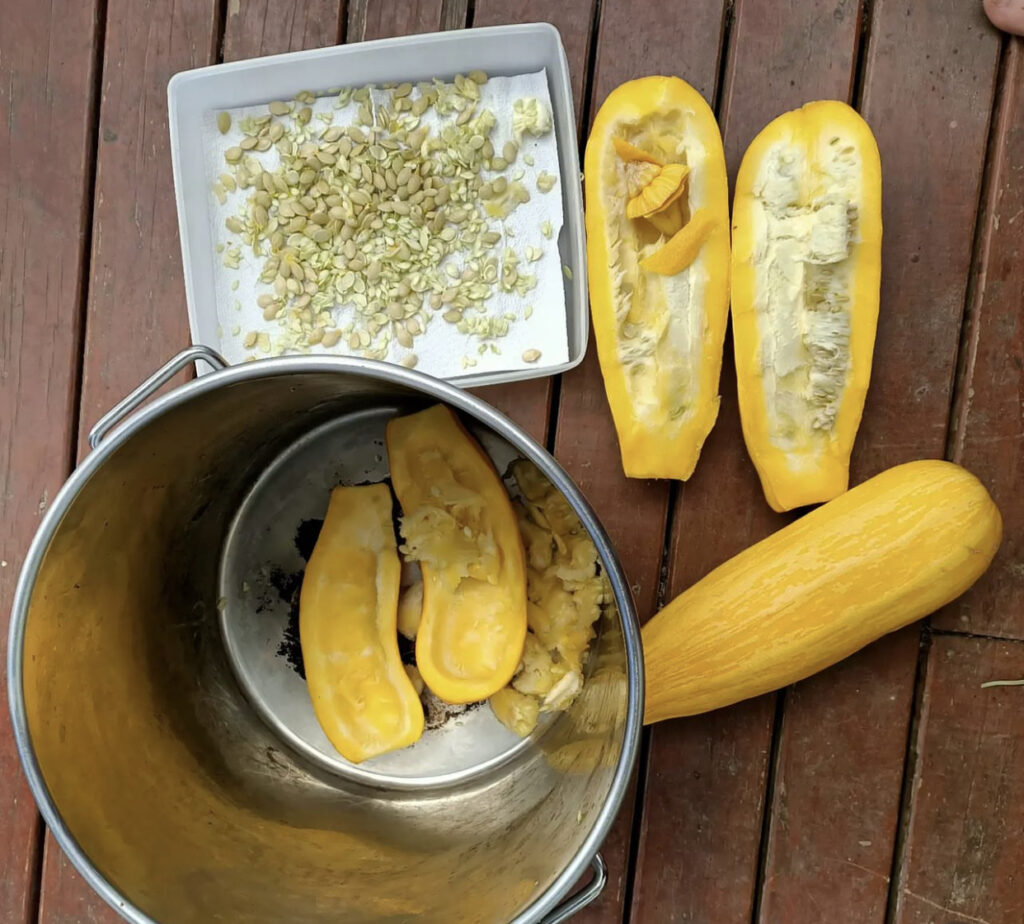
#4 Save Seeds: Golden Zucchini

Saving Seeds - Yelow Golden Zucchini

This photo from Ann of @.GathererForagerFarm is almost a vignette of how to save seeds! Here, you can see Ann also uses a similar paper towel method as Sunny with her strawberries, above!

From Anne: “Seed saving Golden Zucchini today. We don’t use fancy tools I am just using a knife and a spoon. We don’t waste anything either the outer cases will be stuffed baked with home grown tomato and mince from our steer for our dinner. I love how seed production ties in so we’ll with other aspects of our life. The flowers provide essential fodder for the bees and the ‘waste’ materials often feed or nourish us, the animals or go back into the garden.

I also love how it forces me to slow down you really can’t rush seed processing when your doing it by hand without machines. I’m not someone who easily slows down and stops moving so this is something that helps me practice mindfulness when sitting and processing.”

#5 Save Seeds: Native Seed Program

When writing this post, I wanted to be sure to include @.NativeSeedSearch as a resource!

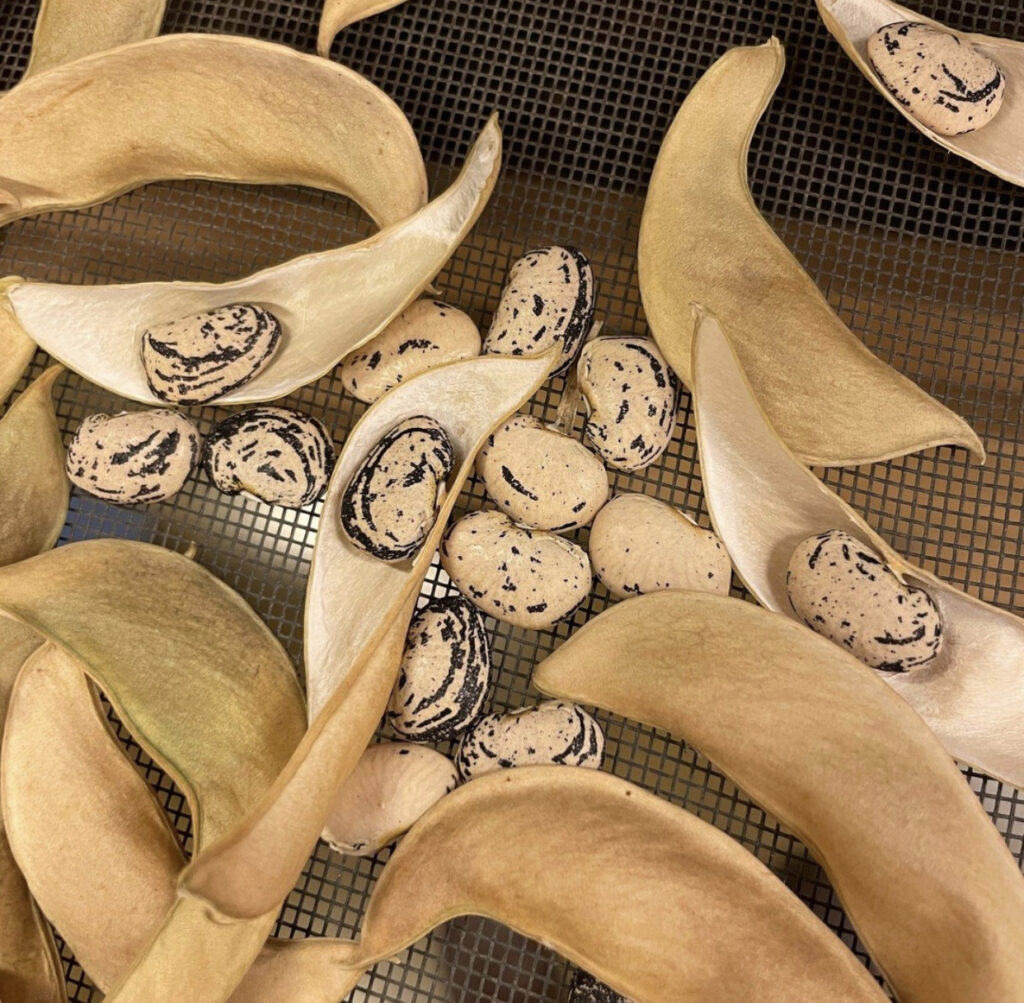
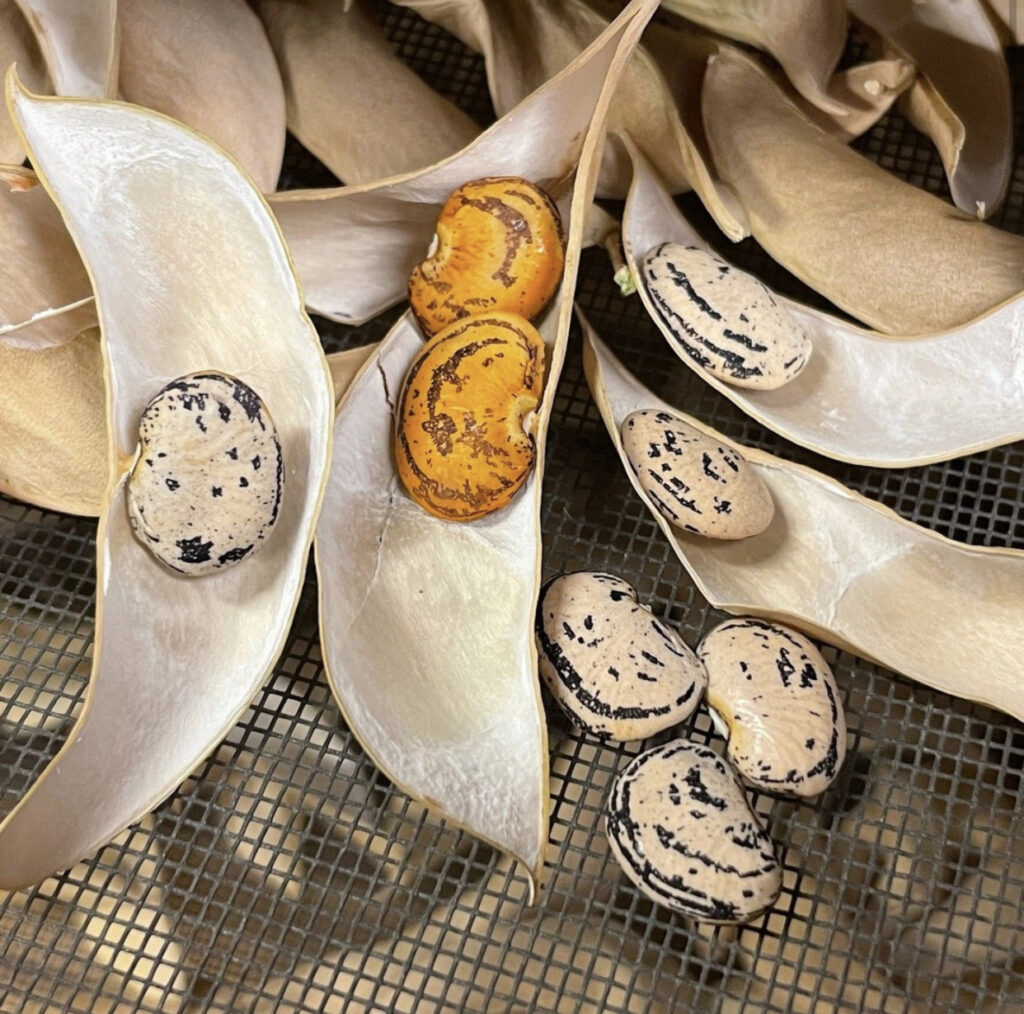
“Recently harvested Maasi Hatíqo (Hopi Gray) Lima beans are drying in the Seed Lab. Collected from Hotevilla in Hopiland, this variety of lima has a nice sweet, rich flavor.

Currently, these seeds are available to Indigenous communities connected to these seeds through the Native American Seed Request program one of our free seed access programs. To learn more go to nativeseeds.org/NASR”

#6 Save Seeds: Sweet Pea Seeds

Here, @.JollyGardens720 shares great tips on how to save seeds – pointing out to save seeds from your best plant!

“SWEET PEA SEEDS

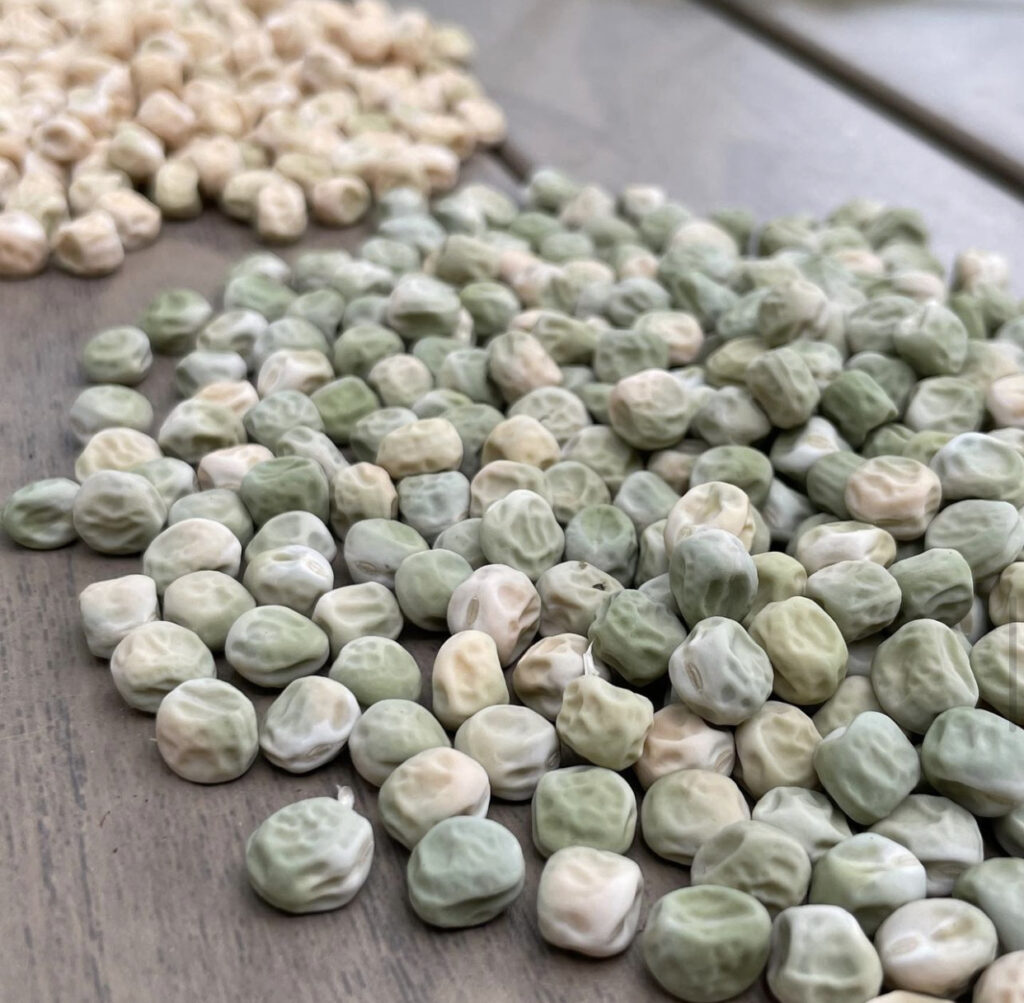
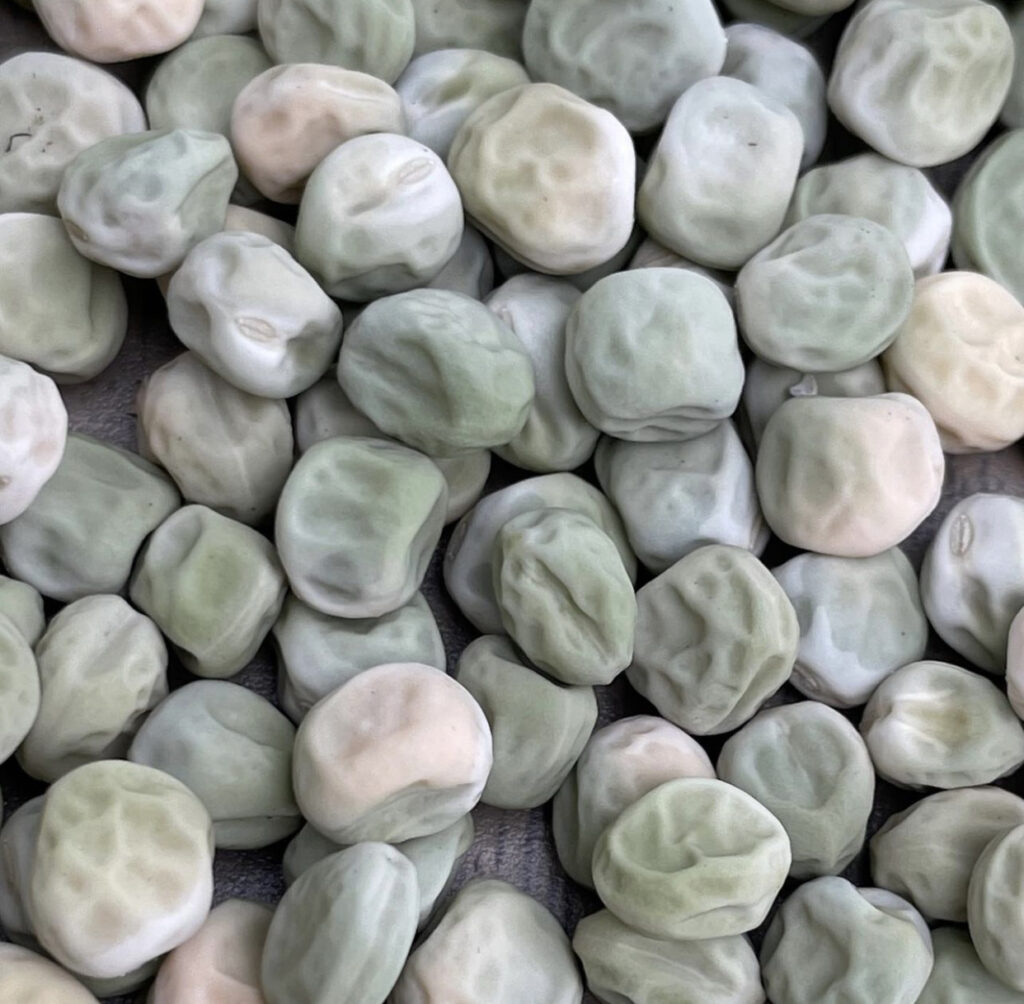
Have you saved sweet pea seeds before? It’s super easy. All you have to do is allow the pods to dry on the plant, then harvest them.

🌱 If you want to save for planting, then it’s best to save seeds from your best plant 🏆

🌱 We saved these seeds for MICROGREENS, which is something I’d love to do more of this year.

It’s easy to forget about secondary food sources our plants can provide, but they will feed us in more ways than one if we’ll let them.”

#7 Save Seeds: Bean Varieties

Saving Seeds - Bean Varieties in Piles

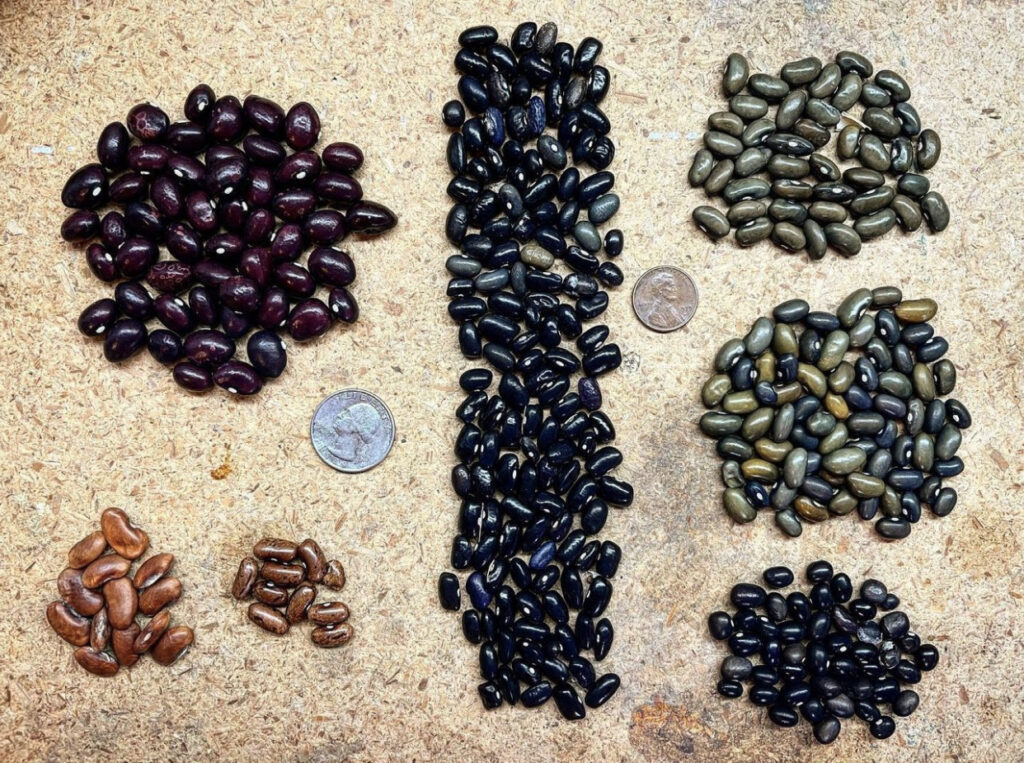
Here, Jeff of @.FarmersFold explains his process for sorting seeds:

“Here’s the shelling pole beans I’ve been collecting. Down the center is the mix of Shackamaxon Blue and Cherokee Trail of Tears (and maybe Jade?) that I have unfortunately gotten all mixed together. Upper right is what I’m calling Toad beans, a gray-green of the same size and shape but with coloring maybe coming from the Jade I grew once. Center right are an off-type that showed up last year with more blue and mustard hints. Maybe call that Glass Gem bean, like the corn? Then lower right is what I’m calling Dark Marble, a small almost round black bean that I separated out. Upper left is a personal favorite, Vermont Cranberry, a big plump bean that strangely has a bush-type called the same but is more speckled. Lower left are two mystery pole beans that I need to grow out. One-off vines that interested me enough to save.”

#8 Save Seeds: Scaling Seed Saving Operations

Saving Seeds - Seeds in Hand

Now, the team from New Orleans @.Baby_TRexFarms shares a thought or hack on seed saving they’re wanting to try in the future:

“I’ve always wanted seed saving to be a bigger part of our operation. We save seed from at least 15-20 plant varieties every year, and I’d love to do more. For a long time, I’ve had the goal of making a designated bed for plants I want to save from– essentially taking the strongest open-pollinated seedlings from each batch sown. That way I can let them flower and go to seed, reserving the time and space for them. What do you like to save seed from? Any book recommendations??”

#9 Save Seeds: Sunflower Seeds & Swaps

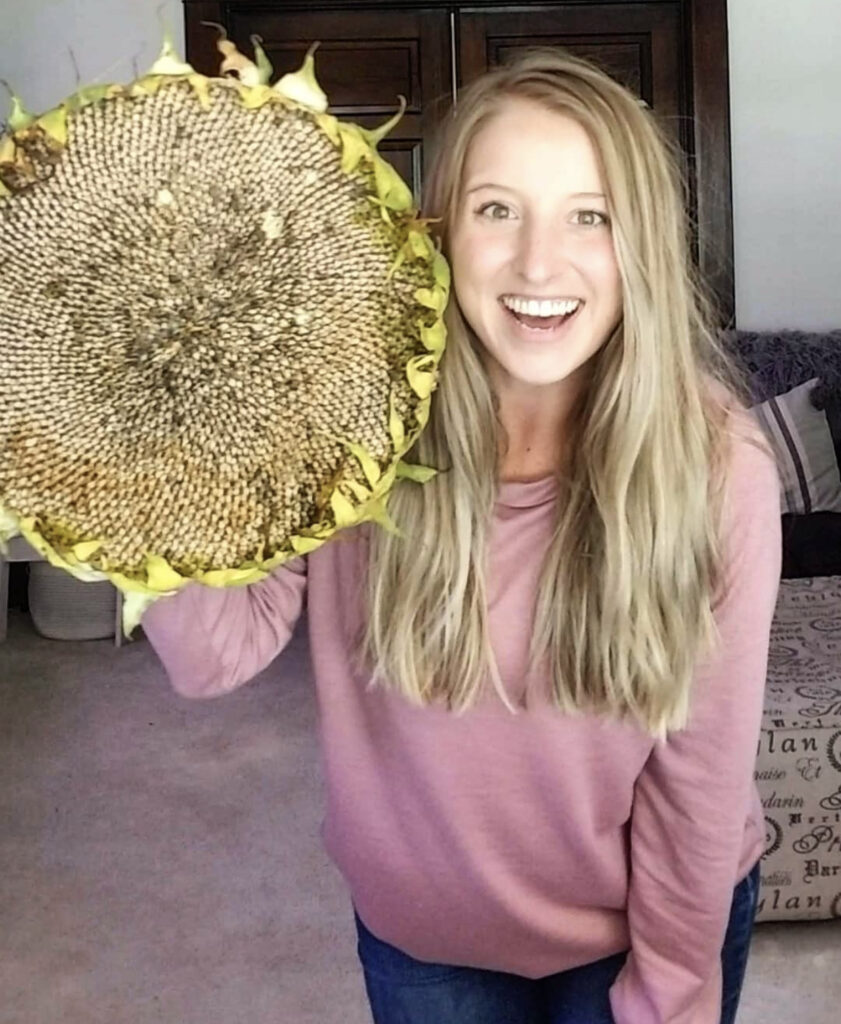
Woman holding up sunflower head next to face and smiling

Our next tip on how to save seeds comes from @.SmallTownGardenLife! Lisa from Illinois loves saving sunflower seeds! She shares her passion and info on seed swaps!

From Lisa:

“Saving seeds from this GINORMOUS mammoth sunflower this morning! 🌻

I started seed saving last year & now I’m basically obsessed. I love that I can plant something from seed, nurture it & watch it grow, reap it’s harvest & then save it’s seeds to start the entire process over again.

It’s easy on your budget too! Plus you can always join seed swaps here on IG & trade your seeds for unique seeds from all across the country as well.

If that ain’t magical I don’t know what is”

What are seed swaps?

A seed swap is where gardeners gather in-person or online via websites and social media, to share and trade the seeds they’ve saved! This is a great way to share with your local fellow gardeners, and find really cool plant varieties you mind not be able to purchase in a store.

#10 Save Seeds: Trial & Error

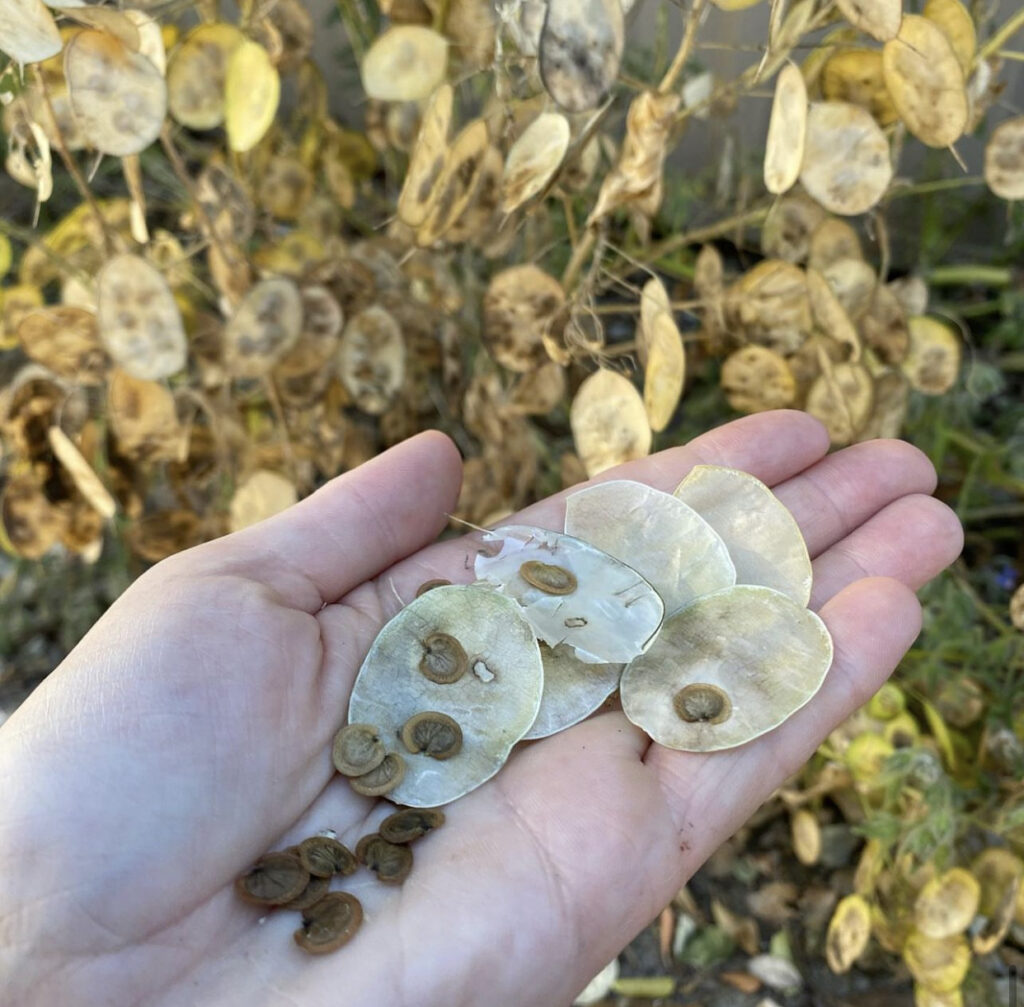
Save seeds - Holding Seeds in Hand

Here, @.Cath_Lily shares the importance of iteration and thinking seasonally with seeds when saving and storing them:

“First time saving white honesty seeds that I’ve grown here, after a lovely lady gave me an abundance of locally grown seeds. I think the spot I grew them in was too hot/sunny, so next time I’ll try them in part shade or morning sun, rather than the hot afternoon sun. Anyway, still able to collect seeds, and will try them again 🤩 I love learning and experimenting.”

#11 Save Seeds: Harvest French Bean Seeds from Plants You Didn’t Harvest

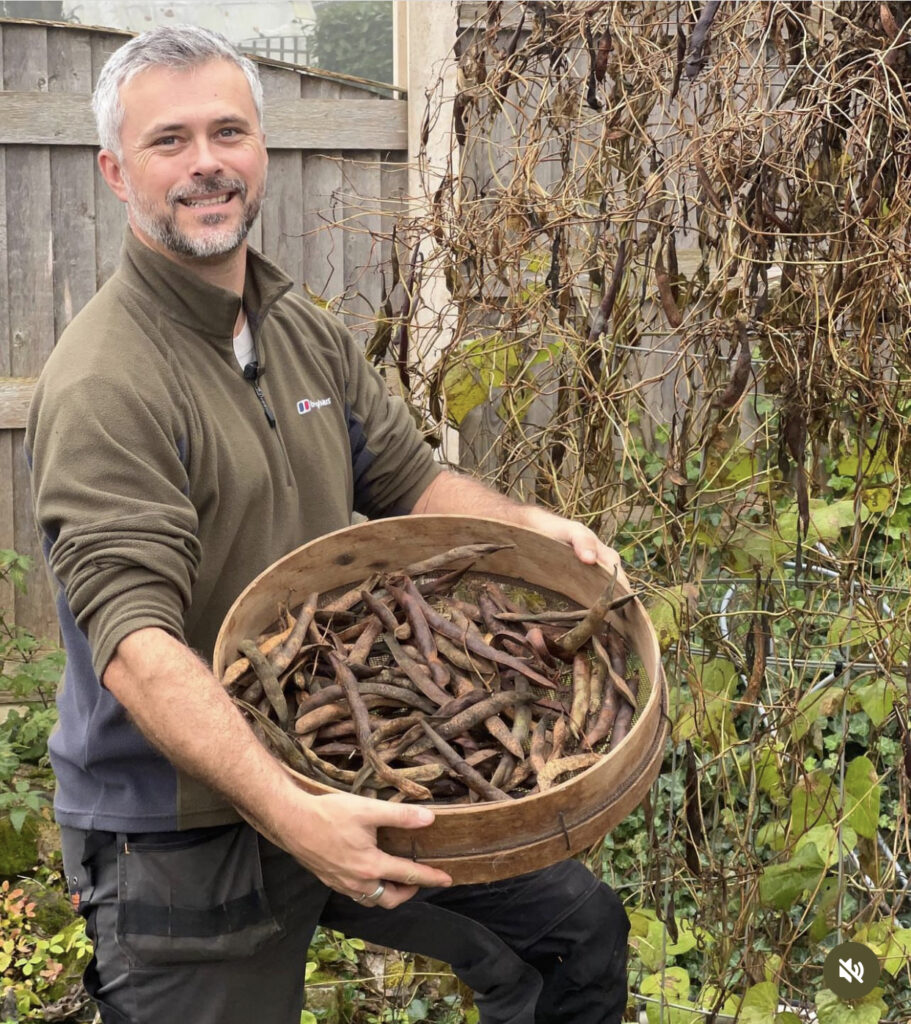
Save Seeds - Man Harvesting French Beans in Basket

Our next tip on how to save seeds comes from @.RobsAllotment, AKA Rob Smith from the UK! Here Rob talks about saving the seeds from the vegetables you weren’t *quite* able to harvest in time to eat!

From Rob:

“Collect seeds and get plants for free next year!

If you didn’t get around to eating all your runner or French beans, why not save the seeds and dry them, then you can grow them again for free next year!
.
If you have extra, why not store them and use them in casseroles and soups; or why not offer them to gardening friends and save them having to buy more next year

Why is Saving Seeds Important?

I believe seed saving is important because of the connection this practice creates between you and your garden. Seed saving has made me more attuned to the entire lifecycle of a plant, from seed to germination, to fruit and then seed again. Seed saving has forced me to slow down be present in the garden. As such, it has become one of the most gratifying practices in my life.

The #1 Mistake of Seed Saving

The top mistake people make when saving seeds is not labeling their seeds for the next growing season! Even the most experienced gardeners would likely not be able to tell a bok choy from a rainbow tatsoi seed. And you definitely won’t be able to tell between different varieties of the same plant! Label every batch of seeds you save with the plant, variety and year it was harvested.

For ideas on how to store your saved seeds, head over to THIS blog post!

Hi, I’m Leslie, Seed Saver Extraordinaire!

Hey friend, thank you for visiting my blog today! I’m Leslie, PunkMed founder, seed lover, and urban gardener. I’d love to connect on Instagram or Pinterest!

This blog post was all about how to save seeds!

What to Read Next

17 GORGEOUS Eco Friendly Ornaments for Christmas | Sustainable Christmas Decor

eco friendly ornaments diy

Looking for eco friendly ornaments? Today on PunkMed, I’m sharing my best advice and tips for finding really cute, sustainable ornaments.

I am such a fan of Christmas (and all holidays!), but I’m not such a fan of all of the waste that is created to celebrate Christmas.

In today’s guide, I’m sharing over 17 gorgeous eco friendly ornaments for Christmas. These ornaments have been made using recycled and found materials, sustainable materials, and other ingenious methods!

This blog post is all about eco friendly ornaments.

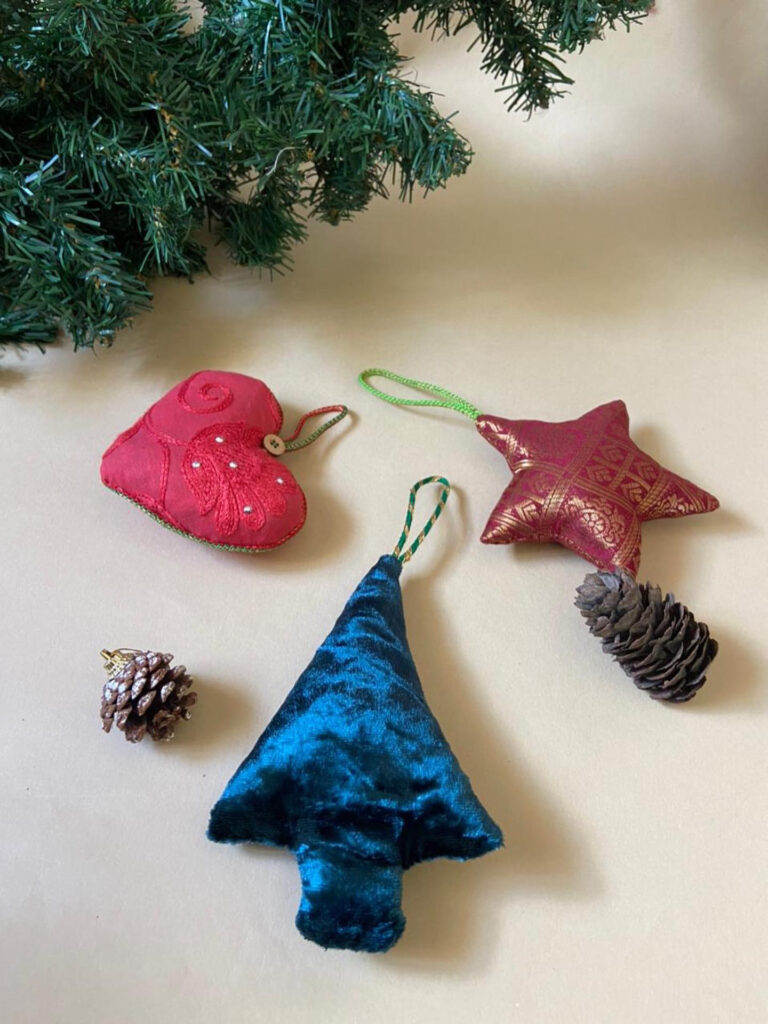
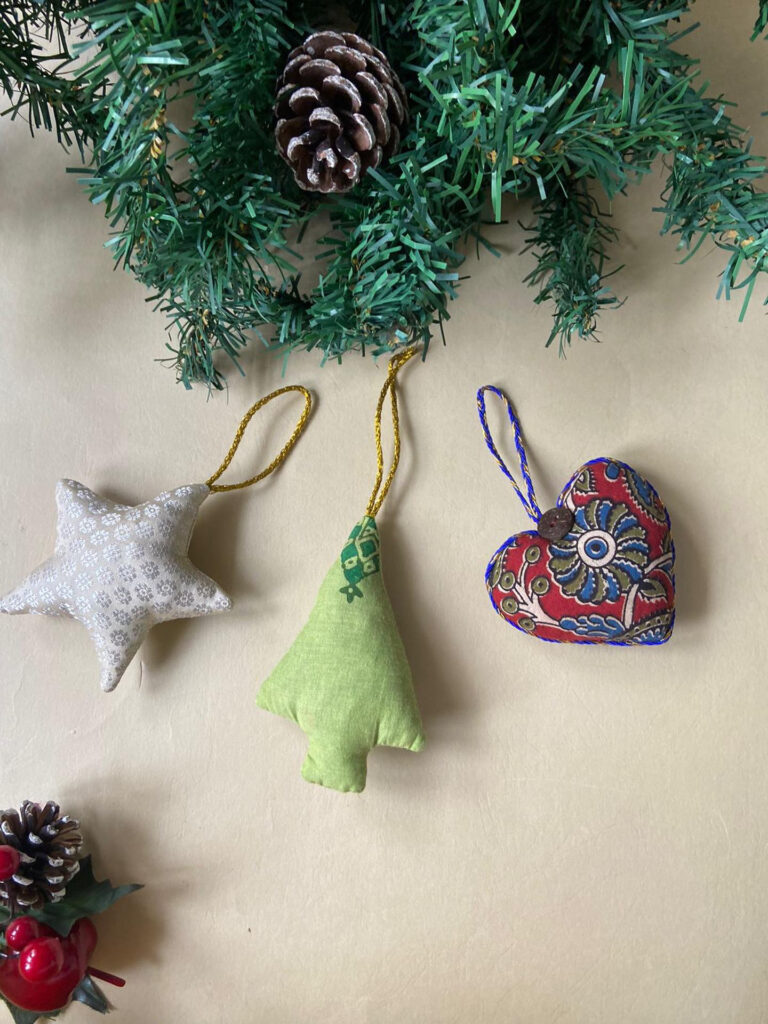
Eco Friendly Ornaments from Oh Scrap! Madras

Eco Friendly Ornaments

When it comes to finding eco friendly ornaments as part of your sustainable Christmas decor, there are a few things to keep in mind:

  • Tip #1: How are we defining “eco-friendly” or “sustainable”? These terms cover a good amount, from ethical labor practices to sustainable sourcing. When you think of your sustainable holiday celebration, what is most important to you?
  • Tip #2: Remember that number of uses matters as well! If you’re buying all new Christmas decor items each year, well, that’s not very sustainable or eco-friendly!
  • Tip #3: Don’t forget the sustainability practices around your eco-friendly Christmas tree itself! What are ways to reduce our carbon footprint here, that work for you and your family?

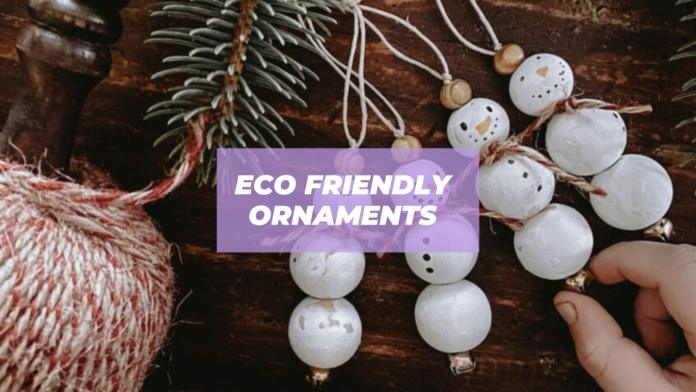
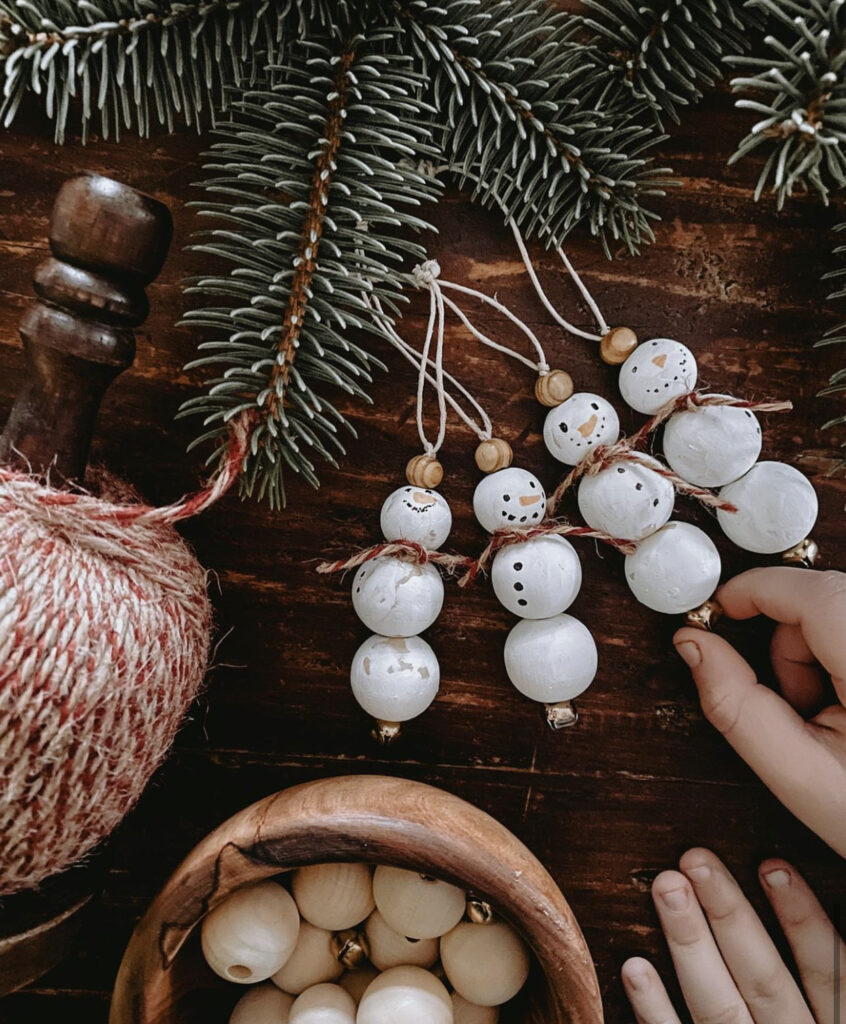
#1 Eco Friendly Ornaments: Cute Snowmen from Wooden Beads

Eco Friendly Ornaments - Snowmen

How sweet are this eco friendly ornaments from @.LeahDamon?!

From Leah:

One of the crafting activities that made it into the line-up this year was the joy of some wee snowmen ornaments made from painted wooden beads! I just love the sweet faces that each boy drew (mine is second from left)!

#2 Eco Friendly Christmas Ornaments: Driftwood Ornaments

These eco ornaments from @.Eco-Labs are lovely, and they’re for sale on Etsy, here! I love the different blues on these ornaments, and I think they’re perfect as part of eco Christmas decor!

#3 Sustainable Christmas Ornaments: Wood Blocks as Ornaments

Eco Friendly Ornaments - Wood Blocks

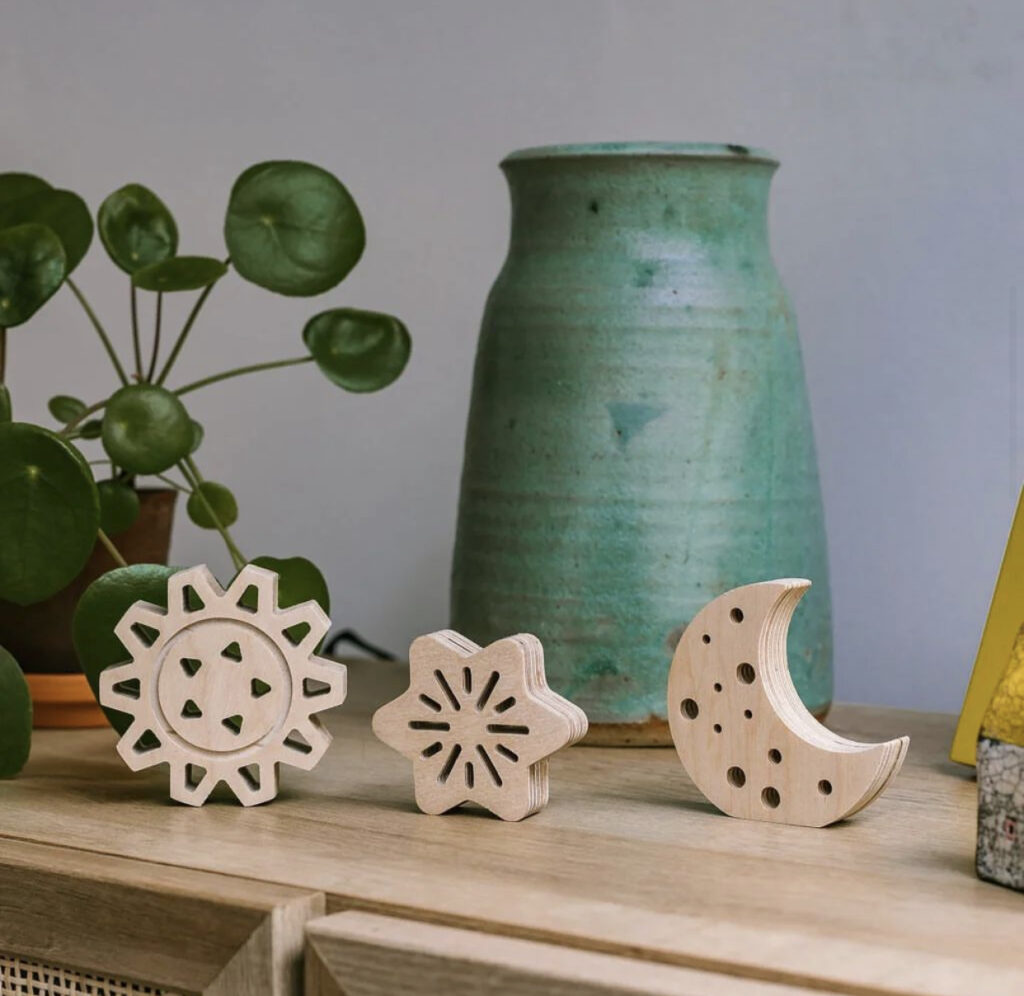
These sustainable Christmas ornament blocks from @BrightCornerShop are beautiful in their simplicity! Simply thread a string through them to turn these toys into ornaments!

#4 Eco Friendly Ornaments: Ornaments from Leftover Clay

Eco Friendly Ornaments - Leftover Clay

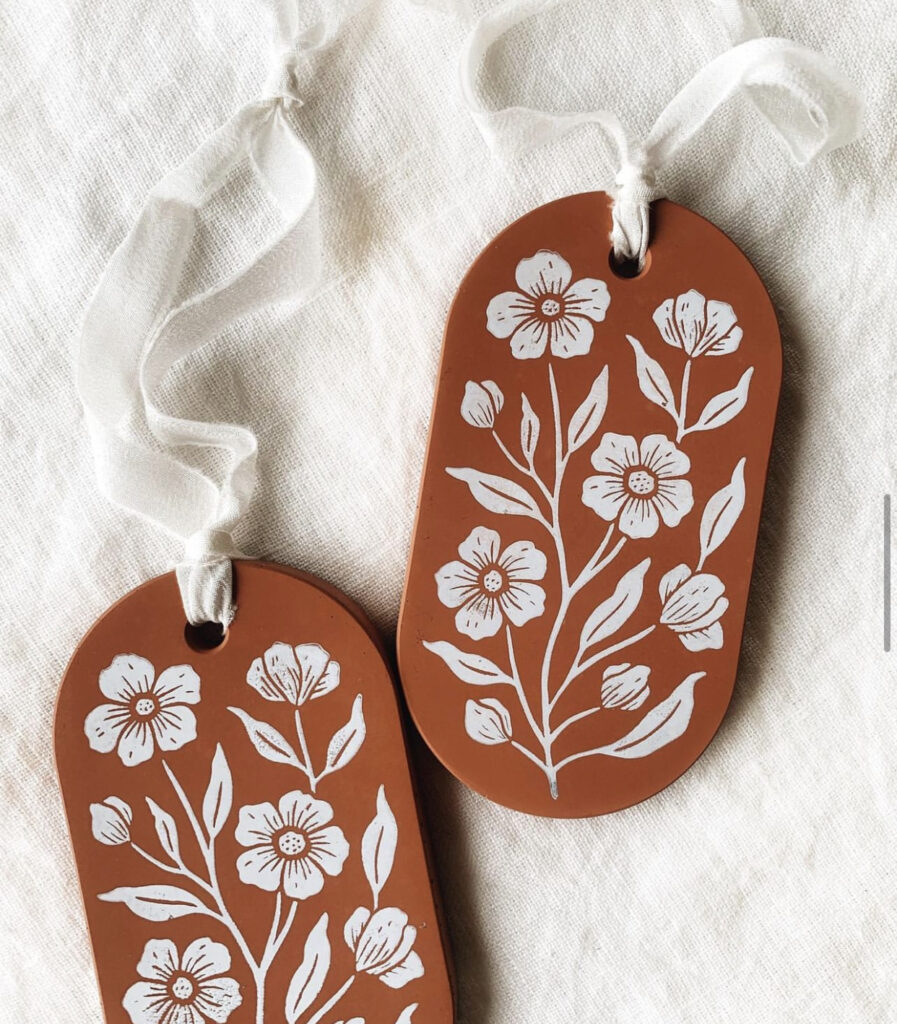
How gorgeous is this eco friendly ornament from @.FloraWestDesign?! I love that she found a way to use waste materials to create something so beautiful and unique!

From Flora: “Every time I made a cement tray this past year, if I had any leftover cement, I would use it up in these little ornament moulds….

Well I finally get to use them! I have over 150 from leftovers that I’m using to make Christmas ornaments! I’m proud of this little zero waste moment, but also that I *actually* premeditated Christmas for myself.

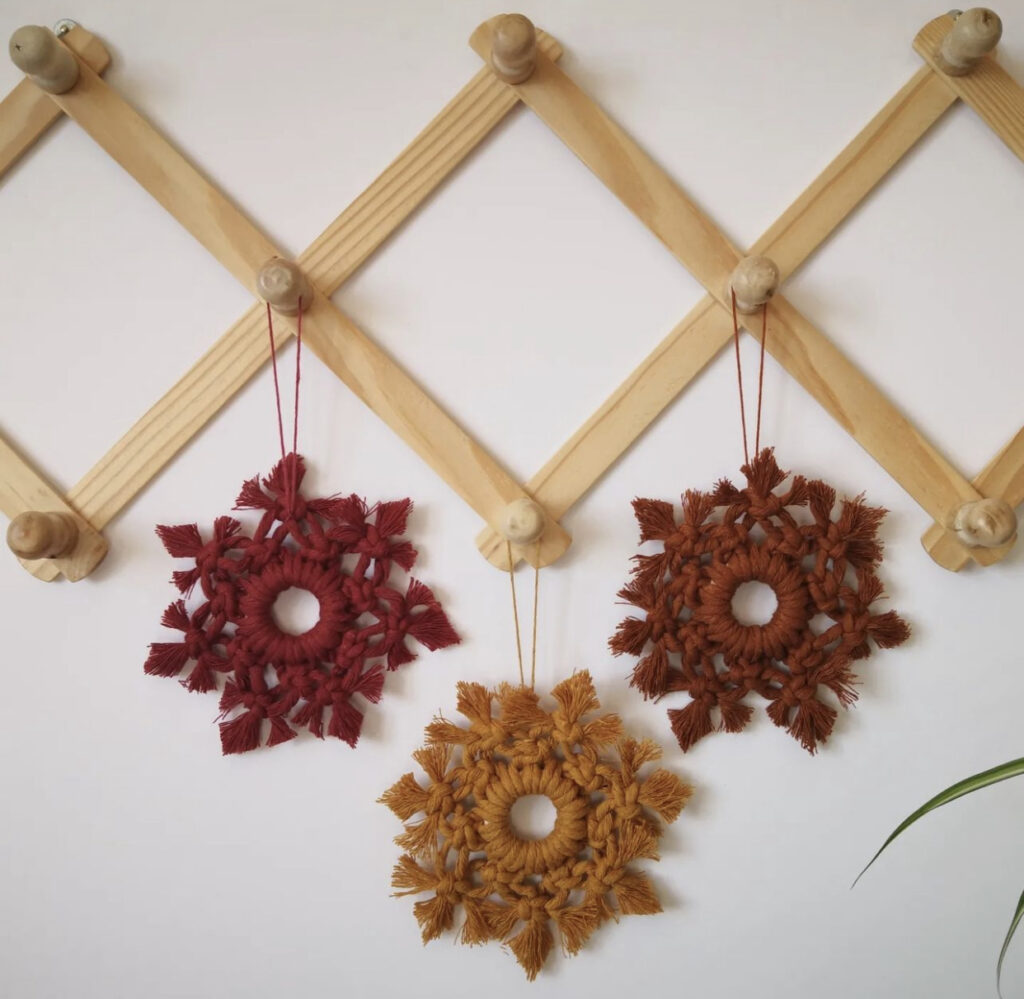
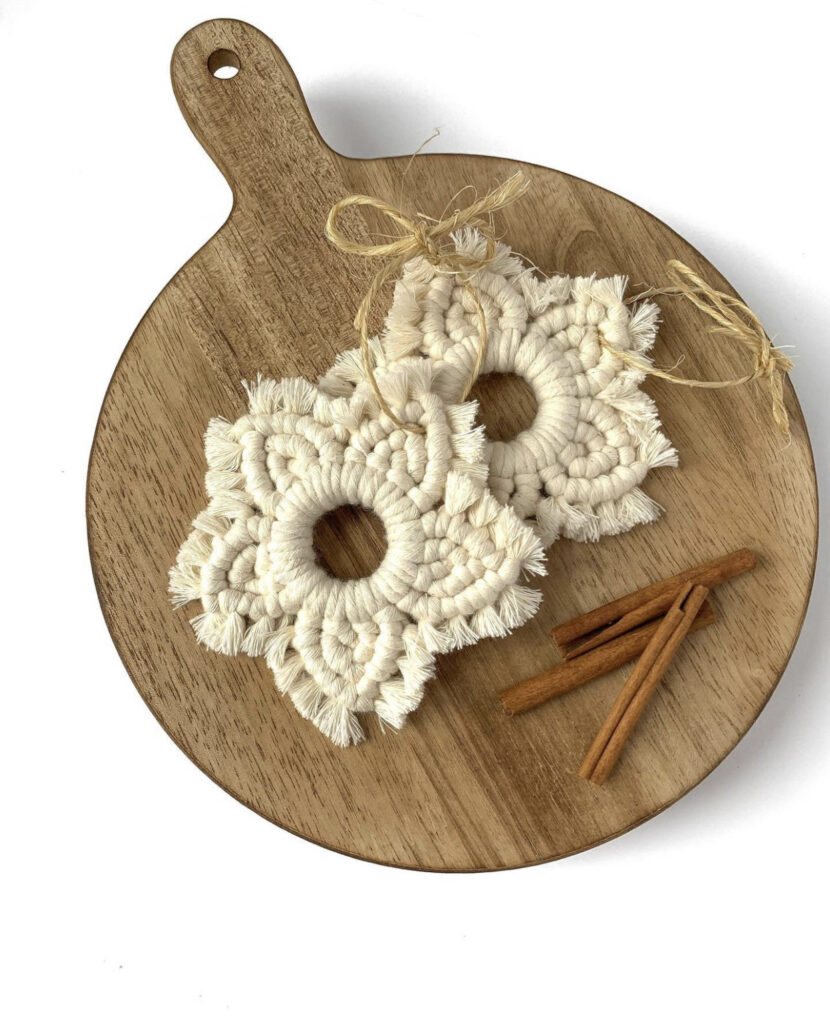
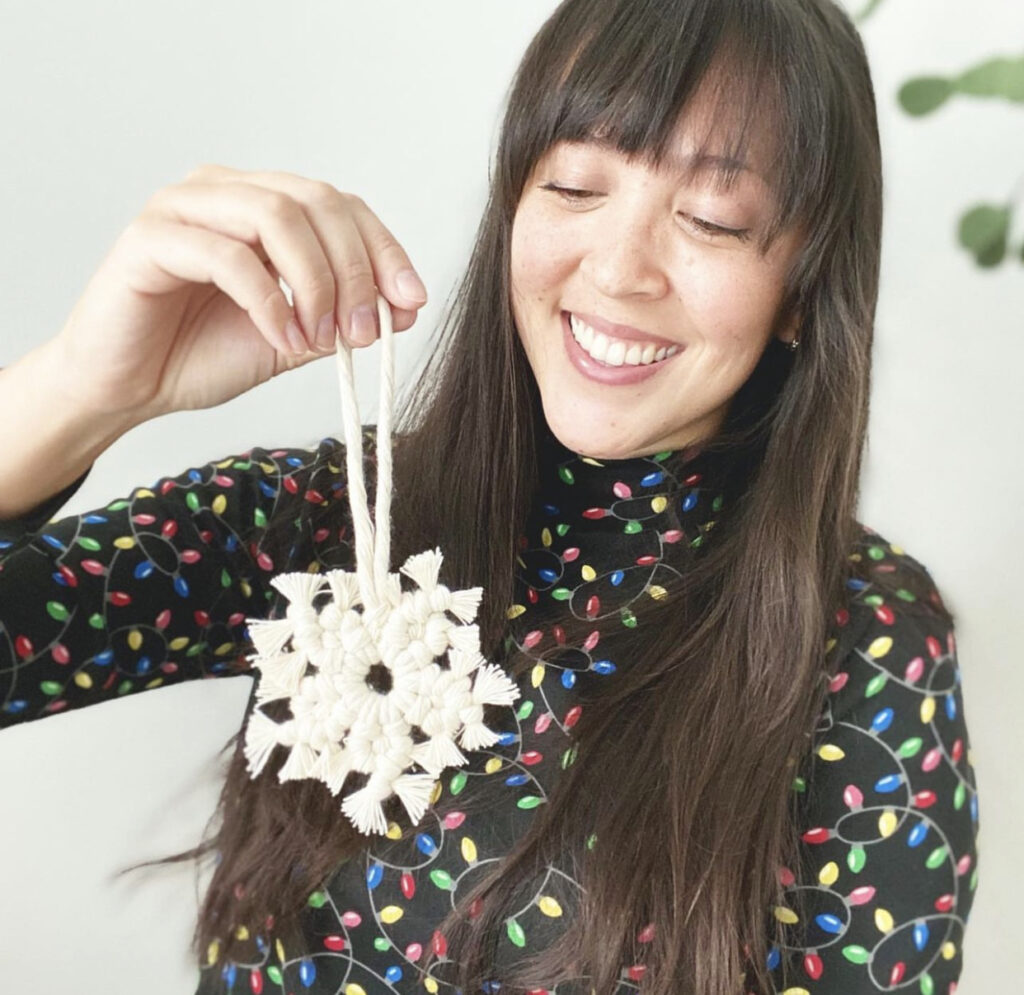
#5 Eco Ornaments: Colorful Macrame Snowflakes

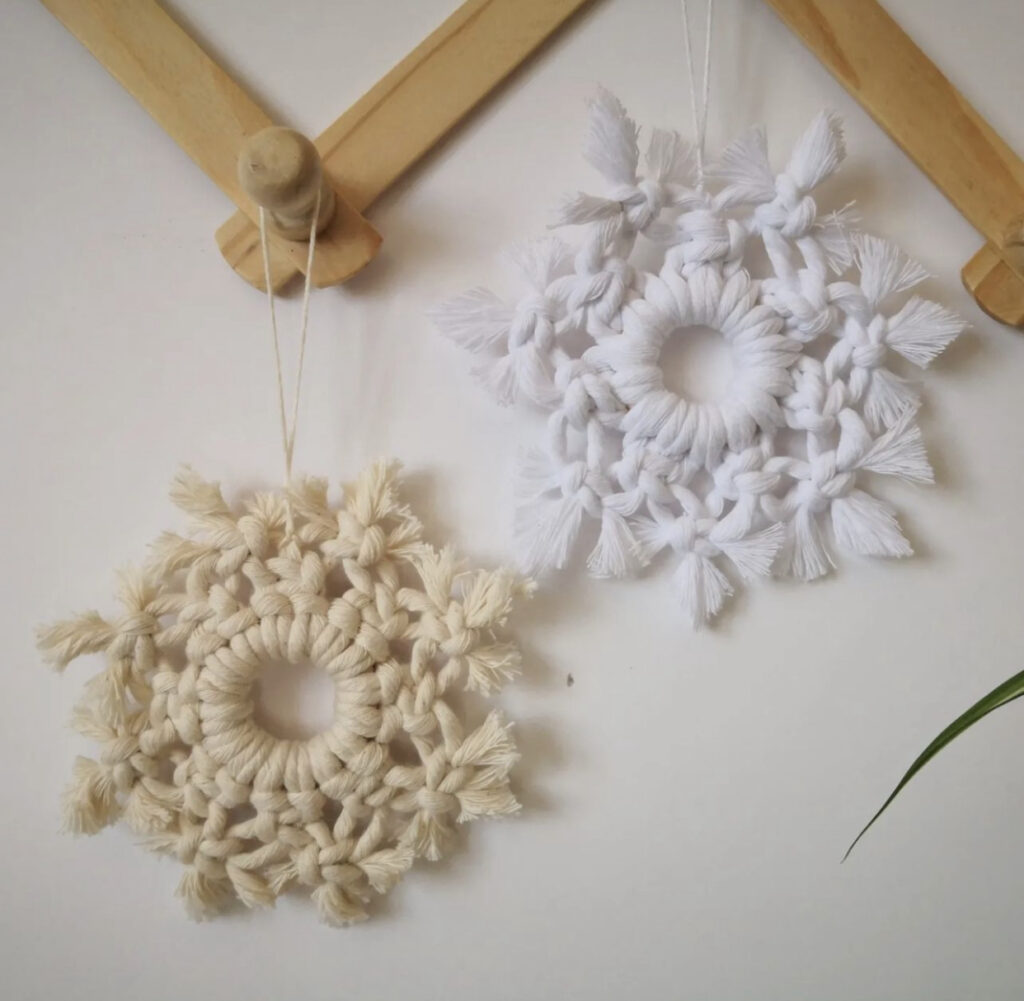
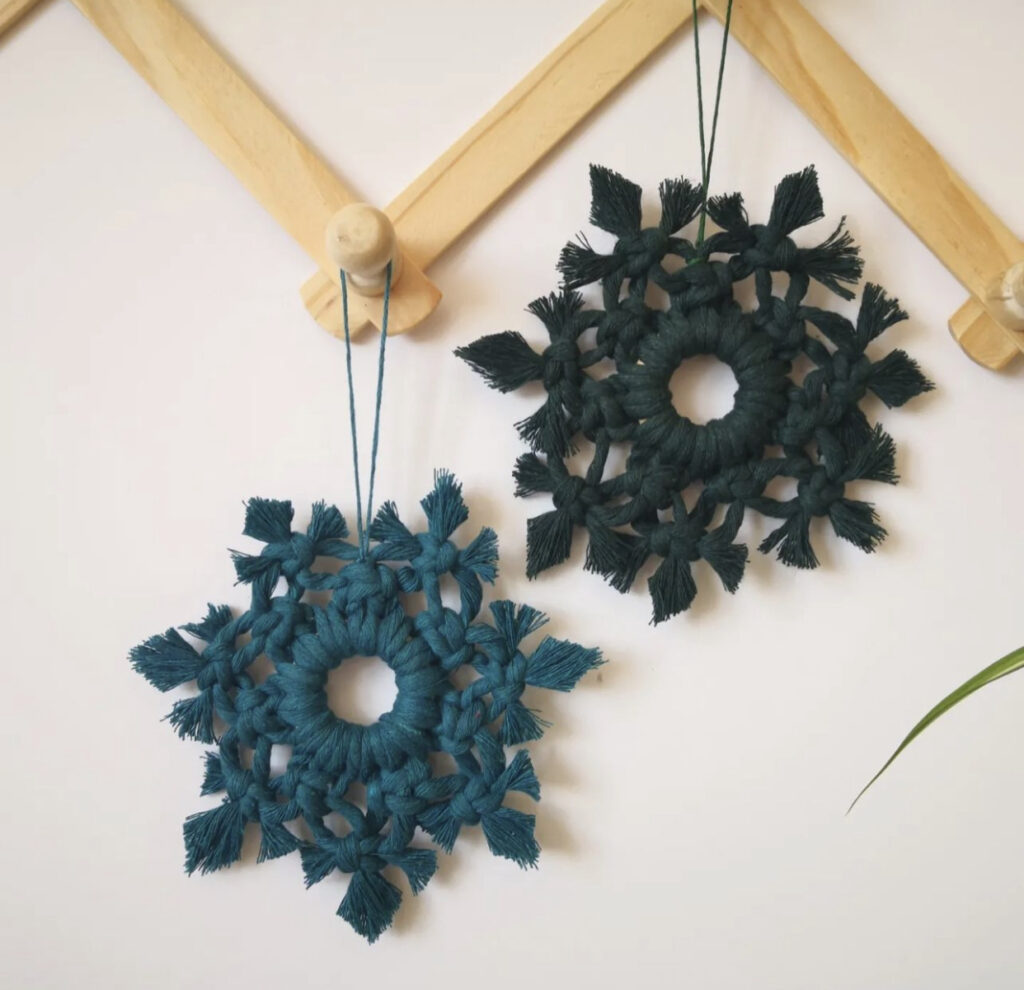
This Christmas tree ornament from @.DianaCrafted are lovely. I love that they work with a variety of Christmas decor color palettes.

From Diana: “Add something eco – friendly to your Christmas tree this year with these beautiful macrame snowflakes made with recycled cotton cord.

They are also great as props for flat lay photography or just for hanging from a door knob, from the mantelpiece, or from a hook on the wall.

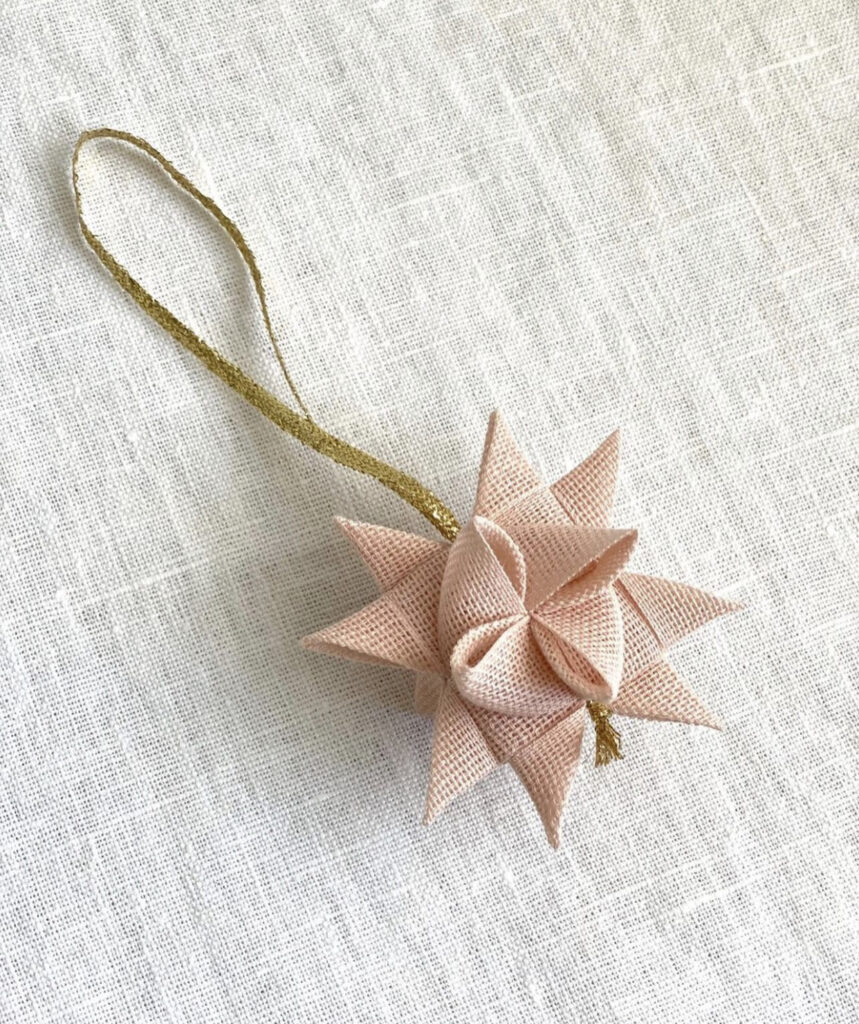
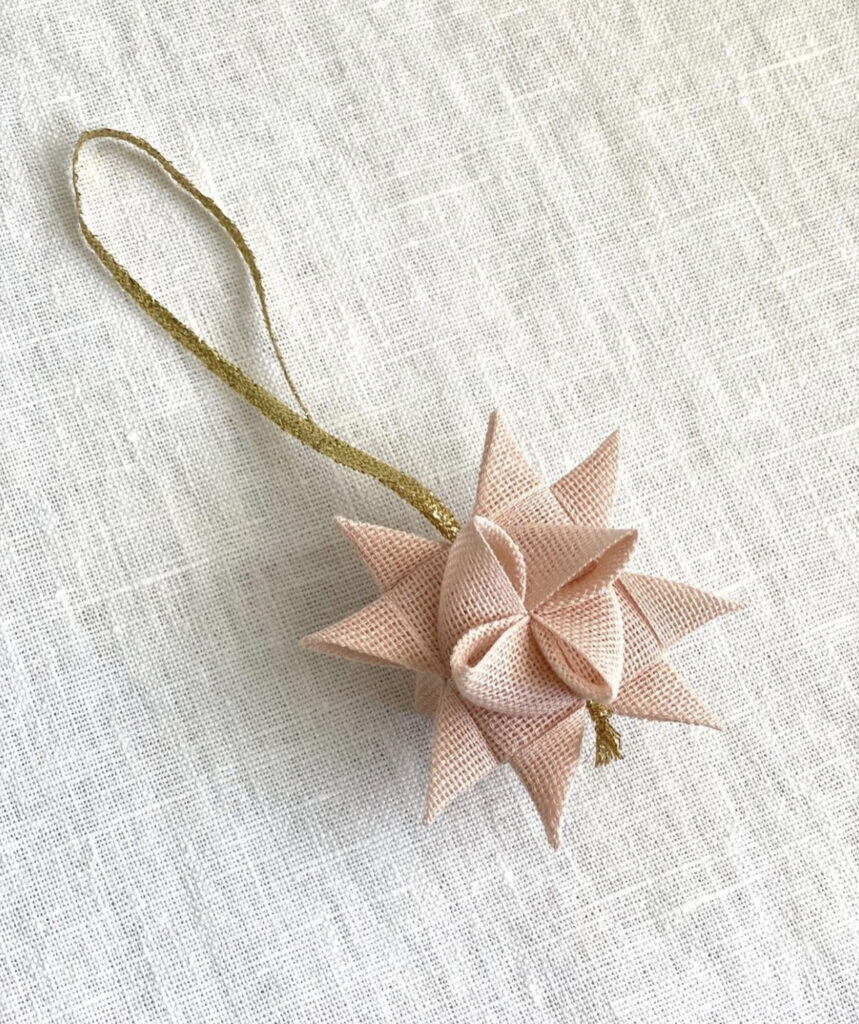
#6 Sustainable Christmas Ornaments: Nordic Stars

I think that these eco ornaments from @.StudioCartaShop are so chic!

From the shop: “The Nordic stars ornaments are the latest addition and so pretty! These were made with cotton ribbon by Lily Raid of @.ApprenticeStudio in California.

#7 Sustainable Christmas Ornaments: Ornament Made From Recycled Paper

Eco Friendly Ornament - Round Ornament Made From Recycled Paper

This eco Christmas ornament was made using recycled paper!

From the maker on Etsy: “First, recycled papers are rolled then quilling techniques are used to create a beautiful upcycled ornament. Personality of each artisan is expressed through the color and the quilling style. Each recycled magazine ornament is unique.

Our upcycled craft workshops improve lives for youth with disabilities, and women with disadvantages in Vietnam.”

Snag this eco friendly ornament here!

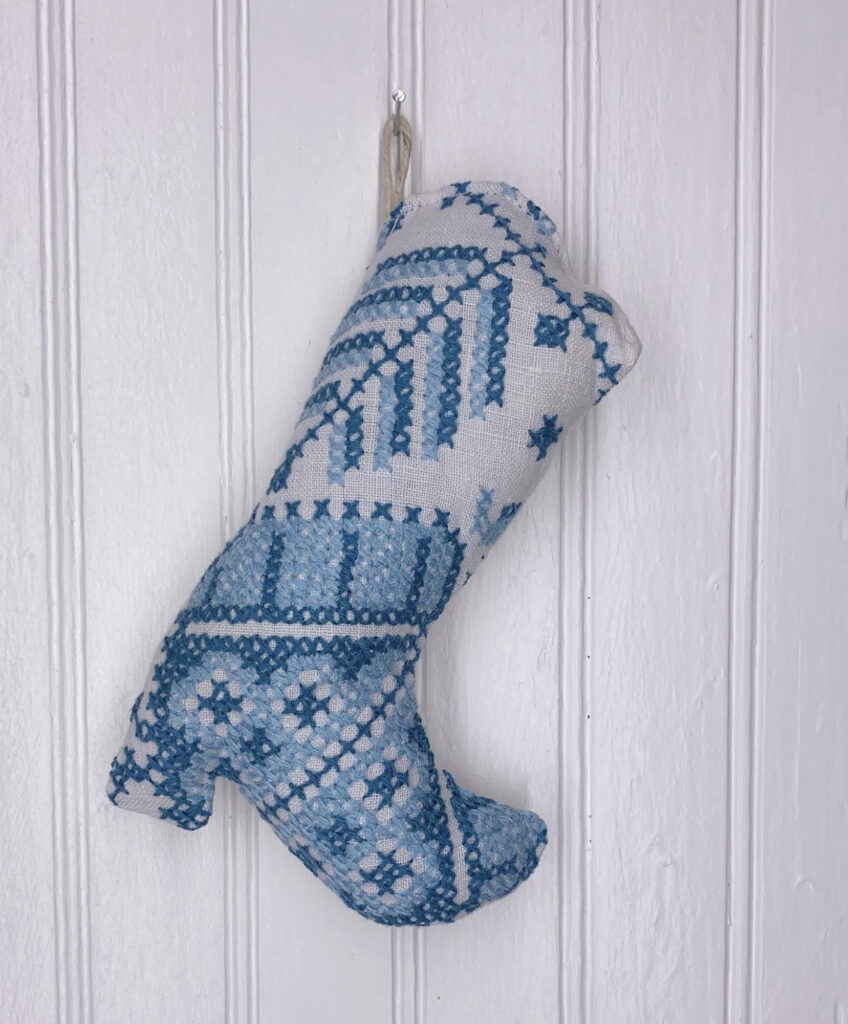
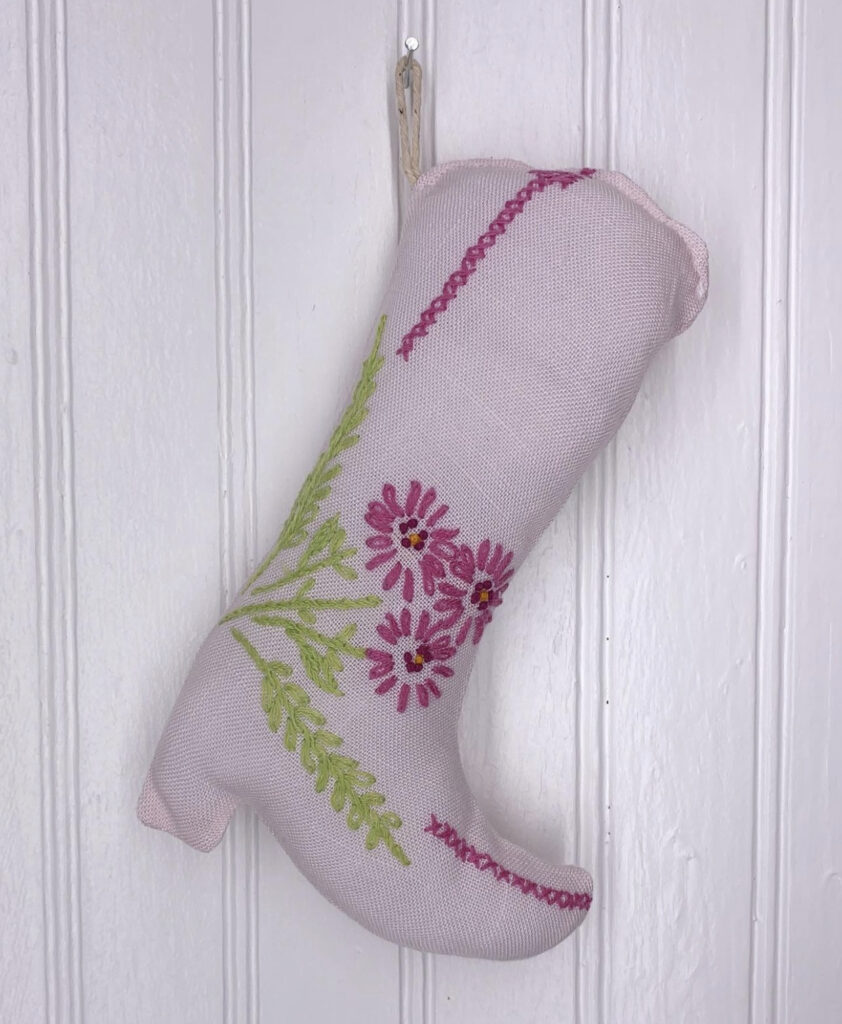
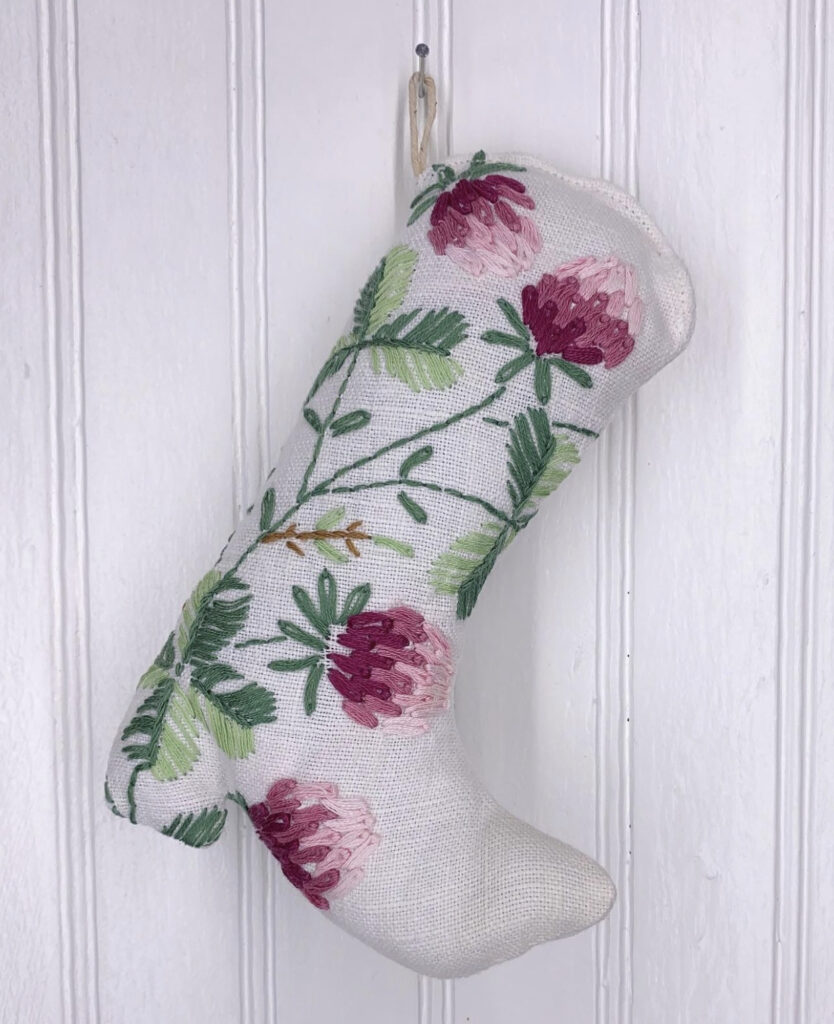
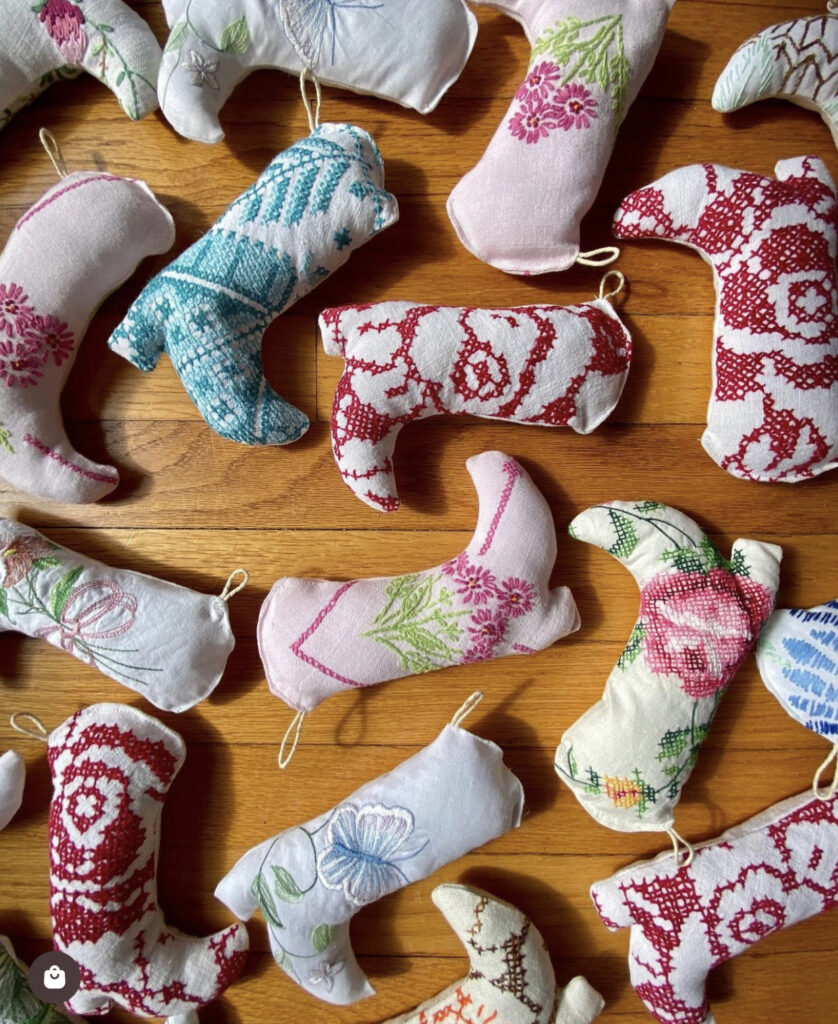
#8 Eco Friendly Ornaments: Cowboy Boots

How rad are these eco friendly ornament from @.PsychicOutlaw?! These are giving me Dolly Parton vibes. Psychic Outlaw makes these sustainable ornaments out of upcycled tablecloths.

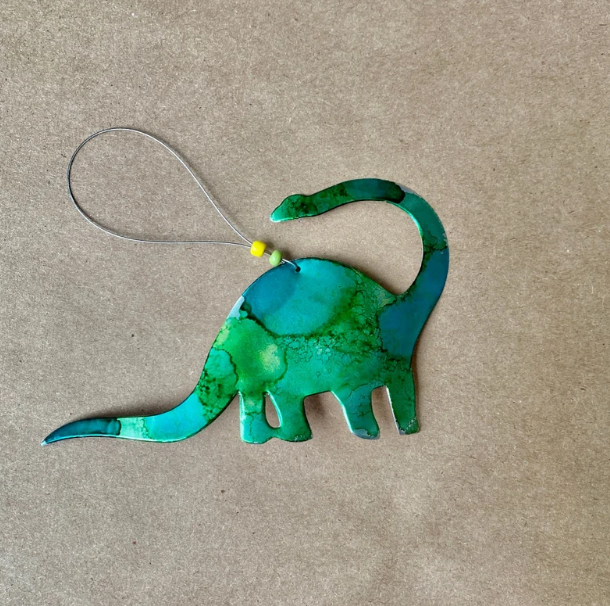
#9 Eco Ornament: Recycled Dinosaur Ornament

Eco Ornament - Green Dinosaur with Long Neck

How fun is this cute little dinosaur eco ornament!? This Etsy maker has other animals as well, including goats, foxes, and flamingos (plus many others)!

From the maker: “This DINO will never go extinct due to its recyclable nature! Upcycled and repurposed aluminum can dinosaur ornament. Each item is hand painted in our studio. Due to the uniqueness of each item, there may be slight variation in color.

Snag this eco ornament HERE!

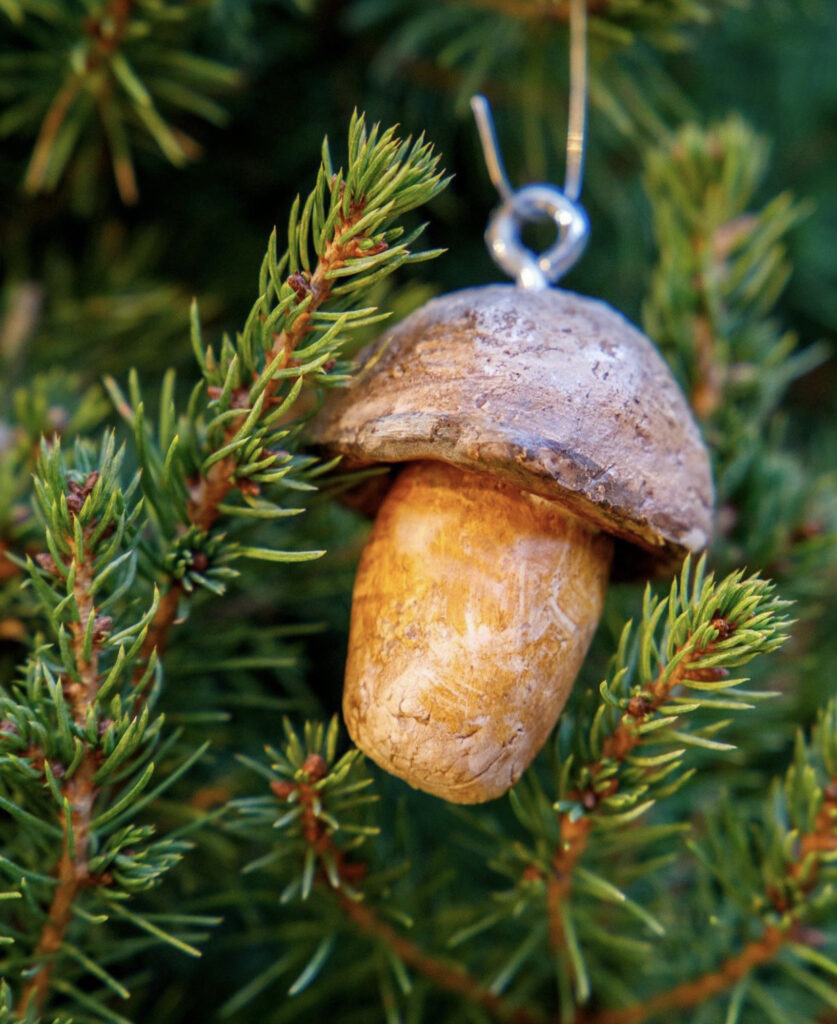
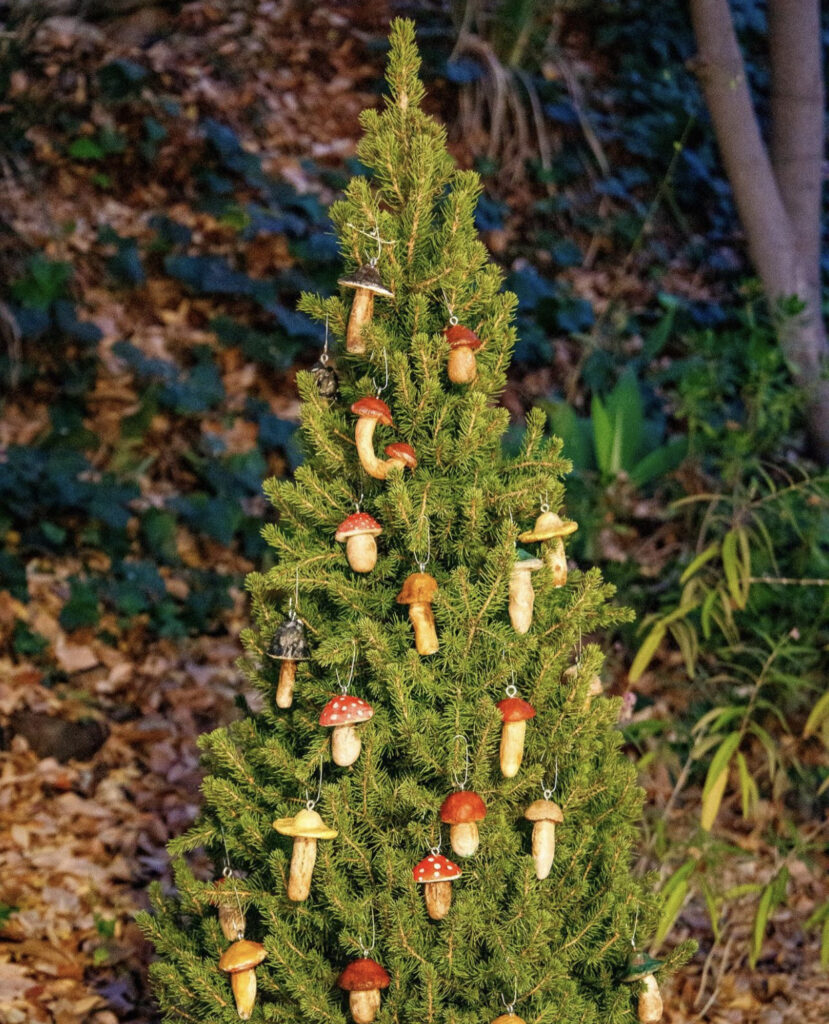
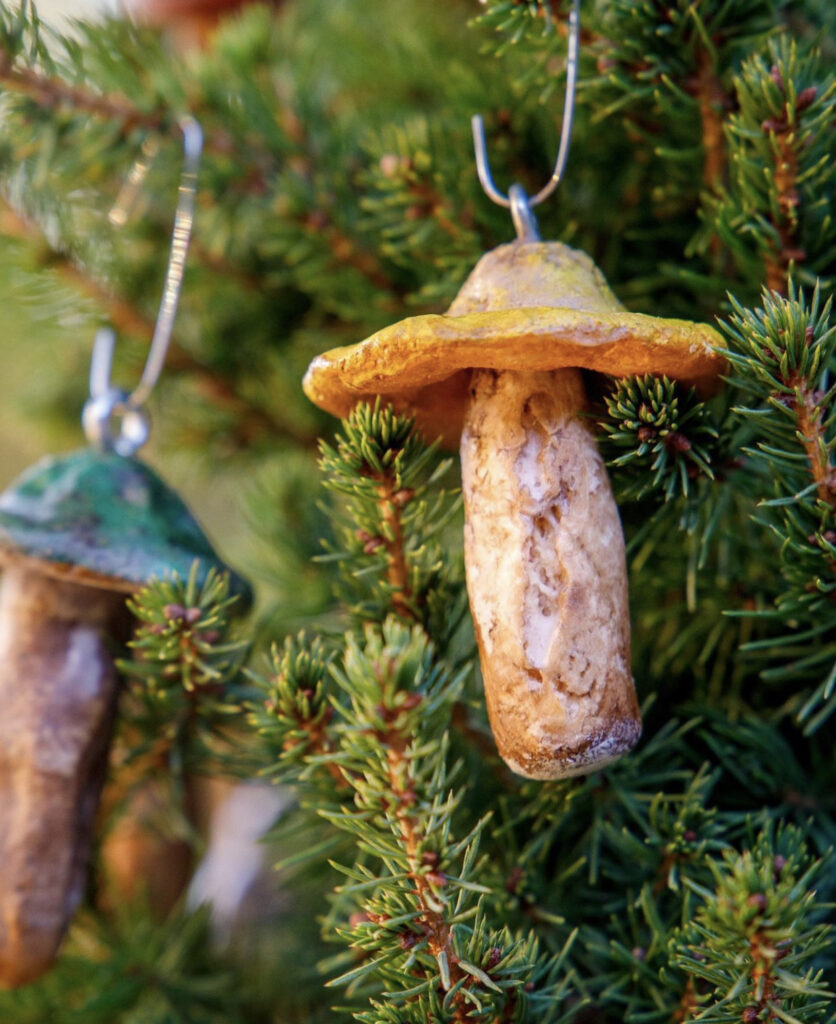
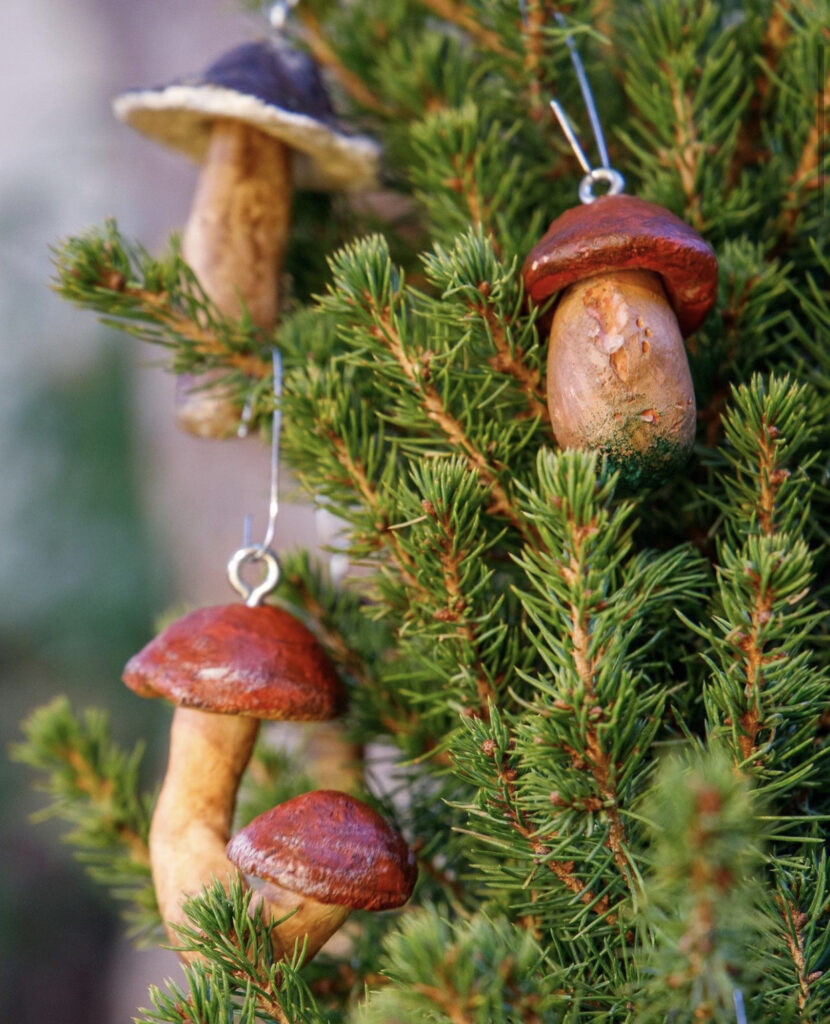
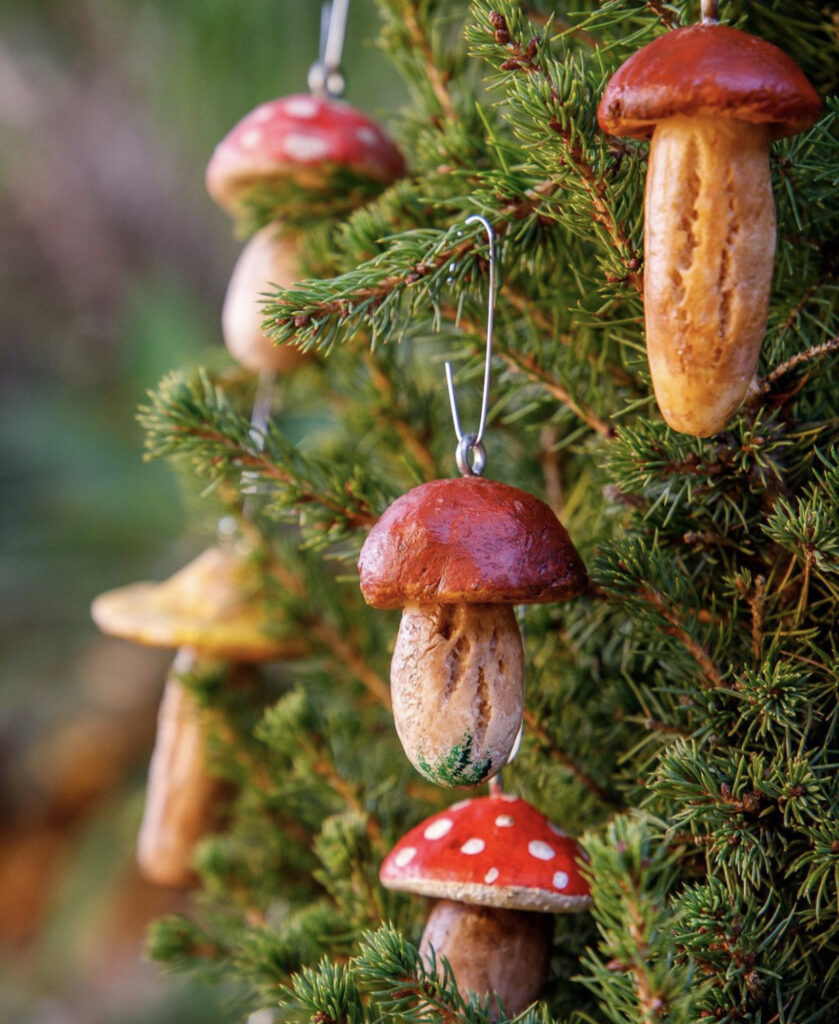
#10 Eco Friendly Christmas Ornaments: Salt Dough Mushroom Ornaments

These eco ornaments from @.My_Seasonal_Treasury look like they came straight from a Jim Henson movie!

From the maker: “These sustainable mushroom ornaments are hand painted and each individual ornament has its own unique design. Sold in sets of 5 or 10. Shipped within the US (free shipping on orders over $35) and to Europe.”

The tutorial to make these eco ornaments yourself are available HERE on Etsy!

#11 Sustainable Christmas Ornaments: Neutral Minimalist Options

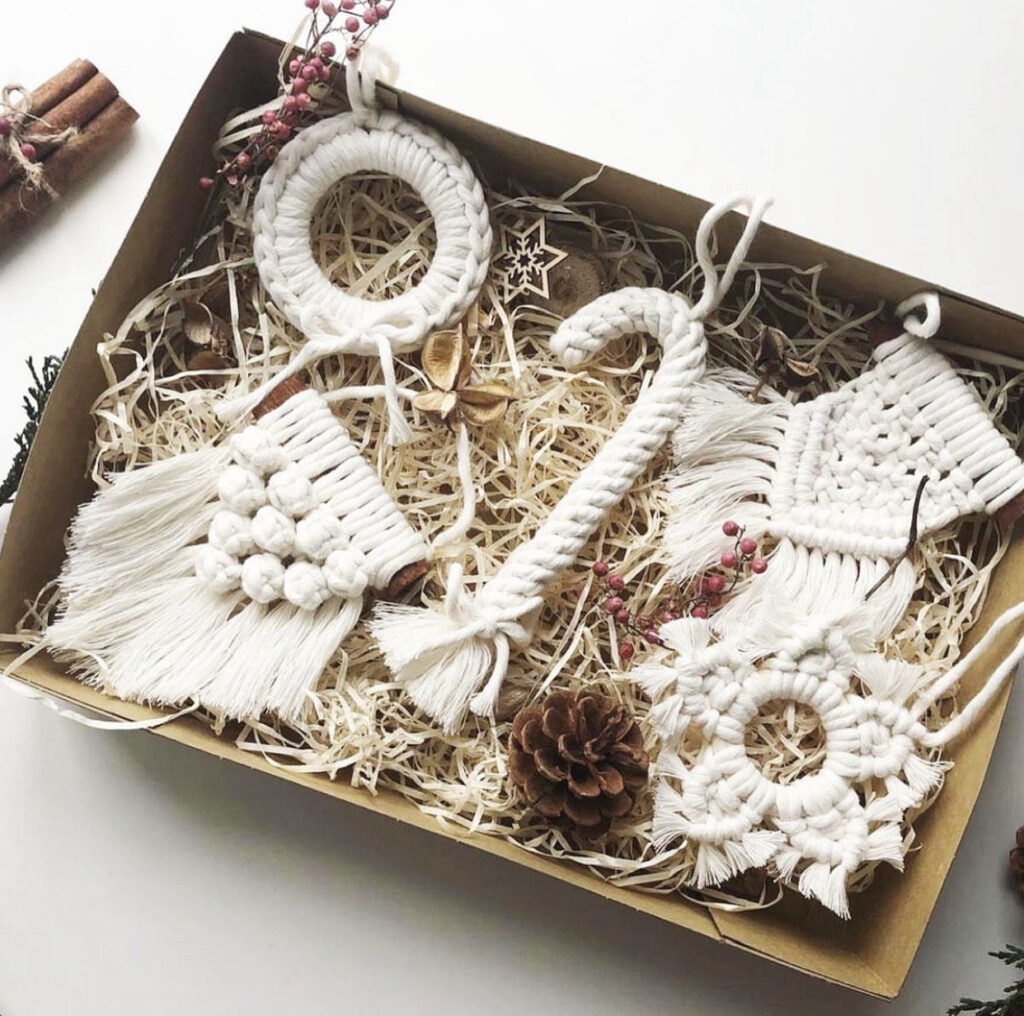
Eco Friendly Ornaments - Macrame Woven Christmas Ornaments

These sustainable Christmas ornaments from @.PeaceWithTheWild are perfect for the macrame lover!

From the brand: “We are so excited to stock these beautiful handmade Macramé Christmas decorations from Boho Eve. Decorate your house with these delightful macramé Christmas ornaments. Made from recycled cotton, this box of handcrafted decorations can be stored away safely and used each Christmas to decoration house plants or indoor festive trees.

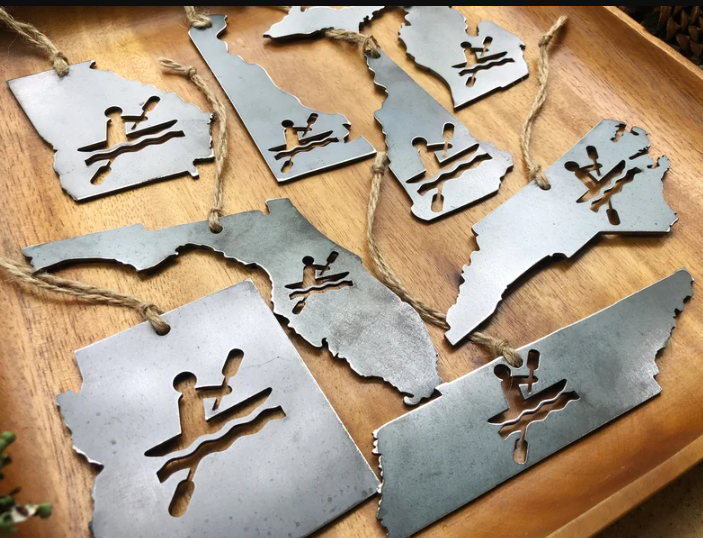
#12 Eco Friendly Christmas Ornaments: State Kayak Ornament (Made from Recycled Steel)

Eco Ornament - State Kayak Ornament from Cut Steel

How rad are these steel ornaments?! This is the perfect sustainable Christmas gift to get for the kayaker in your life!

From the Etsy maker: “Each piece is thoughtfully designed and created from scratch by us, Brandon and Erin Spangler, in Northwest Georgia. We use a CNC laser table to cut out our raw steel creations and then run each item through our finishing machine. Afterwards we hand tie a piece twine along with our story / care instructions card to every item.

Snag this eco ornament here!

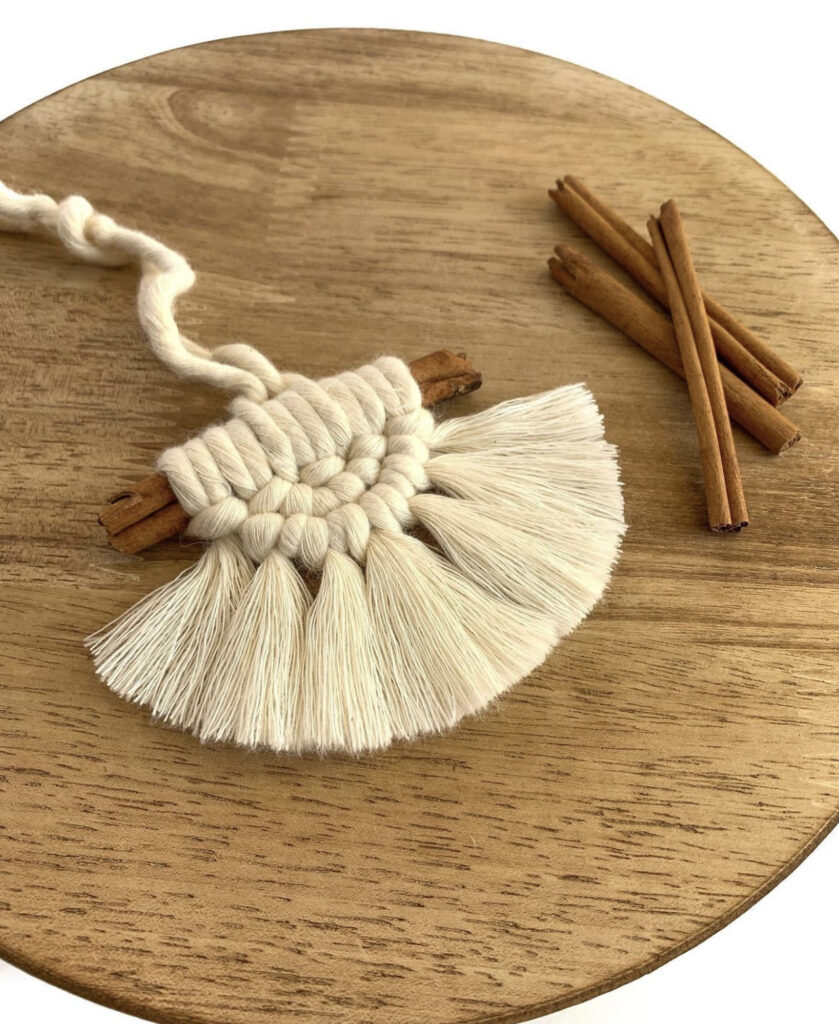
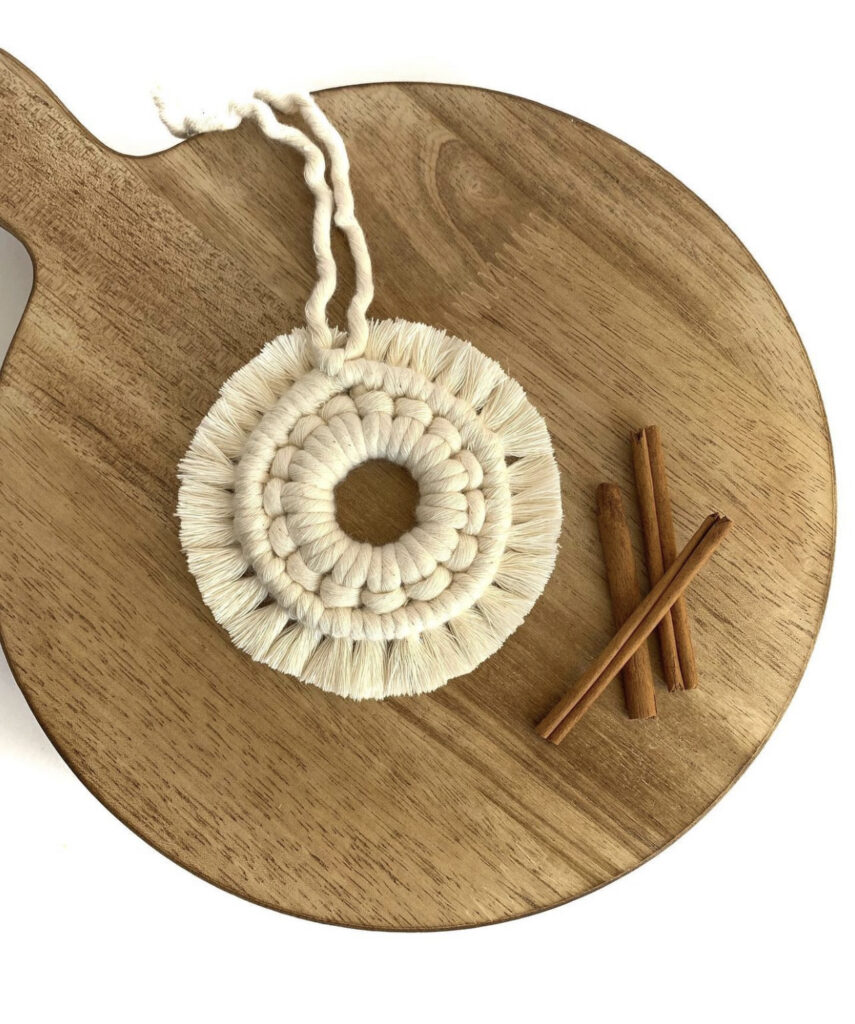
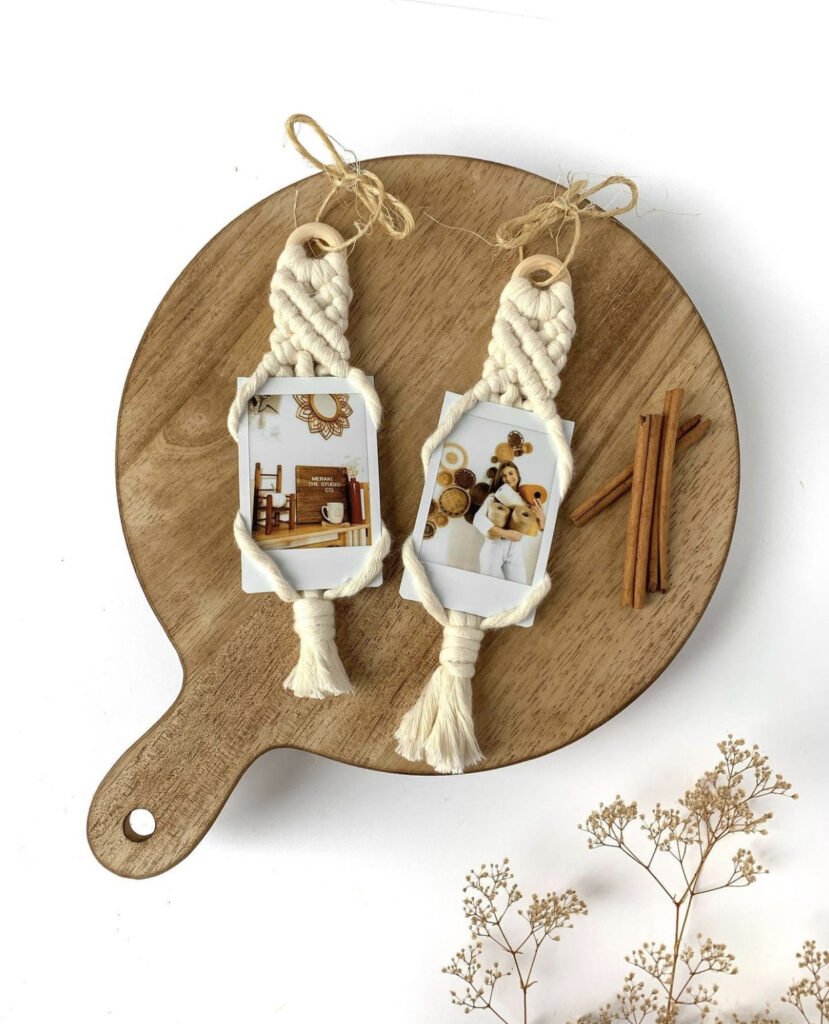
#13 Eco Friendly Ornaments: Creative Macrame & Cinnamon Options

How creative are these eco friendly ornament options from @.MerakitheStudioCo?! I love how they incorporated sticks of cinnamon, as well as photos!

From the maker: “Handmade with 100% recycled, zero-waste, eco-friendly fibers.”

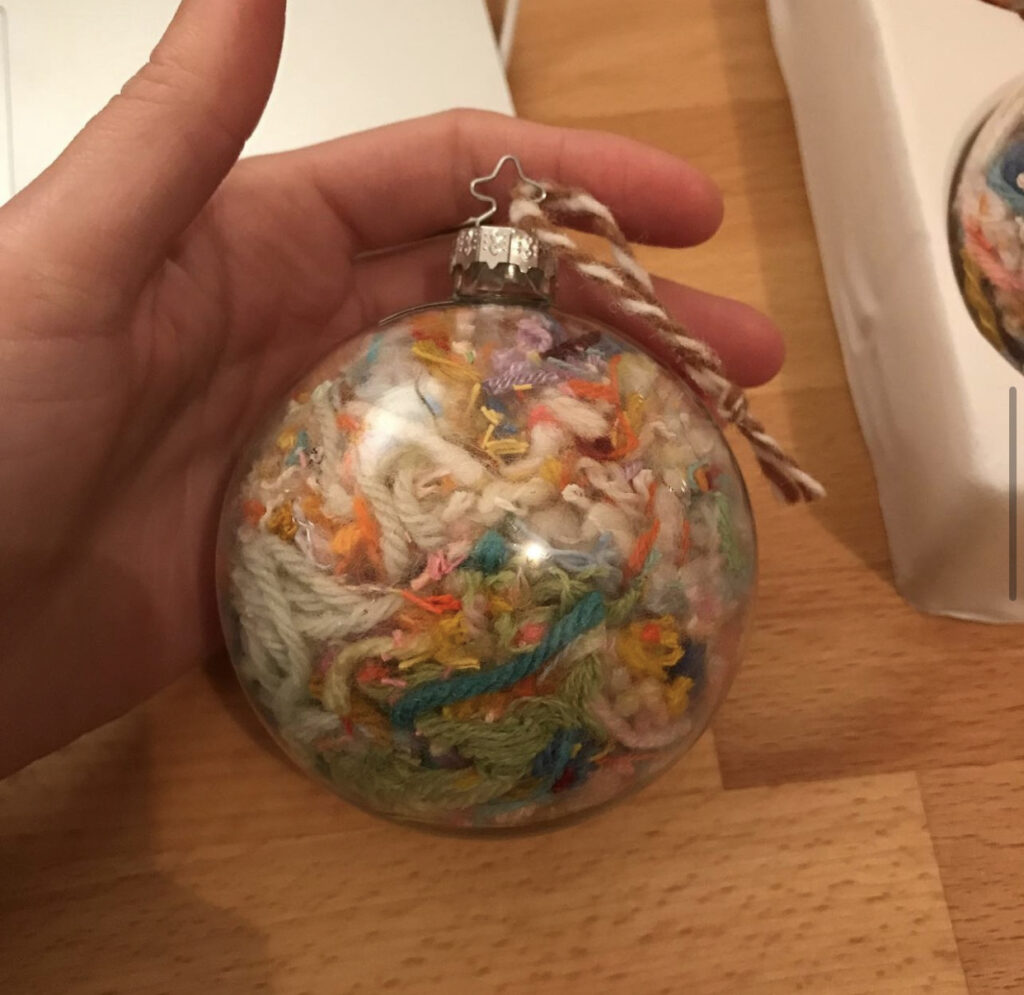
#14 Eco Friendly Christmas Ornaments: Yarn Scraps in Round Clear Ornament

This upcycled Christmas tree ornament from @.AllyRous is so cool!

From Ally: “Glass yarn scrap ornaments! There are so, so many things you can do with these little bits!

#15 Sustainable Christmas Ornaments: DIY Macrame Ornaments

eco ornament - macrame snowflake

This sustainable Christmas ornament from @.Simpul_Boutique is lovely.

From Amanda: “I made these adorable ornaments using single strand natural soft cotton eco-friendly cording from my amazing cording supplier @.ganxxet! I love this woman-owned business!

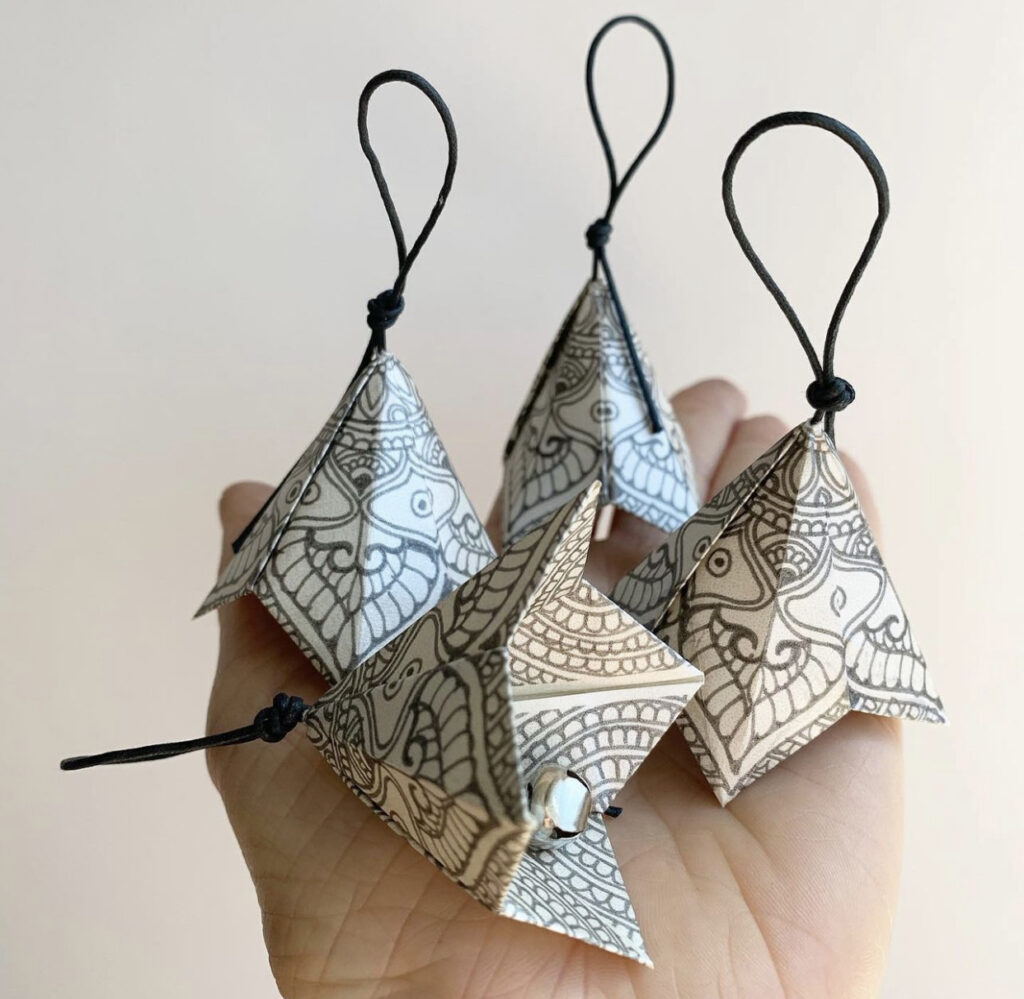
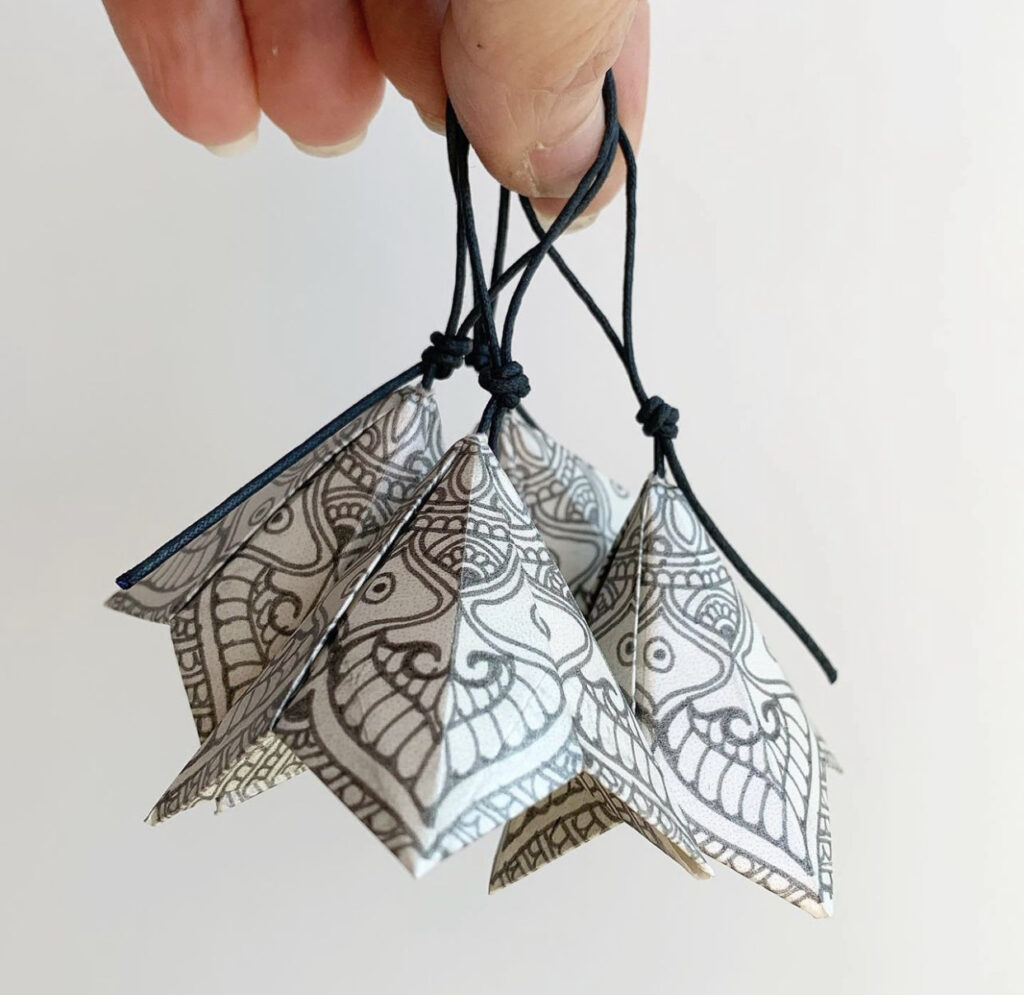
#16 Sustainable Christmas Ornaments: Origami Gift Tag Ornaments

How smart are these ornaments from @.BeemelloFlowers?! They double as gift tags as well as unbreakable ornaments!

From the maker:

You will be able to say goodbye to old boring plain ‘to from’ gift tags, adding some shining original pizazz to your gift giving!

Hand crafted with love in silver and metallic champagne premium imported paper, these will be available for a limited time!

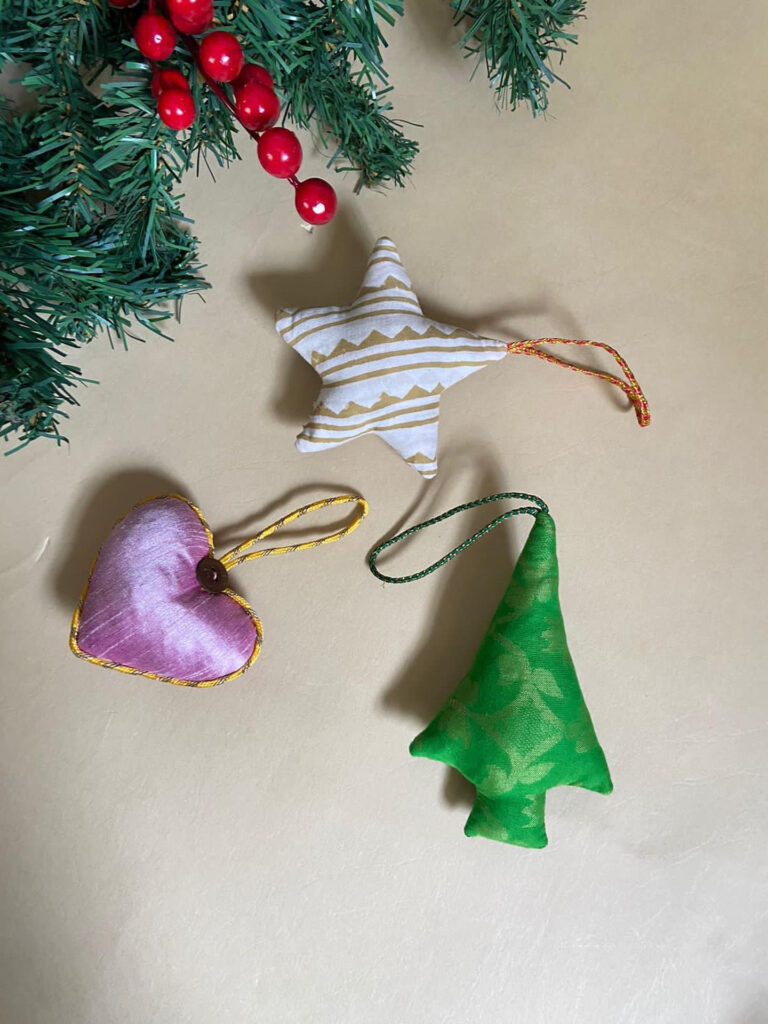
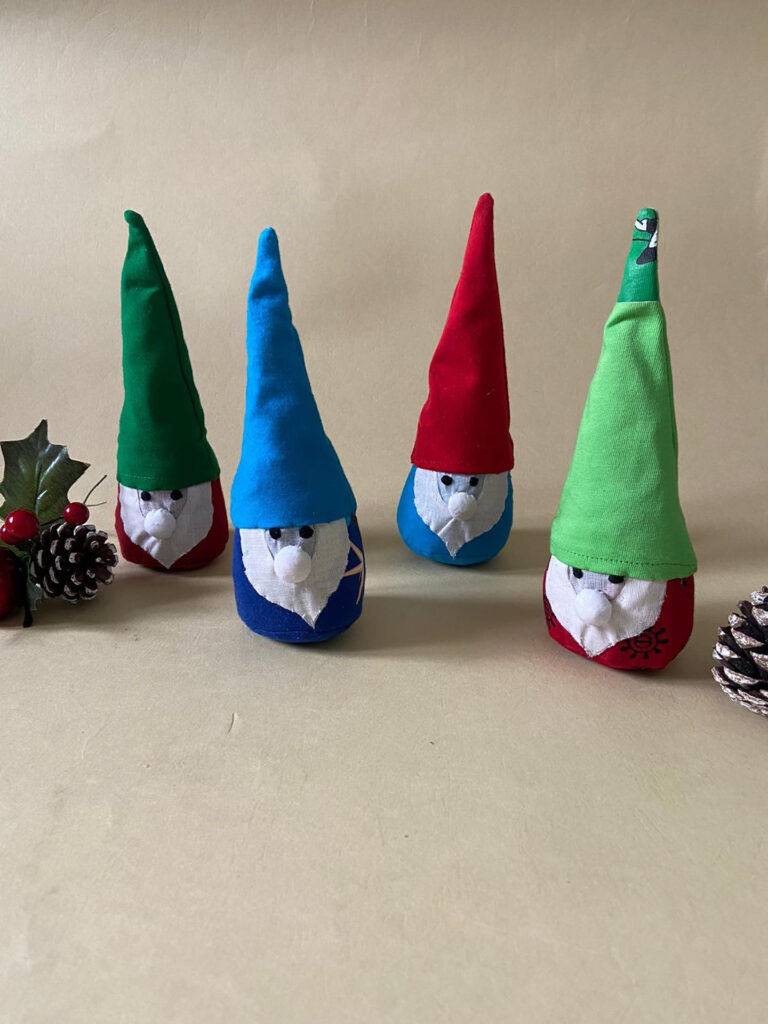
#17 Sustainable Christmas Ornaments: Zero Waste Christmas Decor Using Fabric Scraps

How gorgeous are these individual sustainable Christmas ornaments from @.OhScrapMadras?! These eco ornaments are made using scrap fabric, which is so impressive. I imagine it takes a lot of work to find the right size of fabric scrap for these!

This blog post was all about eco friendly ornaments.

Hi, I’m Leslie, Eco-Friendly Christmas Blogger!

Hello fellow Christmas-lover! My name is Leslie, and I’m the founder and blogger behind PunkMed! On my blog, I share all things sustainable living, from urban homesteading and gardening to DIY Halloween costumes! Thank you for stopping by, and I hope to see you soon!

More Sustainable Christmas Decor Guides —>

17+ BEST Seed Storage Ideas | How to Store Seeds!

best ways to store seeds

Looking for seed storage ideas? These tips will help you keep your seeds viable for years to come!

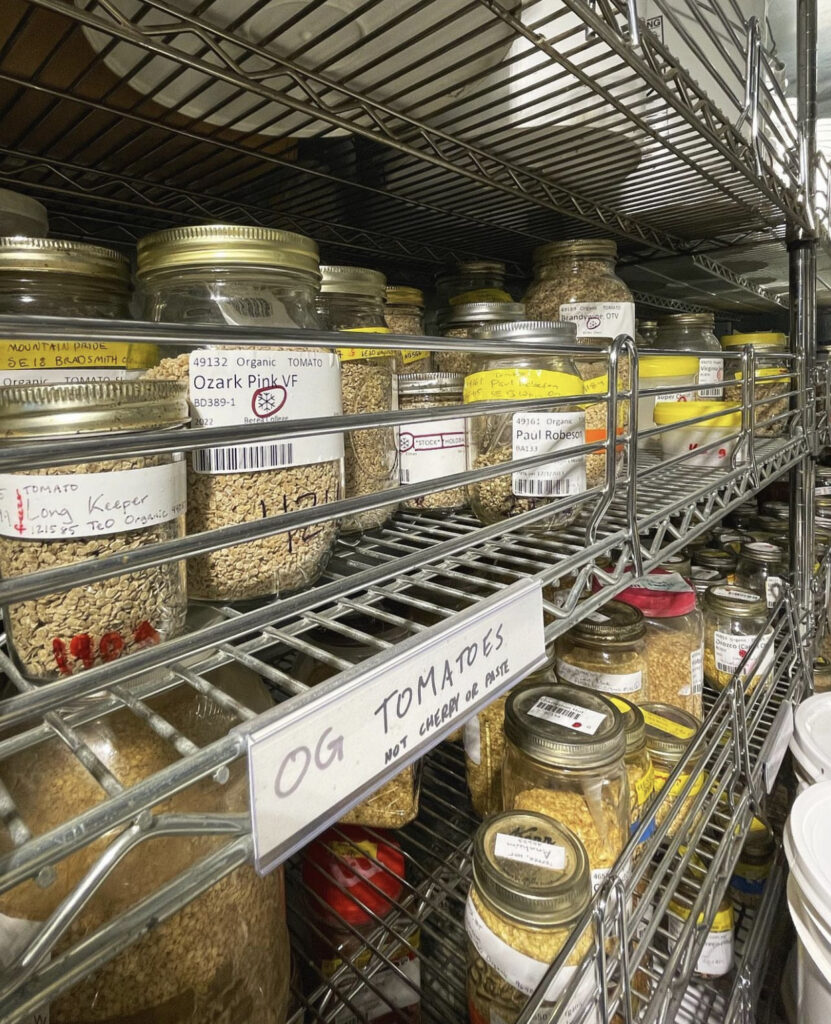
At some point in your gardening journey, you take a step back and think to yourself, “How do I store my seeds?” In today’s blog post, I am excited to use my years of experience as a gardener, urban homesteader and seed fanatic, to help YOU save and store seeds!

To be honest, I do not currently have a fancy storage system. I currently store my seeds in paper sandwich bags, label them with a Sharpie, and store them in our pantry. I decided to write this blog post as I was doing my own research to build out a new organization system!

This blog post is all about seed storage ideas.

Seed Storage

There are a lot of really great ways to store seeds. Before we get into the nitty gritty tips from gardening experts and hobbyists, I want to share some top tips and ideas–some key takeaways if you will!

Tip #1: My Favorite Way to Store Seeds

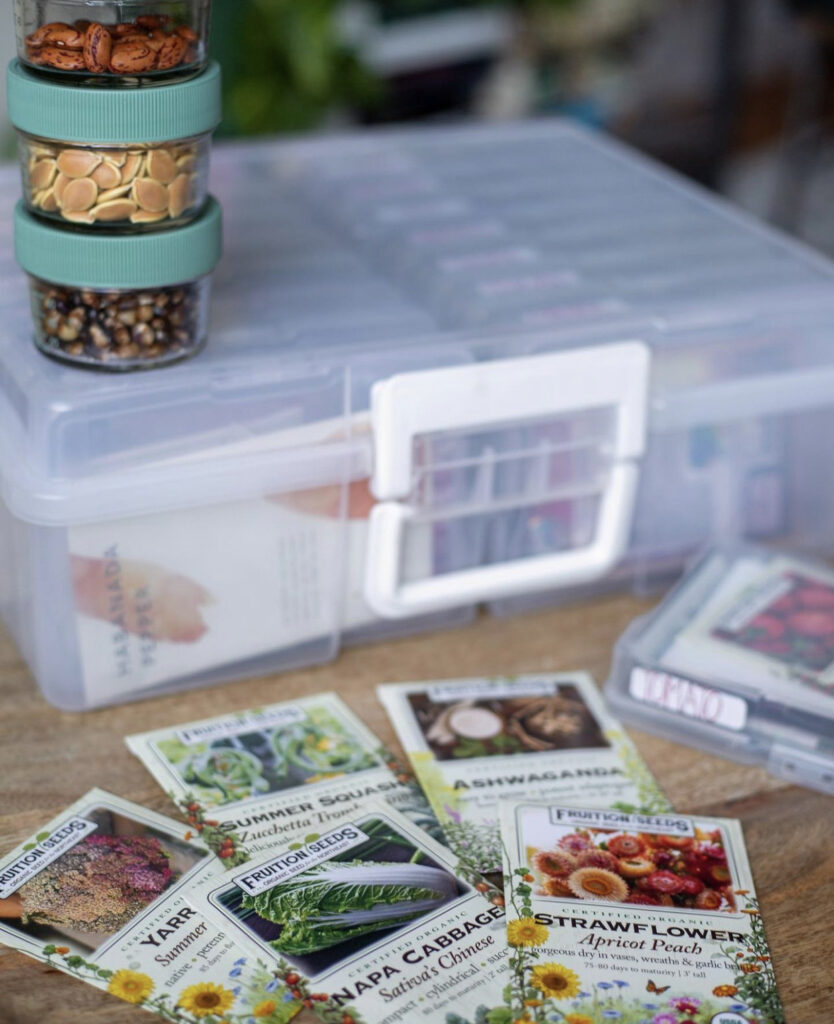
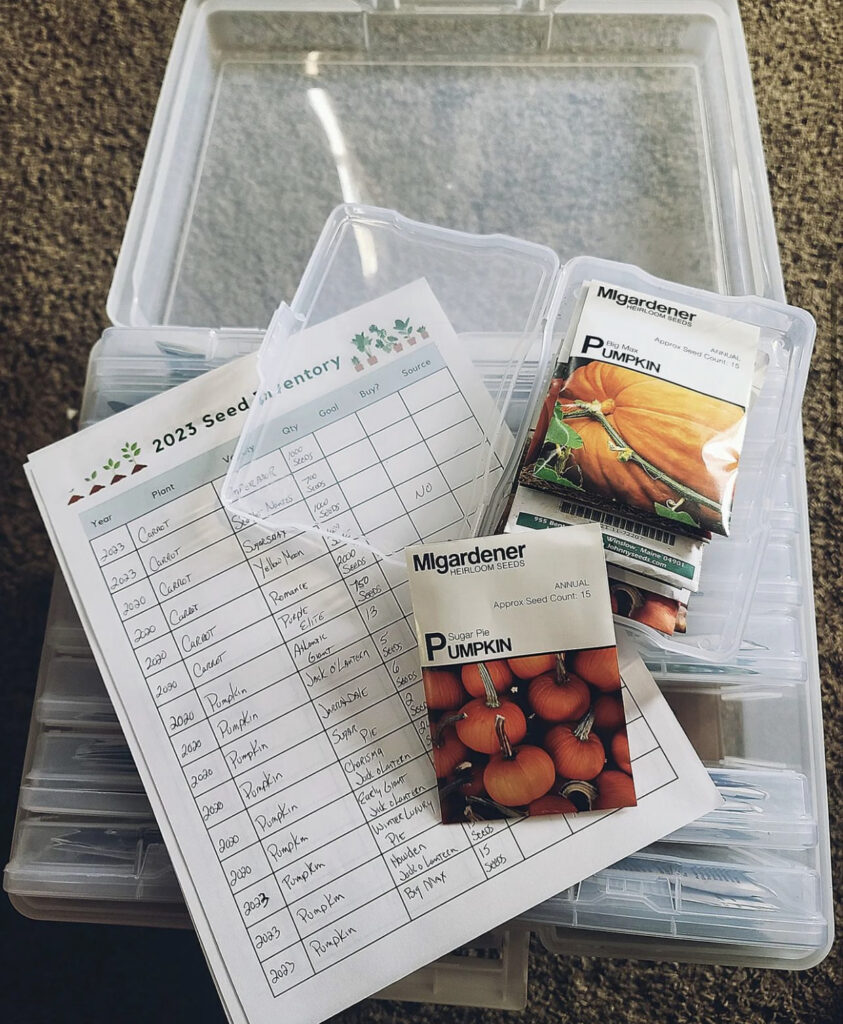
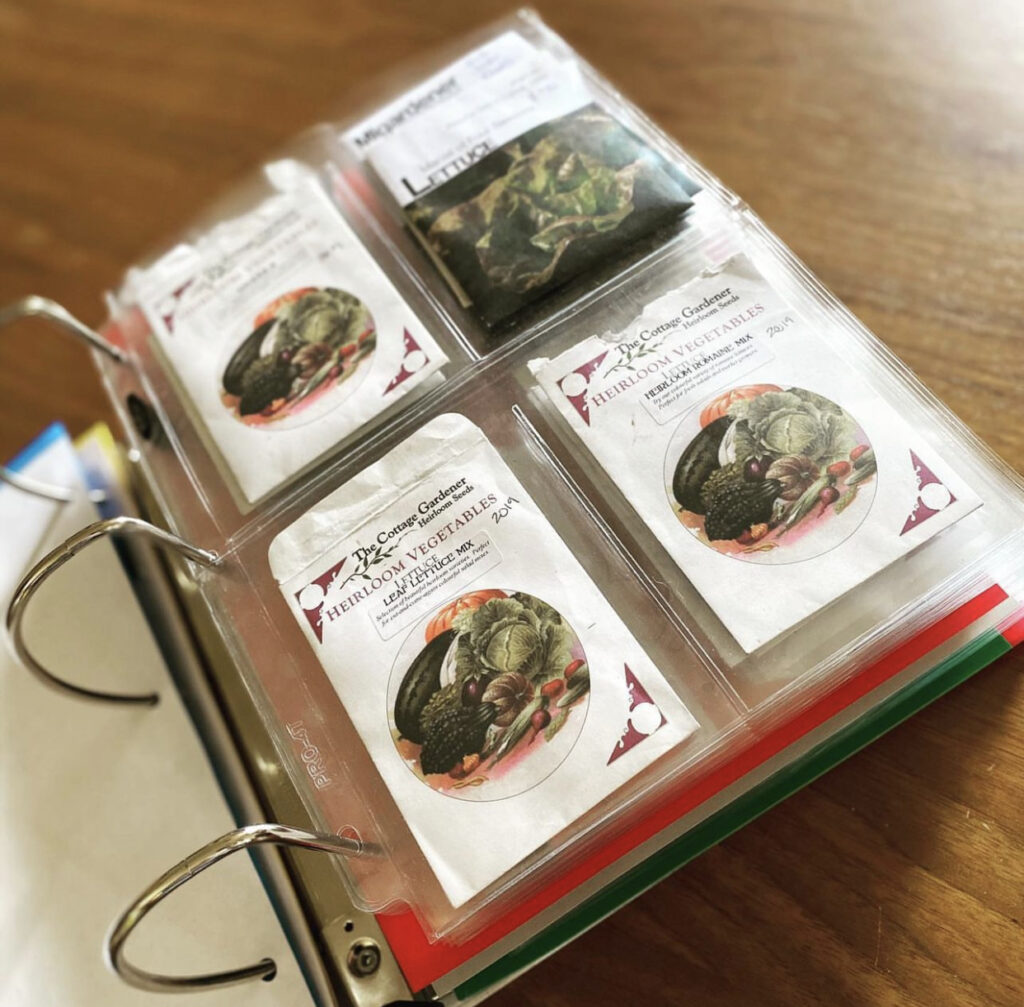
Using a transparent photo case with smaller compartments is my favorite storage idea for seeds. I think the smaller containers are large enough to store packets or baggies (or even large seeds themselves!) and make it easy to get seeds out–if the compartments are too small, your fingers can struggle to grab the seeds easily!

Check out this seed storage hack!

Seed Storage Tip #2: Monitor Temperature

Some seeds are good to hang out in your seed storage organizer until it’s time to do seed starts, but other seeds must be refrigerated. Most seeds do well in a cool, dry location without too much humidity. Be sure to understand how to save your seeds!

Seed Storage Tip #3: Label Your Seeds

The top mistake people make when saving seeds is not labeling their seeds they’ve saved for the next growing season! Even the most experienced gardeners would likely not be able to tell a bok choy from a rainbow tatsoi seed. And you probably won’t be able to tell between different varieties of the same plant! Label every batch of seeds you save with the plant, variety and year it was saved.

    If you’re anything like me, then you’re a huge nerd when it comes to buying seeds, ordering them from all over! For this reason, I recommend also noting the year and where you originally got the seeds you’re storing. Most seed packages are labeled with the growing year for which they are intended.

    #1 Seed Storage: Cool Dry Location & Different Containers

    Store Seeds - Plastic Organizer

    Our next tip on how to store seeds comes from @.TheBirchArborGardens, AKA Arianna who is a gardening educator!

    From Arianna:

    “Let’s talk about seed storage and organization!

    It’s important to understand that different seeds will be viable for varying lengths of time. When properly stored, most seeds can last for years.

    Keeping your seeds stored in a cool/dry location will ensure the highest viability rate for those seeds. Suitable storage is key for the longevity of your seeds. They are after all the life blood of your garden!

    For seeds saved from my garden each season, the baby food jars which I’m no longer using for food storage make the perfect containers.

    For seed packets, I LOVE my photo-case storage system! Each case comes with 16 individual cases which I label alphabetically to soothe my OCD and can easily access as needed.”

    Looking for a similar seed storage system? Check out this photo organizer!

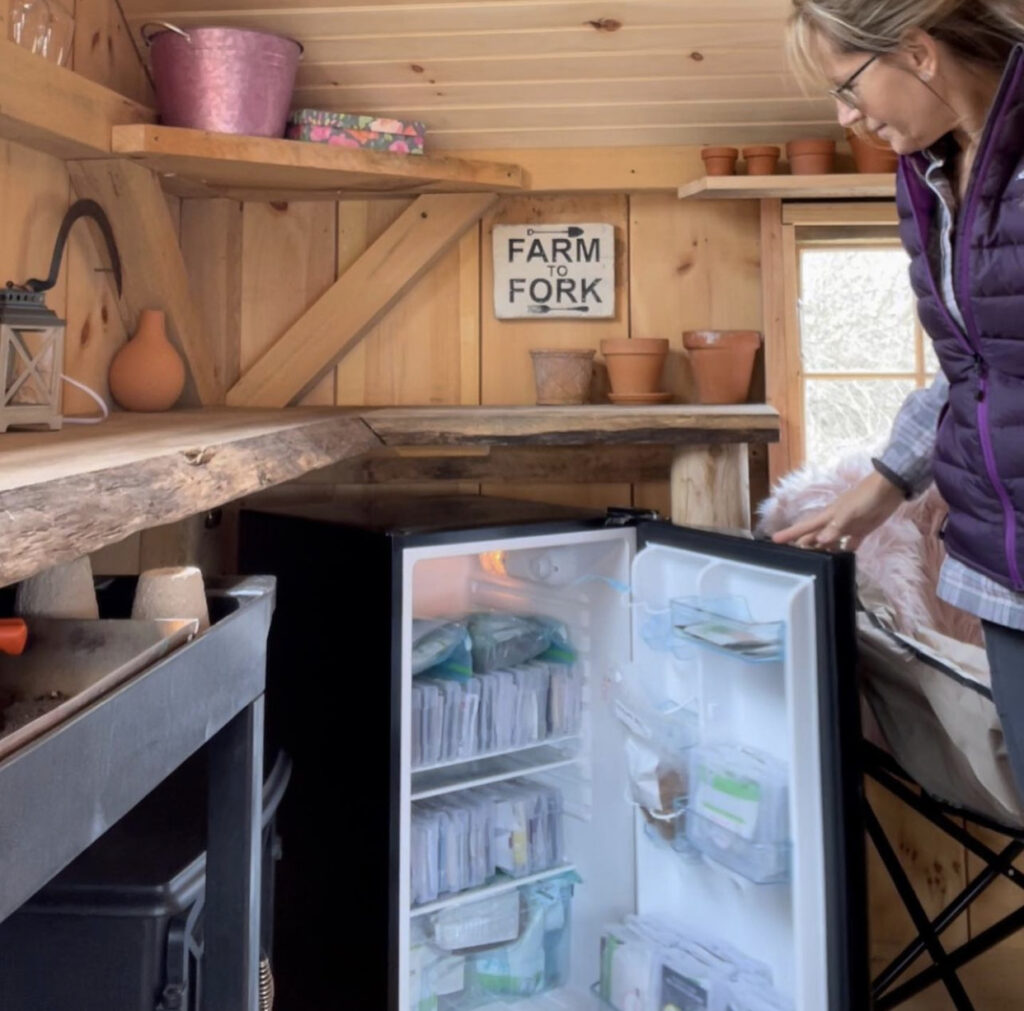
    #2 Store Seeds: Mini Fridge for Refrigerated Seeds

    Store Seeds - Refrigerator in Potting Shed

    This next helpful tip on seed storage comes from @.OurGardeningGig!

    “Here’s a tip for storing your seeds. We purchased a small fridge for the potting shed to transfer our seeds for the summer months, and also for easy access for sowing in the Garden. Keeping the fridge at 50 degrees is perfect for seed storage. When growing a Garden, efficiency is one of the keys to success.”

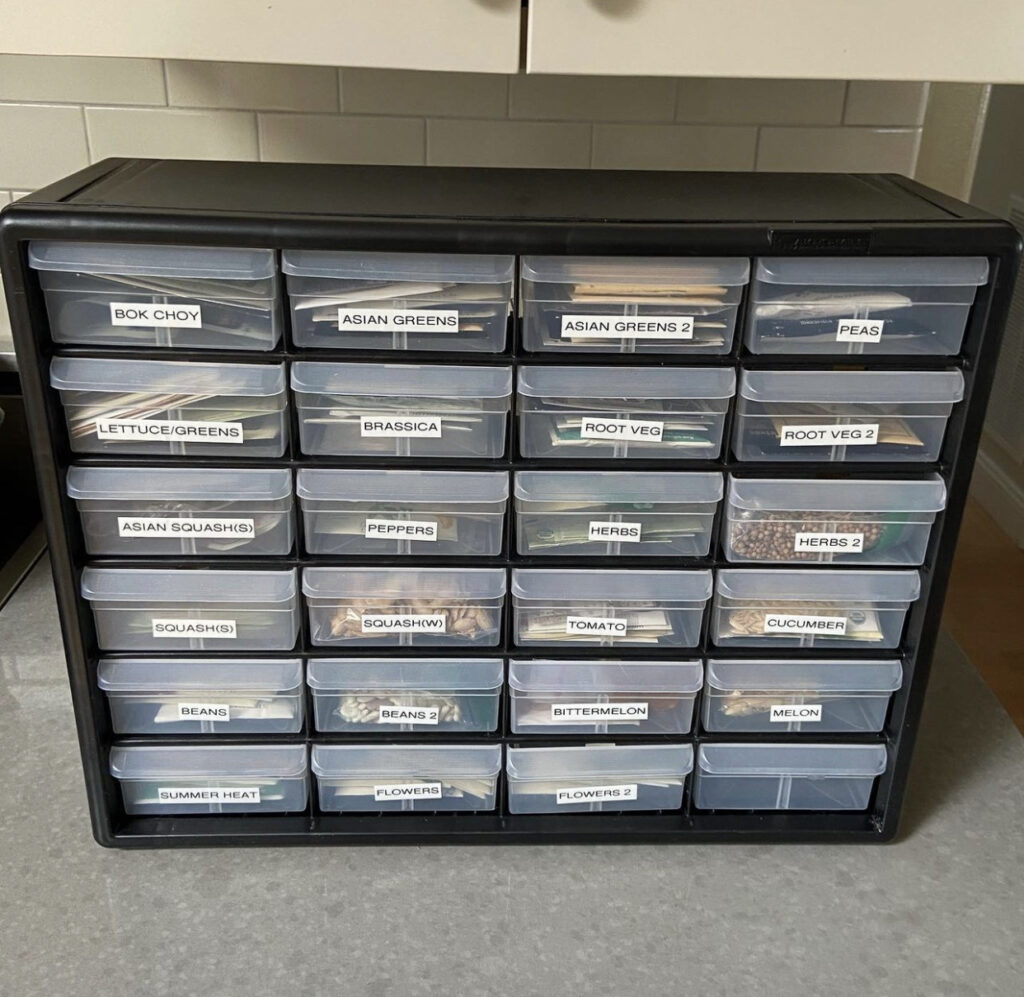
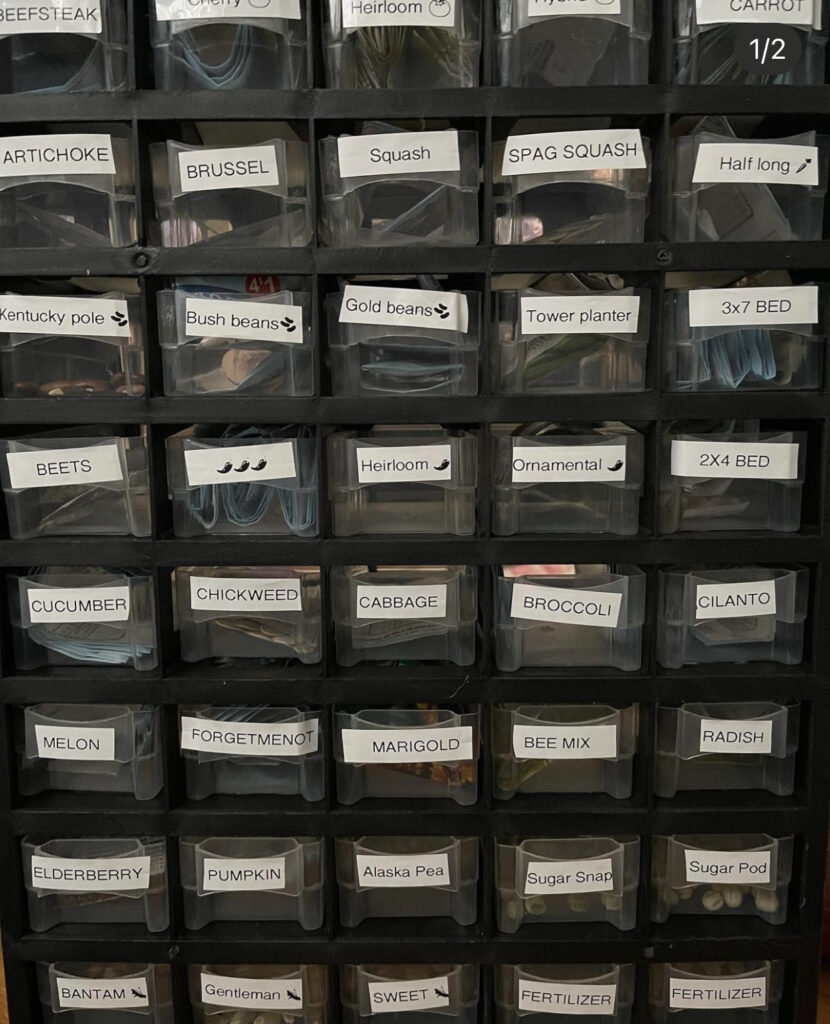
    #3 Seed Storage: Plastic Organizer with Drawers

    When it comes to store seeds, @.AnniesHarvest has a great idea!

    From Annie:

    “I finally had the chance to organize and label my seeds using this Akro-Mils 24 drawer organizer while watching the inauguration 😄. Thank you @.california_gardening for sharing your seed storage method! I love this because I’ve always wanted small cubbies with drawers for my seeds where I can access them by just opening a drawer. The concept is similar to the numerous small wooden drawers you see in Chinese herbal shops, but I don’t have the skills to make them.”

    Want a similar seed storage container? Check out this seed organizer!

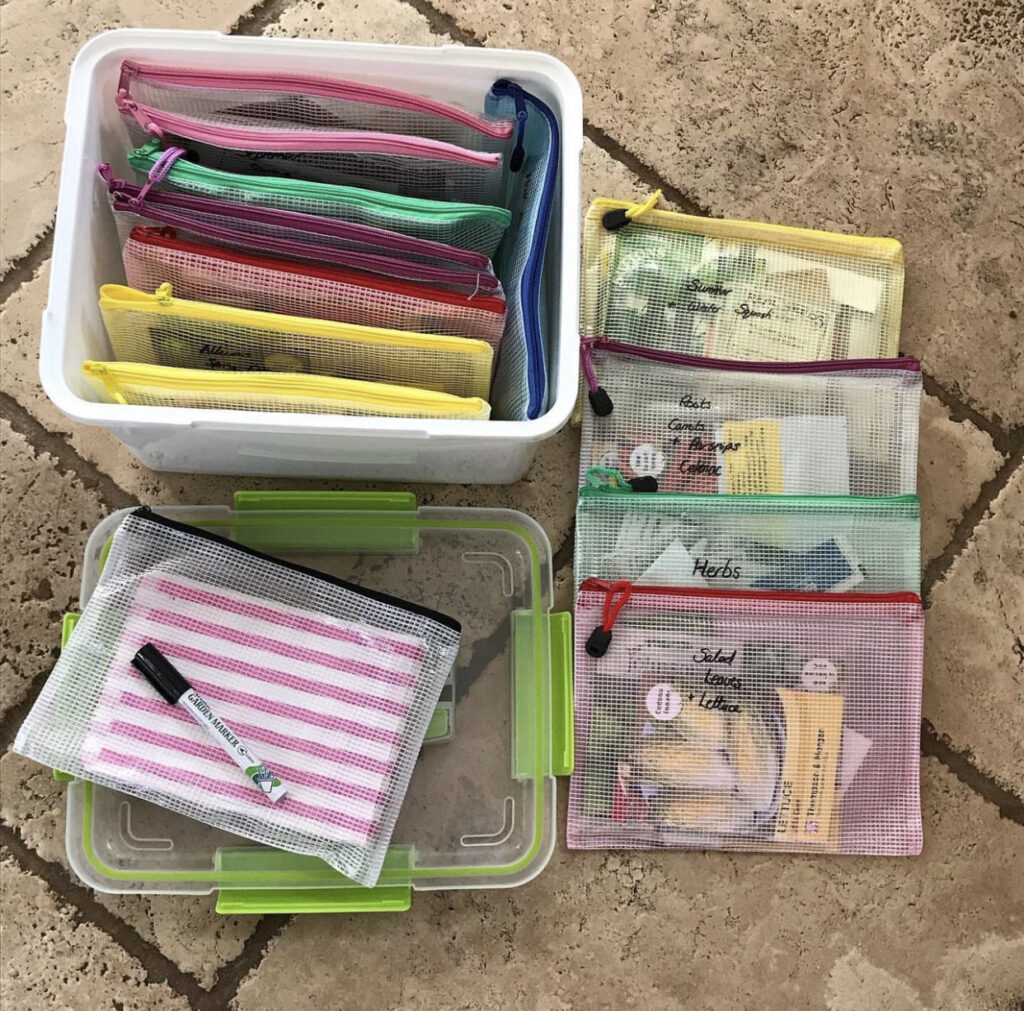
    #4 Store Seeds: Storage Bin & “Zippy” Wallets

    Store Seeds -  Storage Bin & "Zippy" Wallets

    This next unique tip on how to store seeds comes from @.MummyBearGrows!

    “I am really happy with my new seed storage arrangement. I took some inspiration from @augusts_garden and did a bit of searching online. I settled on this clippy plastic first aid medicines storage box and A5 zippy wallets. This replaces 2 old biscuit tins that were far from organised – I just need to finally throw out some of the old seed that has really passed its best now but I hate to let go 🙈 I’m also quite pleased with my candy stripe paper bags for storing my own saved seed as it gives me that same buzz as I used to get buying a quarter of sweets back in the day.”

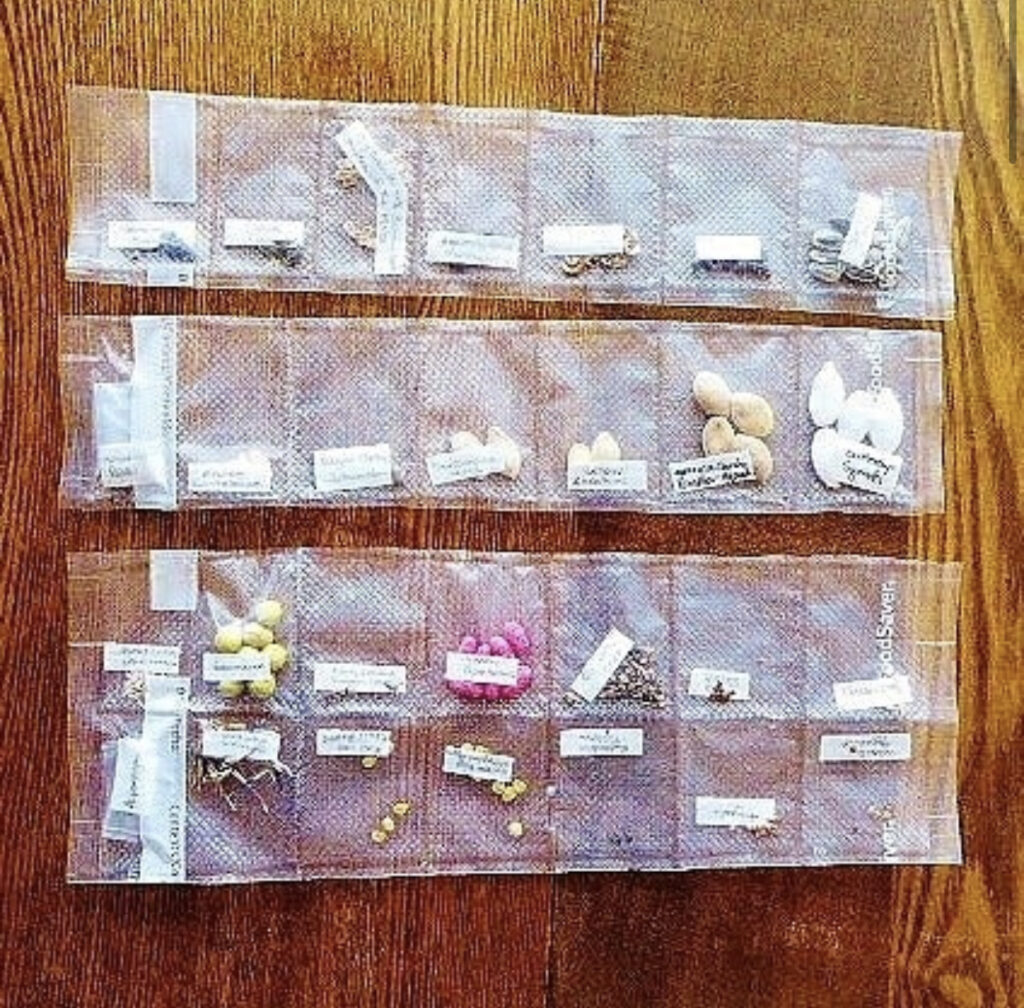
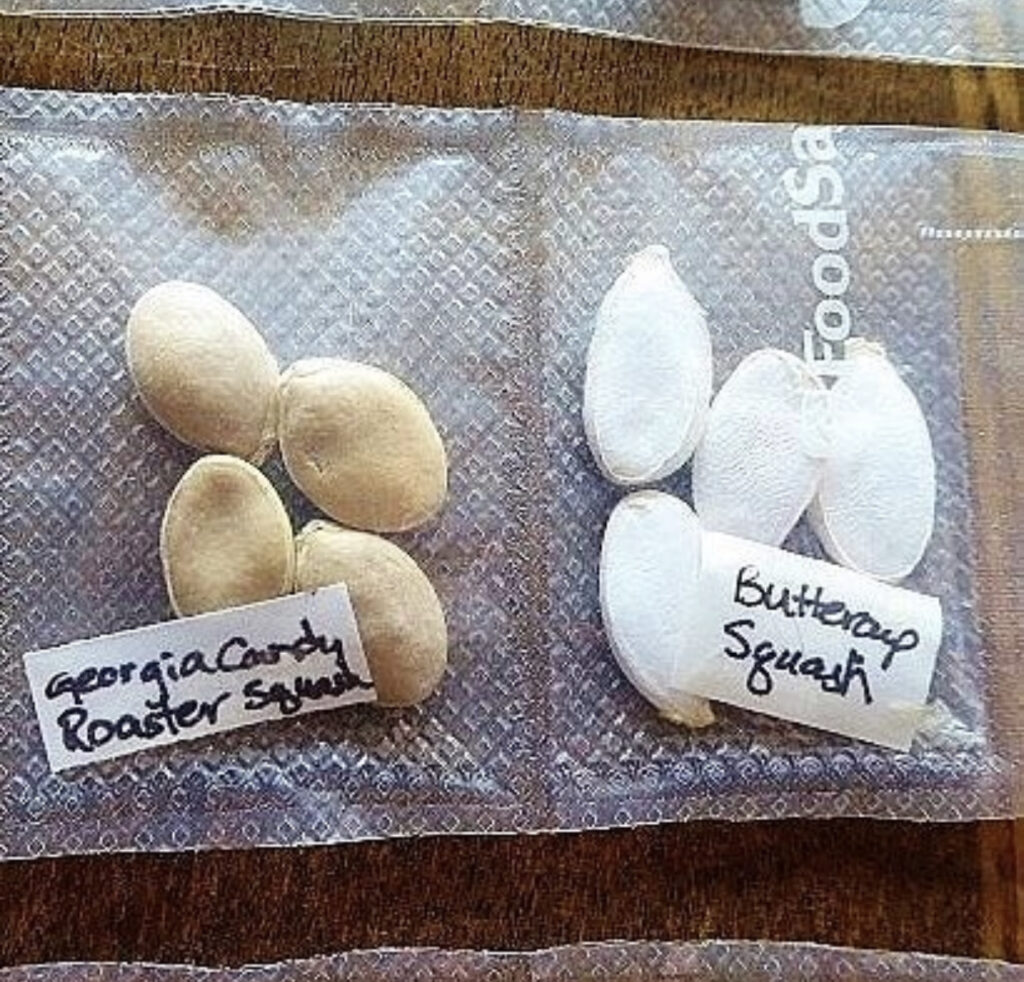
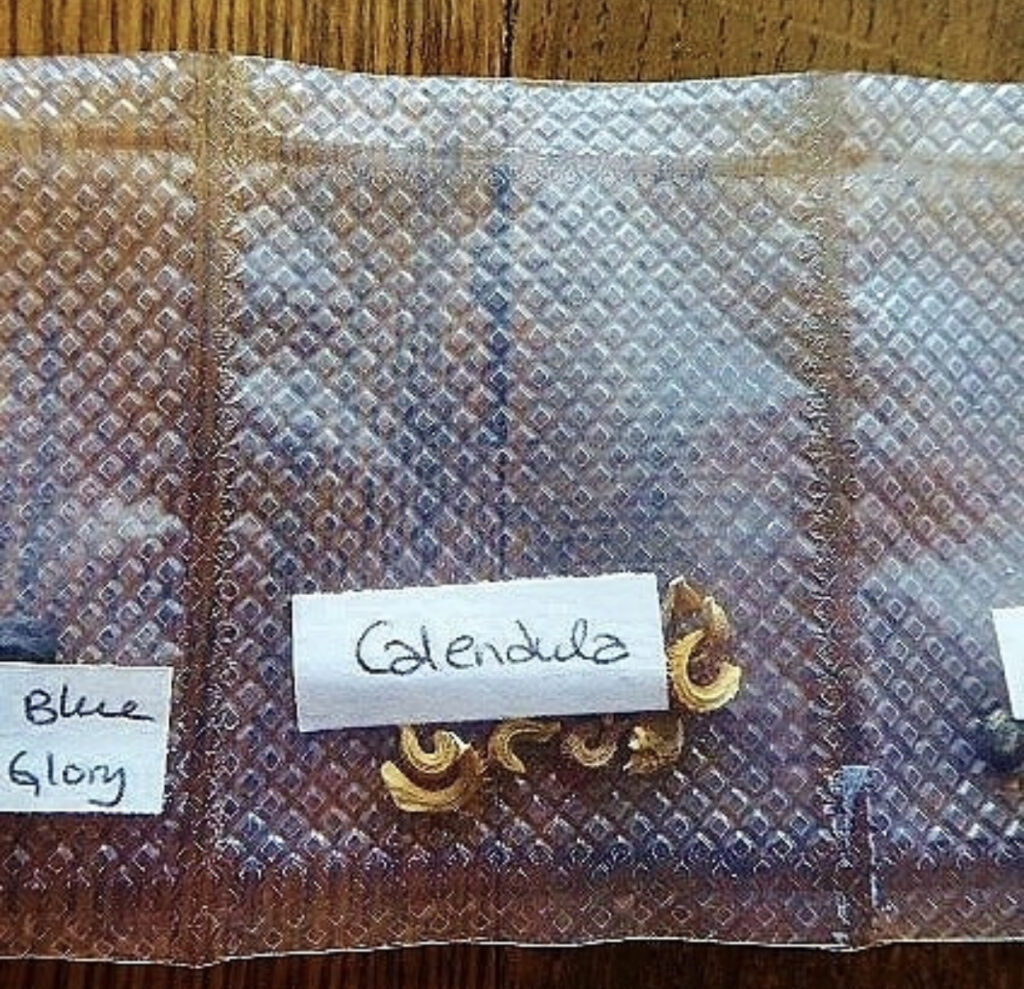
    #5 How to Store Seeds: Vacuum Sealer (“Seal” Function)

    This next tip on how to store seeds would have never occured to me! This idea comes from @.Hilltop.Hygge.Homestead!

    She says:

    “TUESDAY TIP!! SEED SAVING WITH A VACUUM SEALER!! No, you don’t actually use the vacuum setting but, using the seal function, you can create these nifty multiple seed pockets.”

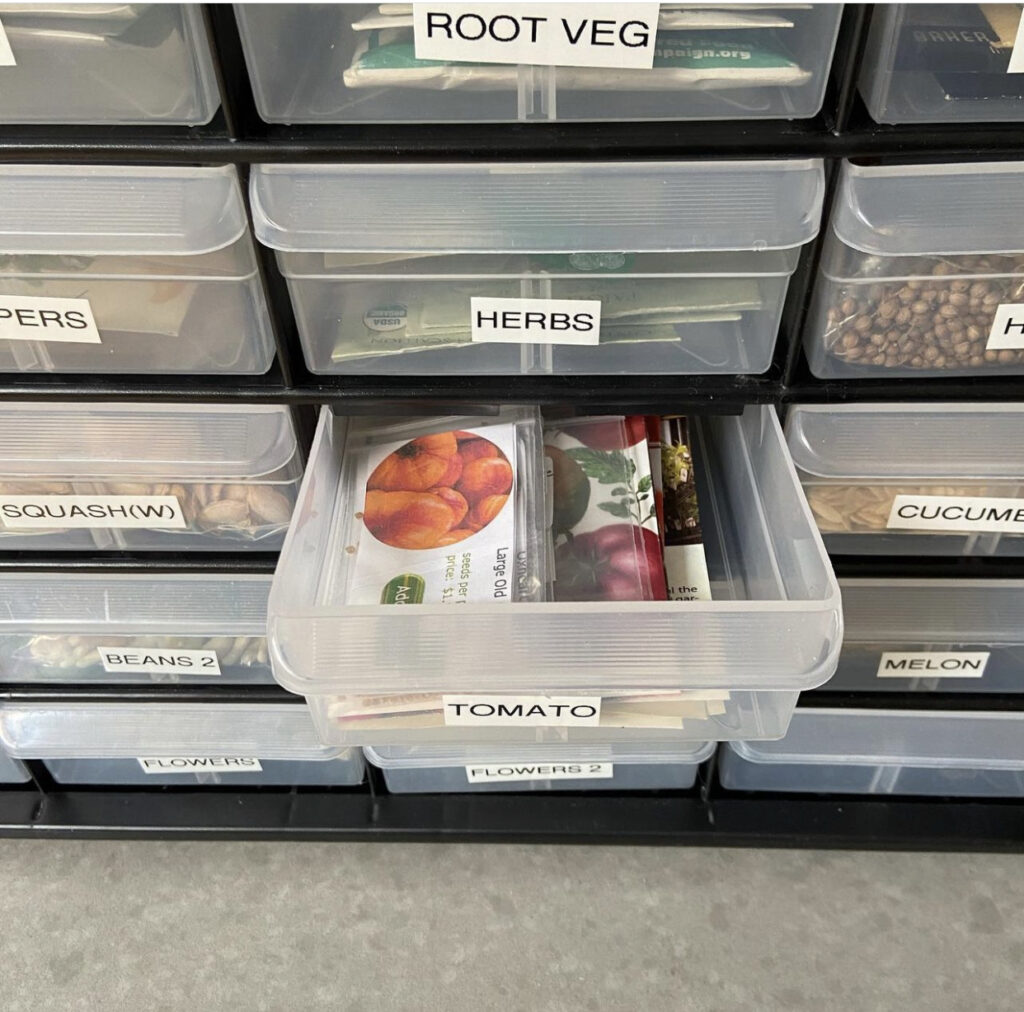
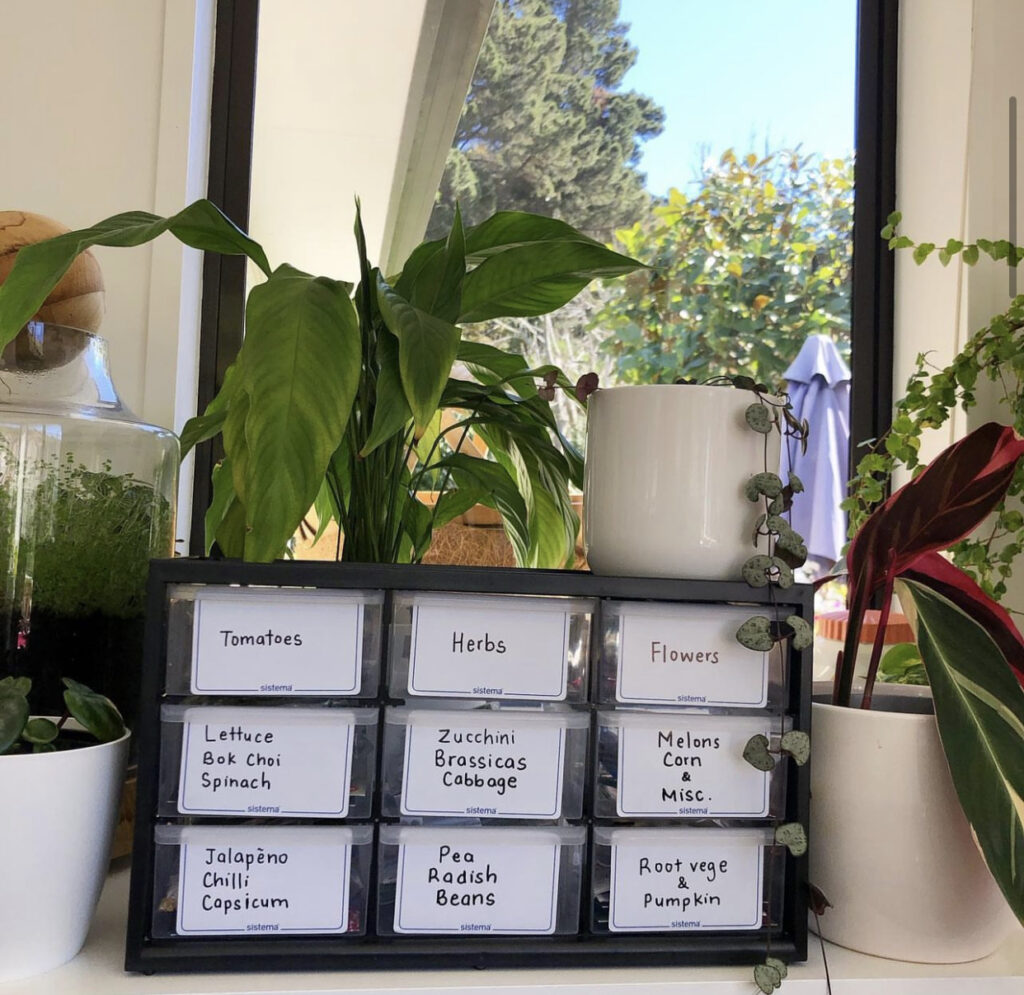
    #6 Store Seeds: Small Drawers

    Store Seeds - Mini Drawer Organizer on  Counter

    This seed storage tip from @.TheGardeningMumma is so satisfying!

    “New seed storage! Went to @mitre10nz and got this @stanleyhandtools multiuse storage. Found some @sistemaplastics labels and they’re all neatly away 🙌🏻 had to get a large storage box for all the micro greens and sprouts plus labels and vivid!”

    Looking for a similar seed storage container? Check out this seed organizer!

    #7 Seed Storage Idea: Storing Seed Packets

    Store Seeds - Plastic Organizer

    My favorite way to store seeds! This post comes from @.TheEalyHomestead!

    “It’s that time of year! It won’t be long before we start our seeds down in the basement. This year, we plan to start almost all of our veggies inside first and then transplant in our no dig beds when the weather warms.

    But first, we’re taking inventory of the seeds we have and making one last purchase of what we still need. Honestly, that’s probably my favorite part of the whole process. Planning out the season so that we’re growing what we need & experimenting with new varieties.

    Have you purchased all your seeds yet?”

    Looking for a similar seed organizer? Check out this photo case!

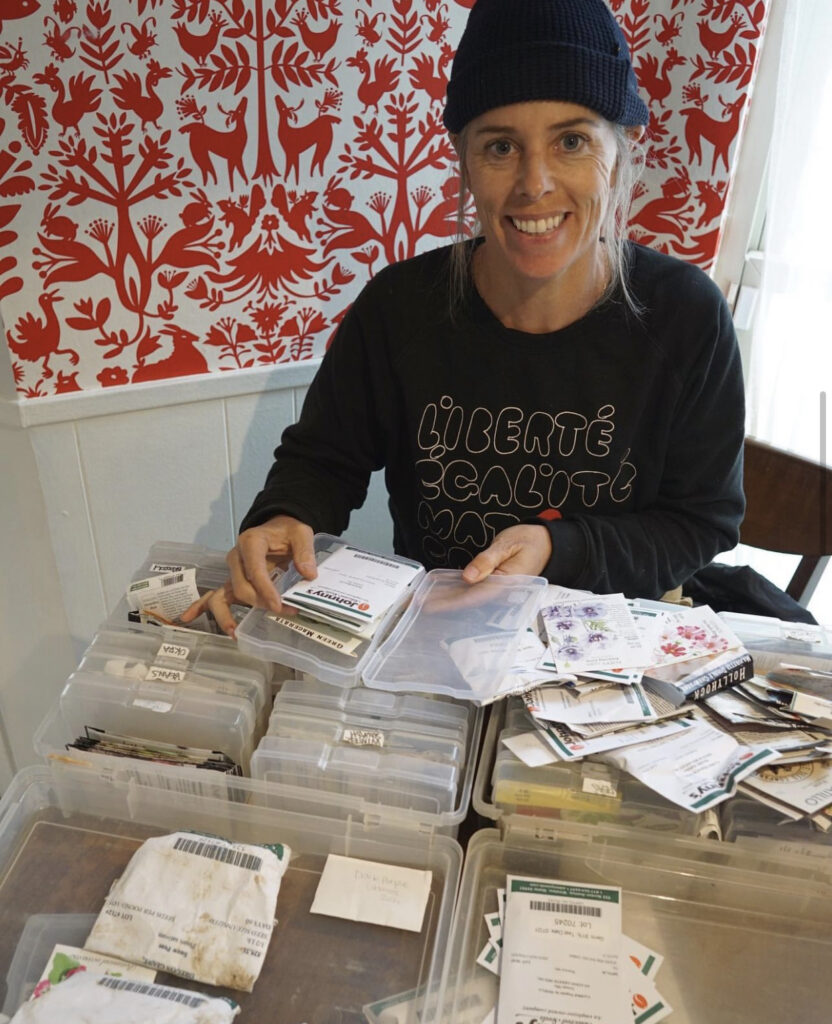
    #8 Store Seeds: Organizer for Seeds (Seed Case)

    Store Seeds - Smiling Woman with Plastic Organizer

    Another seed storage case idea, this time from @.AustineDibleGardens!

    “I’m using this (hopefully last) freeze to prepare my seed cases for spring and summer planting. I carry my seeds around with me in photo storage cases from the container store. I have one for cool season seeds and one for warm season seeds. These seeds are so valuable to me. They represent life, magic, hope and friendship to me. I have bonded over seed sharing with many of you here on Instagram and I have planted these seeds all over Austin. Here’s to the humble seeds that sustain us all.”

    Looking for a similar seed storage options? Check out this photo organizer!

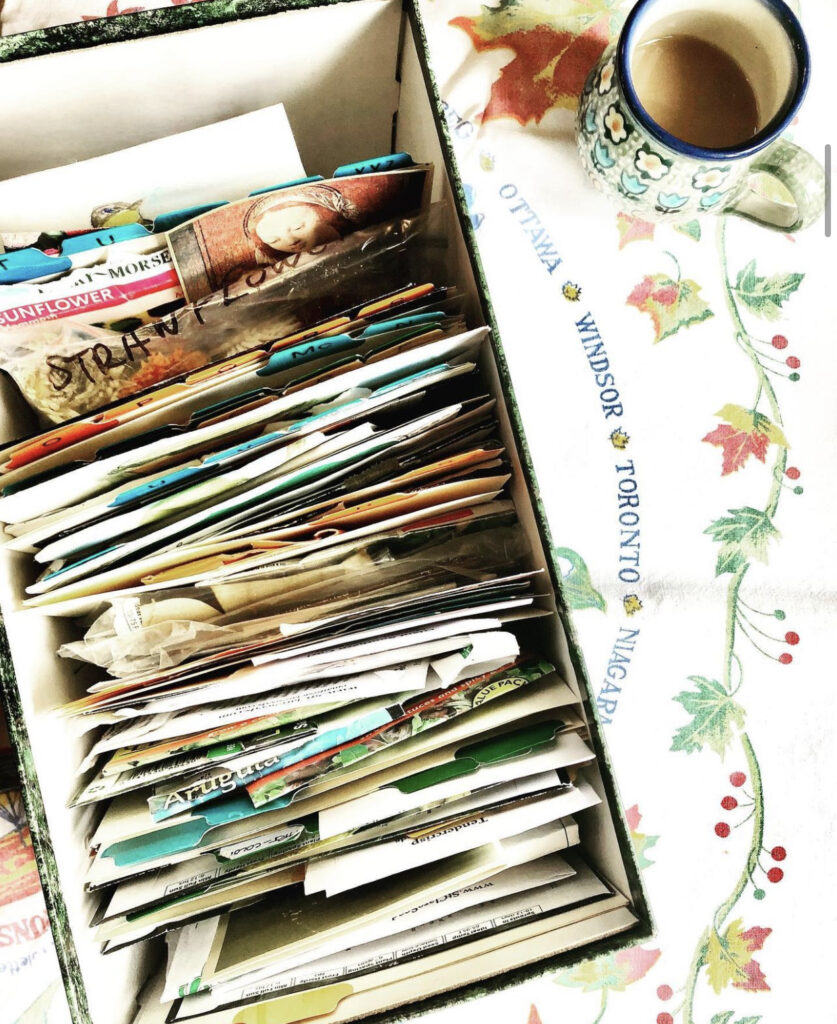
    #9 Seed Storage: Alphabetized Dividers

    This simple tip on how to store seeds comes from @.LeilaMarieLawler!

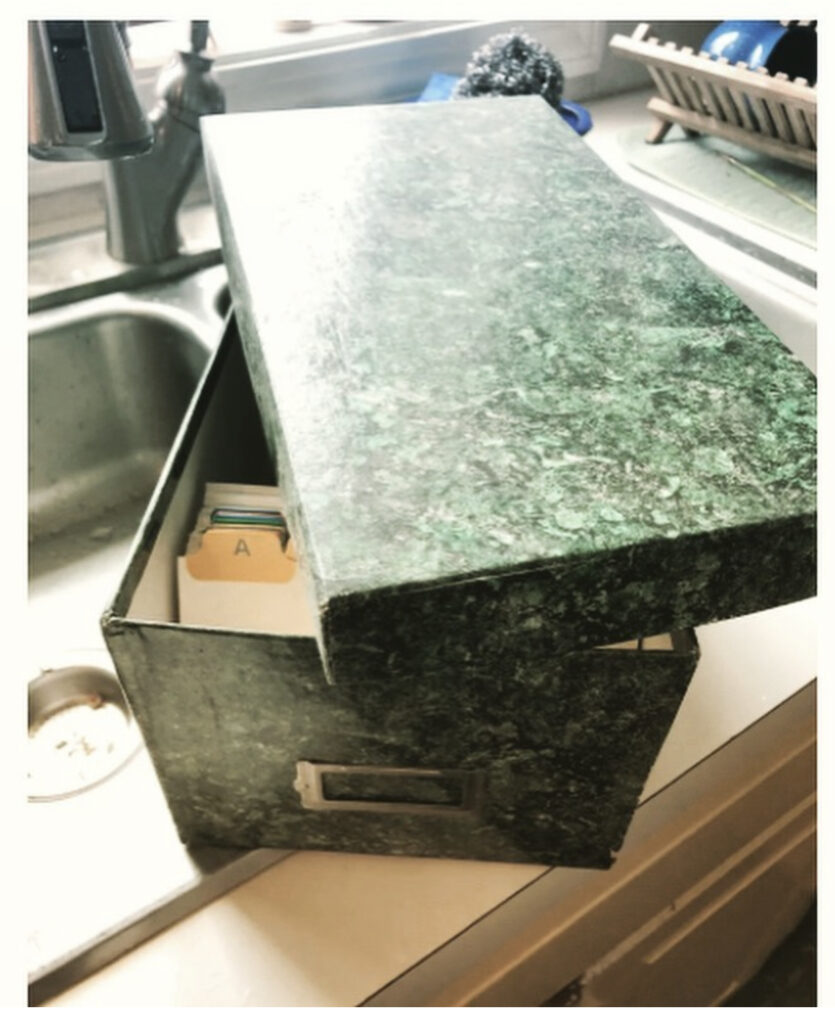
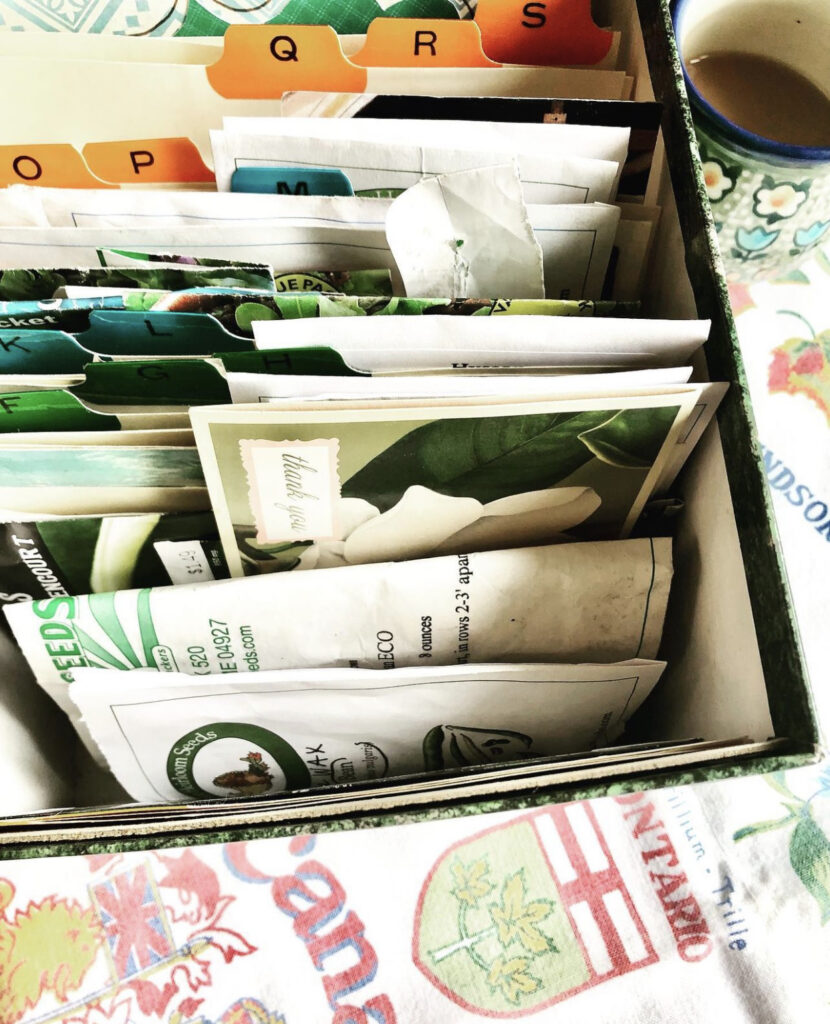
    “Just for fun, here’s my seed organizer using things I found around my house! I wanted a file box with alphabet dividers and I didn’t want to have to open multiple plastic containers or binders — I know myself and my grubby rummaging ways while planting!”

    #10 Store Seeds: Wooden Trunk

    Store Seeds - Woolden Trunk

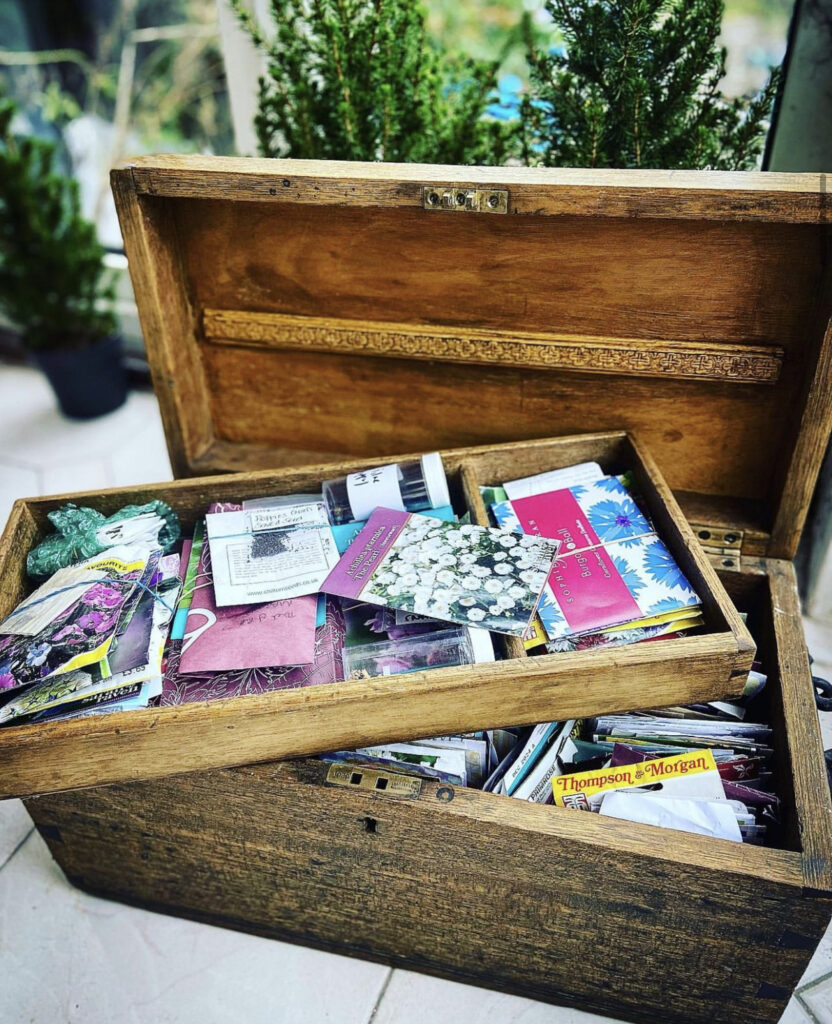
    @.LivingTheGardenDream doesn’t play around when it comes to her seeds! This trunk is impressive!

    “Seeds all organised… ✔️💐

    I keep all my flower seeds in this wooden trunk… (my veggie seeds are in tins stored in a different crate and don’t look so pretty 🙈)

    I’ve spent a very constructive morning noting down every seed packet I possess both bought & saved in a book 📖 ✔️

    I organise my seeds into types and then bundle them altogether with an elastic band. So all my nicotiana varieties for example are in one pile, cosmos in another, annual seeds for pots in another, grasses in another… you get my drift…!”

    #11 Seed Storage Ideas: Mini Drawers

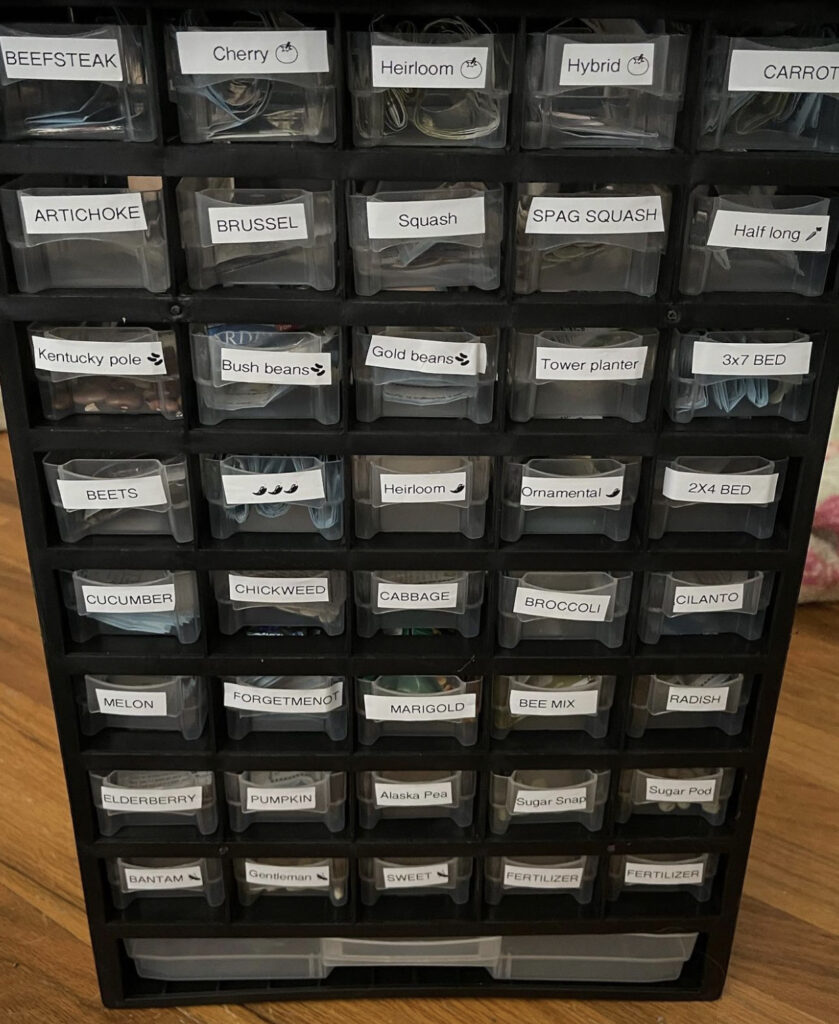
    Love the labels on this seed organizer from @.HomeGrownSprout!

    Need a similar seed storage container? Check out this seed organizer!

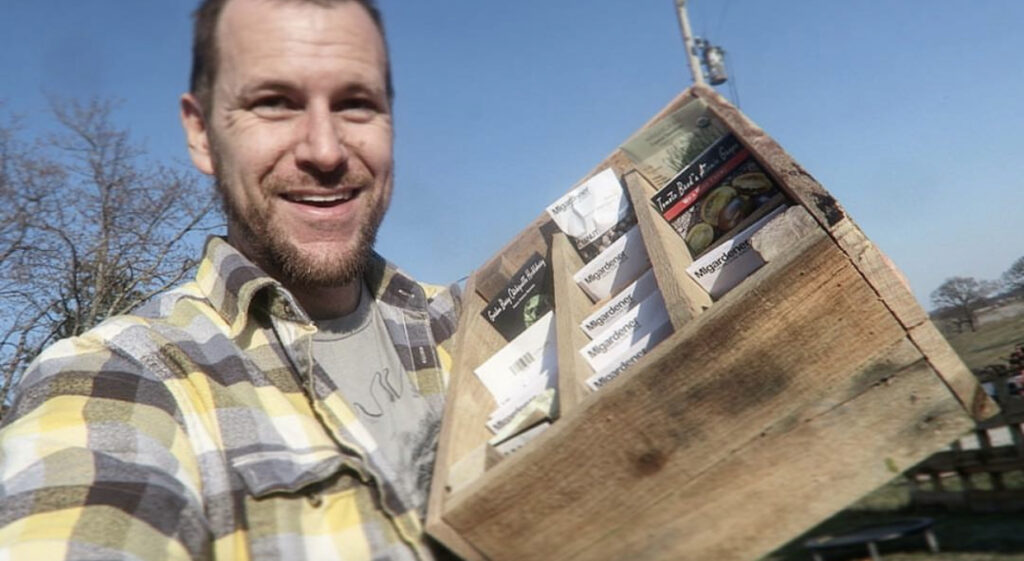
    #12 Store Seeds: Seed Caddy

    Store Seeds - Wood Caddy

    @.WhiteHouseOnTheHill DIY’d this caddy for his seeds!

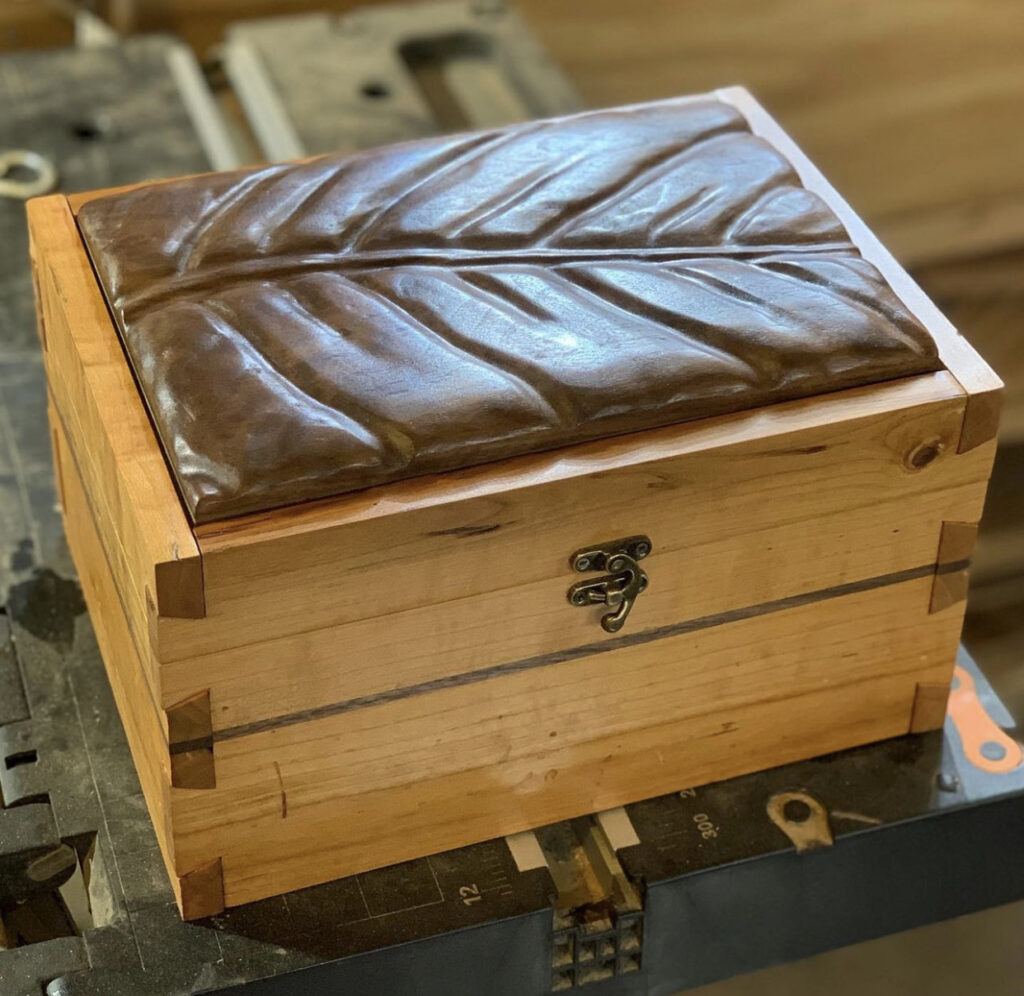
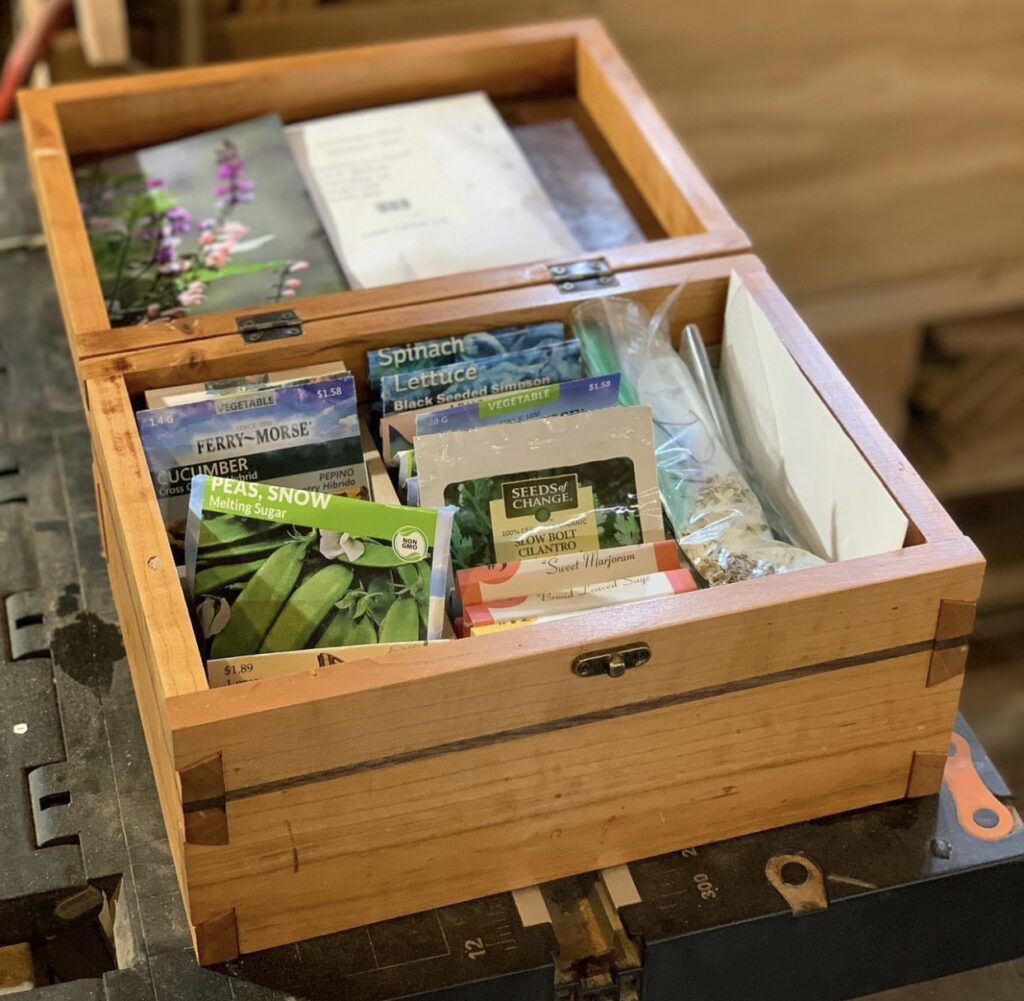
    #13 Seed Storage Ideas: Beautiful Wood Storage Chest

    This next idea on how to store seeds comes from @.LaughingMantisStudio! I love how this seed storage idea is also a beautiful family heirloom. Love the addition of rice (more below)!

    From the studio:

    “Seed storage box!

    I’ve been slowly accumulating garden seeds, both leftovers from this spring, and harvested seeds (for example, I ferment a couple tomatoes every year to collect for next year). I had a large dusty Ziploc of them just sitting in my shop and decided they needed to go into a dark, dry box in our basement pantry. This was a great excuse to use up some cherry logs I got from my boss @adrianvlee1, which are completely filled with bug holes and not very usable for most things. But they’re perfect for something that will be hidden for ~363 days a year and only be seen by me. So why did I waste time on that power-carved walnut leaf top? Because I’ll still see it once a year. Also, I wanted to practice cutting some dovetails. I also through some dry rice in there as a desiccant.”

    #14 Store Seeds: Airtight Container & Refrigeration

    Store Seeds - Seeds in jars fridge

    This is a new type of seed storage method for my roundup, for all of my gardeners who love a seed exchange. These expert seed storage tips comes from @.SouthernExposureSeedExchange:

    “Storing seeds is an important aspect to seed saving! Most seeds will store for 2-4 years if kept clean, cool, dry, and out of light. However, some seeds will badly deteriorate after about one year if not stored in an airtight container in the freezer or refrigerator. These include: onions, leeks, parsnips, celery, spinach, salsify, and hybrid super sweet corn.

    For long-term storage, place seed packets or bulk quantities of seed in a large, airtight container (such as a mason jar with a 2-piece lid) and store in the refrigerator or freezer. It’s very important that the container be airtight to prevent moisture from getting onto your seeds. We stretch parafilm around jar rims to ensure a tight seal, but you could also use ziploc bags as extra security – inside or outside your container. Remember to let the container come to room temperature before opening it, or else moisture will condense on the cold seeds, possibly leading to mold or rot!

    Happy Seed Saving!”

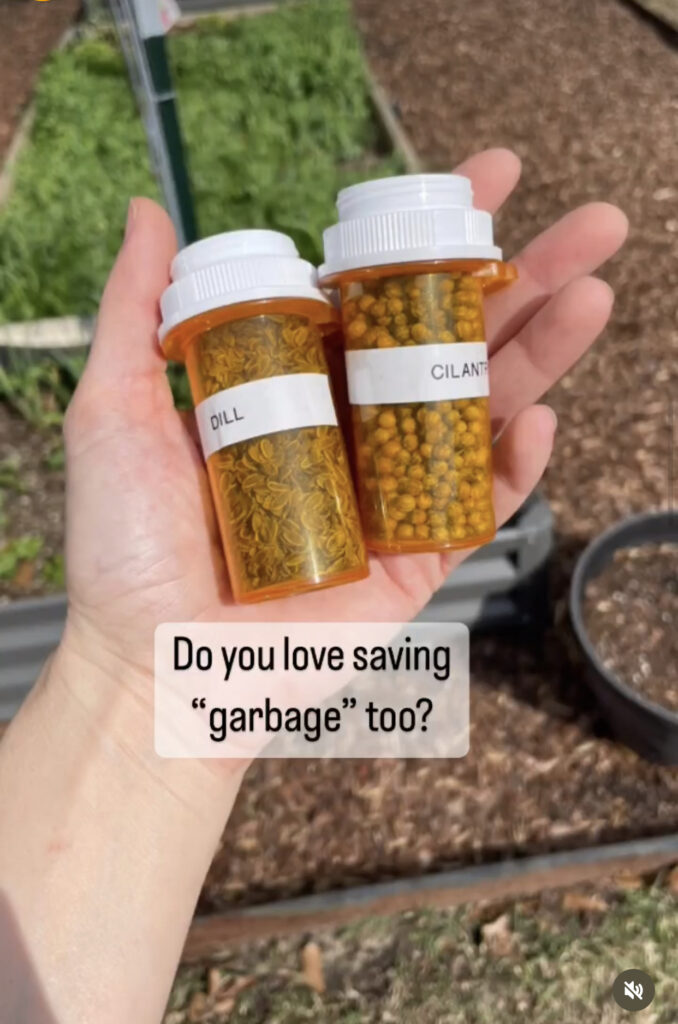
    #15 Store Seed Ideas: Pill Bottles

    Store Seeds - Orange Prescription Pill Bottles

    Our next tip on how to save seeds comes from @.HappyHeartGardens! I love how they use pill bottles as seed storage containers! Rebecca is a farmer in Norther Pennsylvania, and I love this tip!

    #16 Store Seed Ideas: Trading Card Sleeves

    Store Seeds - Seed Binder

    When it comes to how to store seeds, @.SimplyBreatheNow has a great tip: Trading Card Sleeves!

    From Krista:

    “Still organizing and planning over here!
    This is my seed binder that was inspired by @rebekah.rhodes! I am so excited to have this started!

    I have it separated into sections of when to start planting. So I just flip to the month and all my seeds to plant for that month are there!

    I also have added cue cards to allow me to comment on the seeds, fermentation rate, if I liked it!
    AND! I put dates on my seed packs! Small but mighty information! Lol!”

    I found this pretty cool seed binder, for a similar approach if you don’t have packets!

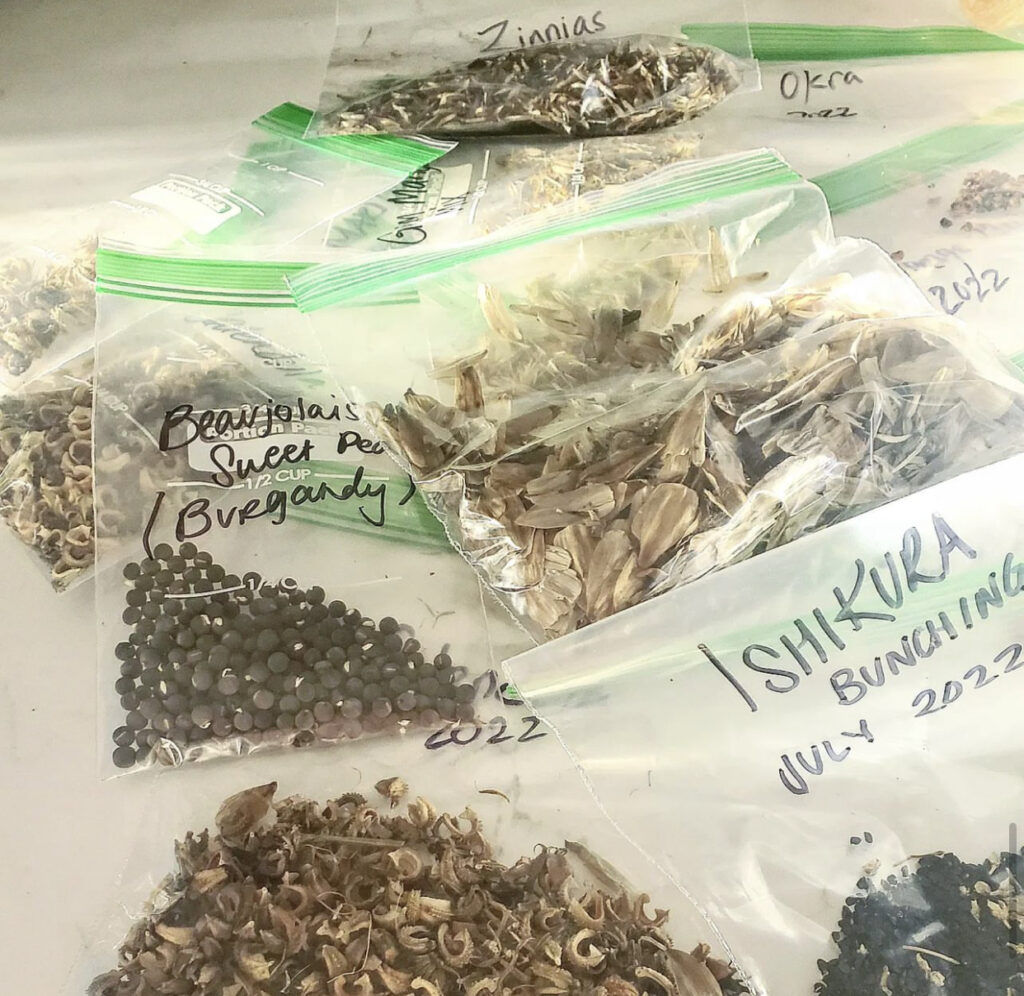
    #17 Store Seeds: Ziploc Baggies & Sharpies

    Store Seeds - Ziploc Bags with Sharpie Label

    Listen! Ziploc baggies and a handy sharpie is a tried and true method for saving and storing seeds! This tip comes from @.GrandRapidsGardening!

    From Ashley:

    “Seed starting season will be here before we know it! 2022 was my year of experiments and expansion. I saved a bunch of seeds and can’t wait to put them to use for 2023. I’m not a super fancy seed-saver. I keep it simple; the seeds I can collect, dry, and bag are the ones I save.

    January is my favorite time to organize my seed collection and take stock. By now, I have ordered plenty of seeds for 2023 from some of my favorite suppliers like @migardenersc. @bakercreekseeds, @botanical_interests . But now is the time to gather my bounty and get organized before the seed starting frenzy begins. Stay tuned to see some updates on my organization process!”

    #18 Ways to Store Seeds: Vessels

    Store Seeds - Ceramic Container

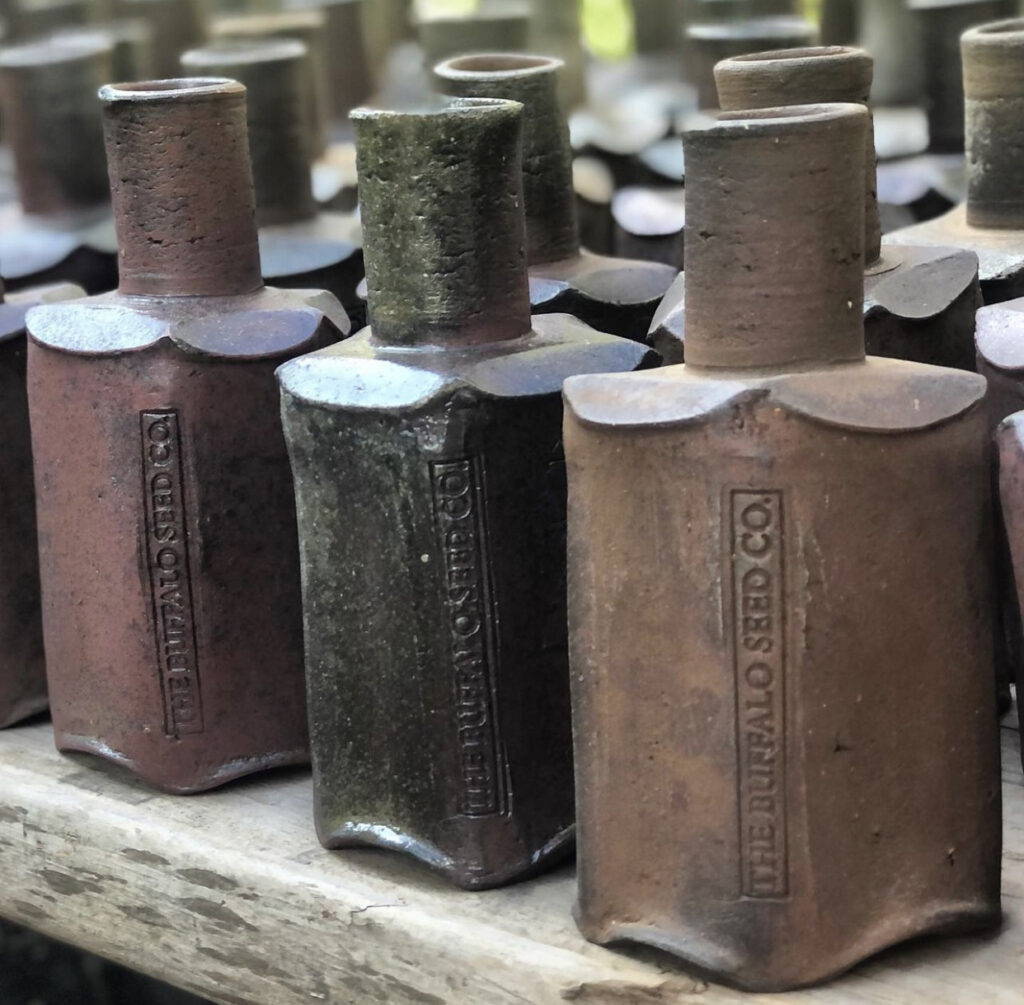
    For my last idea on how to best save seeds, I wanted to share this historical reference from @.Mike_Crouch_Pottery:

    “These vessels for seed storage were made with regional clays from a quarry in Nebraska. What a pleasure it was to meet and work with @the_buffalo_seed_company. Big thanks.”

    Hi, I’m Leslie, Seed Saver Extraordinaire!

    Hey friend, thank you for visiting my blog today! I’m Leslie, PunkMed founder, seed lover, and urban gardener. I’d love to connect on Instagram or Pinterest!

    This blog post is all about seed storage ideas.

    What to Read Next —->

    18 BEST DIY Christmas Ornaments | Eco-Friendly DIY Tree Ornaments

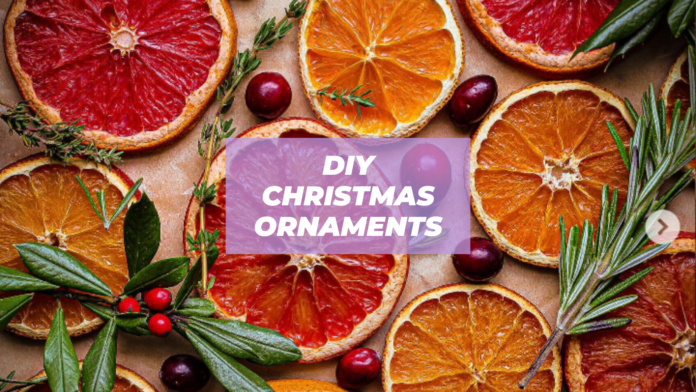
    text reads DIY CHRISTMAS ORNAMENTS over dried orange ornaments

    Today on my blog, I’ve sharing the best DIY Christmas ornaments, with lots of images and inspiration. As an eco-friendly blogger, I find that DIY Christmas decor can be more meaningful and impactful, because of all of the memories one makes.

    This blog post is all about DIY Christmas ornaments.

    Easy DIY Christmas Ornaments

    Before we get started, I’d like to share some of my best tips for DIY Christmas ornaments, as follows:

    • Tip #1: DIY projects are similar to making pancakes. Very often when making pancakes, you may find that the first pancake, well, doesn’t turn out very well. Same goes here! And this is totally ok!
    • Tip #2: Thrift stores FTW! Stay on the lookout for craft supplies at your local thrift stores and donation shops.
    • Tip #3: Keep a holiday craft bin! I find it’s often not very appealing to clean up after a DIY Christmas ornament making session. Make it as easy as possible to clean up, keeping a handy storage bin onhand for leftover supplies. Resist the urge to throw things out!

    And with that, it’s time to share my list of DIY Christmas ornaments.

    #1 DIY Christmas Ornaments: Colorful Easy Trees

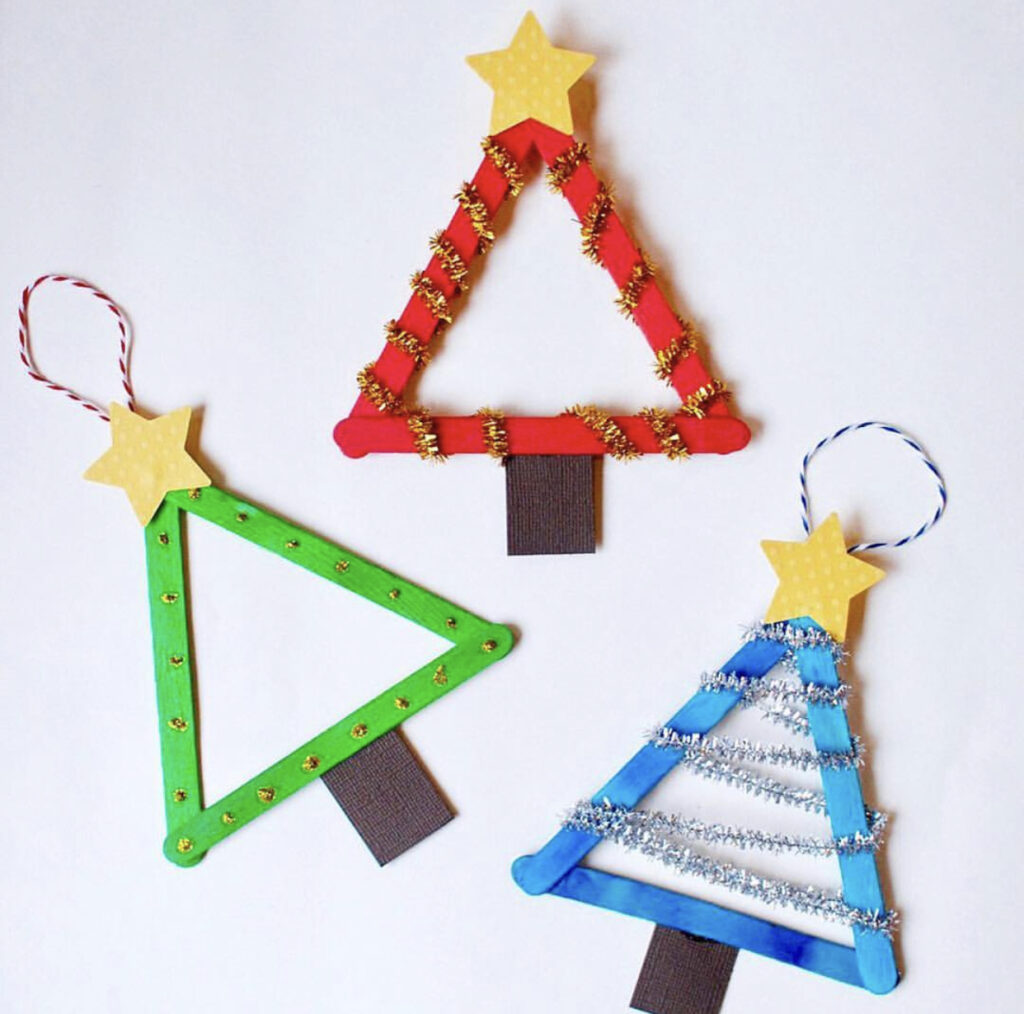
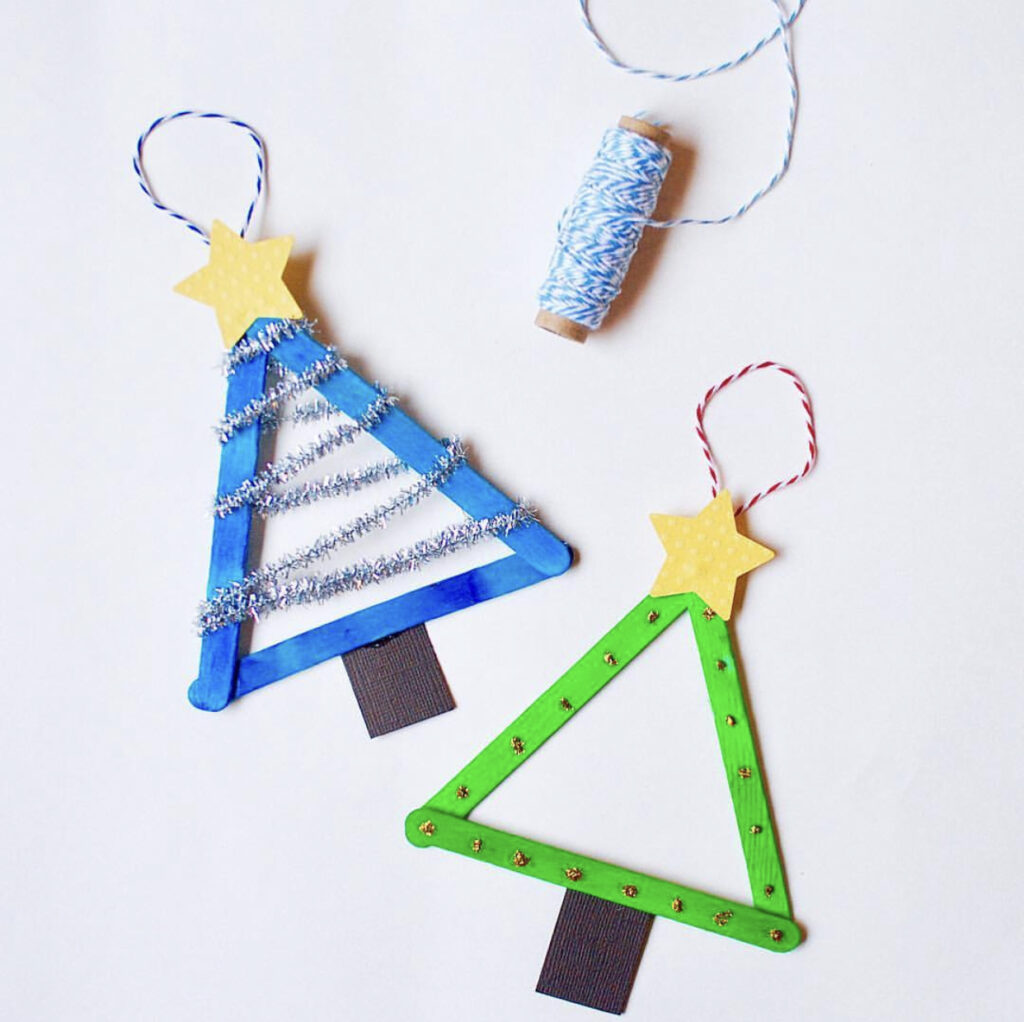
    These DIY Christmas ornaments from @.CraftAndBoogie are so fun and colorful! I love how you can “decorate” each tree differently!

    From the makers:

    Make these at home with rainbow craft sticks, pom-poms, shiny pipe cleaners, glitter glue, and card stock. 😉 We love the idea of sticking a photo inside, too!”

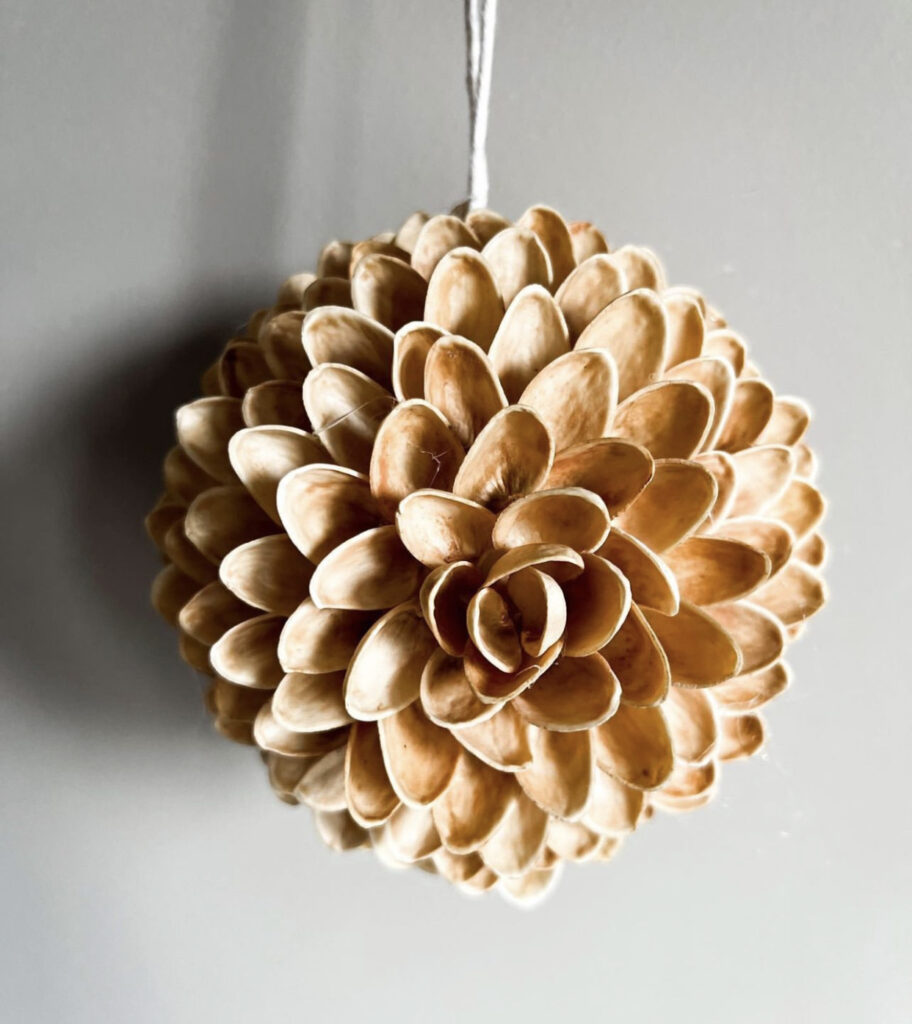
    #2 DIY Christmas Ornaments: Reusing Pistachio Shells

    Easy DIY Christmas Ornaments

    This DIY Christmas ornament from @.LifeofThusNelda is so smart — and eco-friendly! She took pistachio shells to make this gorgeous design!

    From Thusnelda:

    “Pistachio shells are so pretty I couldn’t throw them out. Now I found a use for them.”

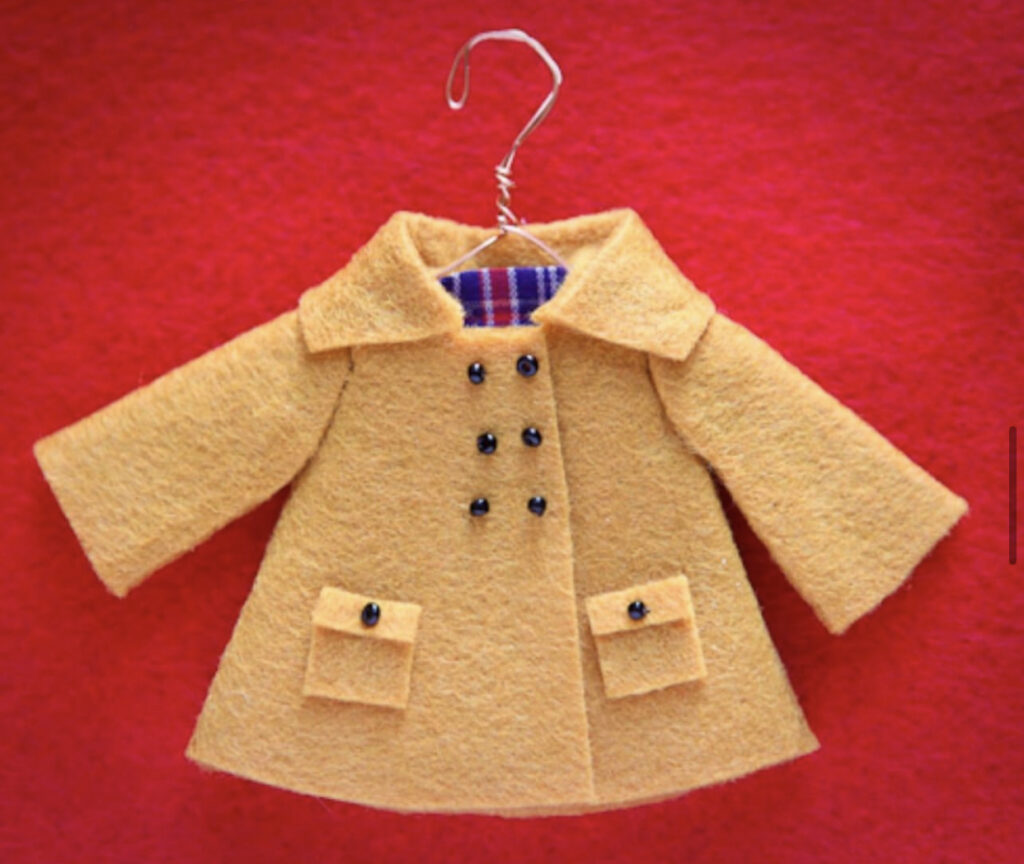
    #3 DIY Christmas Ornaments: Mini Coat Ornament

    Easy DIY Christmas Ornaments

    This DIY Christmas ornament from @.TrueBias i so cute! It’s a little coat!

    From True Bias:

    “I created this tutorial for a handmade ornament 8 years ago, but it is still one of the favorite things on my tree. You can still access the step by step instructions to make your own thru [this link]. Please tag me if you do make one so I can see it.⁠”

    #4 DIY Christmas Ornaments: Sewing Machine

    This DIY Christmas ornament from @.Betz_White is so cute! I love the little Santa Hat being sewn!

    From Betz:

    “If you’ve followed me for awhile you’ll remember this classic from 2015! Folks often make this Sewing Machine ornament in batches to give to friends, quilting guild members etc. I’ve seen it made with the Santa hat swapped out for a tiny quilt block, such a cute idea! (I’ve also seen this image used without permission over the years. Grinches!) Believe it or not, this ornament requires no sewing! Just a touch of embroidery that you could leave off or mark with a pen if you’re afraid of needles🪡”

    #5 DIY Christmas Ornaments: Mid-Century Modern Paper Ornaments

    Easy DIY Christmas Ornaments

    This DIY Christmas ornament from @.LiaGriffith is lovely. It’s so beautiful what you can do with paper! Tutorial here!

    #6 DIY Christmas Ornaments: Constellation Ornaments

    Easy DIY Christmas Ornaments

    This DIY Christmas ornament from @.HeyLetsMakeStuff is so fun! These are perfect for both astrology AND astronomy lovers!

    From Cori:

    “We are just about halfway through the 25 Days of Cricut Christmas! I am not going to lie—I am obsessed with these ornaments I made for Day 12. I’ve had galaxy ornaments on my “to make” list for ages, and I am absolutely thrilled with how they turned out—especially with the adhesive vinyl constellations! Head to my blog to learn which glittering method worked best for me, and grab the whole alphabet of constellations!”

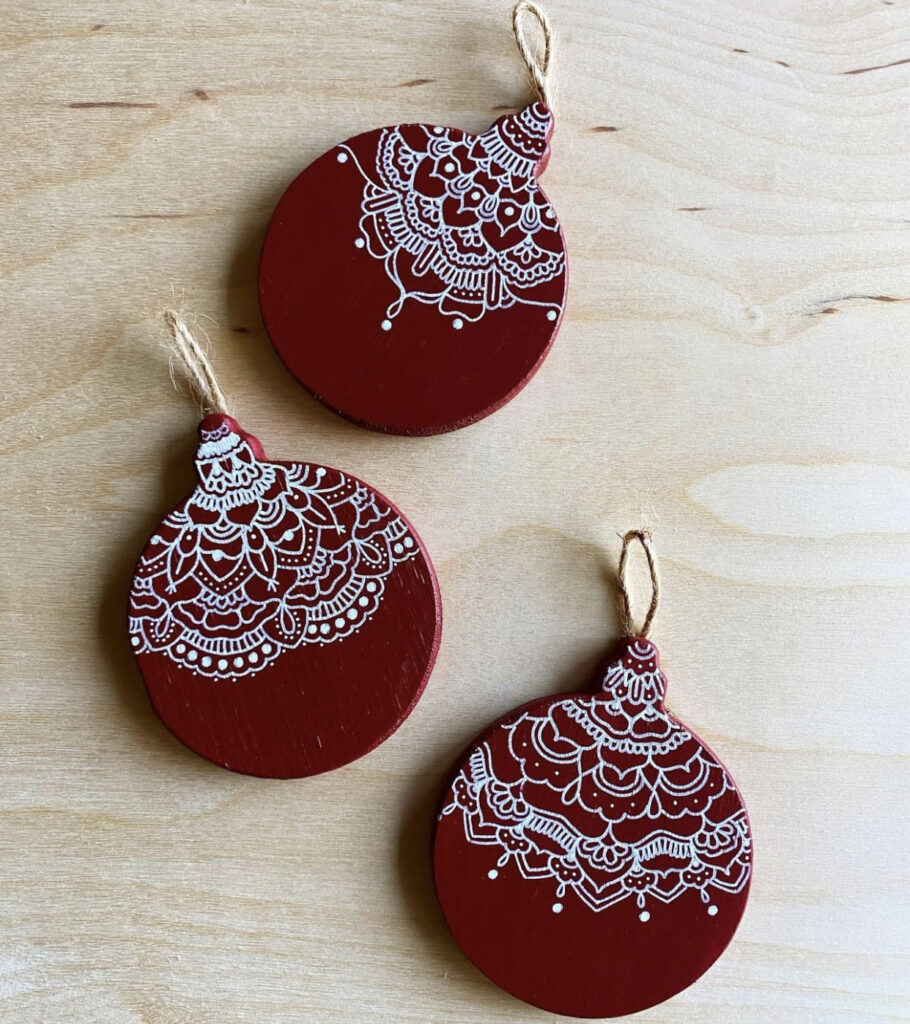
    #7 DIY Christmas Ornaments: 2D Ball Ornaments

    Easy DIY Christmas Ornaments

    This DIY Christmas ornament from @.ArrowArtStudio really has the Christmas spirit! I love how lovely nd intricate these are.

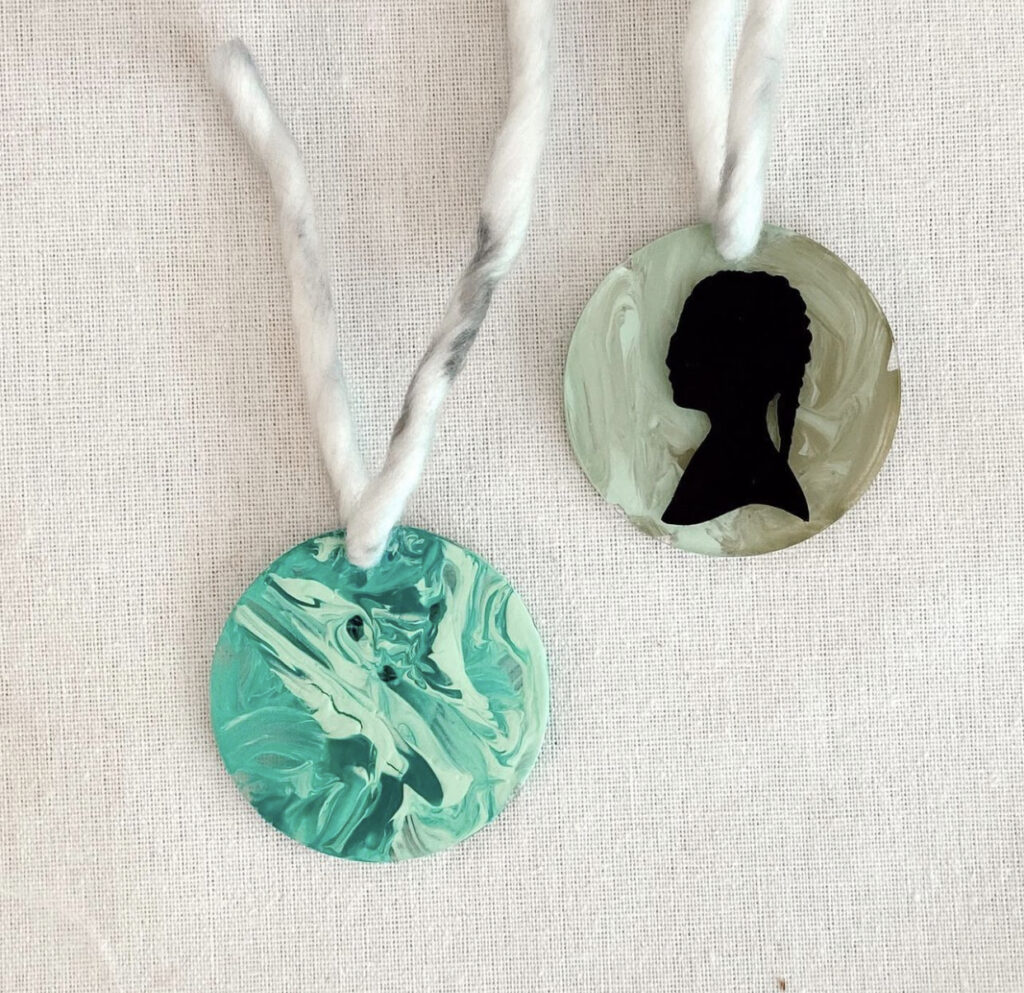
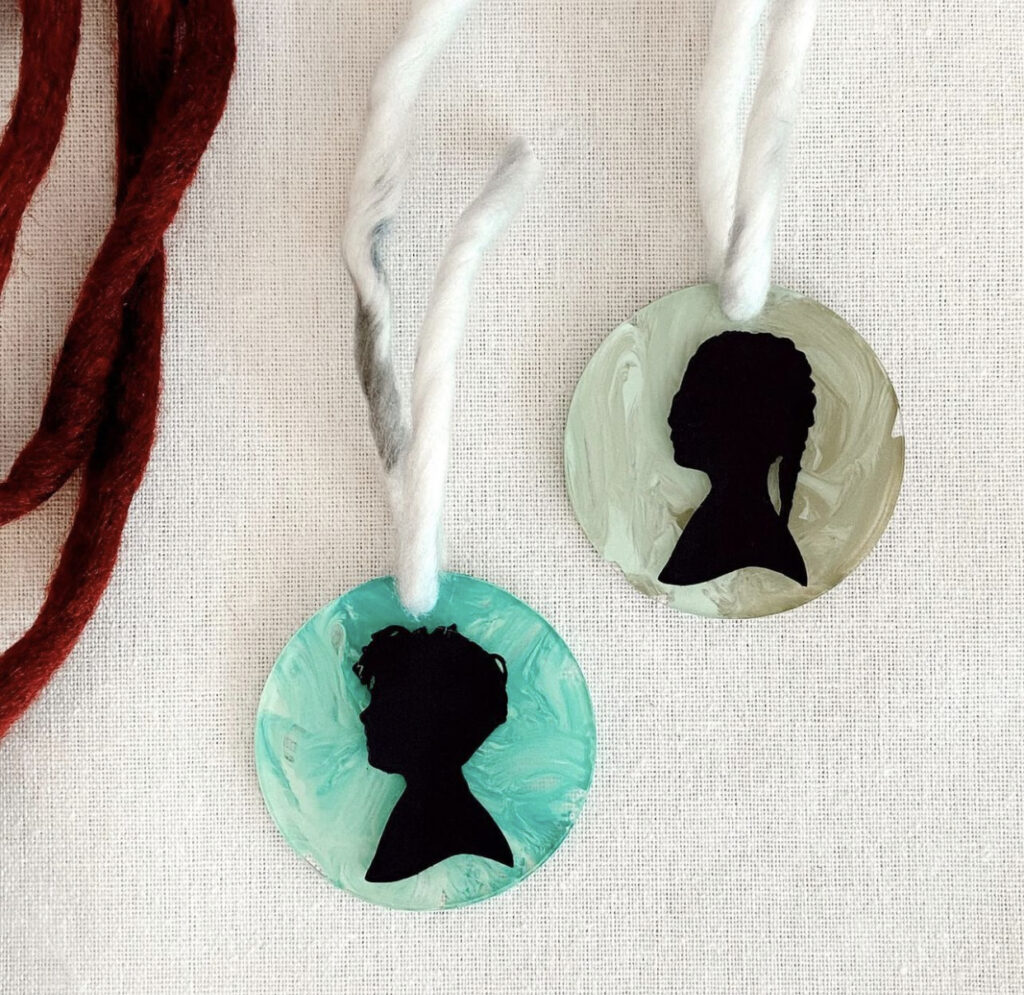
    #8 DIY Christmas Ornaments: Silhouette Portraits

    These DIY Christmas ornaments from @.BeKindAndMakeArt are so fun! These are so perfect for Bridgerton and Pride & Prejudice fans.

    From Ms. Katie:

    “Our GORGEOUS Christmas ornaments that we did this year! Our kiddos (ages 2-5) painted the back of these acrylic ornaments. I put a matte modge podge coat over it. On the other side, I put the child’s silhouette. 😍 ALWAYS a favorite to create these silhouettes! I take a photo of each child (their side profile) against a plain colored wall, put the photo into photoshop, select the child only & convert it to black. Next, I take them, import it into my @silhouette.inc machine, convert to a cut file, and cut them out. It’s a PROCESS, but I know these items are so so cherished.”

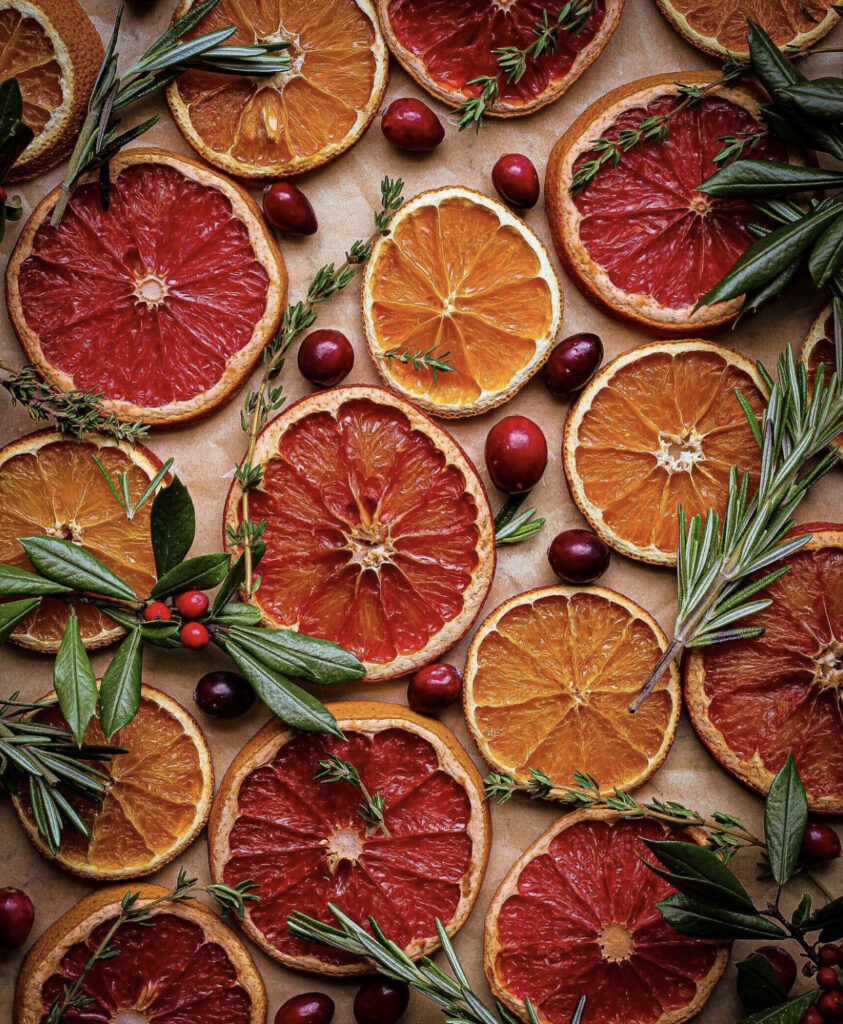
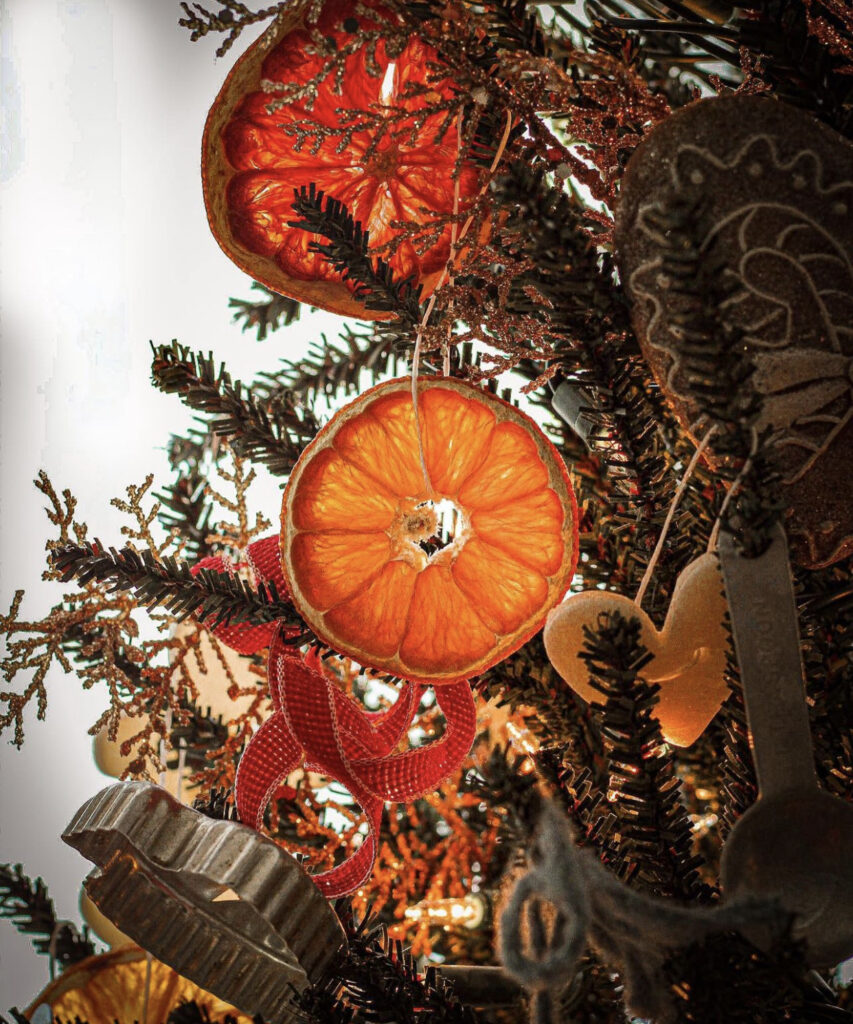
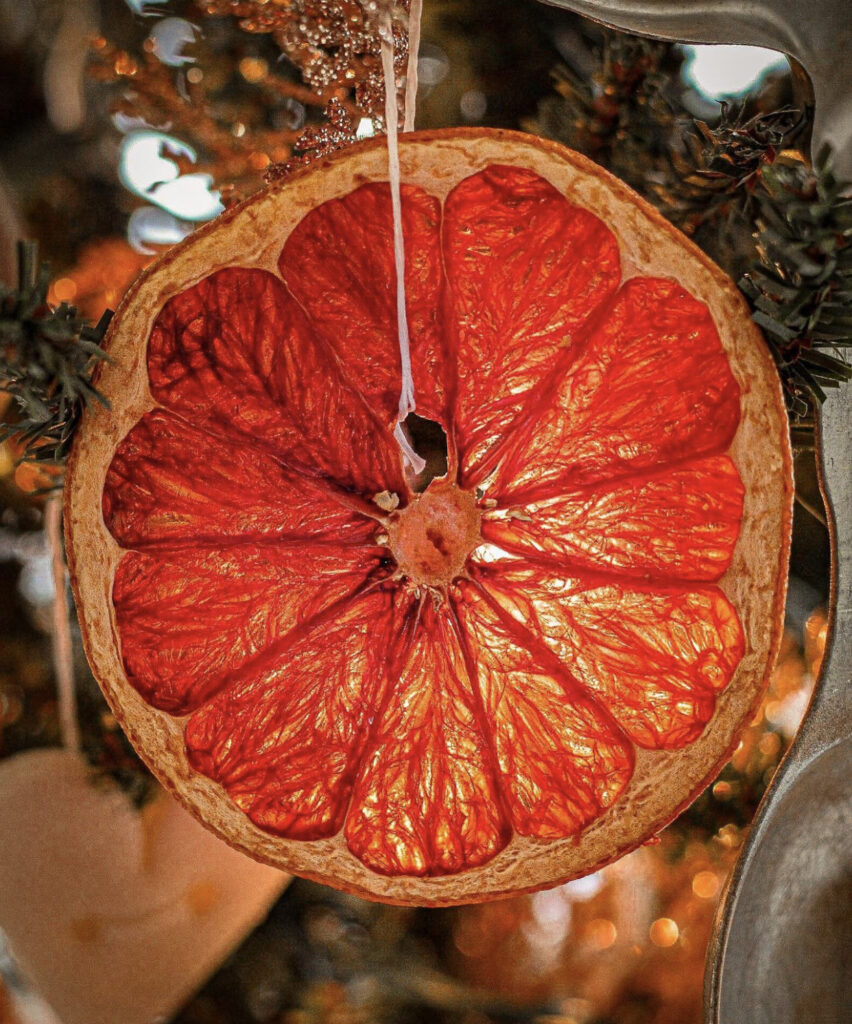
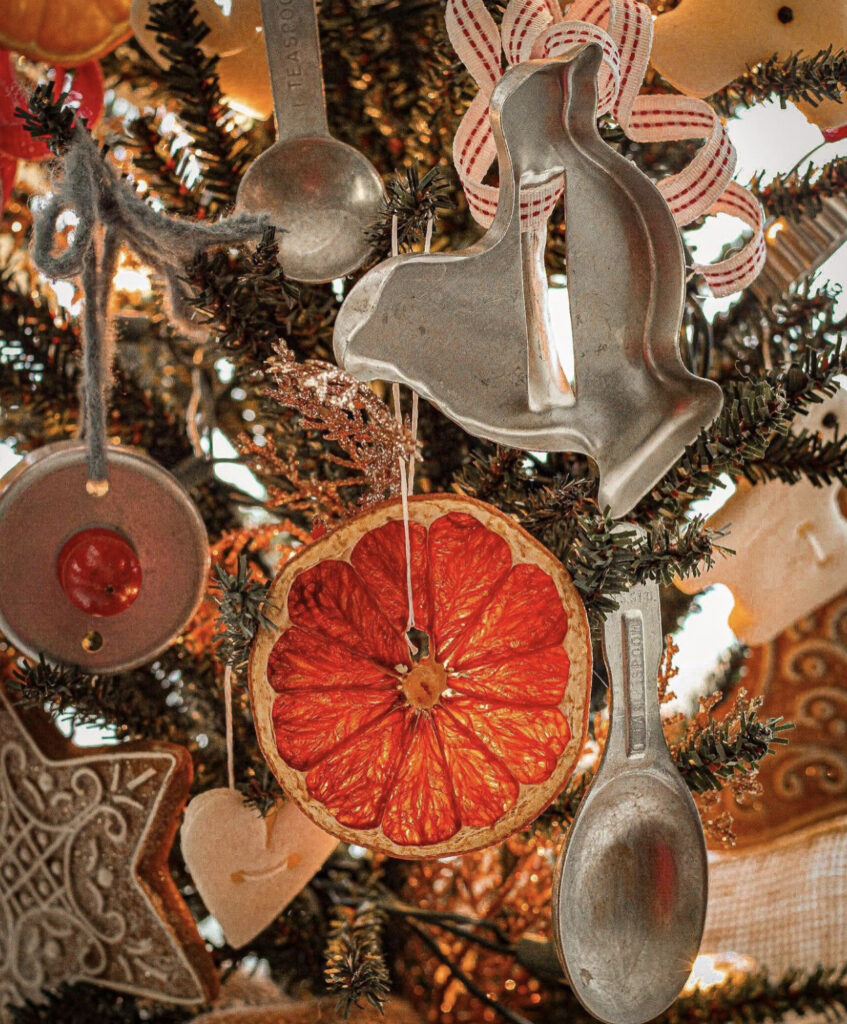
    #9 DIY Christmas Ornaments: Dried Fruit Ornaments

    How gorgeous are these DIY Christmas ornament from @.MustLoveHerbs?

    Here are the instructions from Lauren May:

    “Dried citrus. It not only looks beautiful but smells amazing, too! They’re easy to make.

    • Simply bake them (on a baking rack) 3-4 hours at 200°.
    • Once they have dried almost completely take them out and allow them to finish drying a few days on a rack.
    • You can string them up, store them in an air tight jar to use in soups/stews, or even as a decoration for gifts!
    • This holiday season I am trying in every way to embrace traditions and simplicities. I hope to find happiness and sparkle in even the little things like a pinecone found or a perfect little orange slice. However, I also understand the want to go OVER THE TOP. Which is why I am debating yet another Christmas tree. We have 4 right now! 😂 so tell me… are you simple is better or over the top when it comes to the holidays? Maybe you’re like me and a little of both!”

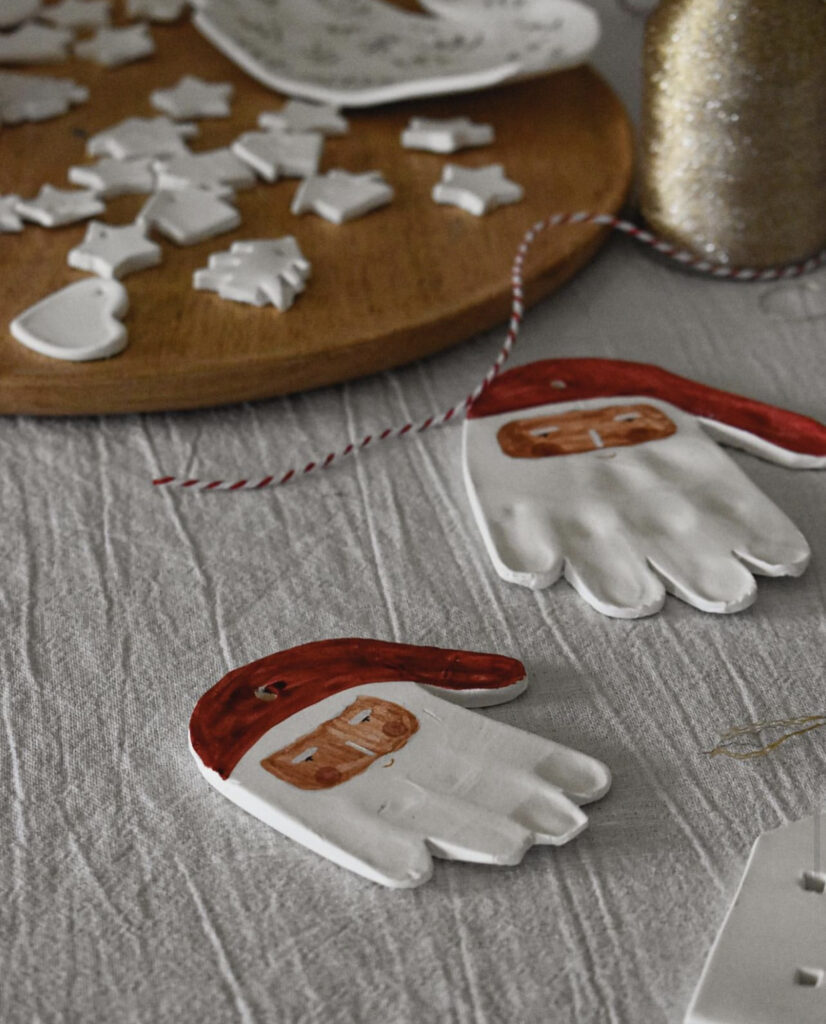
    #10 DIY Christmas Ornaments: Santa Hands

    Easy DIY Christmas Ornaments

    This DIY Christmas ornament idea from @.mywarmnest is so sweet! I love that a family can do this every year to track the growth of their kiddos!

    #11 DIY Christmas Ornaments: Mr. & Mrs. Clause

    Easy DIY Christmas Ornaments

    These DIY Christmas ornaments from @.KittaLeigh.Made really have the Christmas spirit!

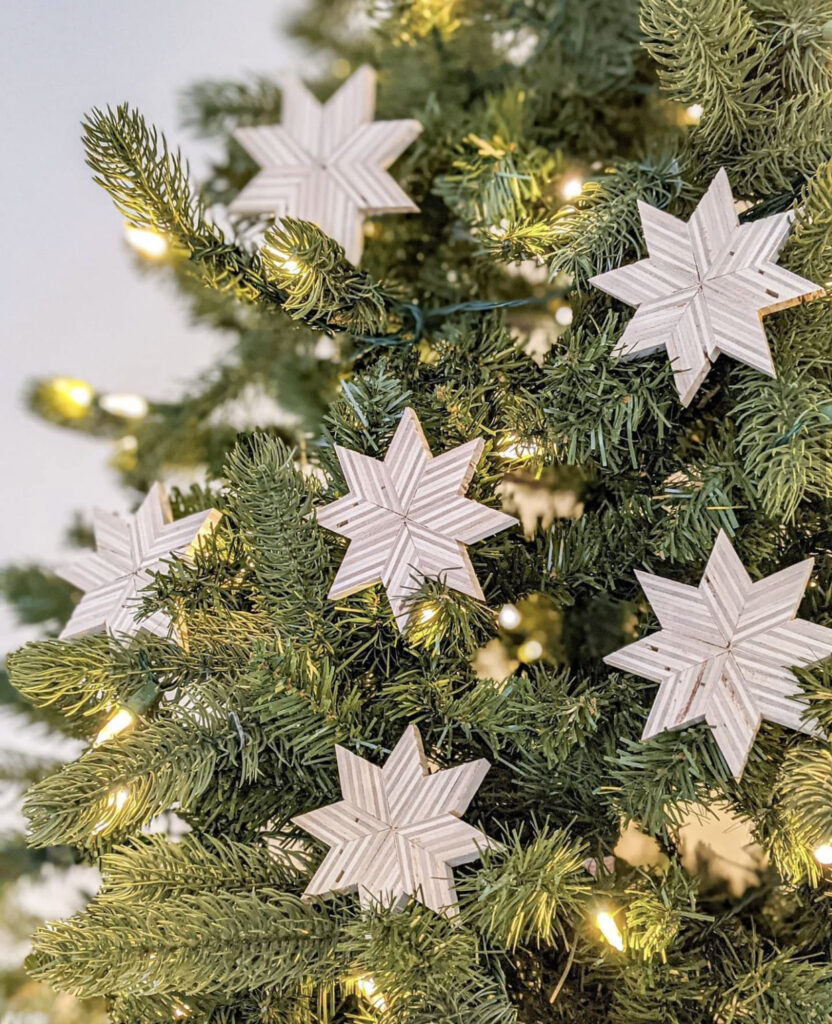
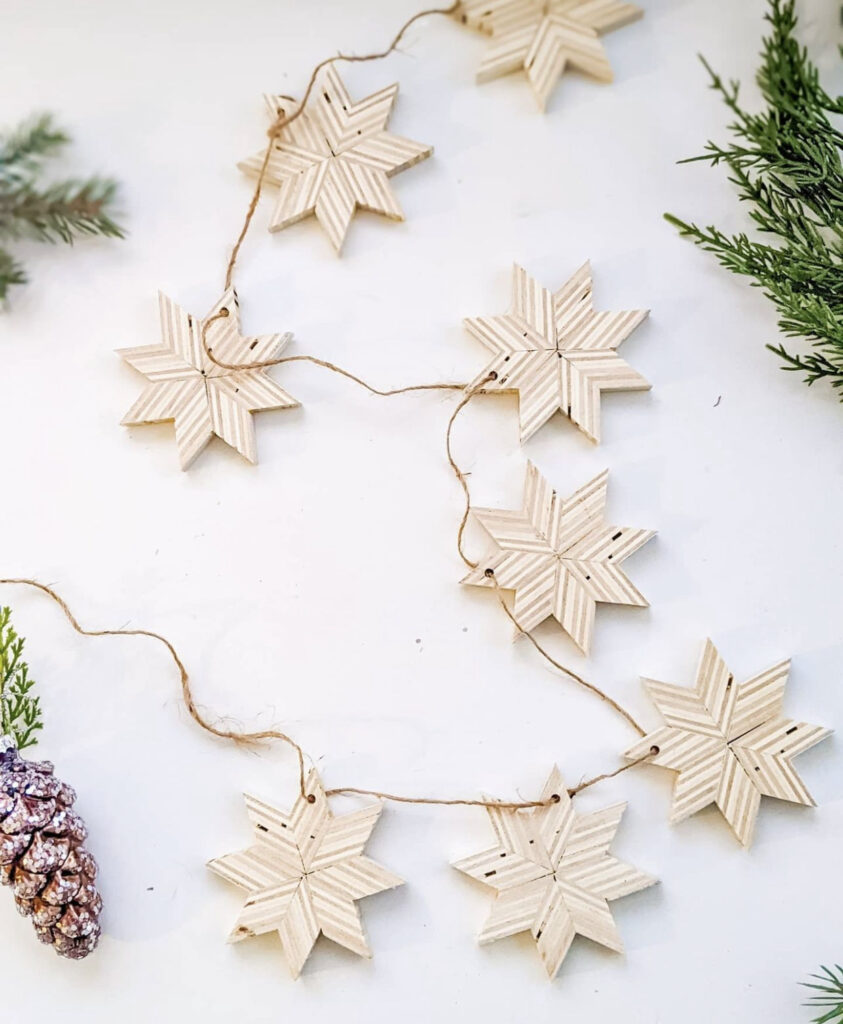
    #12 DIY Christmas Ornaments: Snowflakes from Scrap Wood

    These DIY Christmas ornament from @.UglyDucklingDIY are so clever! I love that she made them from scrap materials!

    From Sarah:

    “Christmastime always makes me feel crafty, so I started a tradition of making a set of ornaments each year. These scrap plywood “snowflakes” (or so I’m calling them) were fun to experiment with and make a fine garland, too! I’m definitely making #patternedplywood a thing I give more thought to in the new year. I already have a few spots in the house that would be perfect for it. Have you ever tried it? I’ve got these saved in my highlights if you’re looking for the how-to!”

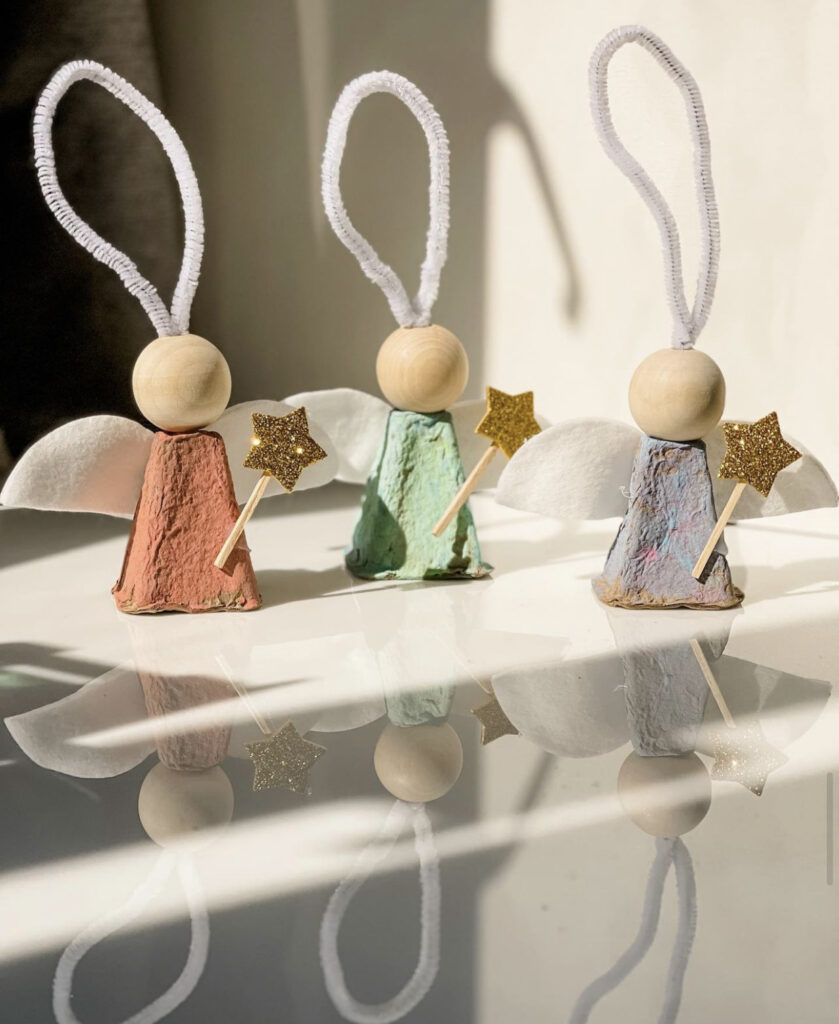
    #13 DIY Christmas Ornaments: 3 Wise Men

    Easy DIY Christmas Ornaments

    These DIY Christmas ornaments from @.Learning_In_D are charming. The 3 wise men!

    From Vivian:

    Last year, I have done some Christmas ornaments with D. We love creating them together and full of beautiful memories. We are still so excited to see them hanging on our Xmas tree after one year.

    So why don’t we do some this year too ? Little d is joining us this year, as well. She is approaching 3, she can master more skills, like cutting, beading and glueing.

    Little d ‘s likes angel ( I just newly discovered it). So maybe it would be a good idea to make a
    simple angel ornament with her. And turn out, she loves them so much 💕

    Materials used:
    – Biodegradable plant pots
    – Circle cotton pad
    – Pipe cleaners
    – Wooden beads
    – Wooden sticks
    – Star stickers
    – Hot glue

    My kids always love mixing color. This time I let them mix their own pastel tone ( paint from @ikeahingkong).

    After painting, cutting, beading and gluing, the angels are ready to be on our Xmas tree.

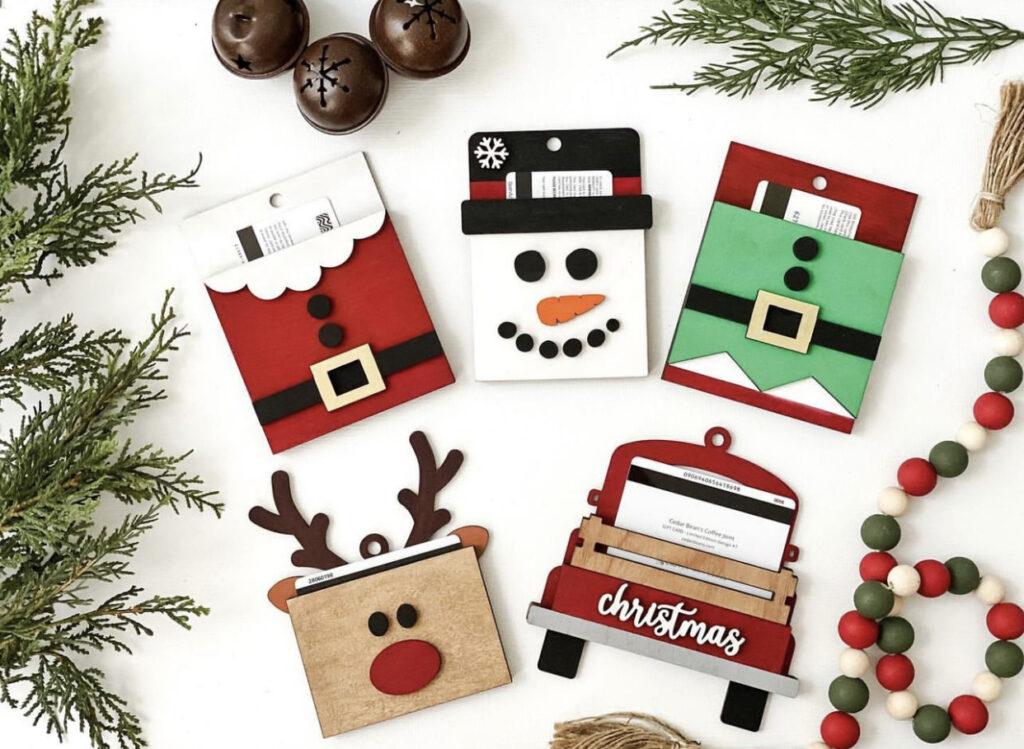
    #14 DIY Christmas Ornaments: Square Ornaments & Gift Card Holders

    Easy DIY Christmas Ornaments

    These DIY Christmas ornament from @.My.Simple.Little.Home are so smart!

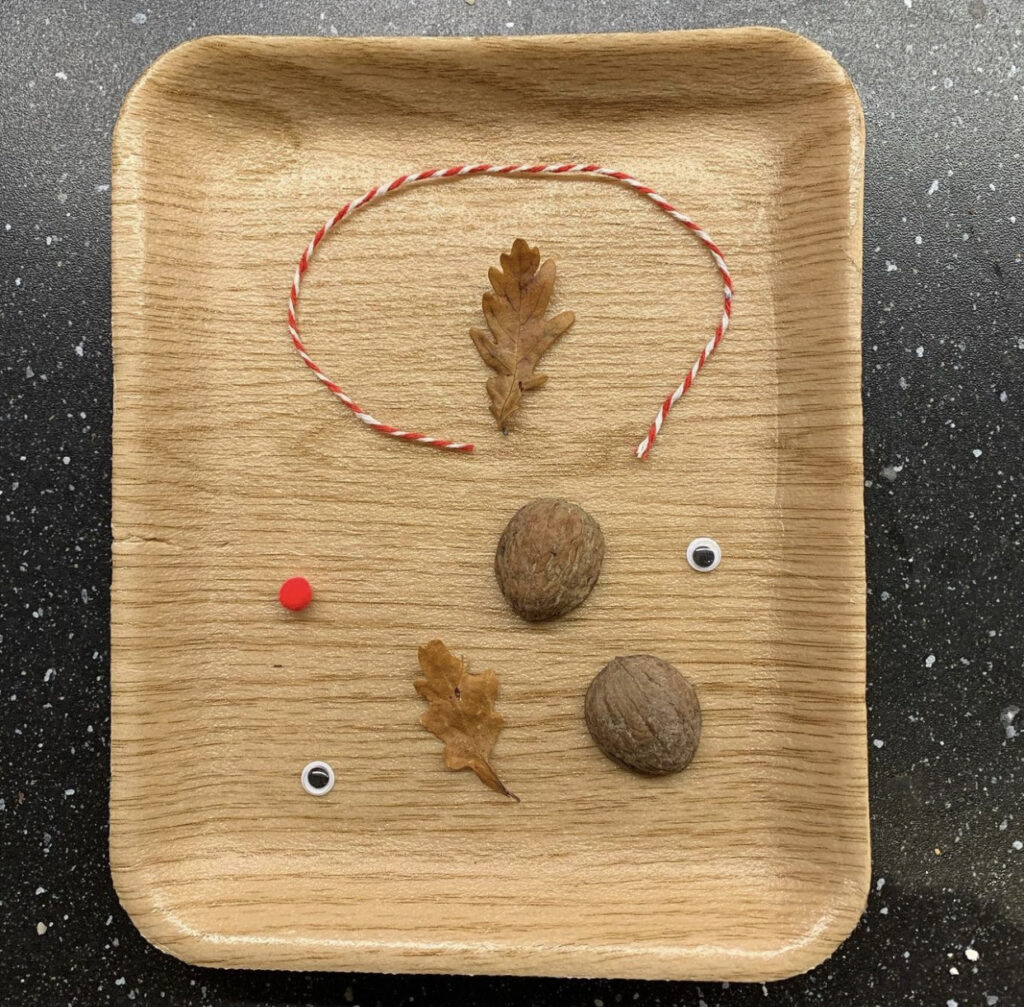
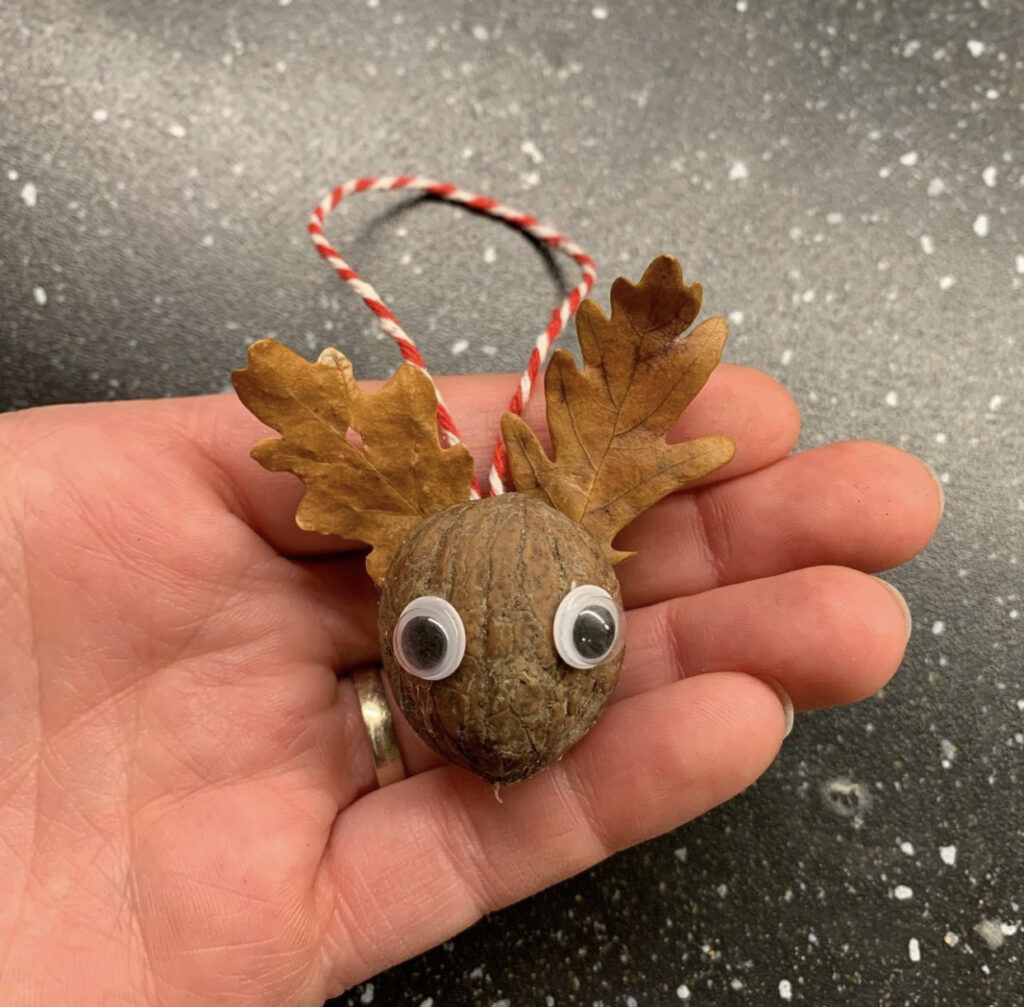
    #15 DIY Christmas Ornaments: Rudolph from Walnuts

    This DIY Christmas ornament from @.Mae.Vabien really has the Christmas spirit! I love the googley eyes!

    From Mae:

    “My daughter and I made this cute little Rudolph ornement! How cute is it?! We used a walnut, 2 oak leaves, a mini pompom and goggly eyes! Slide to see how we made it!”

    #16 DIY Christmas Ornaments: Macrame Ornaments

    This DIY Christmas ornament from @.PrettyLifeGirls is so cute! They remind me of hot air balloons!

    From Liz & Sam:

    “We’re sharing two easy DIY macramé ornaments made with supplies you can grab in a snap from @MichaelsStores! If you’ve never worked with macramé, this is a great beginner project that will to add a fun boho-twist to any Christmas decor!”

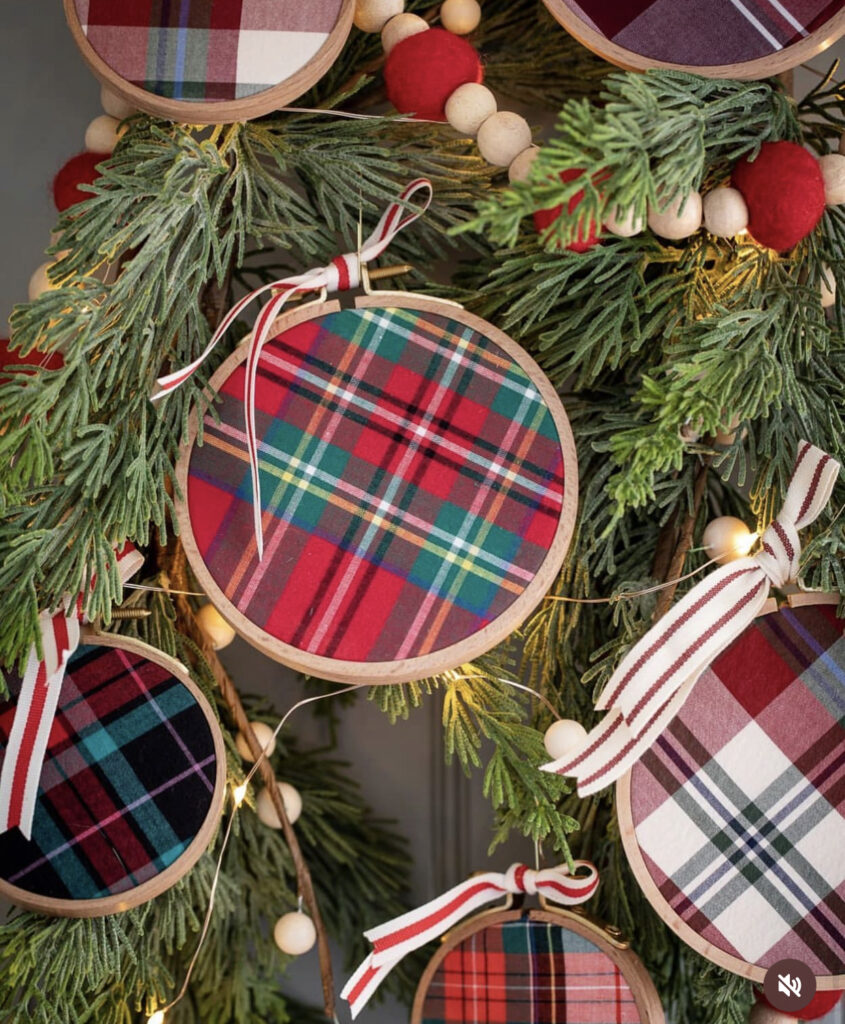
    #17 DIY Christmas Ornaments: Embroidery Hoop Ornaments

    Easy DIY Christmas Ornaments

    This DIY Christmas ornament from @.InspiredByCharm is lovely.

    From Michael:

    “I have a beautiful new project on the blog for you today! Use old plaid shirts and embroidery hoops to craft these DIY embroidery hoop Christmas ornaments.

    This is an easy and budget-friendly craft with stunning results to use in decorating your Christmas tree and home for the holidays.

    You can use any fabric in any color or pattern to match your decor. You could even use clothing from a loved one to create a memorial ornament to give as a gift.

    You can get the tutorial on the blog. There’s is a link in my profile or head directly to inspiredbycharm.com. I shared the full process including product links. (I especially love these embroidery hoops. They are a step up from the traditional with brass screws and beech wood frames.)”

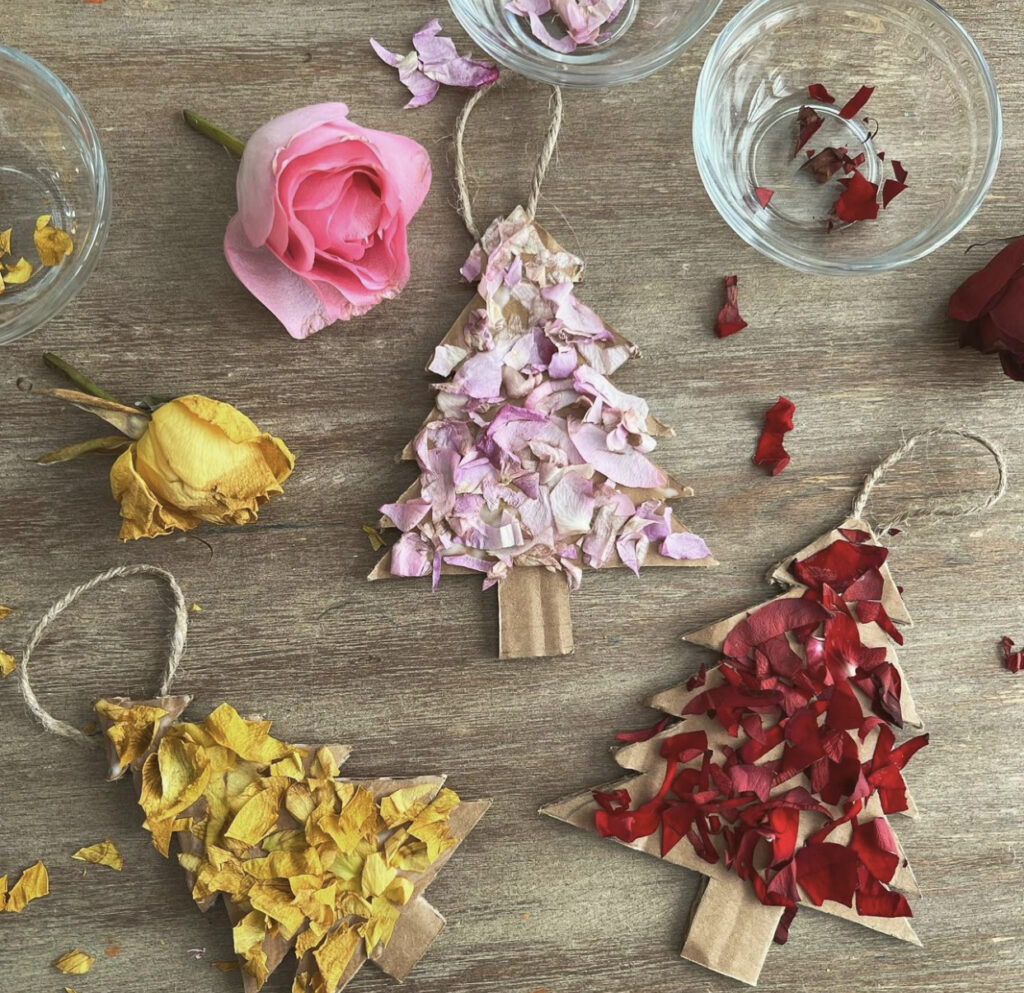
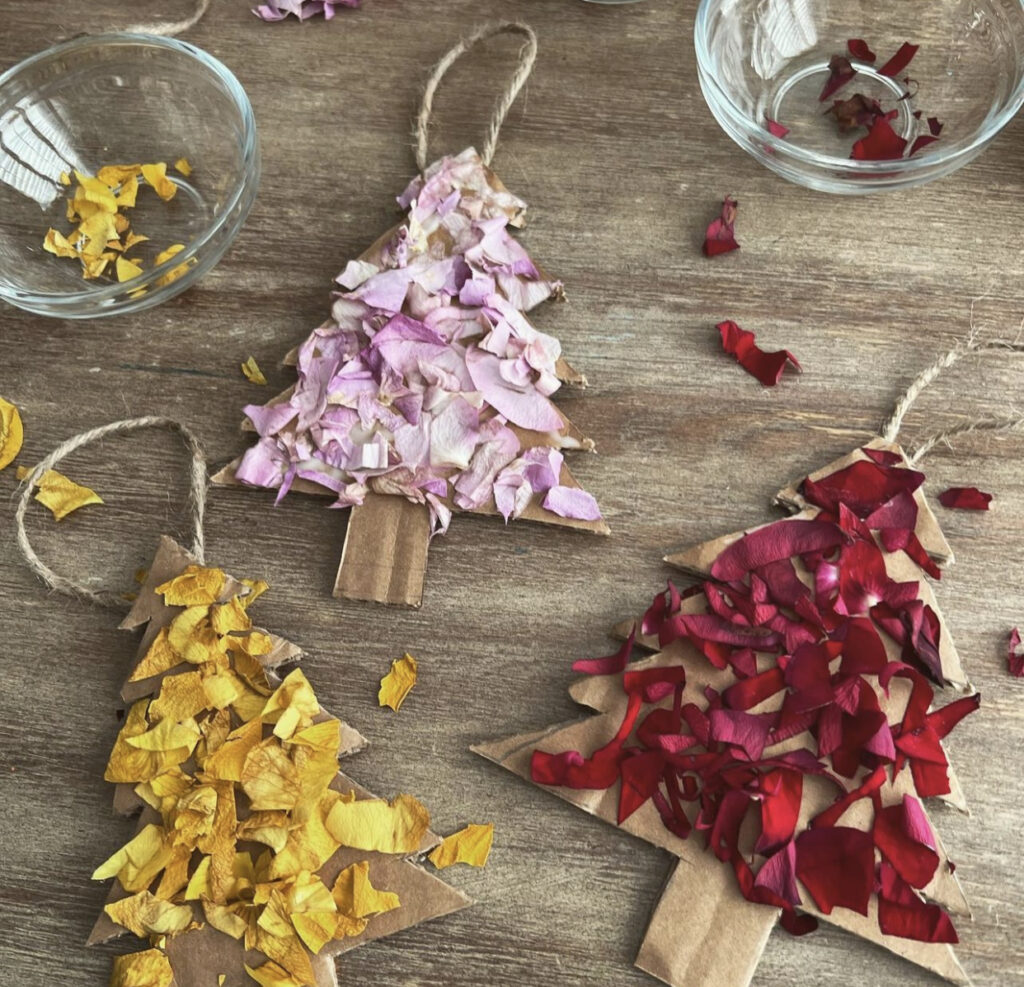
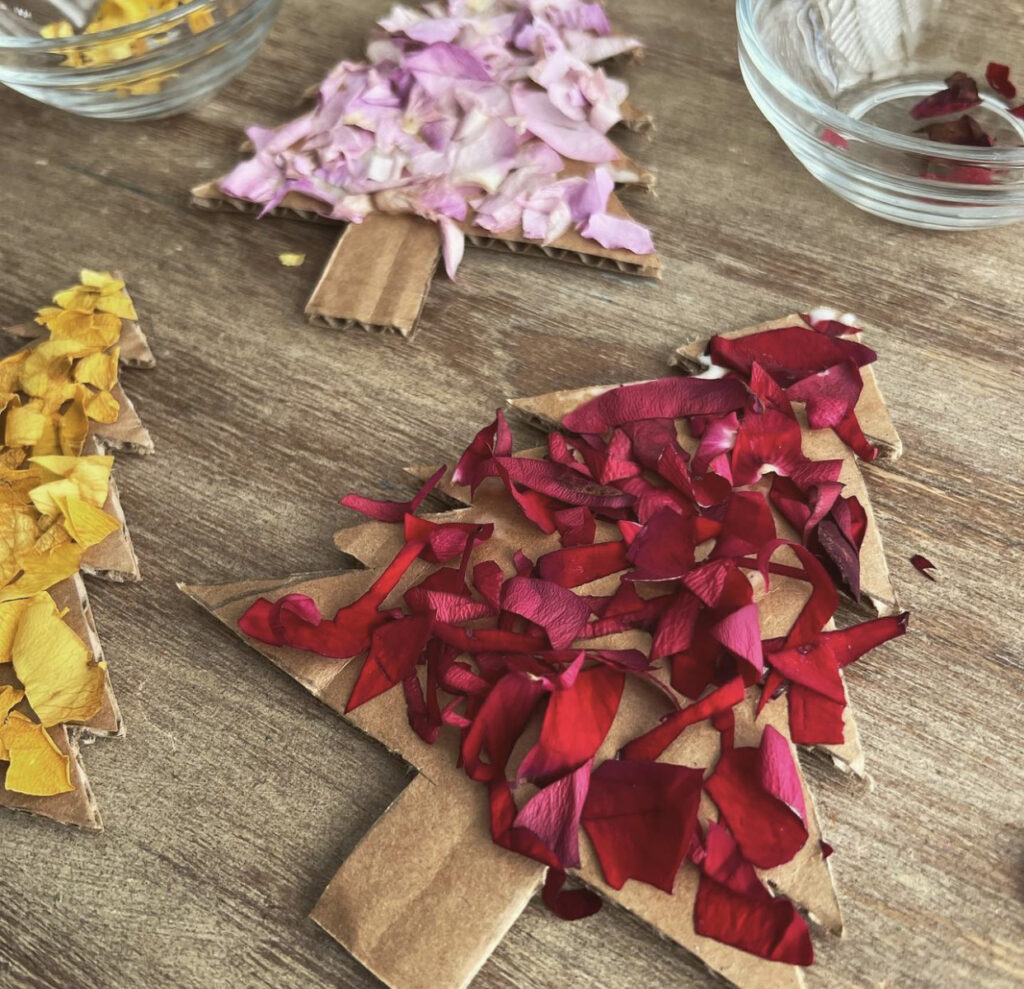
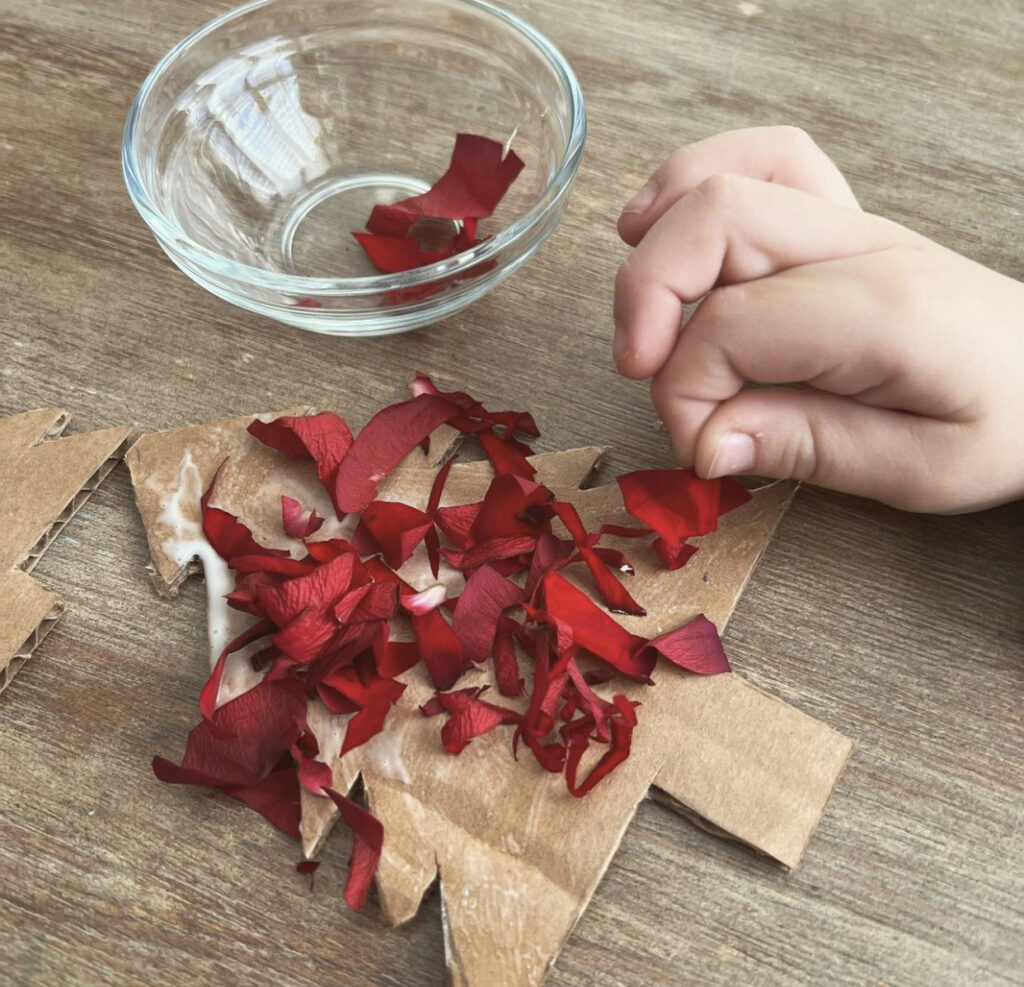
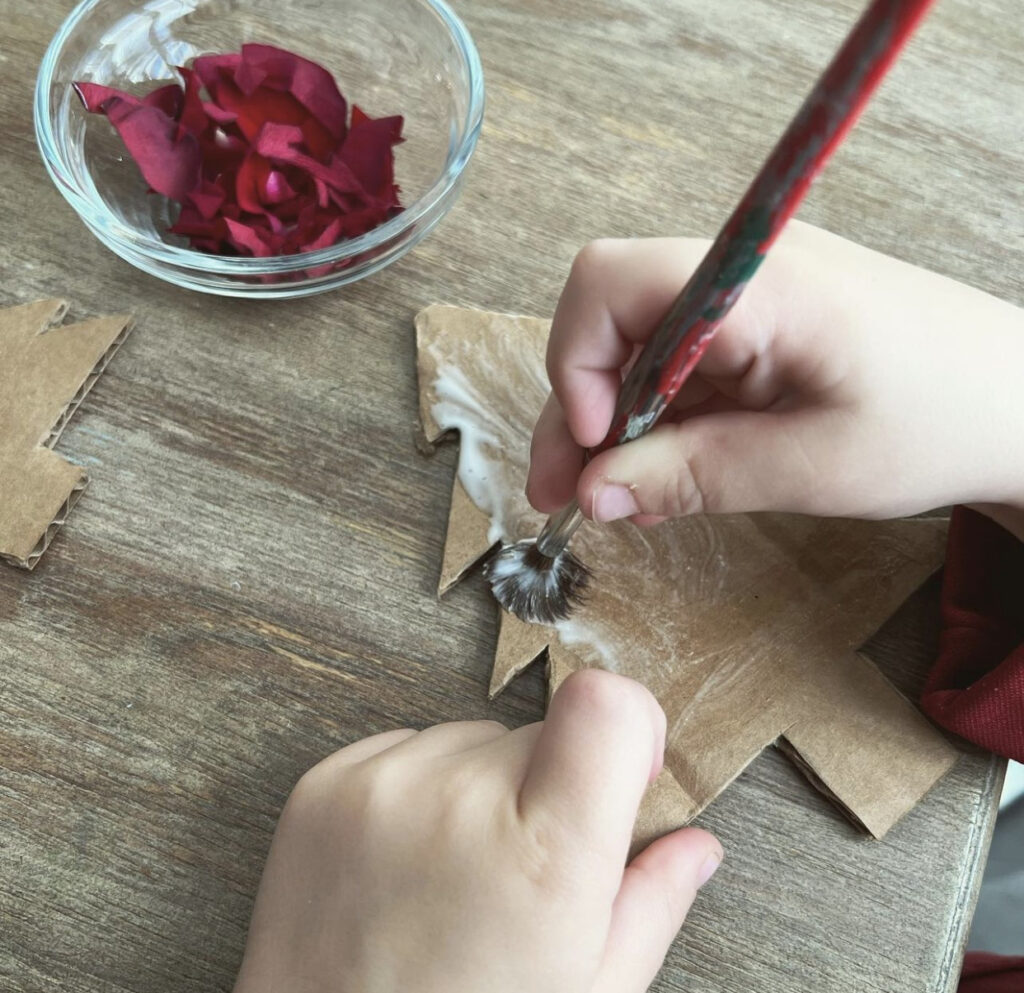
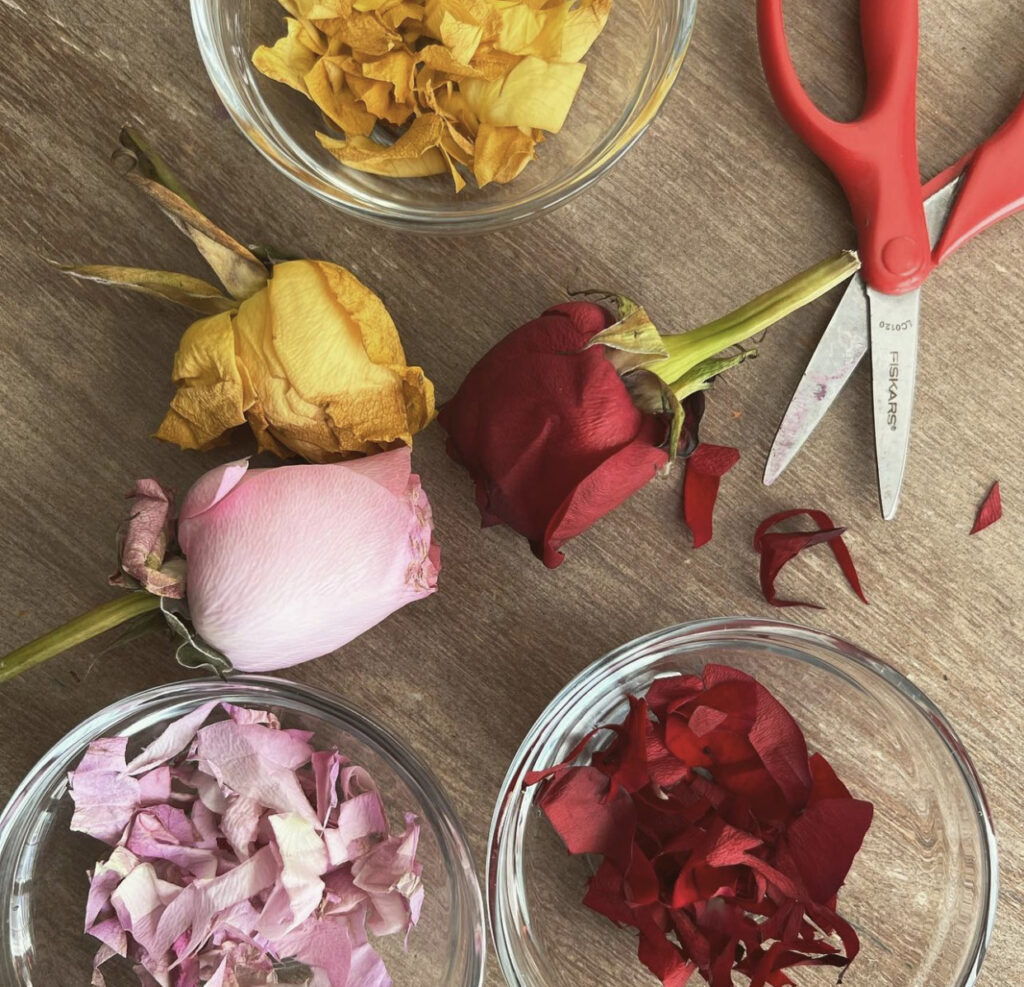
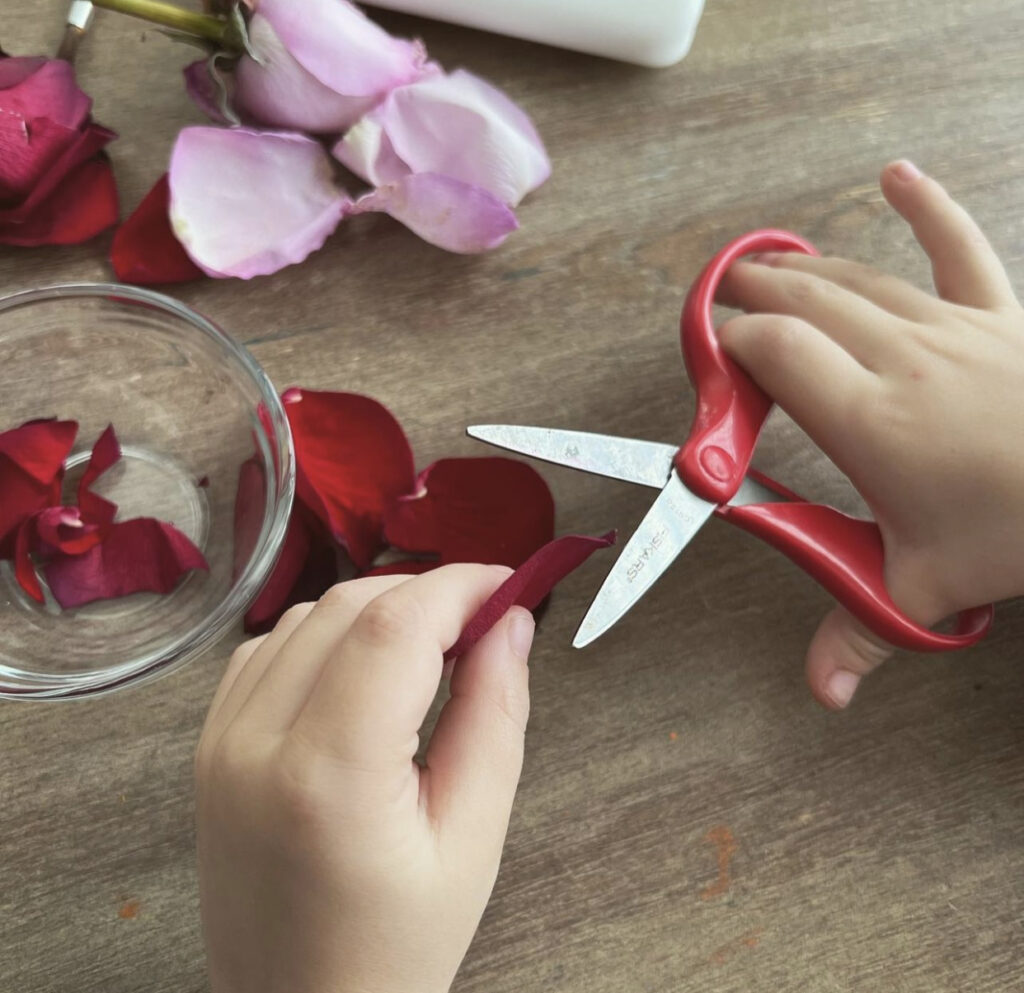
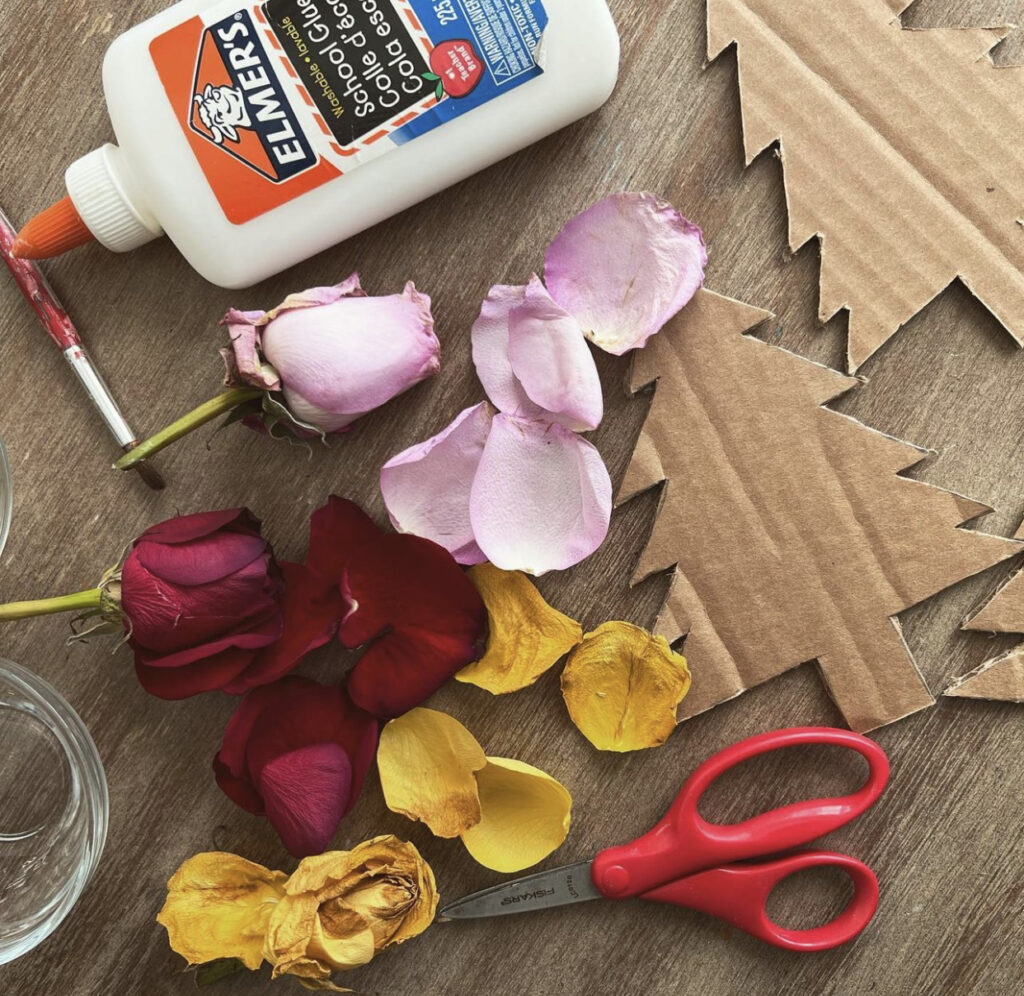
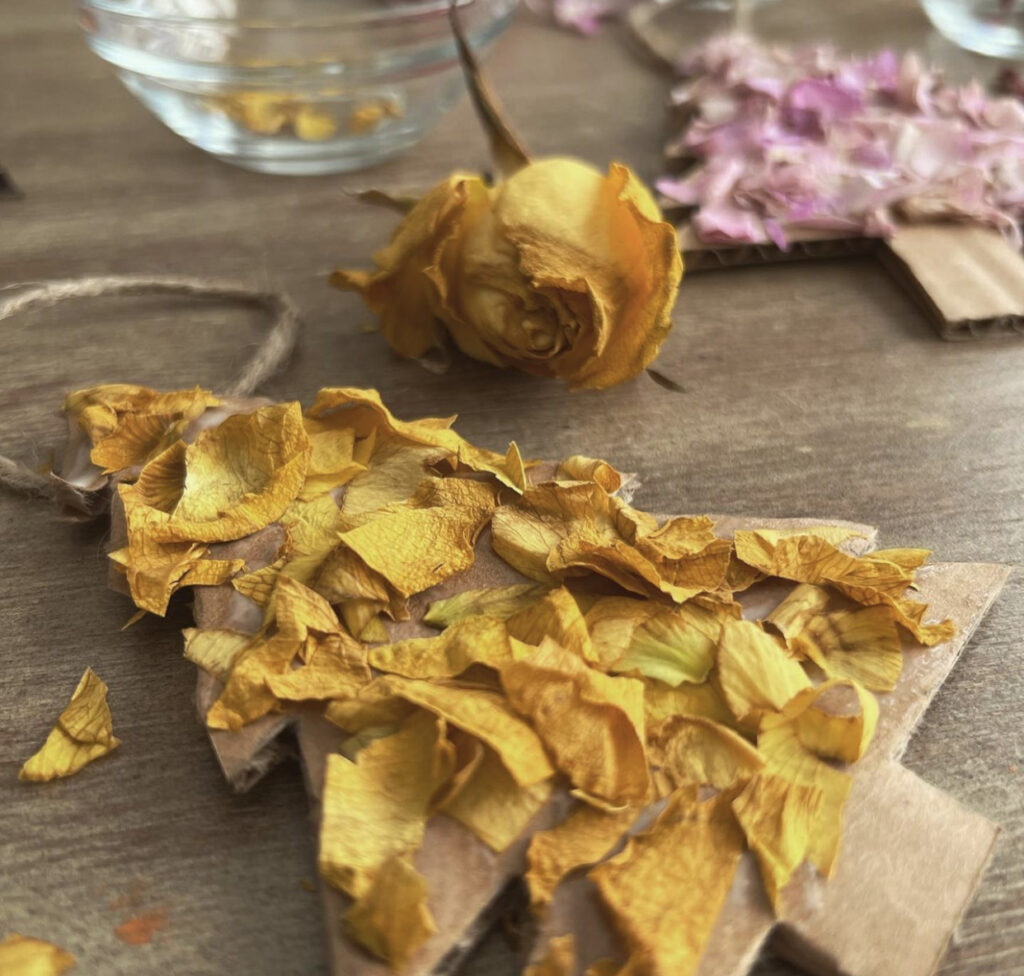
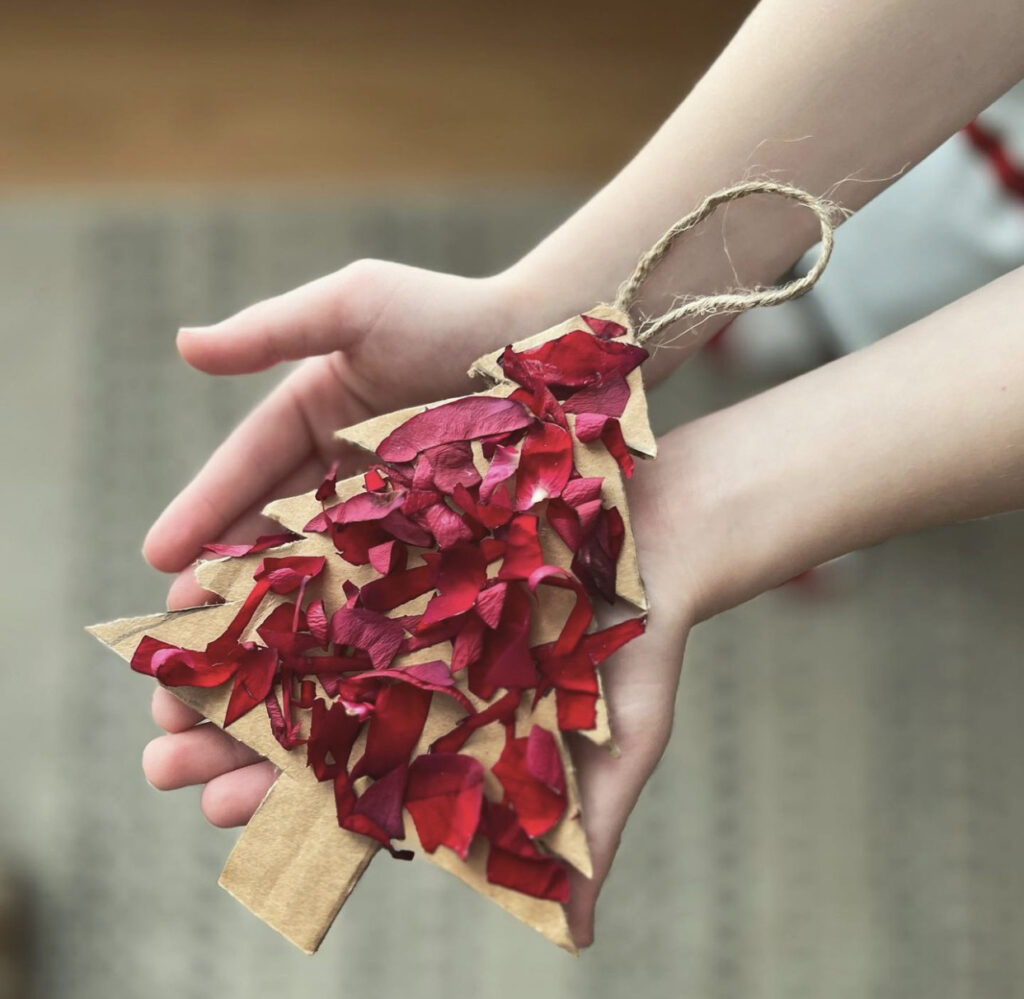
    #18 DIY Christmas Ornaments: Rose Petal Christmas Trees

    How ingenious are these DIY Christmas ornaments from @.PreschoolForYou? I love how they’re reusing materials!

    From Elizabeth:

    “What to do with dying flowers? Let me count the ways…

    This one was inspired by my littlest when he began tearing a fallen rose petal to pieces at the dinner table… next thing you know I’m cutting cardboard trees and he’s cutting rose petals✨

    By the way… the rest of the bouquet is drying… more flower play to come!”

    This blog post was all about DIY Christmas ornaments.


    Hi, I’m Leslie!

    Hi, I’m Leslie! I hope you found some DIY Christmas ornament inspiration on the blog today.

    Hello there! My name is Leslie, and I’m the founder of PunkMed. I regularly share my best info on how to have eco-friendly holiday celebrations, urban homesteading, gardening, and, of course, very thoughtful and helpful gift guides for the holidays.

    What to Read Next —>

    32 Thanksgiving Table Decor Ideas | Eco-Friendly & Sustainable Thanksgiving Decorations

    setting a pretty thanksgiving table

    Today on my blog, I’m excited to share over 30 Thanksgiving table decor ideas, all part of my series on easy eco-friendly and sustainable holiday decorations.

    Today, I’ve shared ideas from my own life and experience, as well as inviting home decor experts, bloggers and influencers to weigh in with their ideas. The goal of this piece is to give you THE BEST and most CURRENT advice on Thanksgiving table decor ideas, with a few other decoration ideas for other areas of your home thrown in.

    This blog post is all about Thanksgiving table decor ideas.

    Thanksgiving Table Decor

    When it comes to finding the BEST Thanksgiving table decor ideas, I have a few tips that I think will make your life a bit easier:

    • Tip #1: Plan Storage NOW! When it comes to holiday decor, it can be very easy to just buy more and more each year. This isn’t good for your or the planet! By planning out the containers and systems you use to store your holiday decor, you can massively extend the useability of your pieces.
    • Tip #2: Consumable Decorations FTW! When planning out your decor, I encourage you to use items that you can eat! Pears, cookies, pumpkins, etc, can all be used as part of your Thanksgiving table centerpiece, and be eaten!
    • Tip #3: Swap Out Black! You can easily repurpose a good amount of Halloween decor by swapping out your black linens and items for a dark brown or forest green.

    Hello, I’m Leslie

    My name is Leslie, and I’m the founder of PunkMed! On my blog, I share my info, experiences, and recommendations in the area of sustainability, urban homesteading, and eco friendly entertaining. Our goal is to make it less overwhelming for you to live a fun and sustainable life!

    In today’s post, I’m sharing my favorite Thanksgiving decor ideas. These ideas come from the process of planning many holiday gatherings, and from hearing from many other hostesses about their tips and tricks for a setting a pretty Thanksgiving table!

    Ready to get started decorating your table for Thanksgiving?! Let’s go!

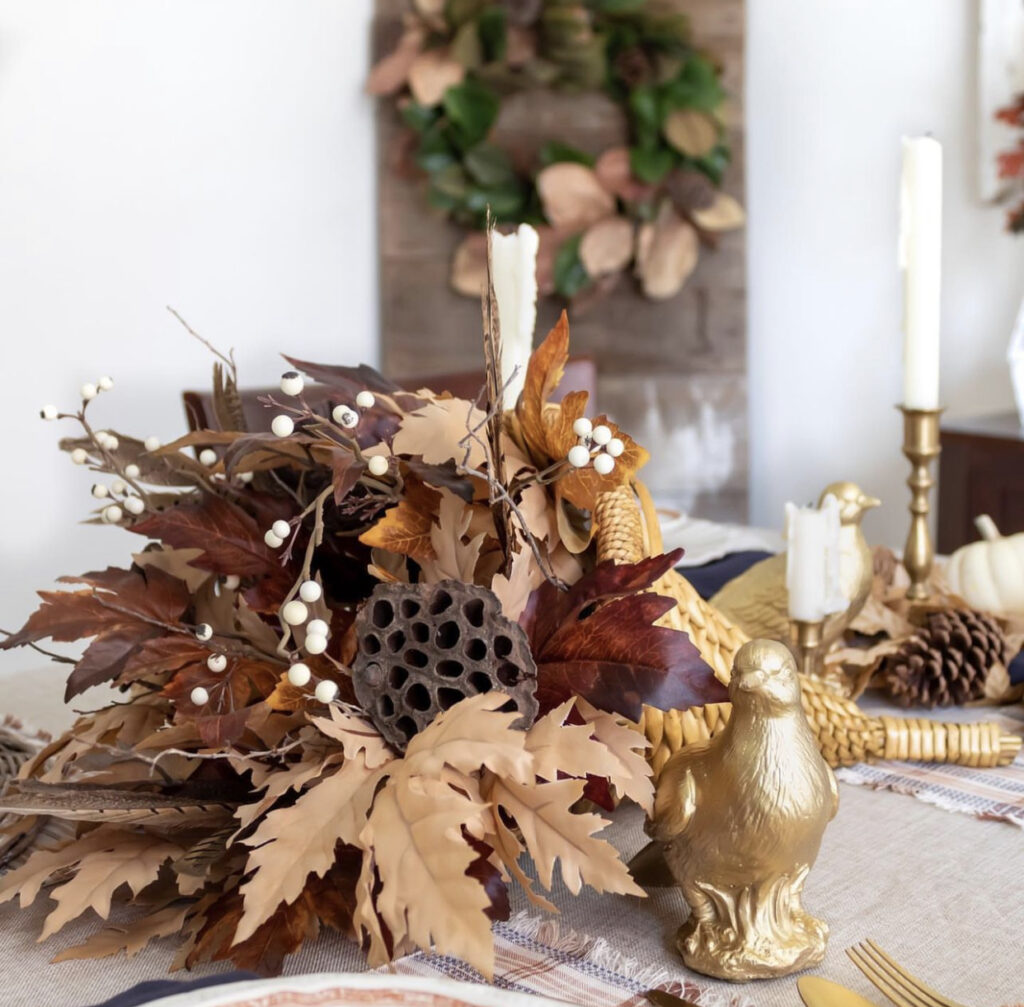
    #1 Thanksgiving Table Decor Ideas: Centerpiece with Golds & Rich Browns

    Thanksgiving Table Decor

    Starting off my list of GORGEOUS Thanksgiving table decor ideas, we have this one submitted by @.midwestlifeandstyle? Some people consider brown to be a bit boring, but this centerpiece arrangement proves them wrong! I love the gold bird as an accent.

    Get the look:

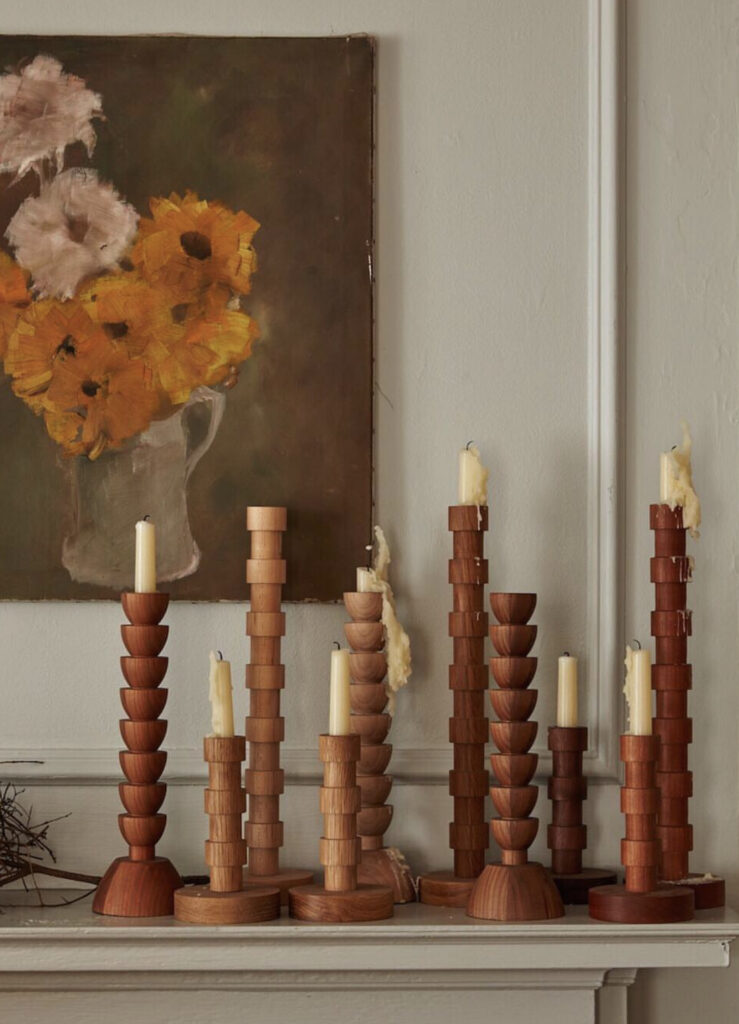
    #2 Thanksgiving Home Decor: Wood Candlesticks

    Thanksgiving Table Decor

    I’m a big fan of candlesticks as part of Thanksgiving table decor (as you’ll see in this post), and these wood candlesticks from Lonstine at Home are just gorgeous. I think they add texture and dimensionality to an arrangement.

    *Image submitted by @.lostineathome)

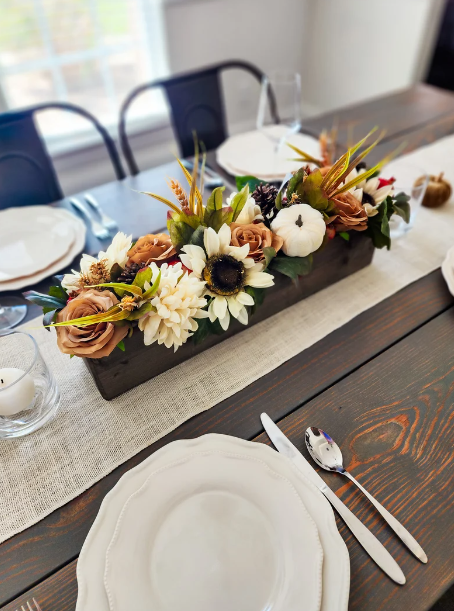
    #3 Thanksgiving Table Setting Ideas: Thanksgiving Rectangular Floral Centerpiece for Table

    Thanksgiving Table Decor

    When it comes to the holidays, I love incorporating a floral arrangement! This faux floral arrangement from Creations by Joy Belle is gorgeous, and can be used for years to come!

    Get the Look:

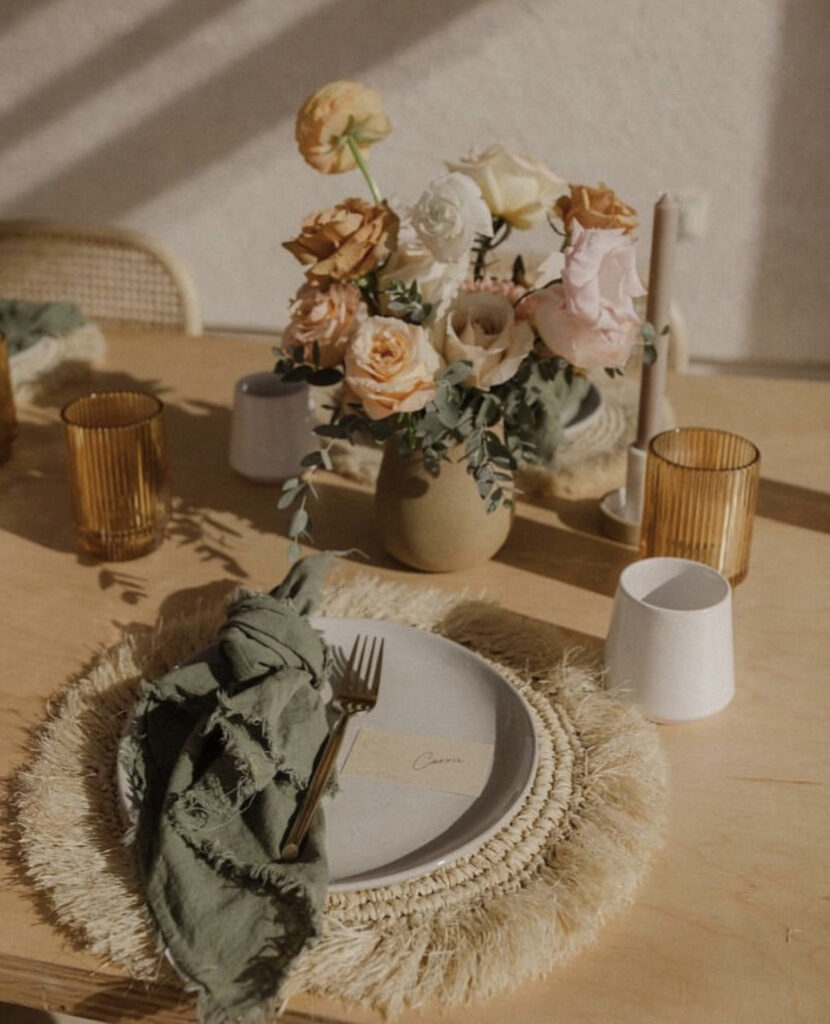
    #4 Thanksgiving Table Decor Ideas: Muted Modern Color Palette

    Thanksgiving Table Decor

    Thanksgiving is a very traditional holiday, and I love how @.madeby_ind played with the traditional colors and textures to bring us something familiar and new — so inspiring!

    Get the Look:

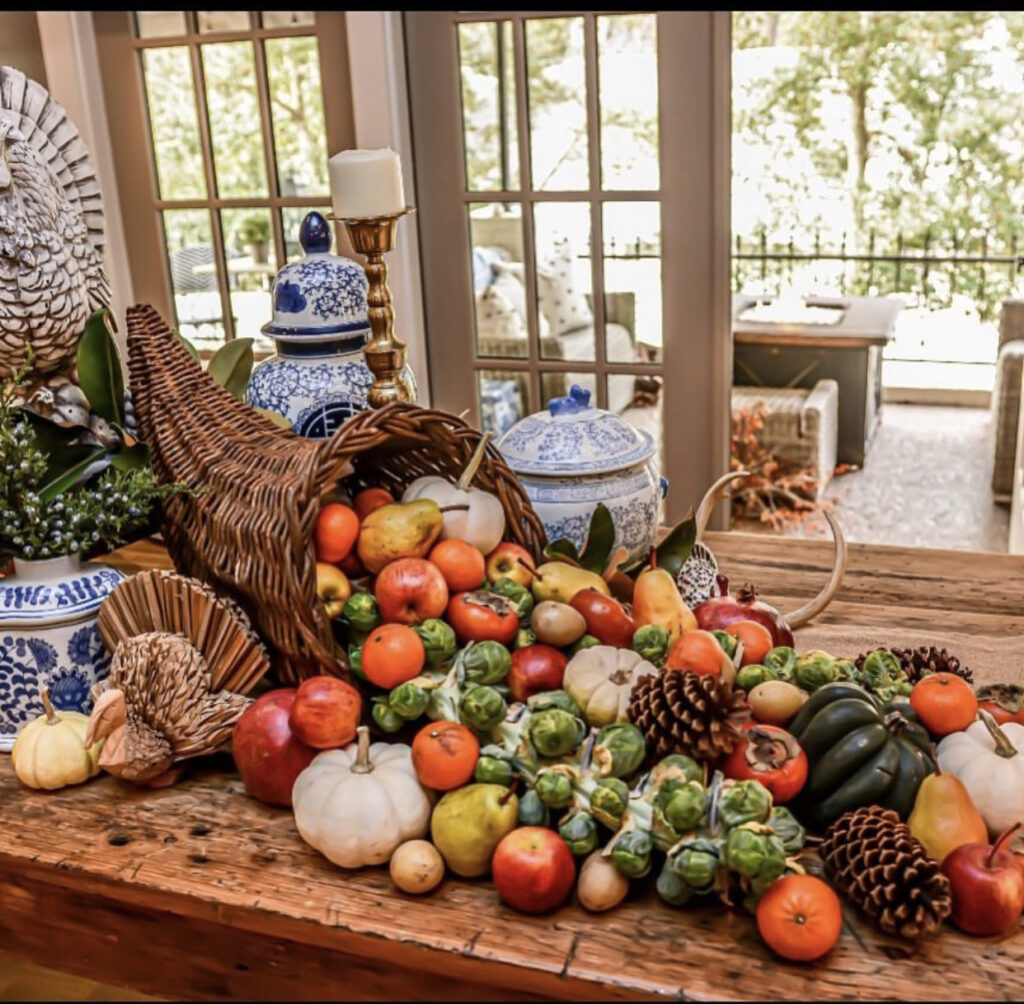
    #5 Thanksgiving Table Decor Ideas: Gorgeous Cornucopia with Fruits & Vegetables

    Thanksgiving Table Decor

    How gorgeous is this Thanksgiving table decor idea from @.amymontgomeryhome? Amy told us that all of these frutis and veggies are natural, and were eaten in the days following Thanksgiving. What a rad and sustainable Thanksgiving decor idea!

    Get the look:

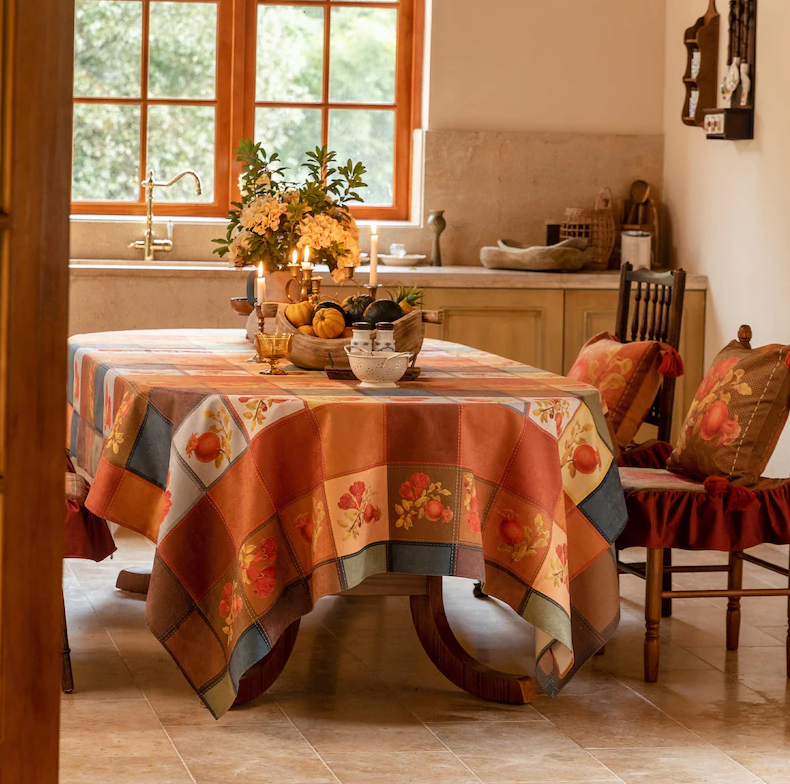
    #6 Thanksgiving Table Decor Ideas: Reusable Thanksgiving Tablecloth

    Thanksgiving Table Decor

    How gorgeous is this Thanksgiving tablecloth, the perfect backdrop to your Thanksgiving table decor plans?! I love that there are so many different colors and earth tones in this tablecloth, making it easy to experiment with different Thanksgiving centerpiece ideas each year!

    Get the Look:

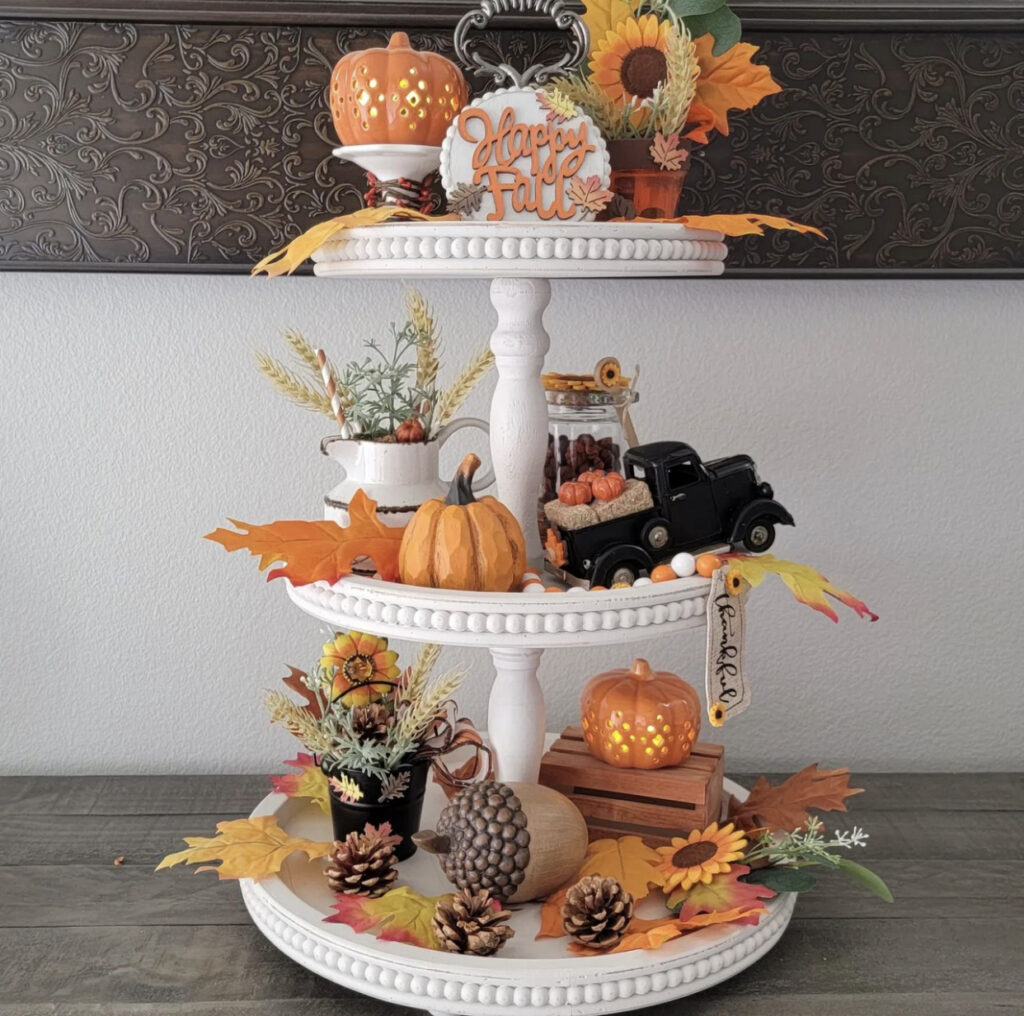
    #7 Thanksgiving Table Decor Ideas: Tea Tray with Fall Decor

    Thanksgiving Table Decor

    This Thanksgiving table decor idea from @.cindyscraftycorner is so fun! I love that everything is artfully arranged, but doesn’t feel STUFFED in there, you know?! The interplay of height and color of the objects is lovely.

    Get the Look:

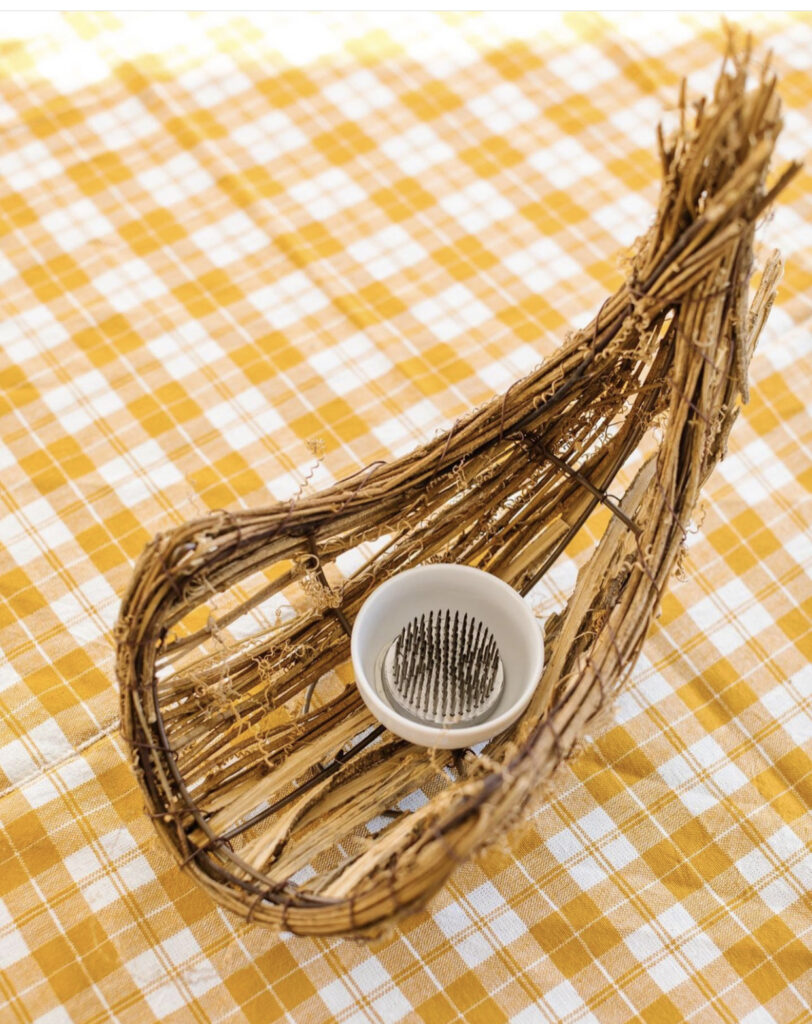
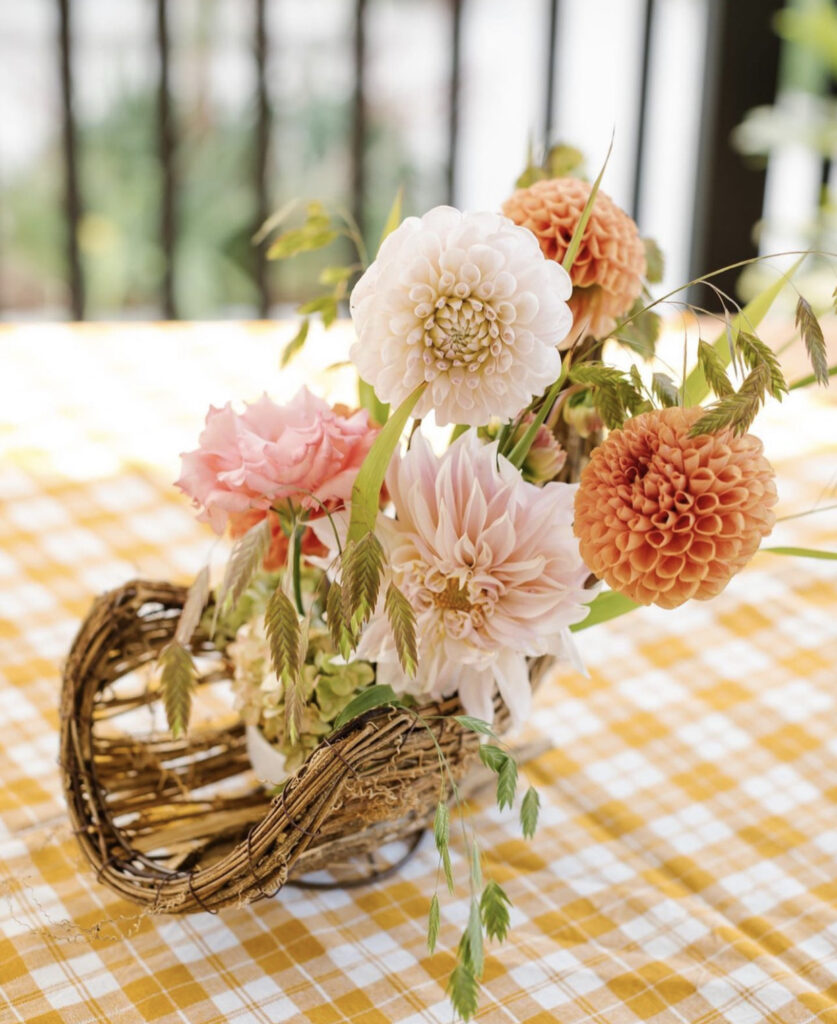
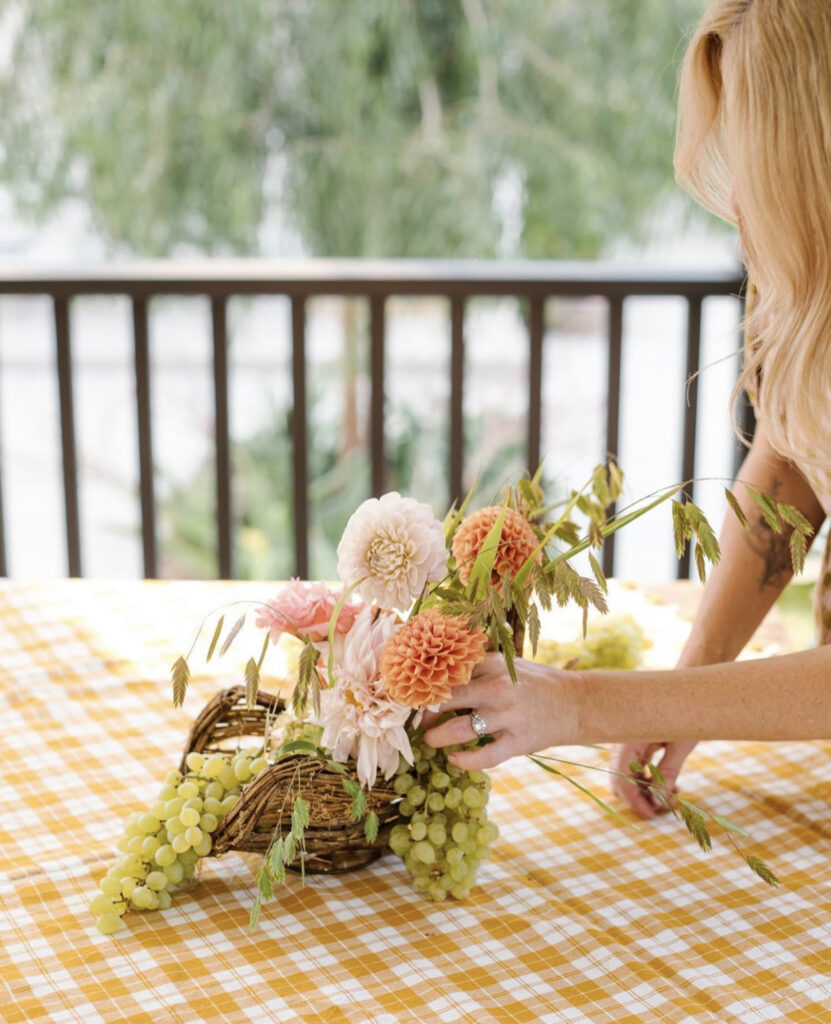
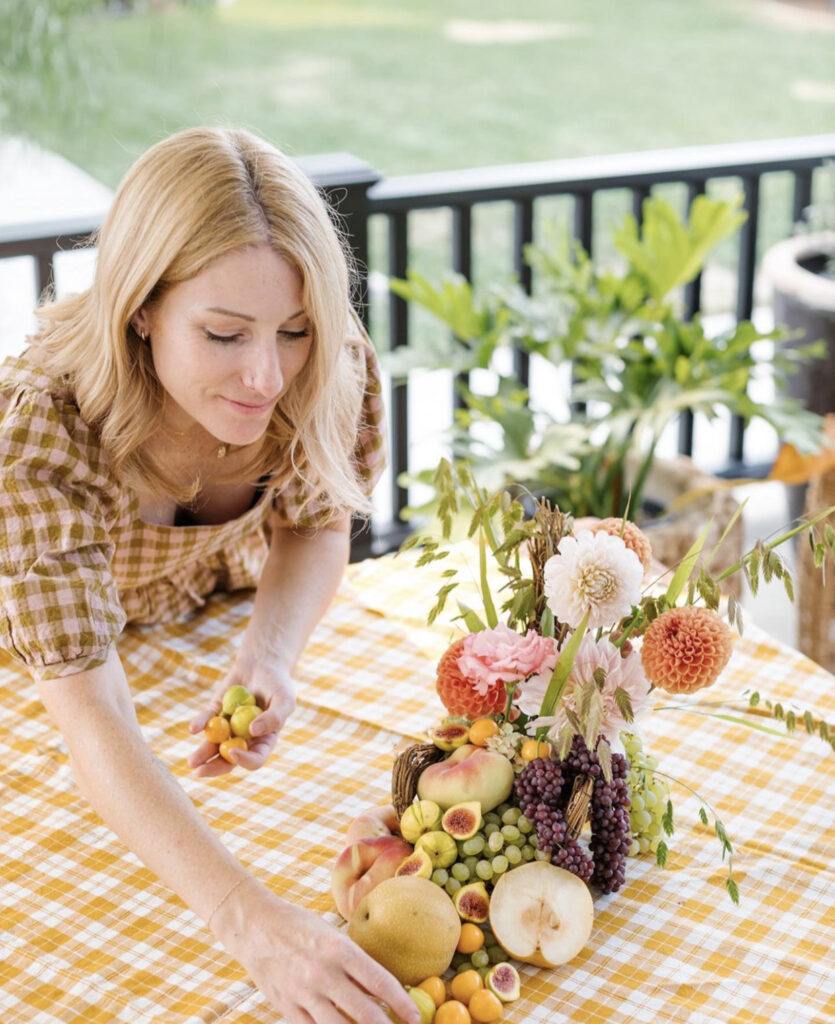
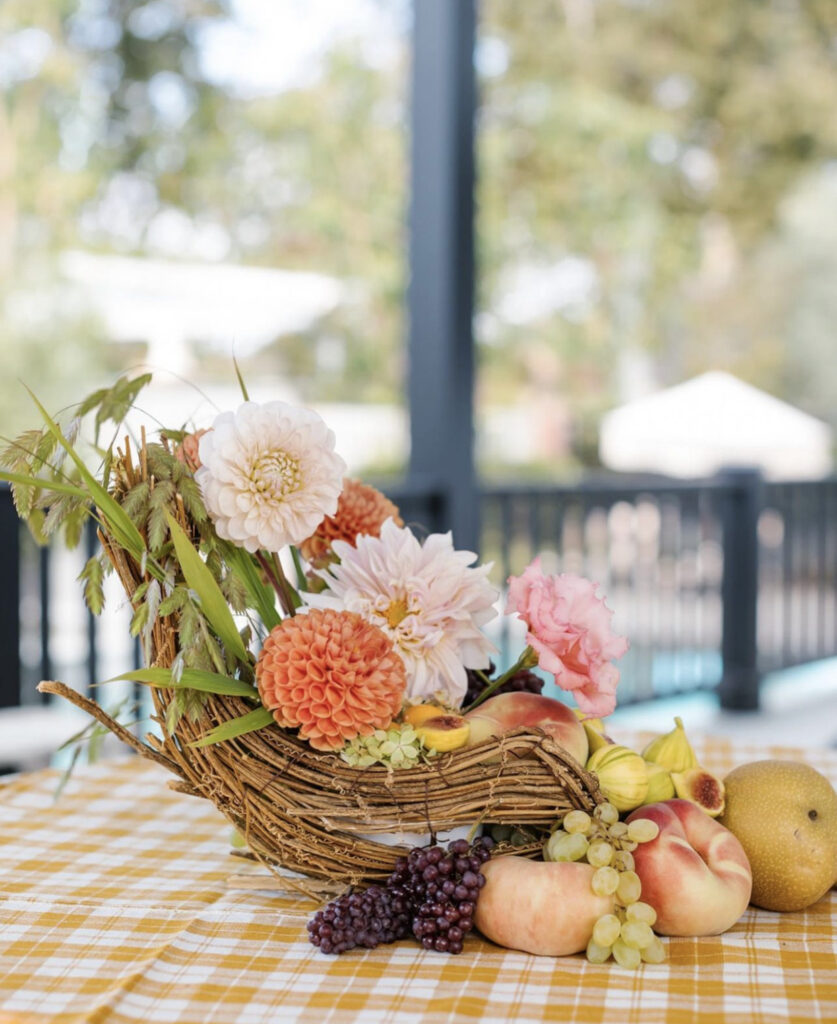
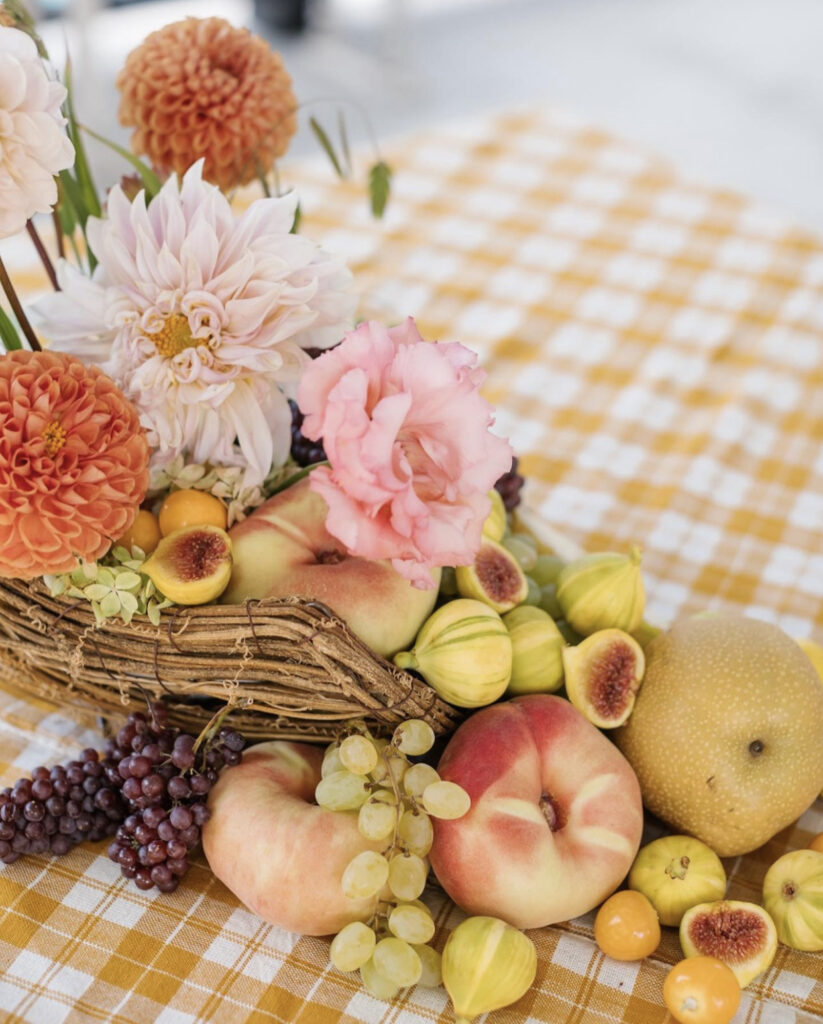
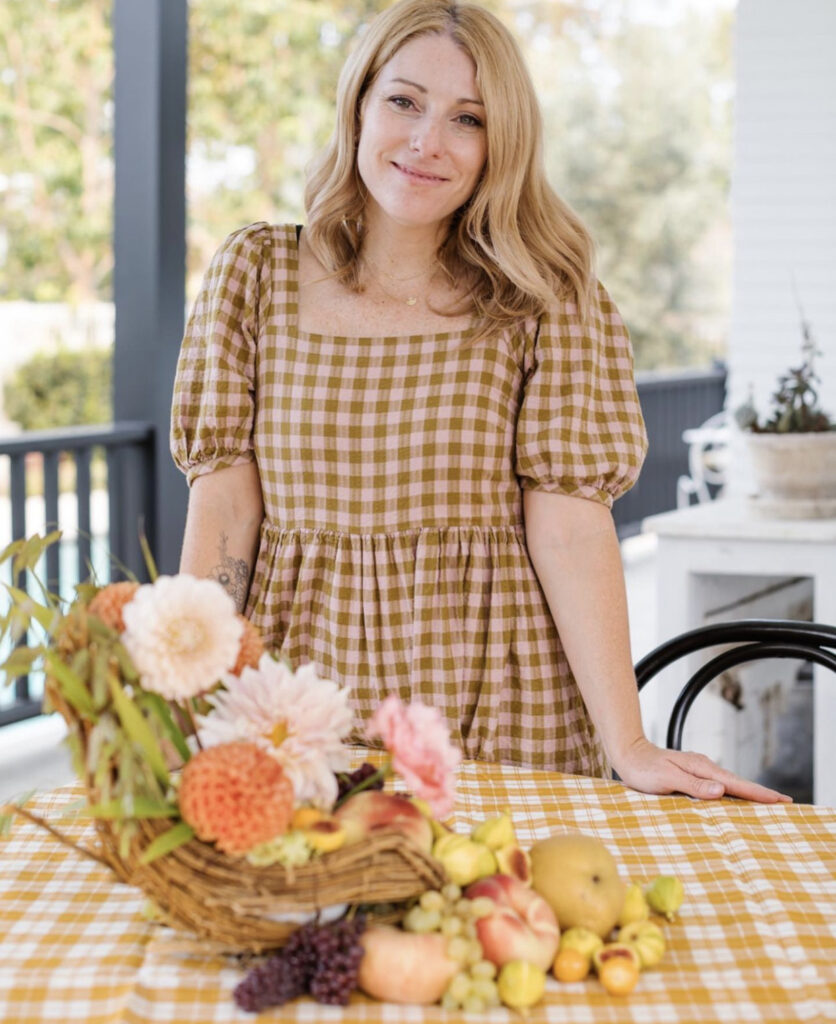
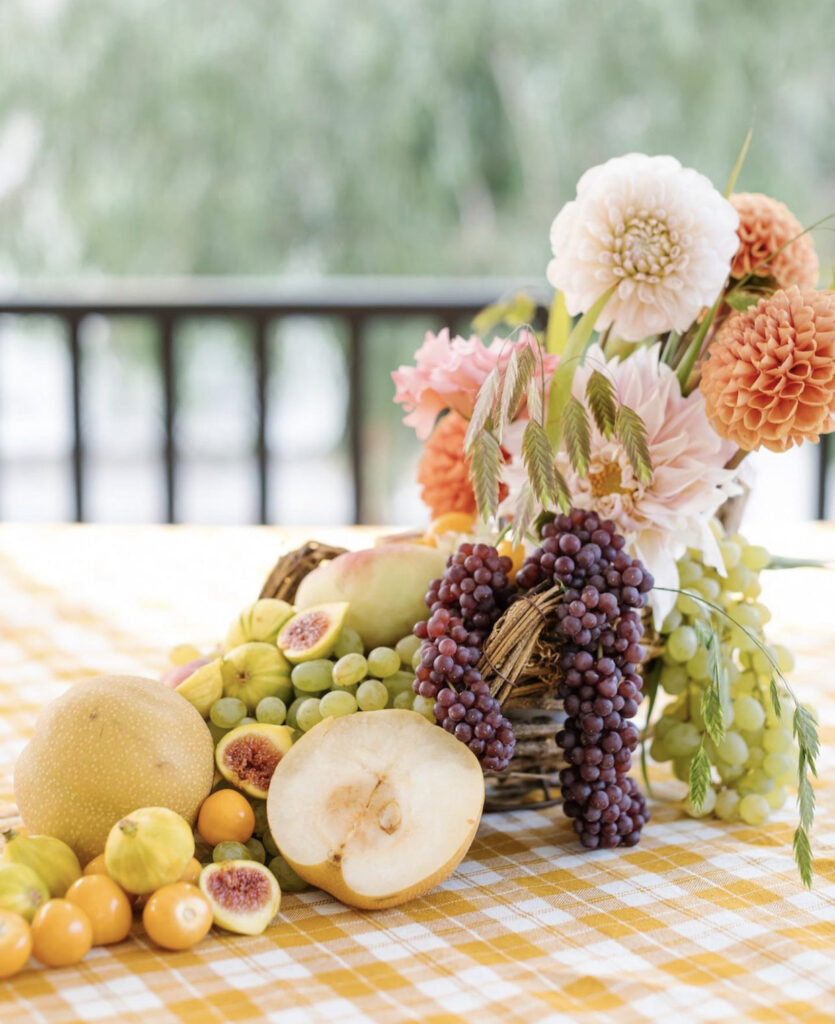
    #8 Thanksgiving Table Crafts: Flowers & Fruit Cornucopia

    I am personally so excited to share this Thanksgiving table decor idea from @.beijosevents? Reimagining the cornucopia with flowers and fruits is so fun and visually interesting, and you can use the basket for different arrangements for years to come. We love to see it!

    (Florist: @notjustinnovels. Photos by @alisonbernier.)

    #9 Thanksgiving Table Decor Ideas: Sophisticated Candle Centerpiece

    Thanksgiving Table Decor

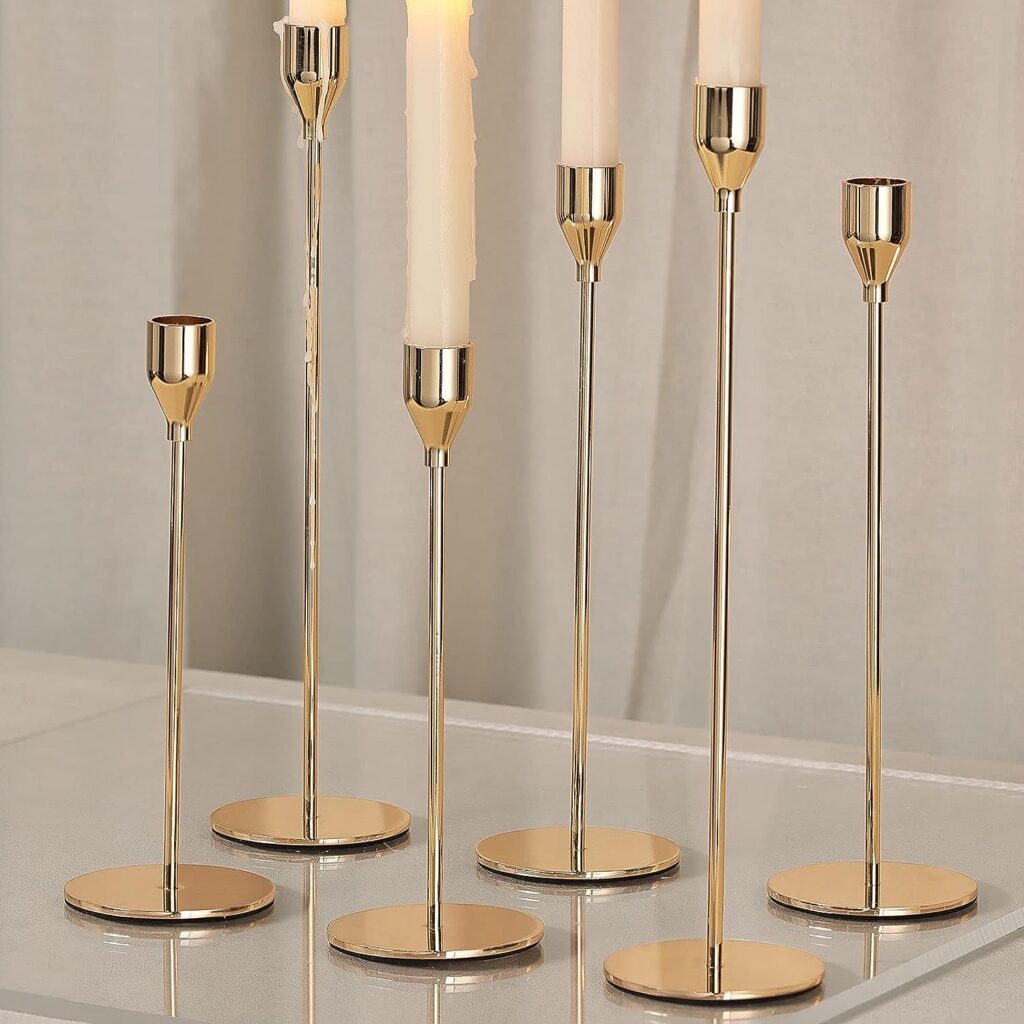
    When it comes to Thanksgiving table decor ideas, there’s a lot of cornucopias and food motifs. If that’s not your jam, a candlelit dinner can be a sophisticated and beautiful option. I love that this candlestick set from Amazon has candlesticks at different heights. Alternatively, you could source your candlestick holders from thrift shops and vintage stores!

    Get the Look:

    #10 Thanksgiving Table Crafts: Drink Tags

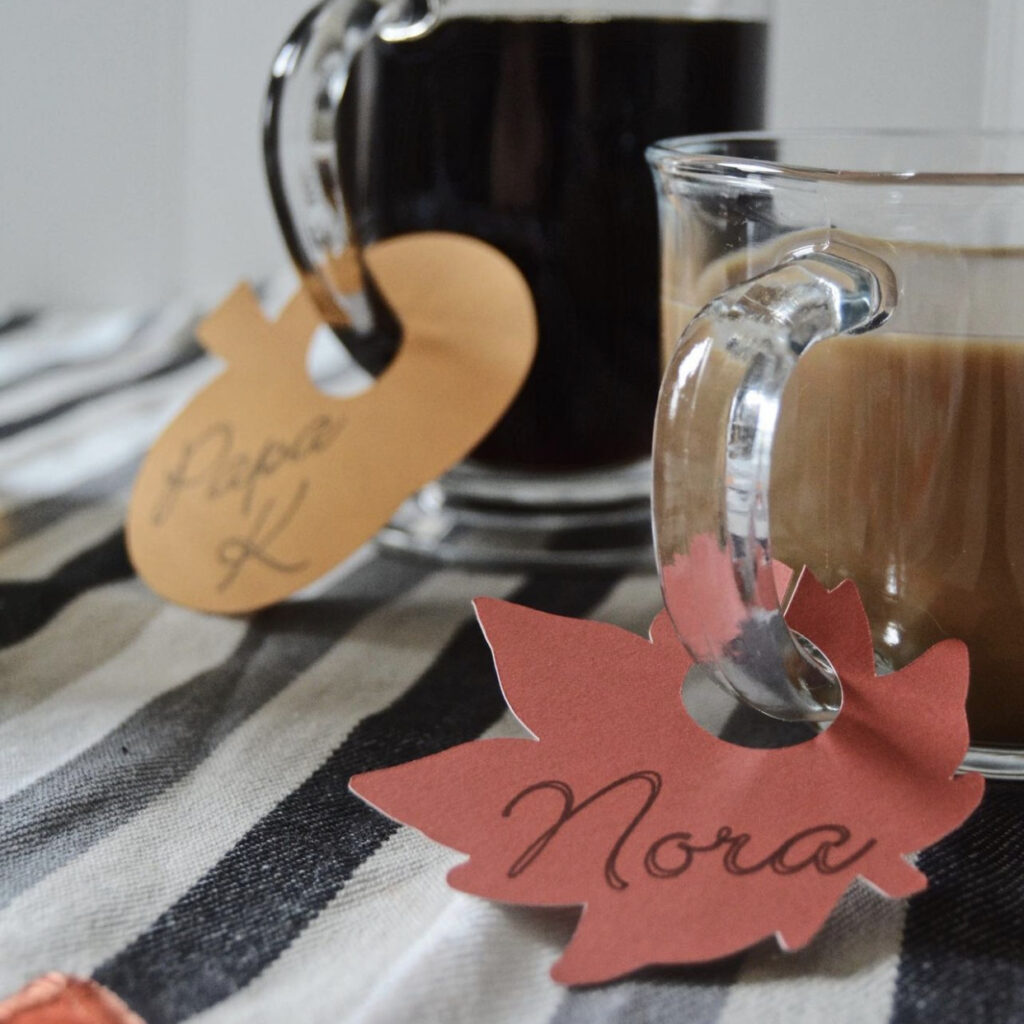
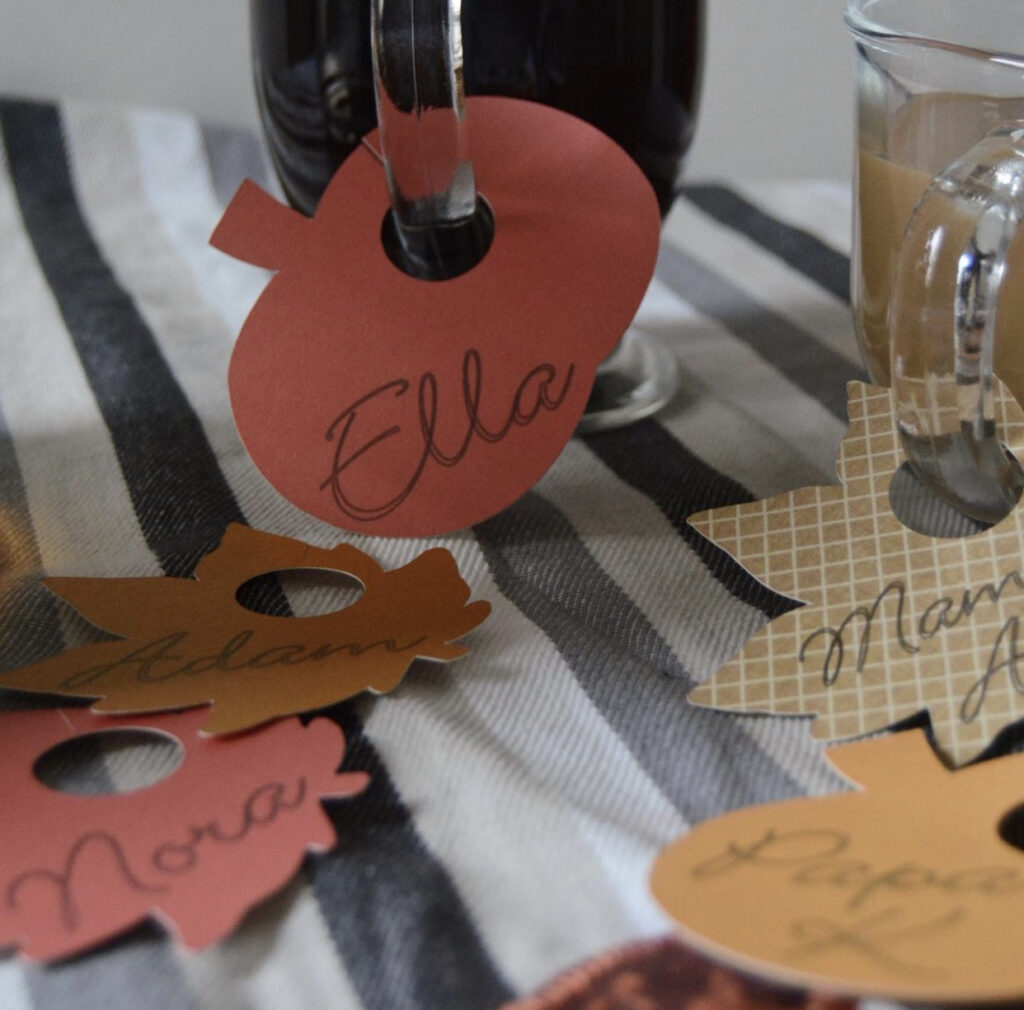
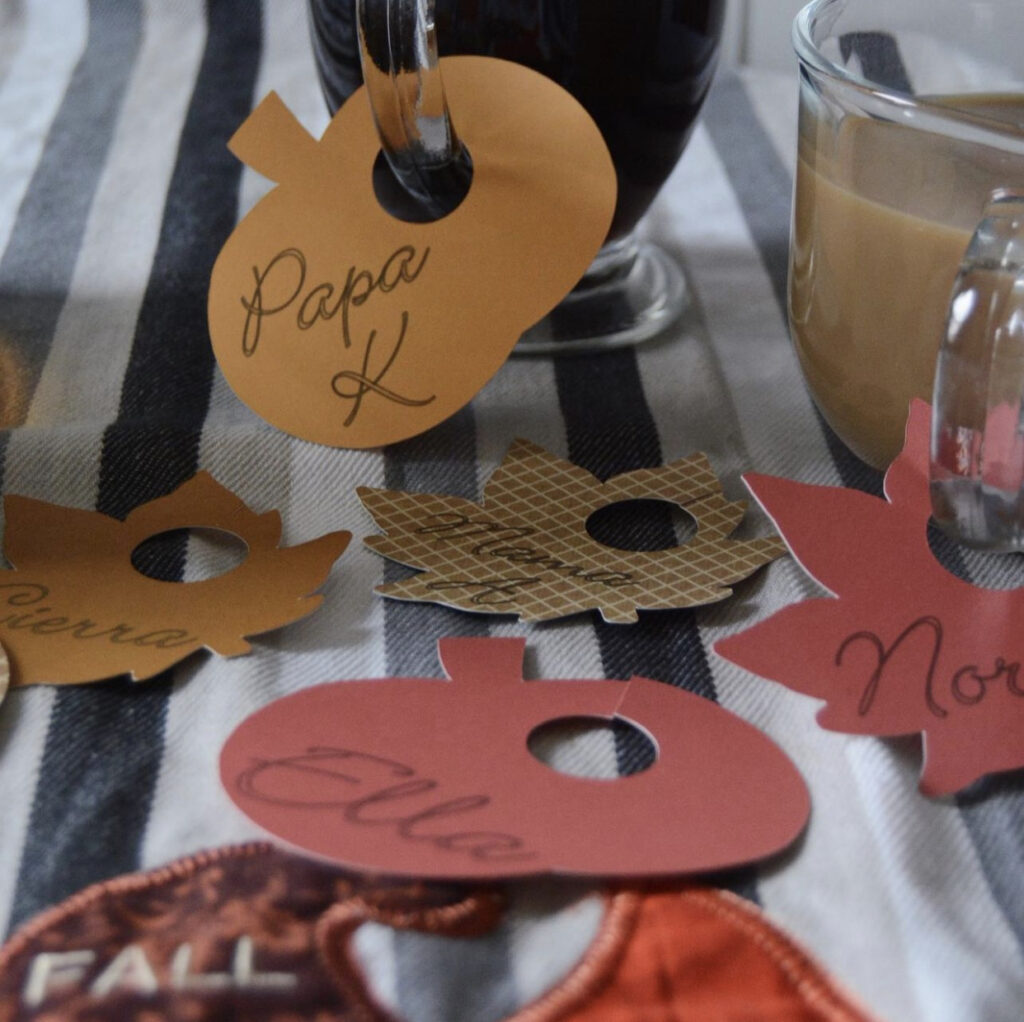
    How fun and useful are these drink tags from @.l.ahdesigns? I know my family has a tendency of going through a LOT of cups, so this is great.

    #11 Thanksgiving Table Settings: Green, Cream & White Table Settings

    I love the combination of the sage green and other greens with the white china and cute little white pumpkin! Thanksgiving table decor idea submitted by @.sarahjanedesignrva?

    Get the Look:

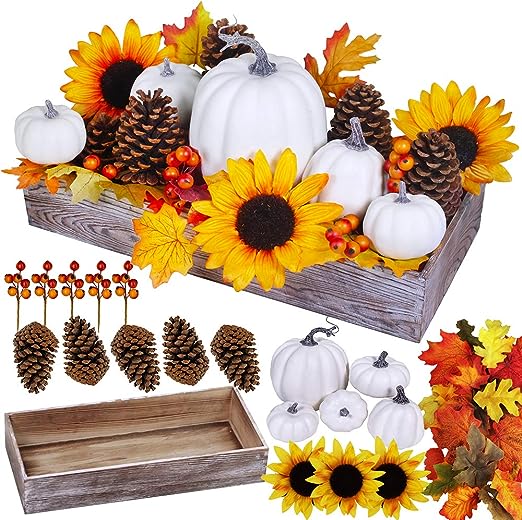
    #12 Thanksgiving Table Decor Ideas: Interchangeable Thanksgiving Centerpiece from Amazon

    Thanksgiving Table Decor

    I was really excited when I found this Thanksgiving centerpiece idea on Amazon, as I love that it comes as separate components! I think this will make it fun to put together each year (trying new designs), easier to store and resuse, and swap out specific pieces as needed (instead of having to throw out the entire piece, should there be an issue).

    Get the Look:

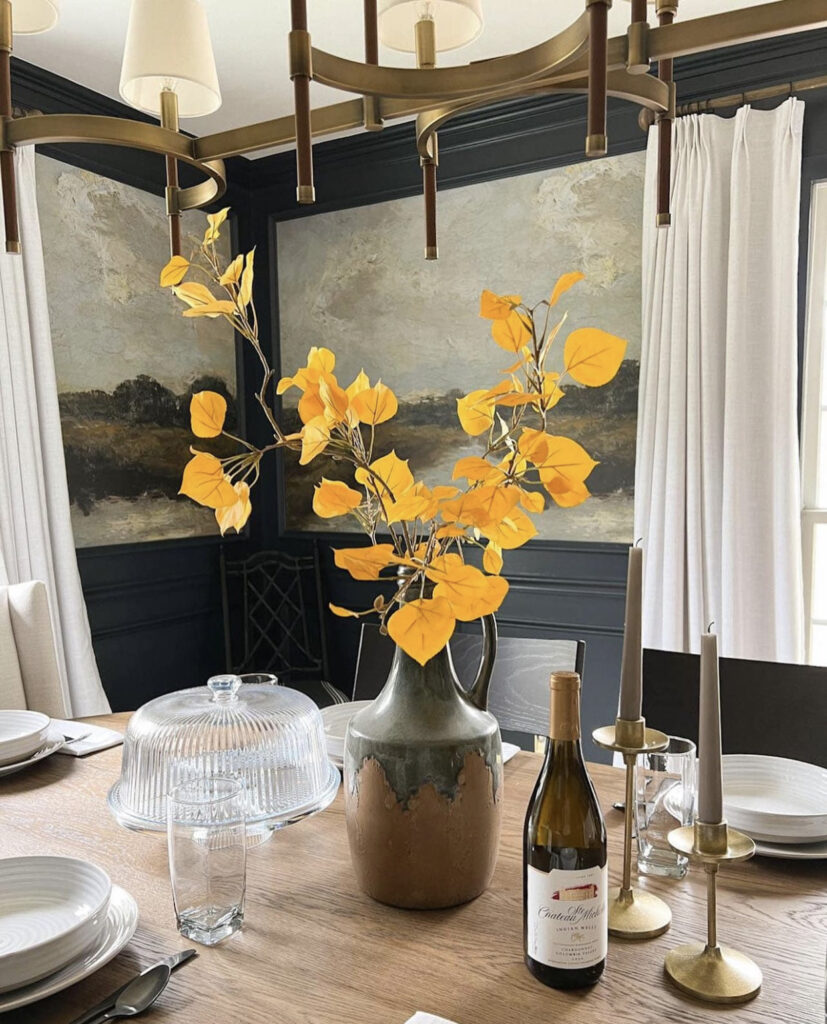
    #13 Thanksgiving Table Decor Ideas: Yellow Fall Decor Leaves

    Thanksgiving Table Decor

    I think that this Thanksgiving table decor idea from @.blesserhouse is beautiful in its simplicity. I love the matte metallic tones.

    Get the look:

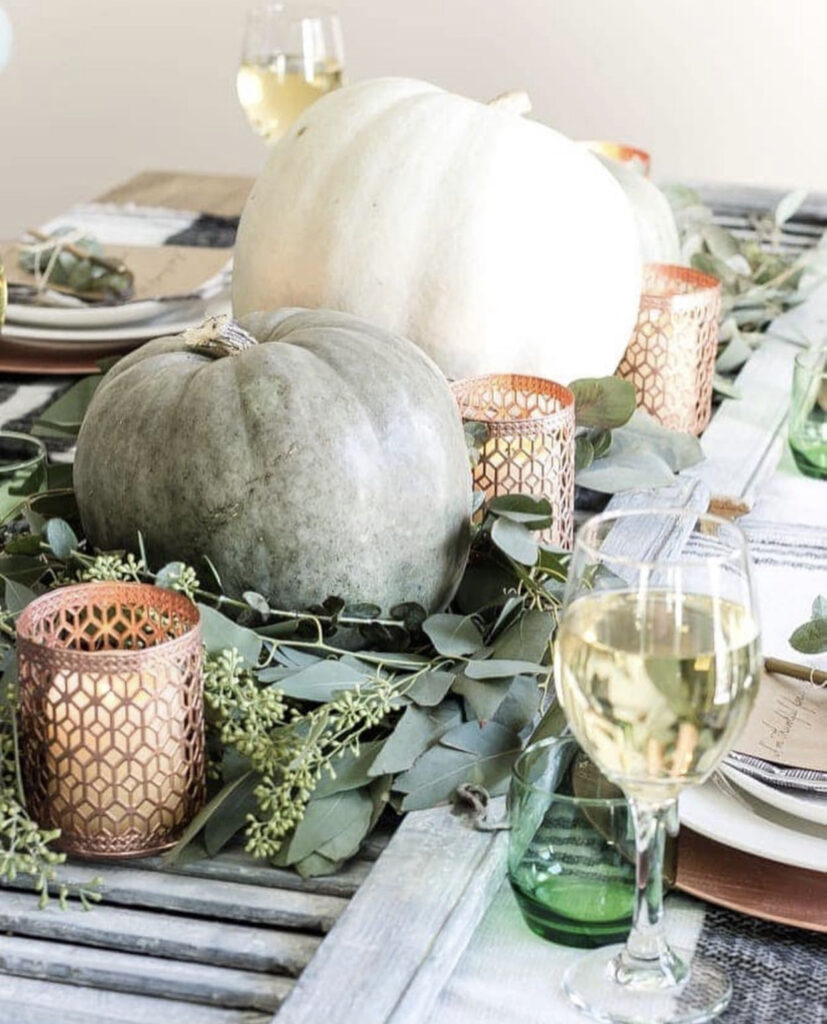
    #14 Thanksgiving Table Decor Ideas: White and Green Pumpkins with Eucalyptus

    Thanksgiving Table Decor

    This @.blesserhouse is gorgeous — it feels like spring but the candle holders bring it to fall.

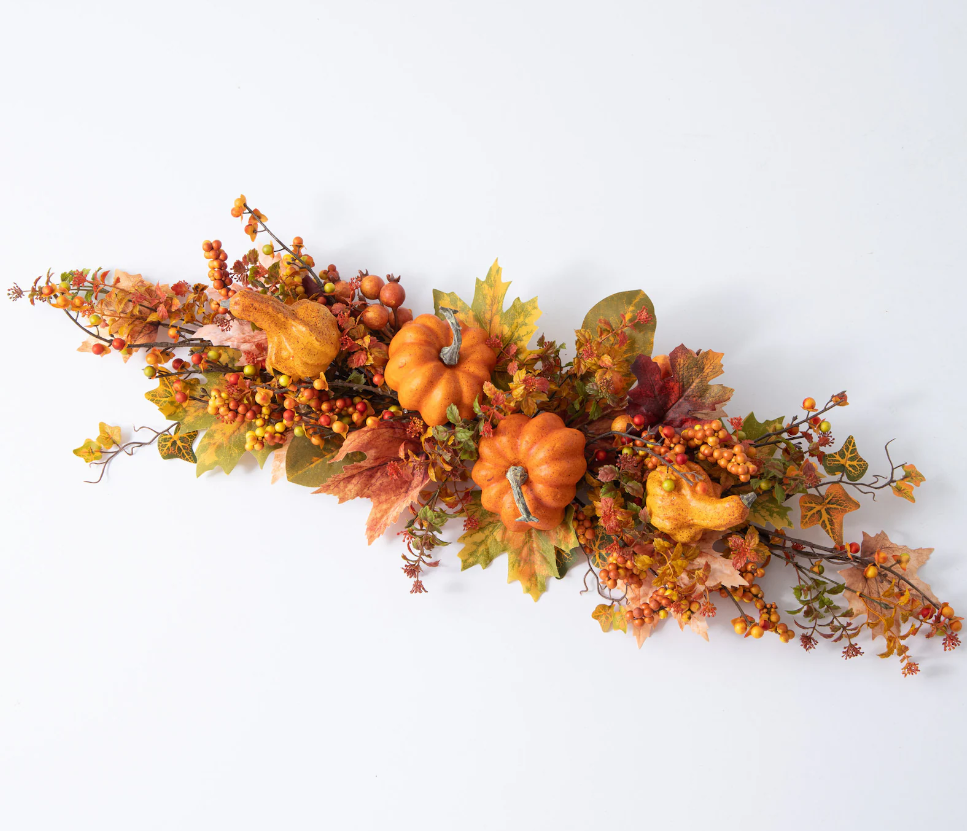
    #15 Thanksgiving Table Decor: Fall Berry, Pumpkin and Gourd Autumn Table Centerpiece

    Thanksgiving Table Decor

    This centerpiece is just so gorgeous, I had to include it! This would like beautiful on a long dining room table for Thanksgiving!

    Get the Look:

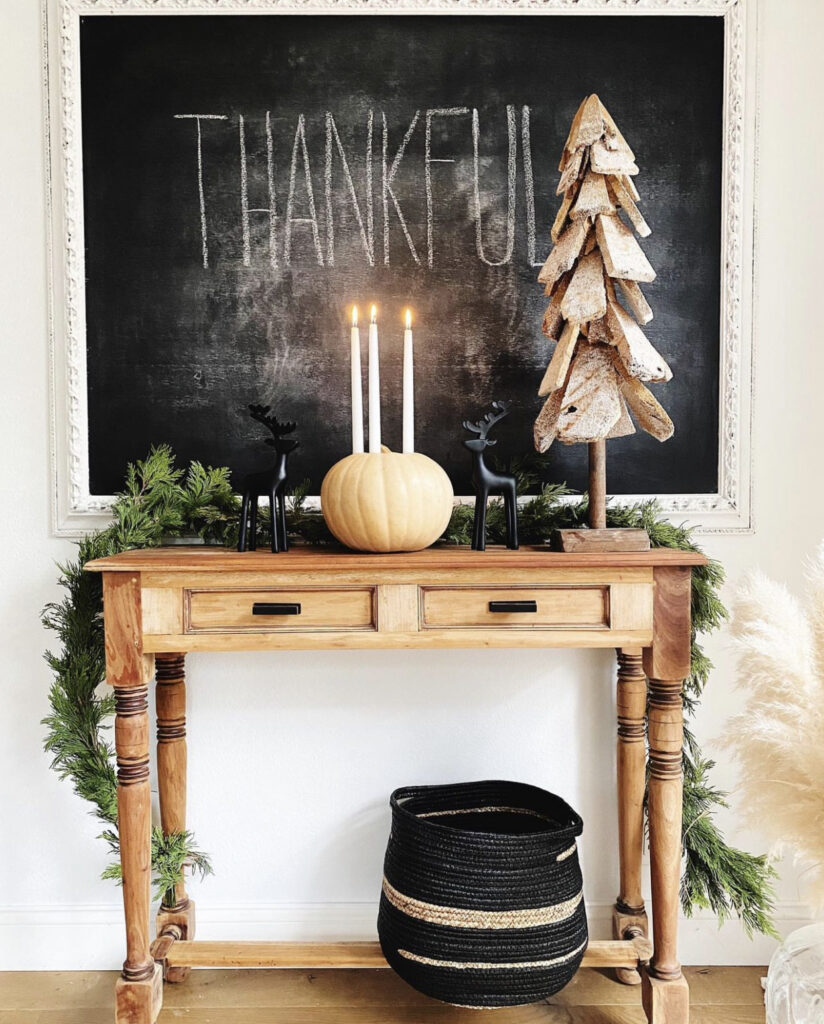
    #16 Thanksgiving Home Decor: Main Entryway

    Thanksgiving Table Decor

    One of the most sustainable decor ideas — a chalkboard! This is the perfect holiday entryway decor idea, submitted by @.always.finding!

    Get the Look:

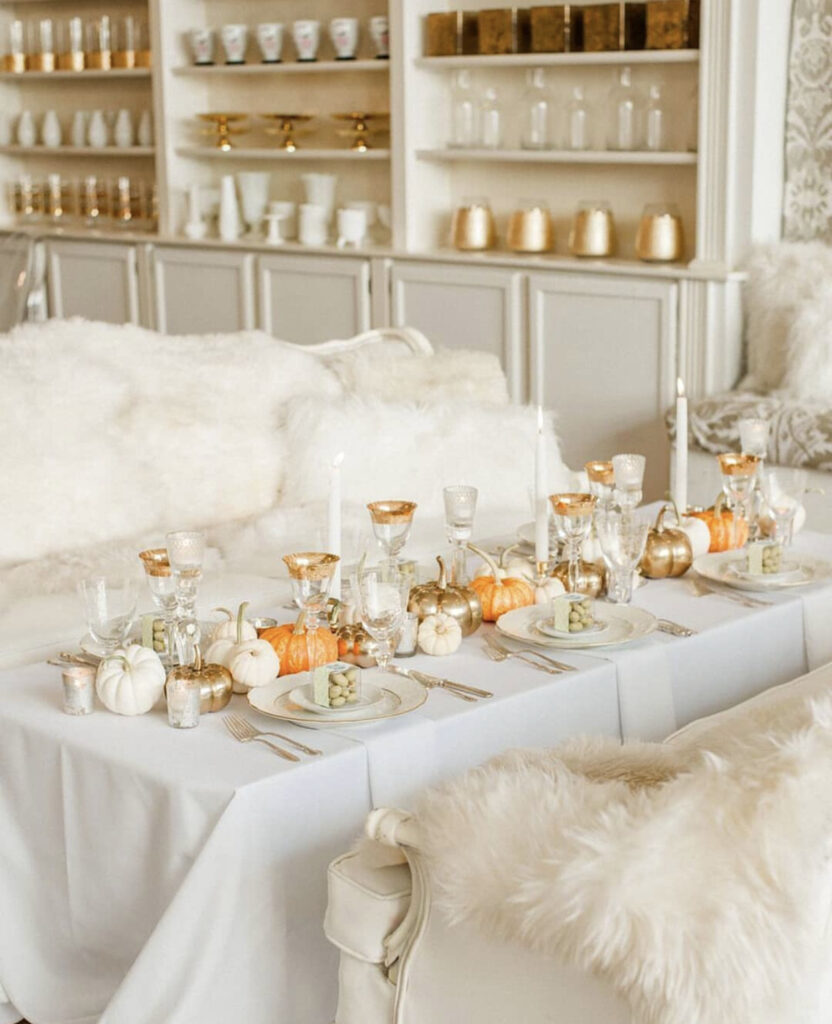
    #17 Thanksgiving Table Decor Ideas: Luxurious Faux Fur

    Thanksgiving Table Decor

    Are you looking for a very glam and opulent Thanksgiving setup? Then this idea from @.PartySlate is for you! I love the gold, white and orange pumpkins!

    Get the Look:

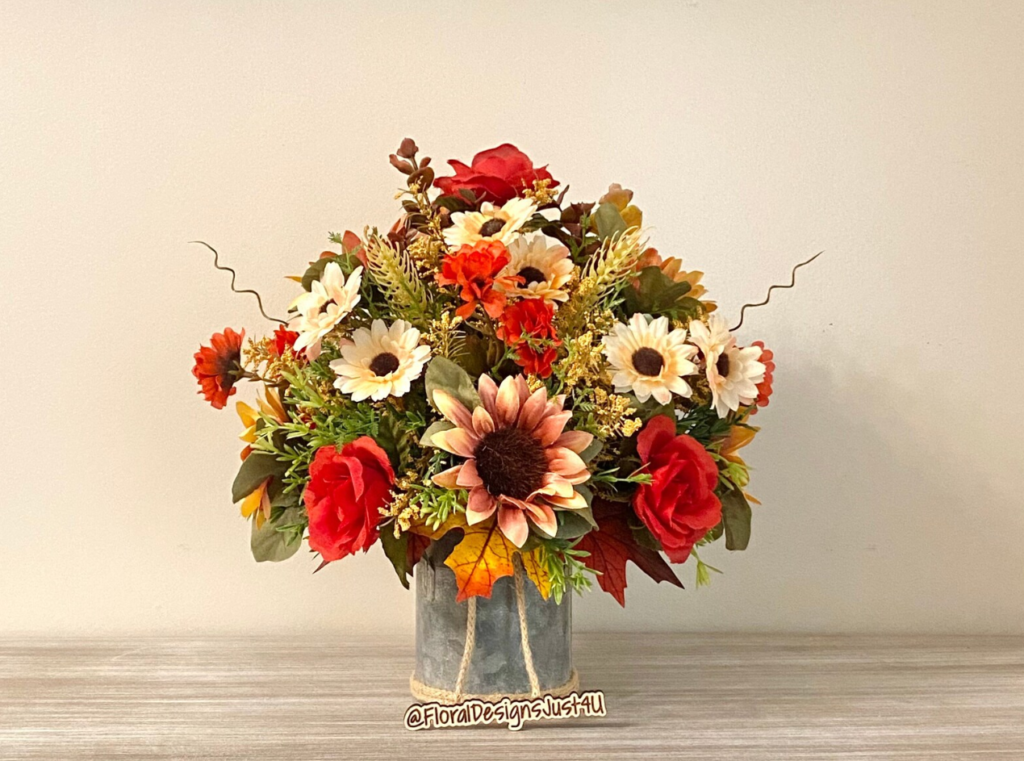
    #18 Thanksgiving Table Decor Ideas: Fall Rustic Floral Bouquet

    Thanksgiving Table Decor

    I love that this fall floral bouquet can serve as a centerpiece during Thanksgiving, as well as be a beautiful item in your home all season long!

    Get the Look:

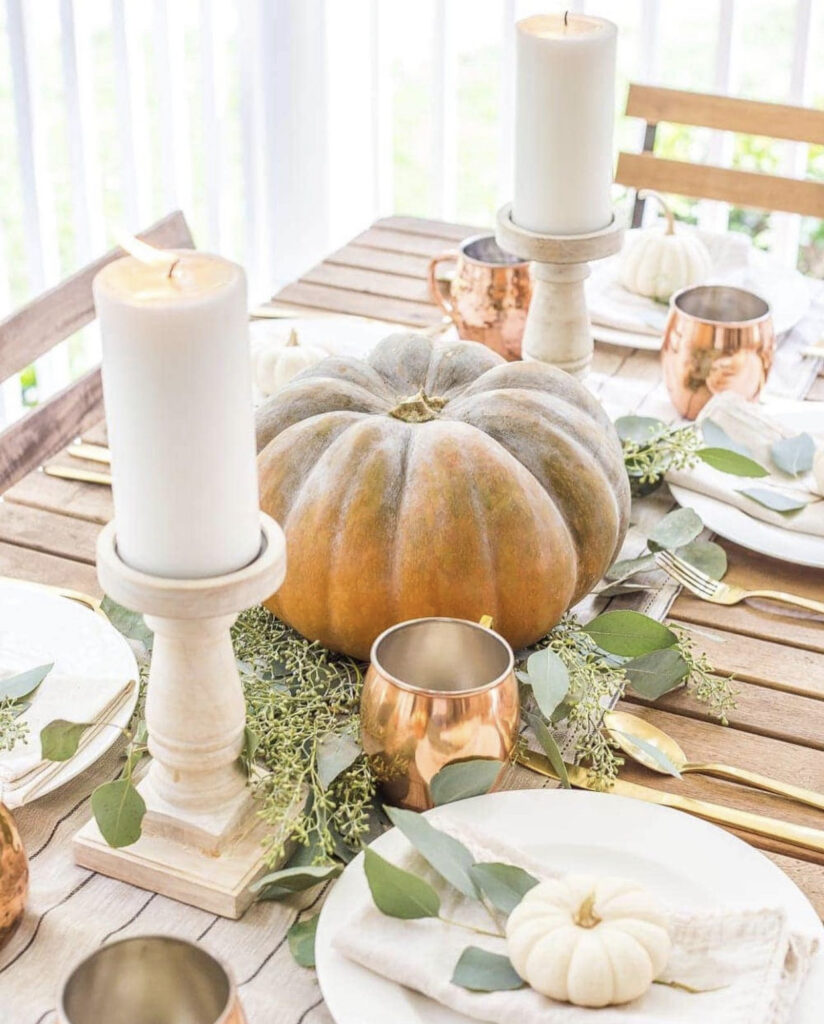
    #19 Thanksgiving Table Decor Ideas: White Candles, Pumpkin & Greenery

    Thanksgiving Table Decor

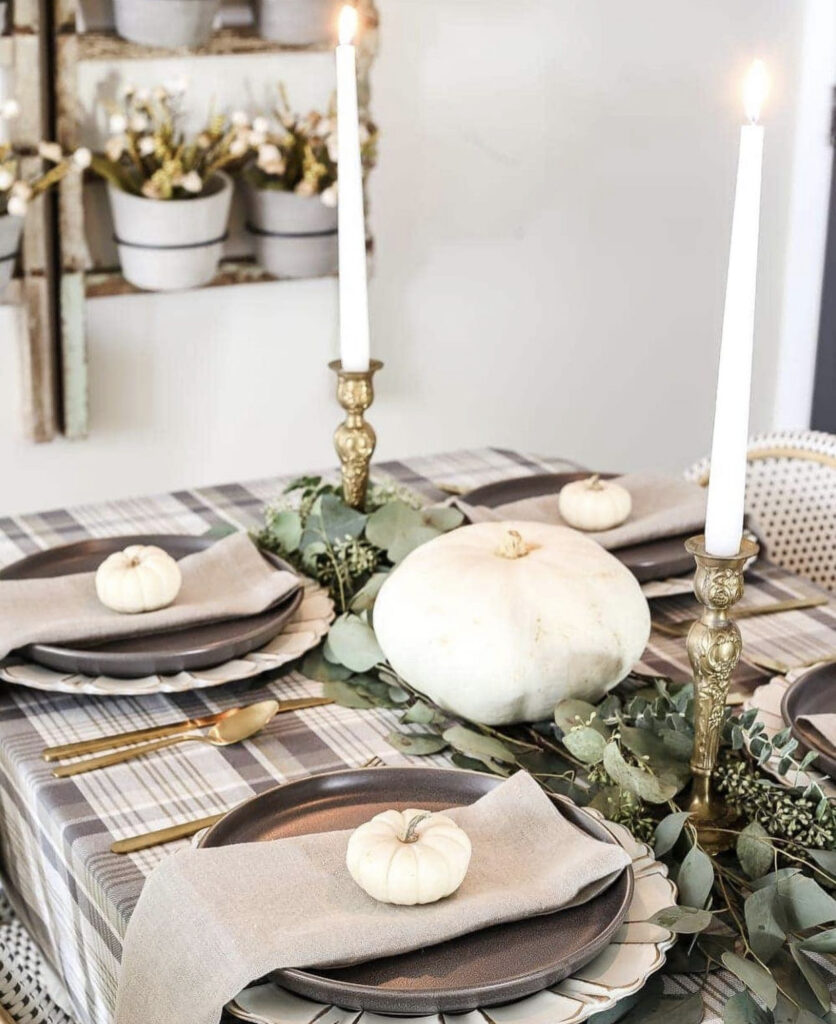
    If the dark colors of fall feel a bit too gloomy, then this Thanksgiving table decor idea from @.blesserhouse is IT.

    Get the Look:

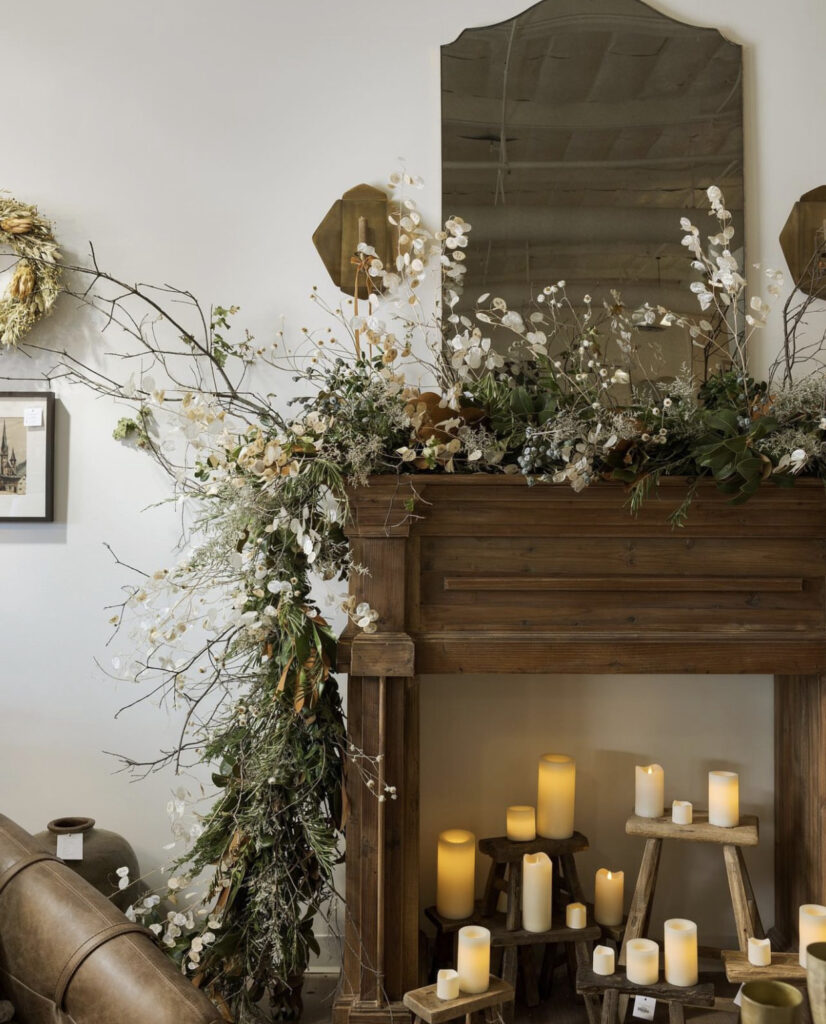
    #20 Thanksgiving Home Decor: Mantle in Dining Room

    Thanksgiving Table Decor

    We just had to include this Thanksgiving decor idea from @.designshopinteriors, as the mantle is just gorgeous! And I love the artfully arranged candles! (I’d do battery operated candles this close to the floor, I think!)

    Get the Look:

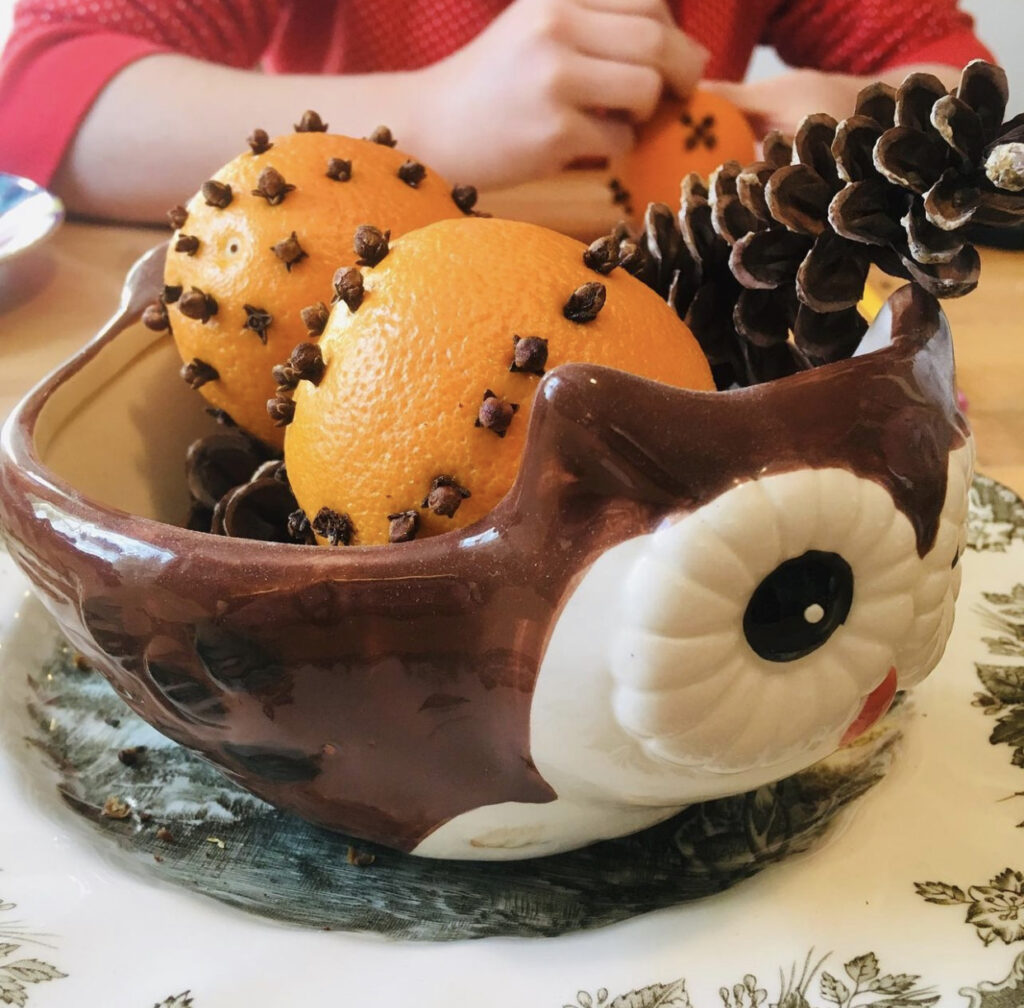
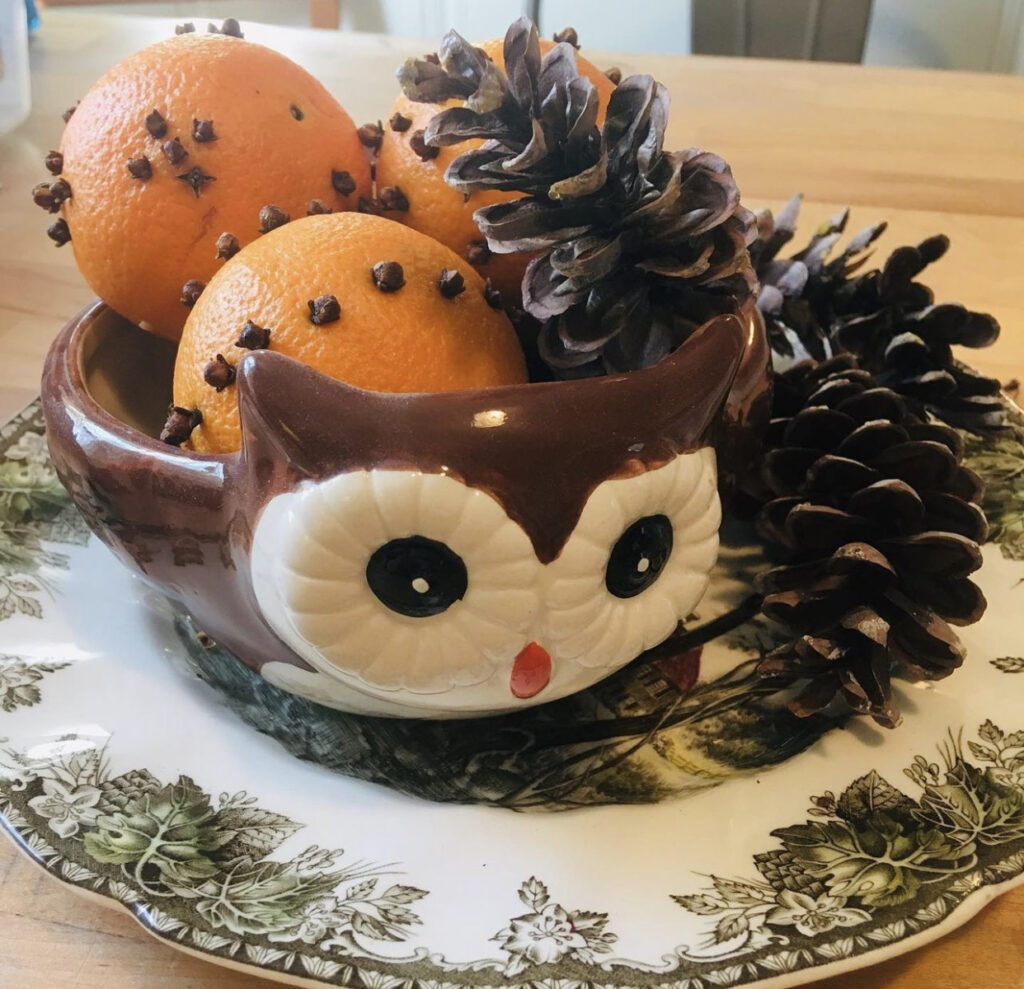
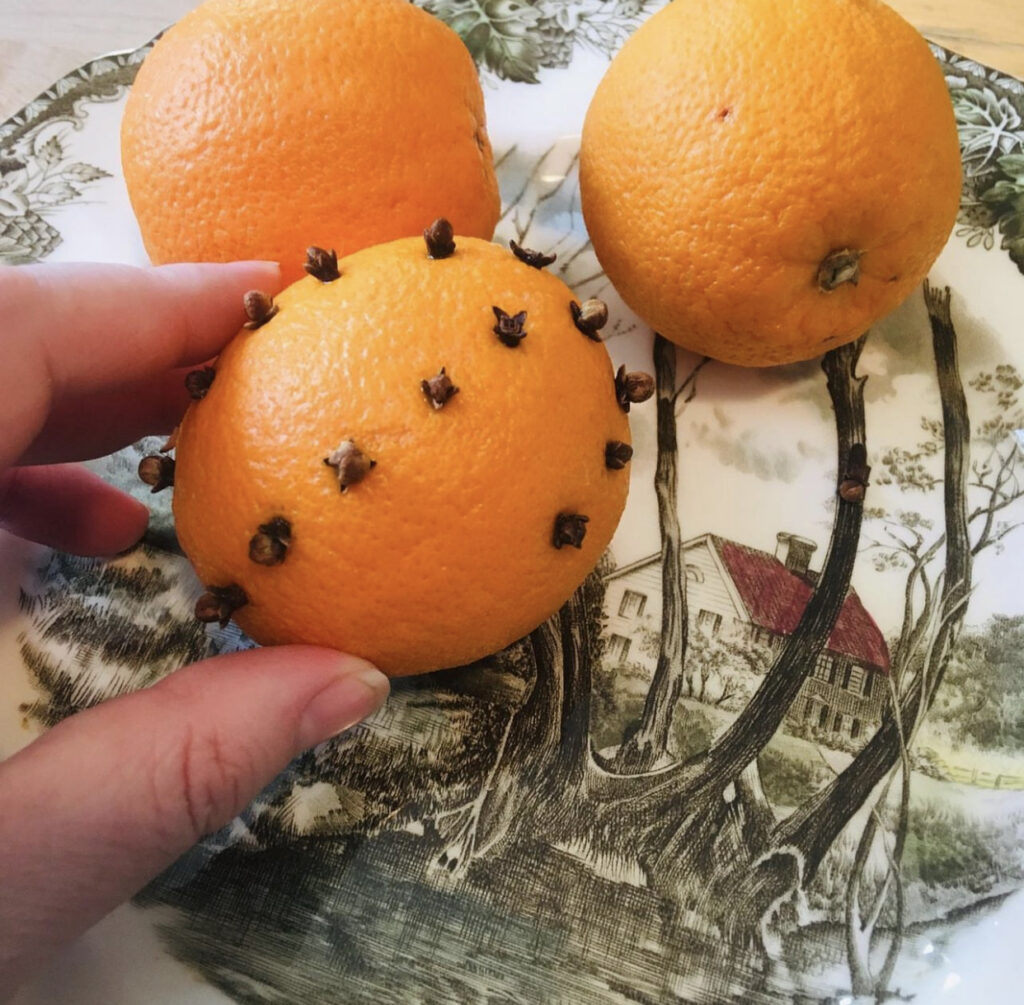
    #21 Thanksgiving Table Crafts: Orange Pomanders

    I love how @.saltboxjournalco took this holiday tradition of orange pomanders and incorporating them into a centerpiece.

    #22 Thanksgiving Table Decor Ideas: Gingko Leaves Centerpiece

    Thanksgiving Table Decor

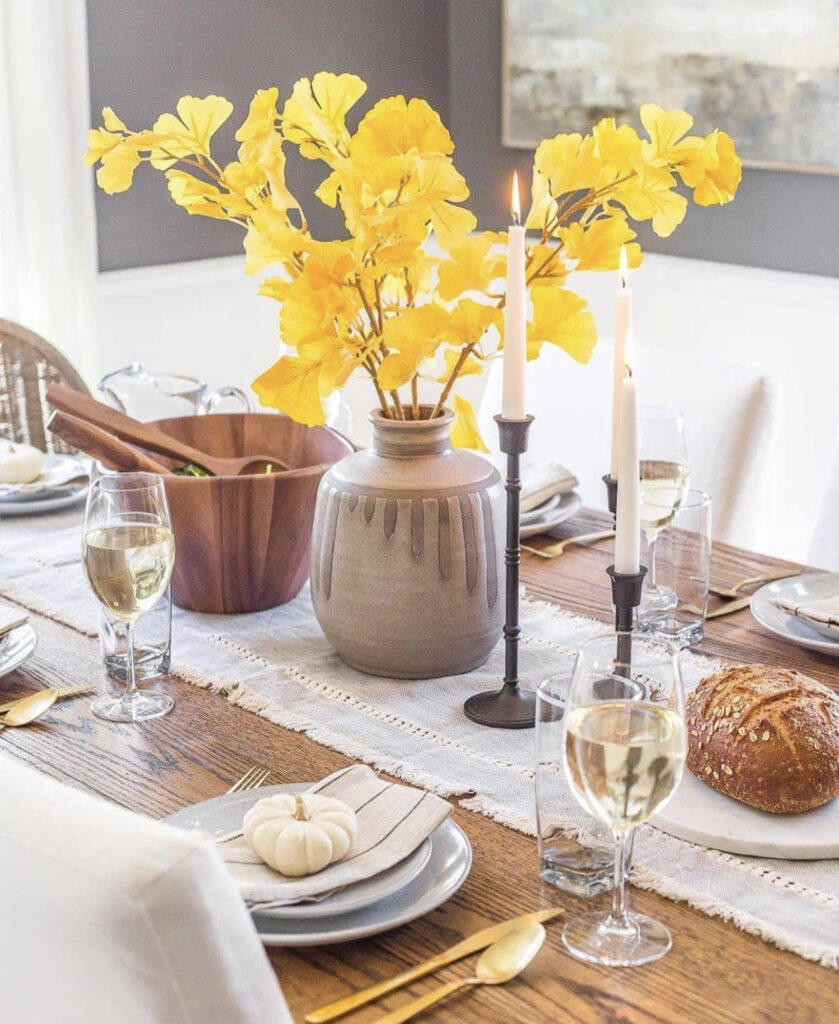
    The gingko leaves are gorgeous in this Thanksgiving table decor idea from @.blesserhouse! I love how the wine and gold cutlery carry that gorgeous fall yellow throughout the table settings.

    Get the Look:

    #23 White Thanksgiving Decor: White Pumpkins & Candlesticks

    Thanksgiving Table Decor

    How cute are these little pumpkins on the linen?! This idea was submitted by @.blesserhouse.

    Get the Look:

    #24 Thanksgiving Table Decor Ideas: Glam Thanksgiving Glass & White Theme

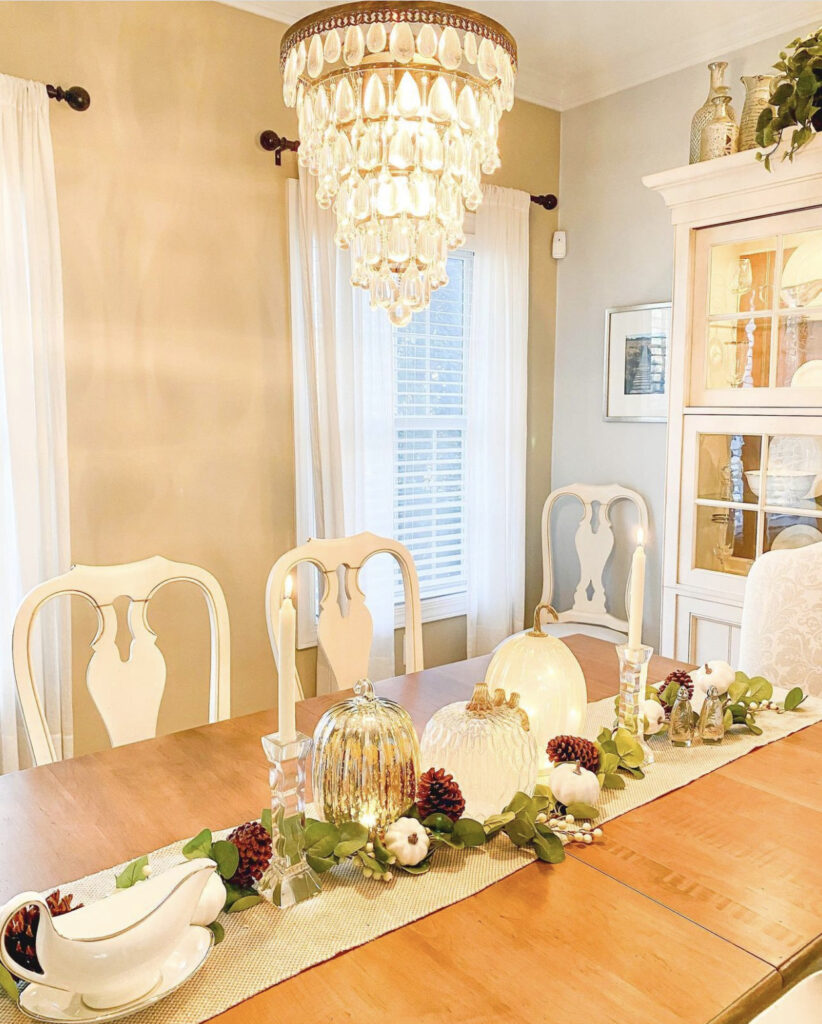
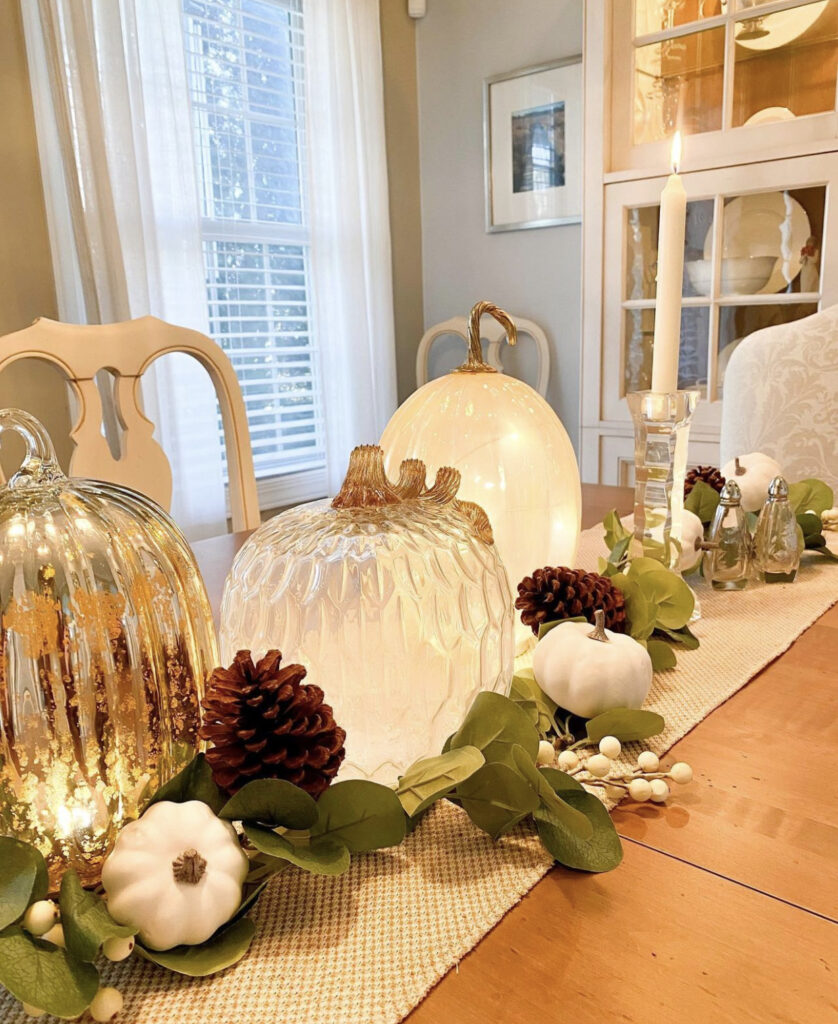
    This Thanksgiving table decor idea from @.homeinharwinton gives me glam Cinderella vibes! I love the glass pumpkins, and this aesthetic really fits the room its in!

    Get the Look:

    #25 Thanksgiving Table Decor Ideas: Outdoor Flannel Setting

    Thanksgiving Table Decor

    I could never eat Thanksgiving outside in the Northeast, but I love this cozy outdoor dinner idea with all of these cozy flannels from @.blesserhouse!

    Get the Look:

    #26 Thanksgiving Table Setting Idea: Cozy Pottery Kitchen

    Thanksgiving Table Decor

    This vignette is perfect for a smaller and more cozy Thanksgiving. Image submitted by @.blesserhouse?

    Get the Look:

    #27 Thanksgiving Table Decor Ideas: Cozy Holiday Vibes

    Thanksgiving Table Decor

    This next Thanksgiving Table Decor idea could also work for holidays in December! I love how versatile this idea is, and the napkin color keeps it in Thanksgiving! Image created and submitted by @.blesserhouse.

    Get the Look:

    #28 White Thanksgiving Decor: Rustic Modern Table Decor

    This next Thanksgiving table decor idea is giving me Joshua Tree vibes! Rustic and glam! This Thanksgiving table decor idea comes from @.KateHouserPeters!

    Get the Look:

    #29 Thanksgiving Table Decor Ideas: Glam Gold & Pears

    Thanksgiving Table Decor

    This Thanksgiving table decor setting and centerpiece feels glamorous and opulent, but not in a brash way! Very understated and gorgeous! Image created and submitted by @.blesserhouse.

    Get the Look:

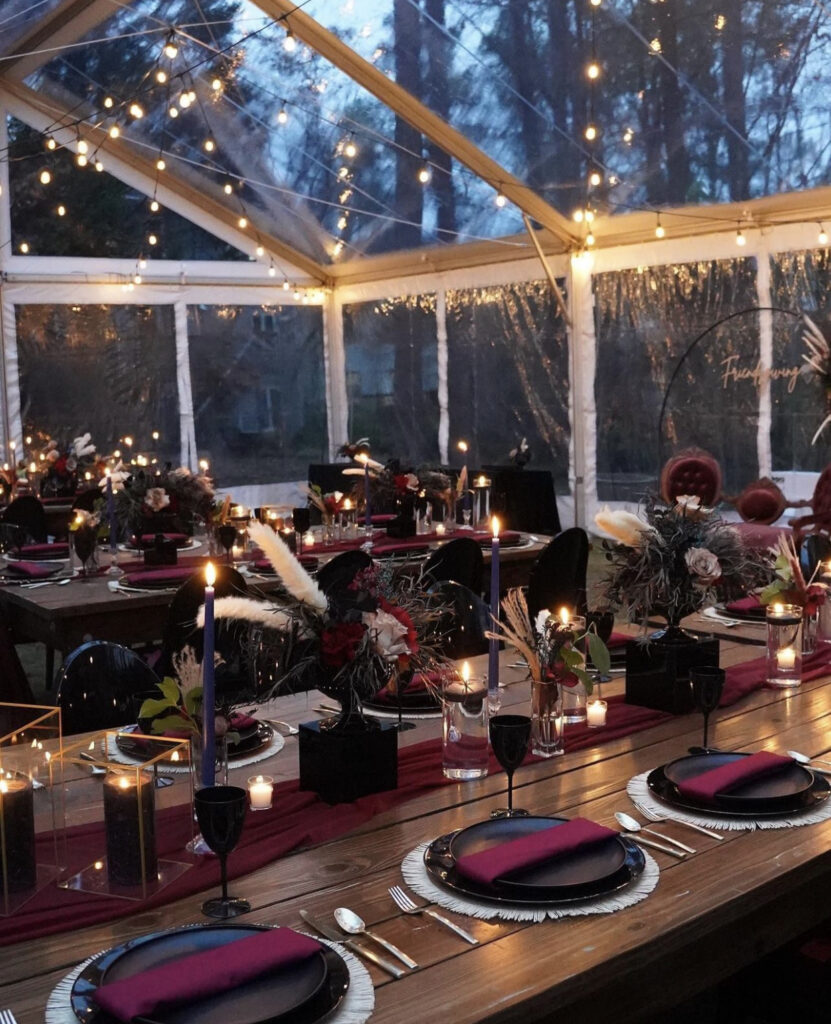
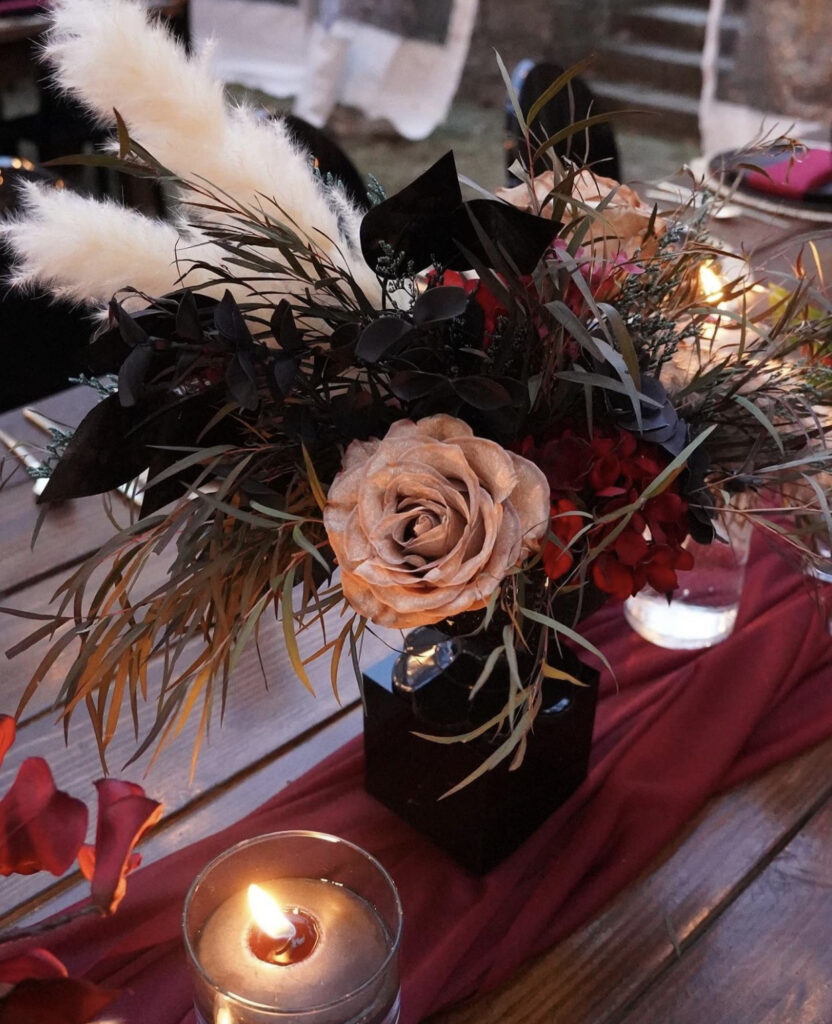
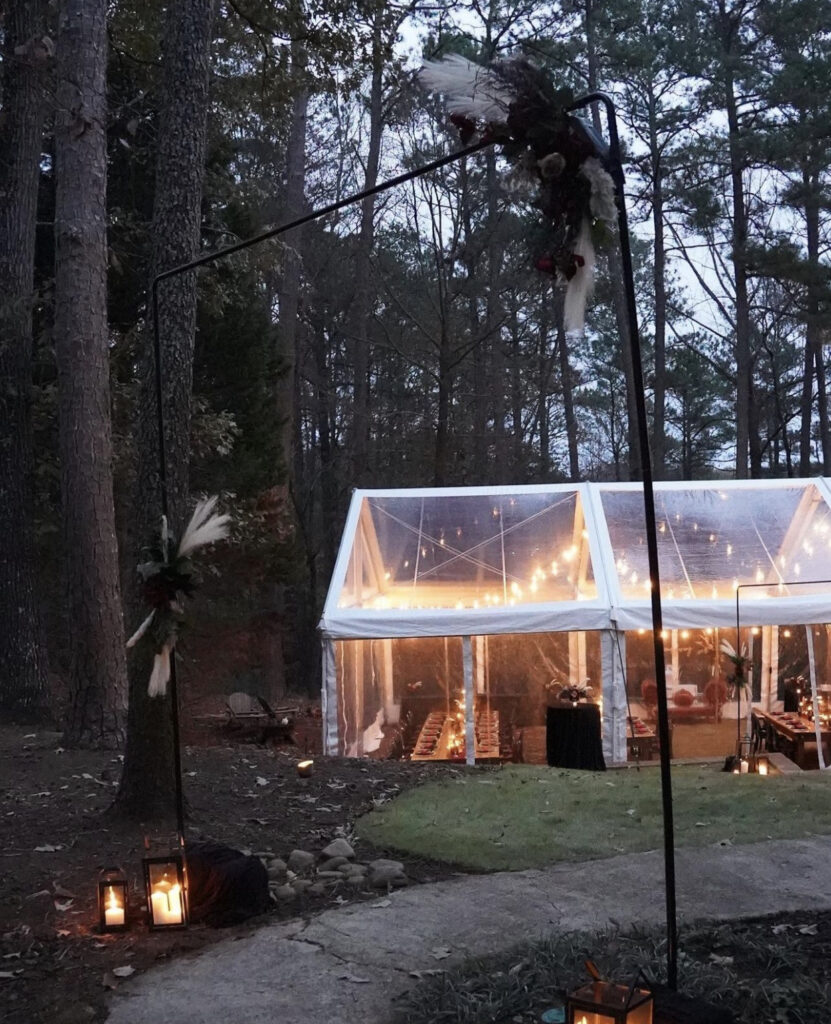
    #30 Thanksgiving Table Decor Ideas: Friendsgiving FTW

    I love how dark and moody this Friendsgiving setup is from @.events.that.sparkle! Truly just a gorgeous event all around!

    Get the Look:

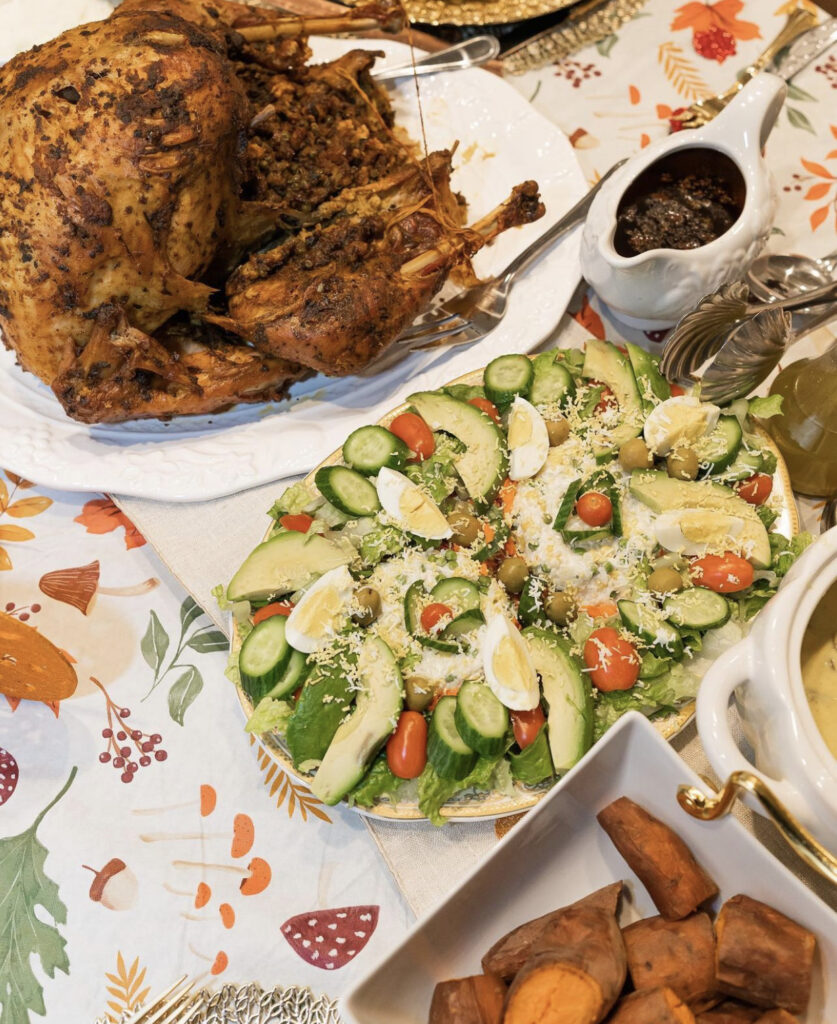
    #31 Thanksgiving Table Decor Ideas: White & Gold Dinnerware

    I want to reach through my screen and eat this gorgeous food! The Thanksgiving table setting and decor from the talented @.theclassypa is just gorgeous!

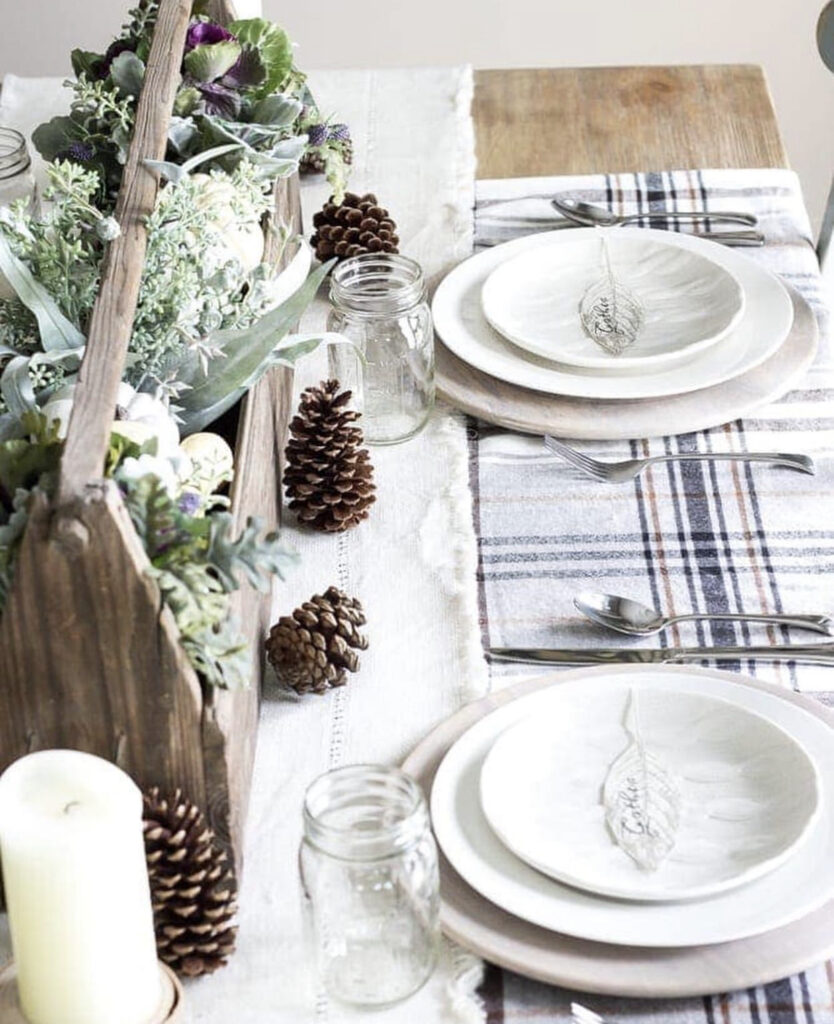
    #32 Thanksgiving Table Setting Ideas: Frosty Flannel & Pinecones

    Thanksgiving Table Decor

    Last, but never least, is this frosty and wintry Thanksgiving table decor idea from @.blesserhouse. The cozy flannel and leaf name card keeps it in Thanksgiving, but this could also work for a December dinner!

    Get the Look:

    This blog post was all about Thanksgiving table decor ideas.


    What to Read Next!

    Did you enjoy going through all of these Thanksgiving table decor ideas? I’m so glad! Below, I’ve shared a few of my other holiday-themed posts, I think you’ll love!

    How to Start a No Till Garden | Beginner’s Guide

    Starting a no till garden is easier than you might think if you follow this simple guide. After gathering your materials, this project can easily be knocked out in an afternoon.

    No till gardening (AKA no dig gardening) has become all the rage in gardening circles recently, and for good reason!

    No dig gardening is a far cry from the gardening practices I grew up with. I remember my dad “turning over the garden” over the course of a weekend every spring to prepare the garden for the growing season. He was pretty grumpy by the end of it!

    The theory behind “turning over the garden” or tilling is that it aerates the garden and the increased oxygen enhances beneficial microbes in the soil.

    We now know that this enhanced microbial activity is only temporary, and depletes soil over time. Plus, as my dad can testify, tilling is a hassle.

    I am proud to say that I’ve been practicing no till gardening for almost 10 years now, and I’m so excited to share my step-by-step process for starting a no till garden today on the blog!

    Hi, I’m Leslie!

    Hi, I’m Leslie (she/her)! I hope you find the inspiration to start your own no till garden on the blog today!

    My name is Leslie, and I’m the founder of PunkMed! On my blog, I and my team share my info, experiences, and recommendations in the area of sustainability, urban homesteading, and gardening. Our goal is to make it less overwhelming for you to live a fun and sustainable life!

    In today’s post, I’m sharing my steps to starting a no dig garden. These ideas come from my years of experience no till gardening in Boston, MA!

    Let’s get into it!

    This post is all about starting a no till garden.

    What Is a No Till Garden?

    A no till garden is one where the soil is minimally disturbed (i.e., not tilled) in an effort to maintain (and even boost) the health of the soil. This means the garden is not tilled, dug up, or turned over.

    Instead, the soil is fortified from the top down via compost and other mulches (straw, wood chips, etc.)

    A no dig garden takes cues from mother nature. The soft soil of the forest floor is fed from above by the decaying natural compost of the falling leaves year after year with no intervention. Like the forest floor, the no till garden is fed from above by a yearly dressing of compost, and not much more work on our end.

    Why Practice No Till Gardening?

    No till gardening is simply the easiest method.

    First, with no dig gardening, you eliminate the back-breaking work of tilling the garden every spring. Instead, plants are fed from the top-town via a yearly dressing of compost and/or other mulch options.

    Second, weeds are naturally suppressed in a no till garden.

    Traditional tilling aerates the soil so that the temporary boost of oxygen not only increases the microbial life, but also activates the dormant seeds that may be present. The weeds that sprout from these seeds often grow very well right after a till.

    By following the steps below, you will initially suppress weeds with a layer of paper that kills the weeds below. From there, your yearly dressing of mulch should suppress most weeds, keeping the weeding necessary to a minimum.

    How to Start a No Till Garden

    Step #1 Pick a Location

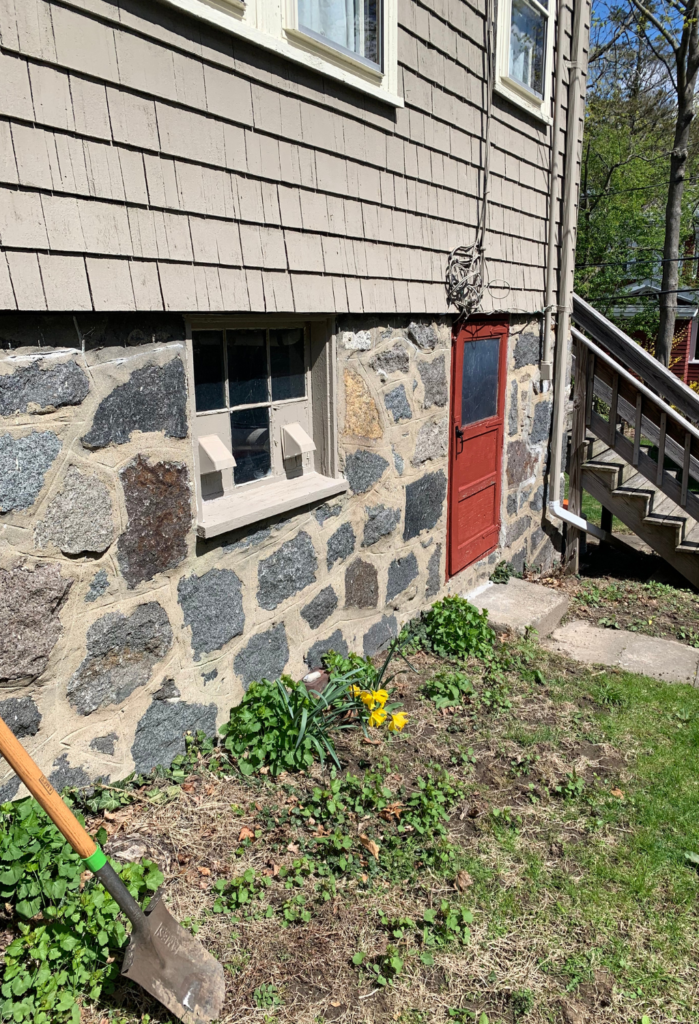
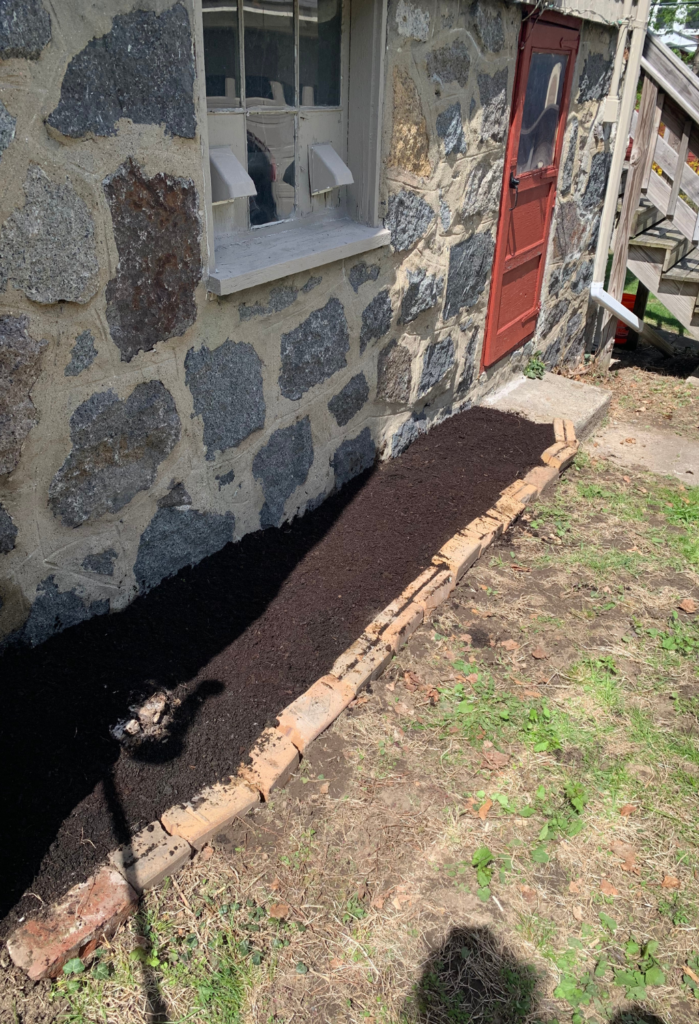
    I chose this southwest facing side of my house for a new, no till flower bed. I need to mow down these weeds first! (And move the daffodils.)

    First, you’ll need to pick a spot for your new no till garden. The ideal location will be dependent upon what you are growing (whether that be vegetables, flowers, trees, shrubs or vines) and how much sun each plant requires. The general rule of thumb is that vegetable gardens need need full sun, which is around 6 to 8 hours a day.

    Don’t worry about any existing vegetation in your selected location. In the coming steps, we will stamp or mow this down! A no till garden can be placed almost anywhere, including a meadow, lawn, or weedy area.


    Step #2 Fertilize

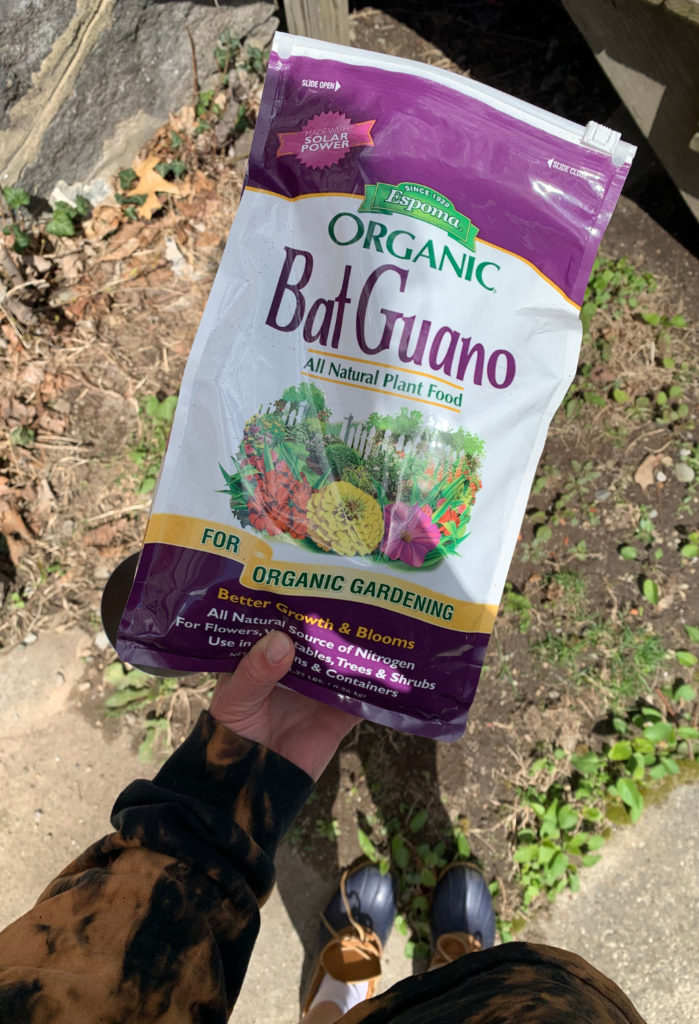
    I chose bat guano for my fertilizer. This bat guano is 10% nitrogen, so I spread 3 cups for every 100 square feet of my new no till garden.

    Next, fertilize the selected area for your no till garden.

    There are many types of fertilizers. Any complete fertilizer that contains nitrogen, phosphorus, and potassium (often called “NPK”) will work.

    Check the NPK values on your chosen fertilizer, often prominently displayed as three digits on the front of the packaging. For example, a 4-4-4 fertilizer contains 4% nitrogen, 4% phosphorus, and 4% potassium.

    Fertilize the area using the following formula: for every 100 square feet of planted area, spread 6 cups of any fertilizer that contains 5 percent nitrogen. Adjust the formula for your fertilizer’s specific nitrogen value.


    Step #3 Cut, Mow or Stamp Down Vegetation

    Next, you will need to create level ground for planting your new no dig garden.

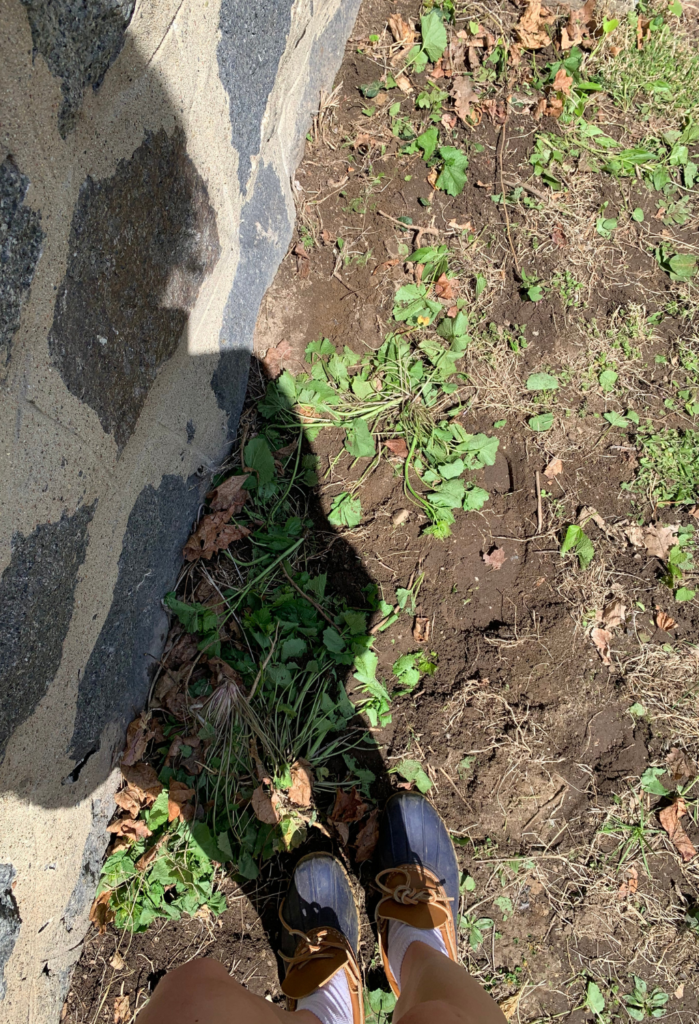
    Cut, mow, or simply stomp down any existing vegetation to make an even surface as close to the earth as possible.

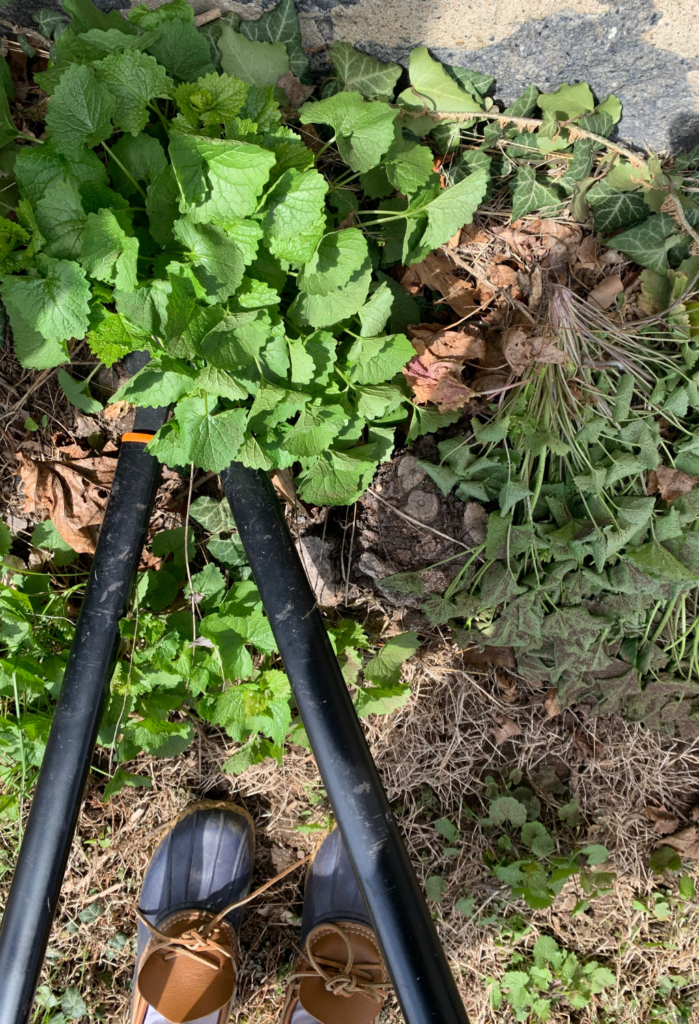
    Often a variety of methods works best. I cut down larger weeds and vines with a heavy branch cutter, stomp down the remaining plants, and mow for a closer shave. A power mow is not necessary, but the clippings do jumpstart the decomposition process.


    Step #4 Lay Down Paper

    I placed a layer newspaper down (4 sheets thick) to kill the weeds underneath.

    So far, you have cut down the existing vegetation in your chosen location, but you have not killed it. The roots remain alive and ready to put out new shoots and leaves.

    To prevent this and fully kill the existing weeds, place a layer of paper down over your new garden plot. This will starve the roots of necessary sunlight, and they’ll die within a few days.

    Newspaper works well for this task, if you happen to have any laying around. (If not, ask your neighbors, or visit a local recycling center!) Four layers of newspaper should do the trick, and make sure the sheets are overlapping so weeds underneath are completely smothered.

    If you can’t find any newspaper, you can use a single layer of landscape barrier paper.

    If you are transplanting established plants, cut X’s in the newpaper layer with a knife, shovel, or other sharp tool. This is where you will place the transplants later, tucking their roots underneath the newspaper.

    Finally, grab your hose and wet the newspaper layer to weigh it down and kickstart the decomposition process.


    Step #5 Add Compost or Other Mulch Layer

    Next, depending on what you are planting in your new no dig garden, you will need to add a compost or other mulch layer.

    Mulch is a general term that refers to materials that act as ground cover to protect your plants’ roots from the elements. There are many mulch options, including:

    • Compost
    • Wood chips
    • Straw
    • Leaves
    • Grass clippings
    • Sawdust
    • Seaweed

    The mulch layer serves multiple purposes. First, the mulch layer will weigh your layer of paper down so it doesn’t get blown away by the wind.

    No Dig Garden Compost

    Importantly, if you are planting seeds or small transplants you will need a layer of compost to act as your growing medium. You’ll need a layer of compost thick enough to plant in (about 3″ deep).

    Additionally, compost is an extremely nutrient-dense medium that will feed your plants through the growing season.

    Coast of Maine Quoddy Blend (1 cu ft) Organic and Natural Compost Blend with Lobster and Crab - Improves and Revitilizes Soil

    I always use my favorite Coast of Maine Compost.

    Trees, shrubs, and established plants do well with an additional layer of a heartier mulch. One of my favorite mulches is straw.


    Step #6 Plant

    I’m starting flowers from seed in this no till garden bed!

    If you’re planting seeds, bury your seeds into the compost layer at the depth specified on the seed packet.

    If you’re transplanting establish plants, tuck the roots underneath the newspaper layer through the X-shaped holes you made in Step #4. Mulch as necessary.

    Water, and enjoy your new no till garden!

    This post was all about starting a no till garden.


    What to Read Next:

    10 Eco Friendly Halloween Decor Ideas | Spooky and Cute!

    halloween decorations

    Looking for eco friendly Halloween decor ideas? Get inspired by these spooky setups that aren’t so scary for the planet.

    Want to know a truly scary statistic? According to Lisa Morton (author of Trick or Treat) in her interview with Marketplace, the average trick-or-treater will generate a pound of waste on Halloween night.

    This doesn’t even consider the plastic Halloween decorations and single-use party supplies that inevitably end up in a landfill!

    I love decorating for Halloween as much as the next girl, but I knew there had to be a better way to celebrate for the spookiest of holidays.

    That’s why I searched the internet high and low for the best eco friendly Halloween decor inspiration. I’m sharing those Halloween decor ideas I got from my friends with you today on the blog!

    Top Tips for Eco Friendly Halloween Decorations

    As you go through these sustainable Halloween decoration ideas, there are a few tips I’d like to share up front to help you when planning your own decorating:

    1. Shop vintage and thrift. As you’ll see in the inspiration images from my internet friends below, there are probably plenty of Halloween decorating options at your local thrift or vintage store! Often, these are the coolest pieces that you’ll be proud to display every year! Yes, this post contains links to retail stores, but I encourage folks to see if they can find the item thrifted first!
    2. Avoid the outdoor cobwebs, as wildlife can get trapped! This is a hot tip I got from one of my gardener friends that I like to share far and wide, because I don’t think many people think about the implications of this popular outdoor Halloween decoration. You know that fake cobweb material folks use to decorate outside their homes and shrubbery? I advise against using it, as birds and other critters can get entangled in the webbing!
    3. Find pieces you’ll reuse year after year. As always my mantra is: reduce, reuse, recycle. Don’t just hit the Halloween aisle of your favorite big box store every year. Think about creative ways you can reuse your favorite Halloween pieces each year, even if it means just slightly rearranging them so you don’t get bored!
    Hi, I’m Leslie (she/her!) I hope you find some Halloween decorating inspiration on the blog today! Photo by Caroline the Photographer.

    Hello, I’m Leslie

    Boo! My name is Leslie, and I’m the founder of PunkMed! On my blog, I and my team share my info, experiences, and recommendations in the area of sustainability, urban homesteading, and eco friendly entertaining. Our goal is to make it less overwhelming for you to live a fun and sustainable life!

    In today’s post, I’m sharing my favorite eco friendly Halloween decor ideas. These ideas come from the process of planning my own Halloween parties, and from hearing from many other Halloween enthusiasts about their decorating tips for their favorite spooky holiday!

    Let’s get into it!

    This post is all about eco friendly Halloween decor.

    #1 Eco Friendly Halloween Decor: Paranormal Portraits

    Wow, I’m obsessed with these paranomal portraits from @.tasha.kaleidoscope. Tasha bought these ghost portrait wall decorations on Amazon, but you could easily recreate this look if you already have a gallery wall–just swap out some of the pictures for something a little more spooky!

    Get the Look:

    #2 Eco Friendly Halloween Decorations: Outdoor Halloween Decor

    This Halloween decor idea from @.blancobungalow is such a great example of what you can do with your entryway! Not gonna lie, these giant spiders kind of truly creep me out!

    Plus, I like that these fake cobwebs are wide and not the kind that could trap and entangle birds and other wildlife!

    Get the Look:

    #3 Sustainable Halloween Decor: Fall Bar Cart

    OMG, I love this fall-inspired bar cart from @.mac.en.moda_. This is such a great example of how your Halloween decorations don’t have to be super specific to the holiday, but instead can celebrate the season more generally. That way, you get much more use out of your decorations!

    Get the Look:

    #4 Sustainable Halloween Decorations: Spooky Fireplace

    @.826farmhouse shows how adding a few DIY Halloween decorations can allow us to celebrate the holiday while keeping decorations in line with our specific style. I love the idea of a DIY cinnamon broom!

    From @.1826farmhouse: “This keeping room fireplace is always the perfect backdrop for my Halloween decor. I added the spiders, 🕷️ crows, and witches 🧙🏼‍♀️ broom 🧹 this year. I made the broom 🧹 out of a branch that fell in my daughter’s yard and a couple of cinnamon brooms from @dollargeneral. The rope came from @dollartree a few years ago. The whole project cost under $20. I’m happy with the results and it makes the room smell amazing.

    Get the Look:

    #5 Eco Friendly Halloween Decor Ideas: Stoop Decorations

    @.mydarlingpassport shows off this stoop she found while exploring Salem, MA! I live nearby Salem, and love getting Halloween decor inspiration from the town that has embraced its witchy history during my travels.

    Get the Look:

    #6 Eco Friendly Halloween Decor: Minimalist Halloween

    @.simplymicheleb reminds us that decorating for Halloween doesn’t mean you have to go over the top. Even minimalists will love this simple mantle Halloween decor idea. Just add bats and a few pumpkins in a neutral color!
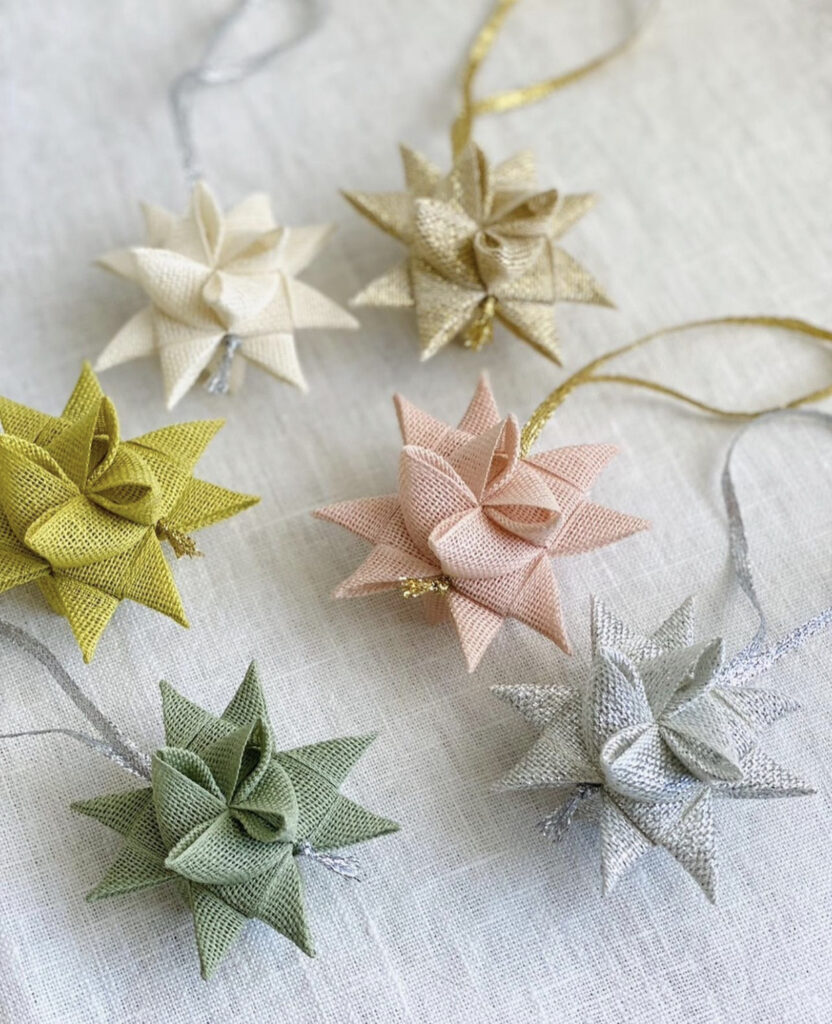
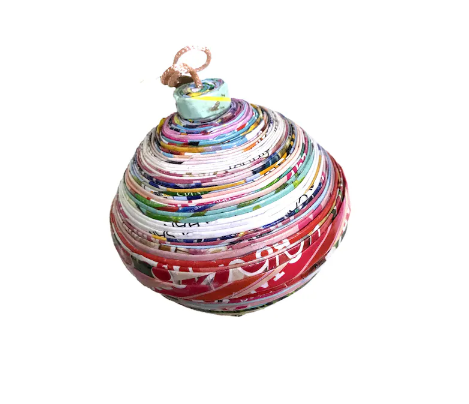
    Get the Look:

    #7 Eco Friendly Halloween Decorations: Spooky Window

    I love the idea of decorating for Halloween by putting a spooky book on display!

    From @.thecaseverde: “Through the years, I’ve learned that you don’t need to spend tons of money and buy one million mini pumpkins to get into the spooky spirit.

    Pairing a statement piece like this little ghost from @dollartree with subtle pieces that fit naturally into your home, like this Halloween book, can really go a long way. Stay tuned to see what else I brew up in here 🧙🏼‍♀️ Anyone else love Halloween??

    Get the Look:

    #8 Sustainable Halloween Decor: Ghastly Shelves

    Shelves are a great place to spruce up for the Halloween season. @.marcelinehome adds a few spooky picture frames and a few pumpkins, and viola!

    Get the Look:

    #9 Sustainable Halloween Decoration: DIY Monster Fireplace

    Wow, I love this DIY monster fireplace idea from @.4theloveoftoys. If I had kids, I would definitely try this! Just make some teeth and eyes from construction paper and use removable mounting putty to adhere to the surfaces of your fireplace.

    Get the Look:

    #10 Eco Friendly Halloween Decorations: Thrifted Decorations

    @.deandaneluzzi remind us that there are so many good Halloween decor finds at your local thrift store!

    From: @.deandaneluzzi: “Years ago I stumbled into one of my favorite thrift stores in Chicago on a random September day. It just so happened to be the day they were putting out their Halloween decorations from storage they received all year from donations. To say I scored would be an understatement. Up to that point I never really bought seasonal decor because I figured I was young and going to be doing a lot of moving around so I didn’t see the point. After that day though, I was hooked on creating my own collection I’ll have for years to come 🧡

    This post was all about eco friendly Halloween decor.


    What to Read Next!

    Did you enjoy going through all of these Halloween decor ideas? I’m so glad! Below, I’ve shared a few of my other holiday-themed posts, I think you’ll love!

    How To Can Vegetables (12 Steps) | Your ULTIMATE Guide for 2023!

    Hey there, friend! Today on PunkMed, I’m so excited to share how to can vegetables. I’m an experienced vegetable canner myself, and I wrote this ULTIMATE guide on how to can vegetables to help my friends, family members, and readers get ready to can vegetables as a beginner!

    Are you ready to jump into the world of canning?! I got you!

    This blog post is all about how to can vegetables.

    My Expertise – Canning Vegetables

    I started canning a little while after I started gardening (about 7 years ago!) when it became evident around harvest time that I had more produce than I could use immediately! I needed to figure out a way to preserve the surplus for the year. I especially was drowning in tomatoes, so I started by canning my own tomato sauce and the rest was history!

    Since then I have canned green beans, radishes, and peppers!

    I would love to preserve my own dill pickles! However, I have such a taste for the super vinegary ones from the grocery store–I’m afraid I won’t be able to recreate that crunch and sourness with my own dill pickles!

    But wait, there’s more! In this post, I’ve also included the expert and hobbyist advice of 20 other homesteaders, gardeners and canning experts! I’ve included their tips and tricks (as well as gorgeous inspo images), to help you get started canning your very own vegetables!

    How to Can Vegetables - Pantry shelves full of canned vegetables and sauces
    Isn’t this pantry of canned vegetables gorgeous? This photo is from @backyard.brambles. “I’m very happy to put my canner away and gaze at a shelf full of good food that we will be picking at over the winter. I consider myself a novice canner, I have never used a pressure canner, but there is still a huge variety of food I can safely put up using a water bath canner.”

    How to Can Vegetables (12 Steps)

    Before I jump into the exact steps of how to can vegetables, I want to give you a few of my BEST (and hard won, lol) tips on how to can vegetables. My goal in sharing my mistakes and issues is to help YOU avoid them!

    I also share how to make the best of my guide on how to can vegetables!

    My Tips for How to Can Vegetables:

    • Tip #1: Give yourself permission to be a beginner! Some batches of canned vegetables will just not turn out, and that’s just how math works! Even the most expert and experienced vegetable canners have batches that don’t work out!
    • Tip #2: Get everyone else out of the house (if you can)! Vegetable canning can take over the WHOLE kitchen (it feels like it takes over my whole HOUSE in Boston, lol), so the less people inside, the better! This will make organizing and sanitizing much easier.
    • Tip #3: Start with ONE type of vegetable, then branch out! I would start with something easy–like tomatoes. Plus, there are so many fun things you can do with tomatoes! Canned them whole or make a ready-to-eat pasta sauce. I wouldn’t recommend starting off with something more technically challenging like meat or fish.
    • Tip #4: Safety first! I always follow the expert advice laid out in the USDA Complete Guide to Home Canning!
    • Tip #5: Feel free to print out my guide! There is a lot (a LOT) of info in this post (I was serious about making it the ULTIMATE guide to vegetable canning!). This post could very well be an ebook! Feel free to print it out so you can make notes and add reminders!

    Finally, it’s a good idea to snag a vegetable canning notebook like this one, so you can easily track what you do over the years! You think you’ll remember, but you probably won’t! 😉

    Alright, you ready to get canning?! Let’s dive into it!

    How To Can Vegetables
    From @.sunshinefarmlife: “I want you to know something…

    This picture was taken my second year gardening and my very first year ever preserving anything.

    I knew nothing when I started. I didn’t know what a perennial was, how jam was made, or how potatoes grew.

    Here is the honest truth about getting started…

    You do not have to have a “green thumb.”

    You don’t have to grow up on a farm.

    You do not need to be an expert in any of this to get started.

    You are more than capable!”

    Step 1: Get Your Equipment Ready! | How to Can Vegetables

    Ok, the first thing you’ll need to do is assemble your canning equipment. Now, it can be tempting to buy ALL the equipment–but as a canning beginner, I recommend keeping it simple! You can add all the gizmos in the coming years!

    Note: this guide covers canning vegetables without a pressure cooker, AKA water bath canning vegetables.

    Vegetable Canning Supplies

    Ball Mason 8oz Quilted Jelly Jars with Lids and Bands, Set of 12

    Ball Mason 32 oz Wide Mouth Jars with Lids and Bands, Set of 12 Jars The size of the jars you purchase will depend on the vegetable you intend to can. These jars are great for larger portions or longer vegetables like beans, carrots, and cukes.

    Ball Mason 32 oz Wide Mouth Jars with Lids and Bands, Set of 12 Jars.

    Ball Mason 8 oz Quilted Jelly Jars with Lids and Bands, Set of 12 Jars These smallers jars are great for smaller portions and harvests.

    Cook N Home 16 Quart Stockpot with Lid, Stainless Steel

    Cook N Home 16 Quart Stockpot with Lid, Stainless Steel A large pot like this 16 quart stockpot is essential to the canning process. You need a pot large enough to hold all your jars, and tall enough to cover them with water.

    Ball Secure-Grip Jar Lifter (by Jarden Home Brands), Regular, Clear

    Ball Secure-Grip Jar Lifter The canning process involves boiling jars in water to create the pressure required make the product shelf-stable. The jar lifter allows you to retrieve jars from the hot water.

    P&P CHEF Round Cooking Rack, 3 Pcs (7½” & 9” & 10½”), Baking Cooling Steaming Grilling Rack Stainless Steel, Fits Air Fryer/Stockpot/Pressure Cooker/Round Cake Pan, Oven & Dishwasher Safe

    Round Cooking Rack, 3 Pcs (7½” & 9” & 10½”) Place this cooking rack at the bottom of your canning pot to keep the jars from rattling around on the bottom of the pot and allow for an even distribution of heat.

    Complete Guide to Home Canning (Color Print, Full Size) The All New Ball Book Of Canning And Preserving: Over 350 of the Best Canned, Jammed, Pickled, and Preserved Recipes

    Step 2: Pick a Recipe | How to Can Vegetables

    The post covers the general principles of canning, which are luckily applicable across most vegetable canning recipes!

    This post does not provide any specific canning recipe for a certain vegetable, as the ingredients will differ by vegetable. Instead, this post will help you become build a confident home canning practice and become familiar with the overall steps.

    I recommend you first choose a recipe for the vegetable you want to can from a reputable source like the Ball Book Of Canning And Preserving.

    Step 3: Sterilize Jar and Lids | How to Can Vegetables

    From @.homegrownonpurpose: “Three guesses as to what I’m up to today. 🙂Harvested eight pounds of raspberries in one day, many more to ripen on the vine!”

    Before you start the canning process, it’s important to sterilize your jars and lids.

    Place the jars you will need in your canning pot and cover with water. Place a lid on the pot and bring to a boil.

    Place the corresponding lids in a separate, smaller saucepan. Cover with water and bring just to simmer. Do not boil the lids.

    Hot tip: the screw bands for the lids DO NOT need to be sterilized.

    Now is a good time to prepare your vegetables as you wait for the jar and lids to sterilize.

    Step 4: Prepare Your Vegetables | How to Can Vegetables

    Prepare your vegetables according to your chosen recipe as the jar and lids sterilize in the boiling water.

    It’s important to rinse your vegetables, especially if they’re straight from the garden! You definitely want to remove any bugs or dirt!

    Step 5: Fill the Sterilized Jars | How to Can Vegetables

    When your vegetables are ready, remove the sterilized jars from the hot water using your jar lifter and place on a paper towel on the countertop.
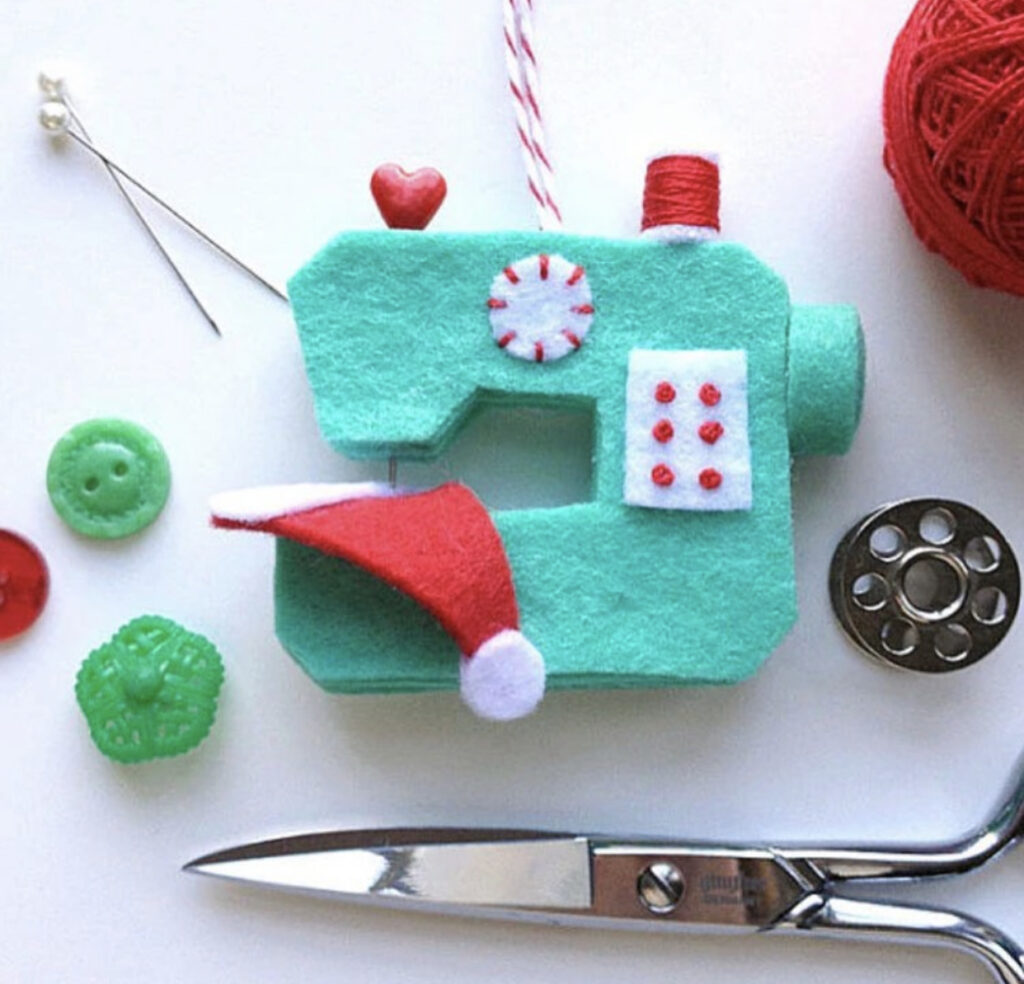
    Fill your jars with the prepared vegetables according to your recipe. Leave about 1/4 to 1/2 inch of space at the top of the jar depending on the recipe.
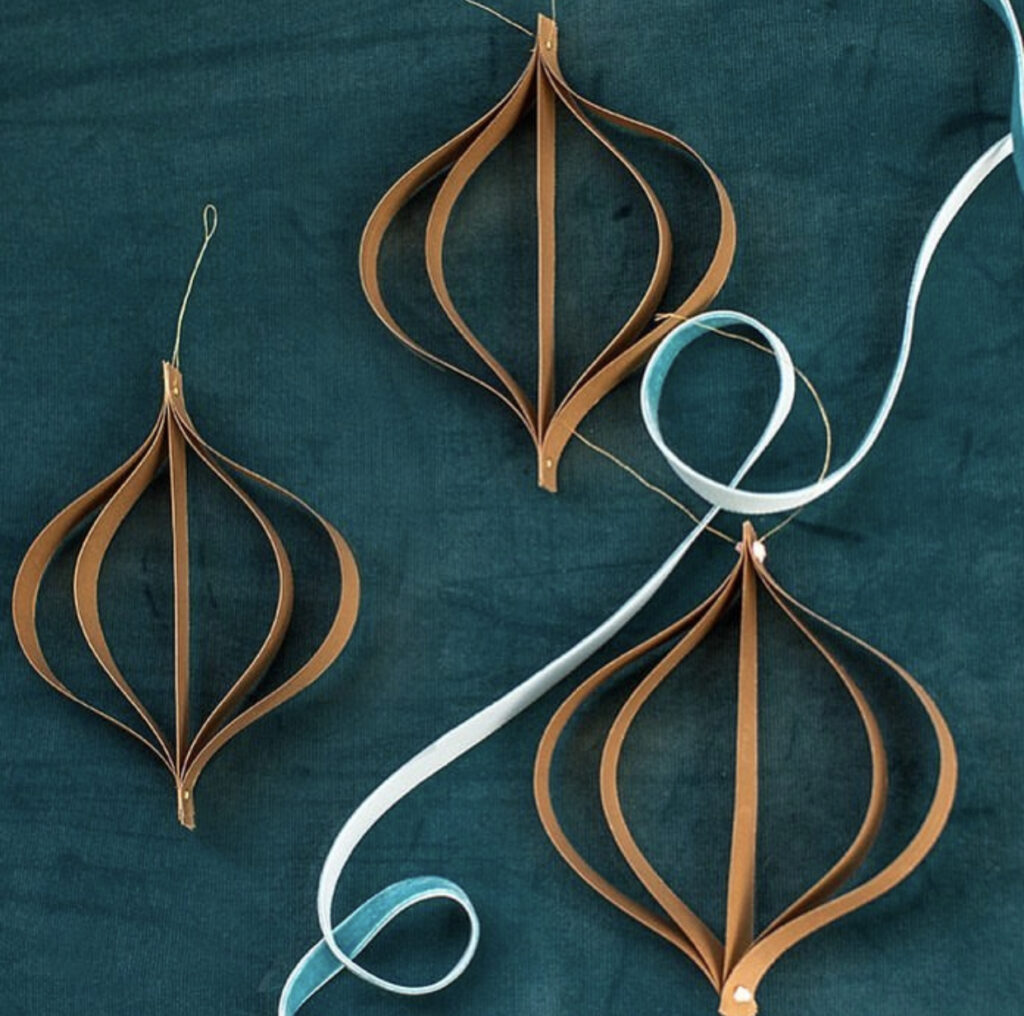
    Wipe the rims of the jars with a clean, damp paper towel to remove all traces of food. Food or moisture on the rim prevents a perfect seal.

    Step 6: Apply the Lids and Screw Bands | How to Can Vegetables

    How To Can Vegetables
    From @.3ravensfarm: “Probably would never eat them together but started some kraut and made a bit of blackberry jam yesterday…yum”

    Apply lids to the filled jars. Screw bands on the lids to secure so that bands are “fingertip tight.”

    “Fingertip tight” means using the strength only of your fingertips to screw on the bands. Screwing on the bands too tight may prevent a perfect seal.

    Step 7: Lower Jars into Canning Pot | How to Can Vegetables

    Lower jars back into canning pot using your jar lifters. (Reuse the same hot water from the earlier sterilization process, just make sure the water still covers the jars.) The jars should not touch.

    Step 8: Bring to a Boil and Set Timer | How to Can Vegetables

    From @.kathryn_grows_stuff: “Today’s plotting along post is ‘preservation station’ which is basically my kitchen! This is my trusty Kilner water bath canning station.”

    Cover the canning pot and bring to a boil.

    Boil jars for the duration specified in your chose recipe. Make sure to start your timer when the water boils, not when the jars first enter the hot water.

    Step 9: Remove from Canning Pot | How to Can Vegetables

    From @.gapey: “Yesterday I made my first pepper jam.”

    When your timer goes off, remove the jars from the boiling water and place on the countertop to cool using your jar lifters.

    Step 10: Allow to Cool on Countertop | How to Can Vegetables

    As you allow your jars to cool on the countertop, you should hear a distinctive “pop” of each lid. The “pop” means you have achieved an effective seal.

    How To Can Vegetables
    From @_the_red_shed: “And it begins!”

    Step 11: Check Seal | How to Can Vegetables

    After the jars have cooled, it’s important to check the seal on your jars before storing. Remove the bands and use your fingertips to pull on the lid. The lid should hold tight to the jar if you have created an effective vacuum seal.

    Step 12: Store in a Cool, Dry Place | How to Can Vegetables

    Store the jars in a cool, dry place. Check your recipe for optimal storage duration.

    Hot tip: I like to label my jars with the canning date with these labels.

    Where to Store Canned Vegetables?

    When it comes to storing canned vegetables, you’ll want to put them in a cool and dry place, away from temperature fluctuations.

    We live in an old home in Boston that was built in 1911, so our kitchen comes with a huge old-timey pantry. (To give you a sense of how old–this pantry has a drain on the floor because half of it served as an icebox pre-refrigeration.) 

    We are definitely not the first tenants to store home-canned goods in this pantry! 🙂

    How to Get Started Canning: Use Water!

    How To Can Vegetables
    Here, Jordyn and Kay of @.portageviewfarm show us where they store their canned vegetables and fruits!

    Next, I wanted to share this pretty rad tip from Jordyn and Kay of @.PortageviewFarm! The dynamic duo “help homesteaders learn how to grow garden & raise meat birds without being overwhelmed!”

    Their advice for people trying to learn how to can vegetables?

    Try canning water!

    “If you’re scared to use your pressure canner, try pressure canning water!
    ⠀⠀⠀⠀⠀⠀⠀⠀⠀
    This will teach you how to use and understand your canner without the prep work and the chance of ruining your food.
    ⠀⠀⠀⠀⠀⠀⠀⠀⠀
    Here is how to do it:
    1. Prepare jars, lids, rings.
    2. Place 3 inches of water in the canner.
    3. Add water into jars, leaving 1/2″ head space.
    4. Remove bubbles, wipe rims.
    5. Adjust lids and rings, but not too tight.
    6. Load the jars into the canner
    7. Fasten the lid securely on canner.
    8. Turn the heat on high.
    9. Exhaust steam and let it flow for 10 minutes, making note of the end time.
    10. Place weight or close petcock.
    11. Let pressure build. You will know when it happens, the weight will start rocking.
    12. Start timing once your canner is at the desired pressure, make note of the end time
    13. Adjust the heat to keep the pressure stable. If you go below your recommended pounds of pressure, you must begin the processing time again!
    14. When the timing is complete, remove the canner from the heat (but only if you can safely lift the canner, otherwise turn off the heat and leave it), now wait until the canner is fully depressurized. How will you know? Nudge the weight to see if steam spurts out; if no steam, remove the weight. This is going to take a while; at least 15-30 minutes.
    15. When fully depressurized, remove the weight
    16. Wait 10 minutes after you’ve removed the weight, THEN
    open the lid away from you
    17. Lift the jars, keeping them upright, place on heavy towel
    18. Allow the jars to cool undisturbed for 24 hours
    19. Check seals and label the jars
    20. Don’t forget to wash & dry the canner, gasket & lid so they will be ready for use next time”

    How To Can Vegetables
    From @.jharmondesign, who started a new account all about vegan canning and homesteading!

    How long to can vegetables?

    If you’re like me and SUPER into planning, here’s a rough breakdown on time to can 4-6 quarts of vegetables:

    • Gathering Canning Ingredients and Supplies (plus a last minute store run): 2-3 hours
    • Preparing Vegetables: 30 min – 1 hour
    • Sanitizing Equipment and Jars: 1 hour
    • Actual Canning: ~1 hour (depends on recipe)
    • Processing Time: 2 hours
    • Cool Down Time: 2 hours

    All in all, the total time to can vegetables takes 6 hours, plus about 2-3 hours of prep!

    Benefits of Canning Vegetables

    Are you asking yourself, “Why even can vegetables?! This is a LOT of work! Is it worth it to can vegetables?”

    The answer is YES, it absolutely is! Canning is so rewarding because it gives you a sense of self-sufficiency knowing you can extend your harvest and feed your family year round from your garden. It’s also fun to share and trade jars of your creations with friends and family!

    How Hard Is It To Learn to Can Vegetables?

    Canning vegetables is a lot like baking! It’s an exact science, but once you get the hang of it, you’re good to go! People have been canning and preserving food for centuries–you’ve got this!

    More Canning Inspiration & Tips

    Below, I’ve shared more tips and inspiration on vegetable canning from those in the community!

    How To Can Vegetables
    From @forjarusa: “Do you have a favorite vegetable that you love to can?
    For our family, it’s definitely tomatoes! There’s nothing quite like open a jar of homemade canned tomatoes in the dead of winter and getting a taste of summer. Plus, they’re so versatile – you can use them in soups, stews, sauces, and more.
    But maybe you prefer pickled cucumbers, or spicy jalapenos, or sweet corn? Let me know in the comments what your go-to vegetable for canning is!
    And if you’re new to canning, don’t be intimidated! It’s a great way to preserve the harvest and enjoy your favorite veggies year-round. Just make sure to follow proper safety guidelines and sterilize your jars before filling them with deliciousness.
    Happy canning”
    How To Can Vegetables
    From @trudi_brugesvegan: “Haricots from my #veggarden. Already the 3rd batch this Summer!”
    How To Can Vegetables
    From @.creativecanning: “Canning carrots at home is an easy way to preserve carrots and prepare them for quick weeknight meals at the same time.”

    Creative Canning also has a bunch of rad canning recipes!
    How To Can Vegetables
    From@.trinsculinarycorner: “Pickled carrots and radishes!”
    How To Can Vegetables
    From @.blackoakhollow: “Hot and mild banana pepper rings complete!”
    How To Can Vegetables
    Photo of canned vegetables from @.songbirdjh77!
    How To Can Vegetables
    From @.thehighlanderhomestead: “24 quarts of black beans canned this past weekend. This was my fourth time pressure canning and the first time I’ve had every single jar seal!!! I’m so happy😁

    Pressure canning felt very intimidating to me, so for years, I just stuck to only canning foods that could be water bath canned. I’ve learned a lot and I’m very grateful for those of you that helped me learn. Appreciate y’all!”
    How To Can Vegetables
    From @.ambear2723: “Garden harvest and canning!”

    This blog post was all about how to can vegetables.

    What to Read Next:

    Loved this guide on how to can vegetables?! Here’s a few other posts of mine I think you’ll love!

    Join Me on Pinterest

    Pinterest is a great platform for getting canning and pickling tips! Join me on Pinterest here, to get all of my urban homesteading content.

    17+ Eco Friendly Bridal Shower Gifts That She’ll Love Forever

    sustainable wedding gifts

    Looking for eco friendly bridal shower gifts for the newly engaged cutie in your life? Or perhaps you’re putting together your own registry right now and you’re looking for a little inspiration? Read on for our favorite eco friendly bridal shower gifts!

    As someone who got married last year–and is around the age where all my friends are getting married–I know a thing or two about bridal showers.

    But to be honest, as a sustainable blogger (and for a few other reasons), the thought of a bridal shower stressed me out so much I just didn’t have one! Having a bridal shower felt like asking for a lot of stuff we didn’t need (my husband and I had lived together for 7 years at that point). Plus, I cringe at all that wrapping paper that just goes to waste!

    That being said, I love supporting the people I love as they transition into this new phase of life. I totally think there are ways to host an eco friendly bridal shower and give sustainable bridal shower gifts.

    A few tips before we get into the actual bridal shower gift ideas:

    1. Prioritize buying gifts from the gift registry. A good way to ensure that a gift gets used is that the couple wanted it in the first place! This list of eco friendly bridal shower gifts is meant to offer ideas in lieu of or to supplement a registry. If you’re unsure as to whether a certain gift might be appreciated, it’s a good practice to ask the couple or someone close to them whether they are in the market for what you are about to buy. 
    2. Avoid anything that says “bride.” Look, this may be just me, but I have so much “bride” merch left over from my wedding festivities that I just no longer have use for. (Like, it’s weird to wear white pajamas that say “bride” all over them after the wedding, right?!) If you’re going for kitschy wedding stuff like this, try to get it thrifted. I’m sure there are plenty of former brides like me dropping this stuff off at the thrift store.
    3. Opt for gifts that will last a lifetime. When shopping for bridal shower gifts or scanning the registry, I’m often looking for items that I know will last forever–dutch ovens, stainless steel cookware, cast iron pans, etc. OR items that have  a really great lifetime warranty, e.g. Vitamix blenders. 

    Eco Friendly Bridal Shower Idea – Sustainable Registry

    Just quickly adding here, if you’re the bride looking for registry inspiration, I would highly recommend you check out Everlastly to host your gift registry. This platform allows you to search for products based on your values including durability, circularity, and sustainability.

    Hi, I’m Leslie! I hope you find the perfect eco friendly bridal shower gift on the blog today.

    Hello, I’m Leslie

    My name is Leslie, and I’m the founder of PunkMed! On my blog, I and my team share my info, experiences, and recommendations in the area of sustainability, urban homesteading, and outdoor living. Our goal is to make it less overwhelming for you to live a fun and sustainable life!

    In today’s post, I’m sharing my favorite eco friendly bridal shower gift ideas These ideas come from the process of planning my own wedding in September 2022 and from hearing from many other brides about what they wished they would have put on their registry!

    Let’s get into it!

    This post is all about eco friendly bridal shower gifts.

    Eco Friendly Bridal Shower Gifts

    #1 Sustainable Wedding Gifts – Recycled Glass Champagne Flutes

    A toast to the newlyweds! These recycled glass champagne flutes have a funky silhouette and wavy detailing to keep the party going long after the wedding.

    Due to the handmade quality no two glasses are the same, and can vary in detailing, color, and size up to two inches. These flutes come in a set of four, and are hand-crafted in Bogota, Columbia.

    We recommend you remind the bride to hand wash these glasses to maintain their quality over time. These flutes should be handled and gift-wrapped carefully!

    #2 Sustainable Gifts for Couples – Porcelain Olive Oil Bottle

    These modern handmade porcelain olive oil bottles from the Bright Angle make for a versatile sustainable wedding gift. Use them for olive oil, dish soap, syrups, and more. 

    The Bright Angle specializes in modern home decor and dishware made with stunning, translucent porcelain intended to last several lifetimes. 

    This brand makes all their porcelain mugs, planters, vases, and pots in Asheville, NC with raw, natural materials from the nearby mountains. 

    #3 Sustainable Bridal Shower Gifts – Waffle Kitchen Towel Set

    Often a wedding means moving in together, buying a home, or upgrading to a new space. This can be a great time to make sure the newlyweds are fully stocked with kitchen essentials like this beautiful towel set!

    The first time you wash these towels, something magical happens: the smooth basket weave puckers into a waffle texture that offers more surface area per square inch, drinking in water like no regular woven towel can.

    Loomed from organic cotton, these towels have a beautiful soft color that endures through hard work and frequent laundering. 

    #4 Eco Friendly Bridal Shower Gifts – Upcycled Tablecloth and Napkin Set.

    Shopping for a bride that loves to entertain and enjoys a good tablescape? Gift premium quality and timeless designs with this upcycled tablecloth and napkin set from Hilana. 

    Made in Denizli, Turkey and handwoven by a collective of weavers, each piece features heritage textile techniques and is composed of 50% regenerated cotton upcycled from clothing manufacturing waste and 50% virgin cotton.

    Hilana’s innovative production process is zero-waste and chemical-free, making their products the perfect eco friendly wedding gift. They also produce long-staple Turkish cotton fibers without water waste, and use less electricity than creating a new garment.

    #5 Sustainable Bridal Shower Gifts – Recycled Glass Carafe and Tumbler Set

    One of our favorite sustainable bridal shower gifts is this recycled glass carafe and tumbler set. 

    This tumbler set is made with sustainable glass that’s been repurposed, helping to reduce the number of single-use plastics and glass sent to landfills. 

    This set includes one carafe and two tumblers which are dishwasher safe and made from recycled, hand-blown glass. The new couple will definitely have something to cheers to!

    #6 Eco Friendly Bridal Shower Gifts – Organic Striped Placement Set

    If the couple likes to entertain, they may appreciate these chic, recycled placemats.

    These recycled placemats are eco-friendly, heat resistant, and made in the United States. 

    Designed to last, use these mats to provide extra grip to dishes and utensils at the table or protect from crafts or projects. This set is a multipurpose tool that will last a lifetime!

    #7 Eco Friendly Wedding Gifts – Essential Recycled Copper Mixologist Set

    Another beautiful bridal shower gift for the entertainer!

    These beautiful and durable recycled copper mixologist set will elevate any bar cart, whether at home for fun or entertaining house guests. 

    Plus, this set guarantees the cleanest tasting cocktails, as copper is a naturally antimicrobial material. This is truly the perfect gift for the amateur mixologist.

    #8 Sustainable Wedding Gift – Emile Henry Tagine

    Emile Henry Made In France Flame Tagine, 3.7 quart, Burgundy

    A tagine can be such a fun gift for the foodie bride in your life!

    This eco friendly bridal gift can be used on all direct heat sources: gas, electric, or halogen, and in the oven.

    The ceramic material has been designed specifically for slow simmering, which brings out the flavors in the recipe, and is guaranteed to last for years.

    #9 Sustainable Gifts for Couples – Tchon Bamboo XL Salad Bowl

    If the bride is a big salad™ kind of girl, she’ll love this one-of-a kind salad bowl. 

    Finished with all-natural lacquers and varnishes, this handcrafted wooden bowl is made to last.

    The size is ideal for serving family-size portions of their favorite dishes, from leafy green salads and pasta dishes to soups or punch.

    #10 Sustainable Bridal Shower Gifts – Stoneware Serving Tray Set

    A serving tray set is an item you don’t think you’ll ever need until suddenly your married and tasked with hosting Thanksgiving. (Am I speaking from experience?! Maybe.) Help a bride out with this eco friendly wedding gift.

    Each tray set is designed as a statement piece for serving bread, cheese and charcuterie. Each piece is made by hand with Convivial’s proprietary sand clay and finished in their signature ivory glaze. The glaze on the rim of each piece has been removed to allow the warmth of the sand clay to be highlighted.

    Founded with sustainable ideals in mind, Convivial strives to create locally made, environmentally friendly, and socially responsible ceramics. 

    #11 Sustainable Wedding Gifts – Personalized Live Edge Wooden Charcuterie Board

    These live edge charcuterie boards make such special wedding gifts.

    With a live edge, black walnut wood is exquisitely shaped to focus on the unique grain and natural edge of the board. Finished with mineral oil and a beeswax buff for superior shine, these boards can be used to prepare the spread and to serve your guests. 

    As an extra touch, you can personalize your charcuterie board with the recipient’s name to memorialize this next step in their relationship!

    #12 Sustainable Bridal Shower Gifts – Circo Massimo Recycled Throw Blanket

    Everyone loves a cozy blanket, and this recycled one from Circo Massimo makes for an extra special bridal shower gift!

    This super soft throw is made in the USA from 100% recycled materials.

    The beautiful neutral colors invert on either side and stay cozy no matter what. Choose sustainability with this beautiful recycled throw blanket.

    #13 Eco Friendly Bridal Shower Gifts – Le Creuset Enameled Cast Iron Signature Dutch Oven

    Le Creuset Enameled Cast Iron Signature Round Dutch Oven, 5.5 qt., Cerise

    No kitchen is complete without a dutch oven, designed for long and slow roasts. 

    This sustainable Le Creuset Enameled cast iron dutch oven is a perfect bridal shower gift as they are truly built to last!

    These dutch ovens are hardy and heat resistant, meaning they will outlast many of your other pots and pans through the years. The enamel protection allows for even heat distribution.

    #14 Sustainable Bridal Shower Gifts – OUTLINE PRO CARRY-ON SPINNER

    Is your bride preparing for a honeymoon? Check chic new luggage off the list with this recycled carry-on from Samsonite.

    It’s made with a durable polypropylene shell and Recyclex® interior liner fabric made from 100% recycled plastic bottles.

    Plus this carry-on comes with convenient extras like a built-in TSA lock with an integrated USB port and internal battery pocket.

    #15 Sustainable Wedding Gift – Cast Iron 15″ Lean Grill Pan

    Cast iron makes the perfect sustainable wedding gift because it’s pretty much indestructible, just like the marriage (we hope!)

    This cast iron grill pan allows you to achieve BBQ-level flavor inside the kitchen or out. The ribs on this pan give you the best cross-hatch grill marks whether on the stove, grill or over the coals.

    Great for steaks, chops and salmon—it was made for the reverse seared steak technique.

    #16 Sustainable Bridal Shower Gifts – Vitamix 5200 Blender

    Vitamix 5200 Blender, Professional-Grade, Container, Self-Cleaning 64 oz, Black/Grey

    If you really love your bride, you’ll show it with this iconic Vitamix blender!

    Sure, it’s pricey, but it’s absolutely worth it (I’ve had one myself for almost 10 years now!) I consider it one of the most sustainable kitchen appliance gifts you can give because they are engineered to last forever, and they come with a lifetime warranty!

    This Vitamix has a variety of speed controls and can make up to 64-ounce batches.

    #17 Sustainable Gifts for Couples – Solo Stove Bonfire Fire Pit

    Solo Stove Bonfire Fire Pit - Smokeless Large 19.5 Inch Stainless Steel Outdoor Firepit | Portable Backyard Natural Wood Burning Firebowl | No Gas or Propane Required

    The Solo Stove Bonfire makes for a really unique wedding gift, especially for couples that love to spend time outdoors!

    Backyard entertaining has never been more accessible with this minimal smoke and ash output portable fire pit.

    Plus, the Solo Stove is easy to clean up and won’t leave everyone smelling like a campfire.


    This post was all about eco friendly bridal shower gifts.

    Read these next for more sustainable wedding ideas:

    Looking for more eco friendly wedding tips? Below, I’ve shared a number of posts I’ve written on how to make this super exciting time more eco-friendly!

    Join Me on Pinterest

    Pinterest is a great platform for planning your wedding and finding new eco-friendly products! Join me on Pinterest here, to get all of my sustainable wedding tips.